


Ever since the day automation has come into the picture, so have the various tools used to cater automation existed. Either it is a simple tool used for windows desktop automation or a tool used by enterprises to automate humongous tasks, each and every tool has its own functionalities. UiPath is one such tool and certifying in it can land you as an RPA developer. So folks, in this article, let us learn the very basic topics such as the variables, data types and activities in UiPath.
The following are the topics covered in this article:
So, folks let us get started now.
Variables, Data Types and Activities in UiPath | Edureka

This video will cover the fundamental concepts of UiPath such as Variables, Data Types, and Activities in UiPath.
UiPath Overview
UiPath is one of the leading market leaders of RPA Tools. This tool is used to automate repetitive tasks and offers a drag and drop functionality. So, any action which you wish to perform gets catered by activities which can be dragged and dropped into your working pane.
Now, to automate tasks in UiPath, you have to create projects based on your need. So, next in this article, let us look into the various projects in UiPath.
Projects in UiPath
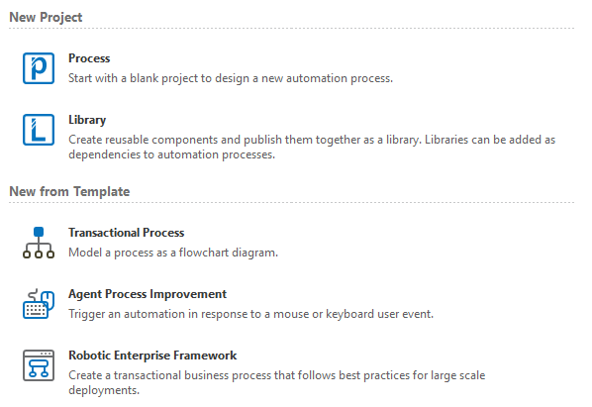

There are mainly five kinds of projects in UiPath. Refer below.
- Process – A process is a simple blank project, which is used to design new automation process.
- Library – This kind of project is used to create reusable components and then publish them as a library.
- Transactional Process – This type of project is used to create a process as a flowchart.
- Agent Process Improvement – This kind of project triggers an automation in response to either a mouse or a keyboard event.
- Robotic Enterprise Framework – This type of project creates a transactional business process which follows best practices for large scale deployments.
Now, once you choose the type of project, you will be redirected to the UiPath Dashboard. So, next let us look into the different panes in the UiPath Dashboard.
UiPath Dashboard
The UiPath Dashboard has mainly four panes apart from the workplace to design automation. Refer below.


- Activity Pane: This pane consists of activities which are used to cater different functionalities such as printing output, for loop, if-else loop etc.
- Ribbon: Ribbon consist of options such as Save, Run, Data Scraping, Recording etc.
- Properties Pane: Properties pane consist of the properties of the activities which you have dragged and dropped in to the automation.
- Output Pane: The output pane displays the output of your automation.
Now, since you know the panes of UiPath let me tell you that when you drag and drop a activity, then either you can create a Flowchart or a Sequence. So let us understand these terms.
Flowcharts and Sequences
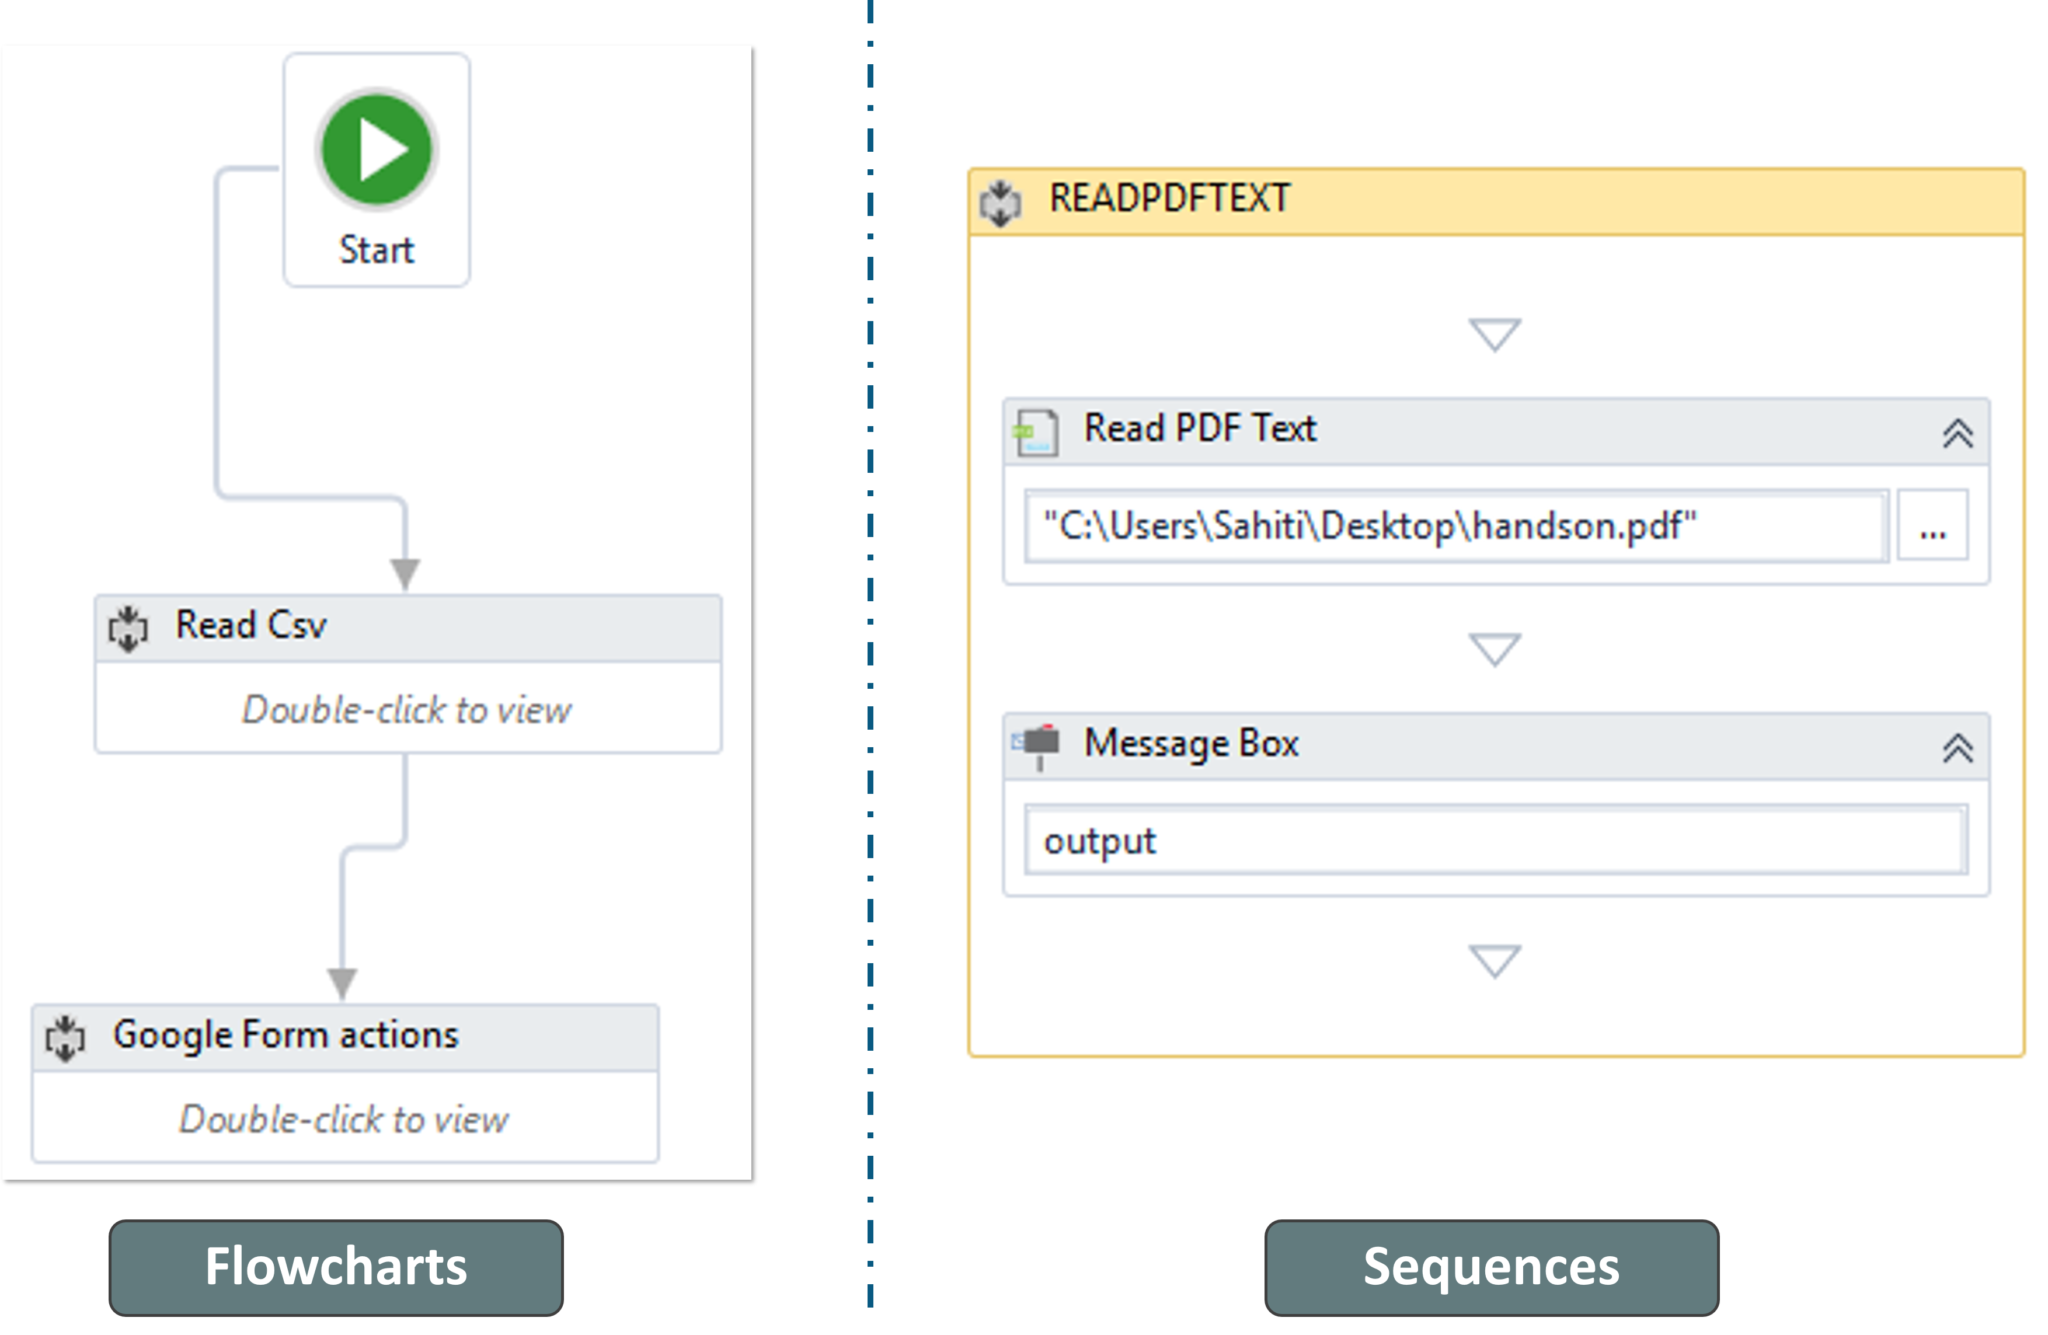

Sequences: are used to go from one activity to another seamlessly. So, when you put a group of activities in a sequence then they are act as a single block activity.
So, you can use a sequence inside a flowchart and can also use a flowchart inside a sequence.
Now, let us start with our main topic which is Variables in UiPath.
Variables In UiPath
Variables are used to represent unknown fields such as files, folders, alphabets, numbers etc. Variables in UiPath are similar to the variables in any other programming knowledge. So, you can create, remove and manage variables. Next in this article, let us look into the same.
Create, Remove & Manage Variables
Create Variables
To create variables in UiPath, the following are the two options available.
- Select an activity and press on Ctrl + K in the output section of the Properties Pane.
- Click on the Variable Pane as below.


Remove Variables
To remove variables in UiPath, the following are the two options available.
- Choose variable from Variable Pane -> Right Click -> Choose Delete.
- Choose the option “Remove Unused Variables” from Design Tab.


Manage Variables
To manage variables in UiPath, the following are the two parameters you have to consider. Refer below.
- Mention the Scope of the Variable.
- Mention the Default value(You do not have to mention the default value for each and every variable).
Now, let us move forward and see the various types of variables.
Types of Variables
The various types of variables are as follows:
- Text Variables – This type of variables is used to store the text values.
- True/False Variables – This type of variables is used to store Boolean values.
- Number Variables – This type of variables is used to store Integer values.
- Array Variables – This type of variables is used to store an array of integers or string.
- Date and Time Variables – This types of variables is used to store date and time variables.
- Data Table Variables – This type of variables is used to store Data Table, which stores the values in the form of table.
- Generic Variables – This type of variables is used to store generic type such as Mail Merge, Database etc.
Now, let us move forward to the next topic i.e. Data Types in UiPath.
Data Types In UiPath
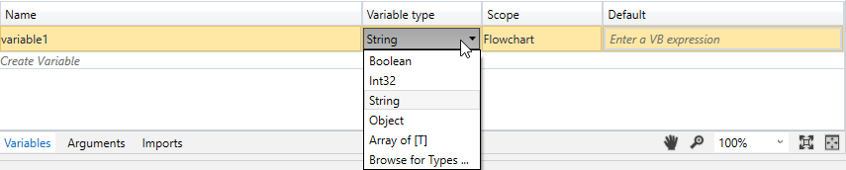
Data Types classify the type of the value of the variable. In UiPath, it could either be an Integer, String, Boolean, Generic or an Array Of.
So, to choose the data type of the variables, you have to go to the Variable Pane and then choose the Variable Type. Refer below.

Activities In UiPath
Activities in UiPath provides various actions which you need to automate different applications. There are various numbers of Activities in UiPath, for each and every functionality, but I’m just going to discuss the following few activities.
So let us get started.
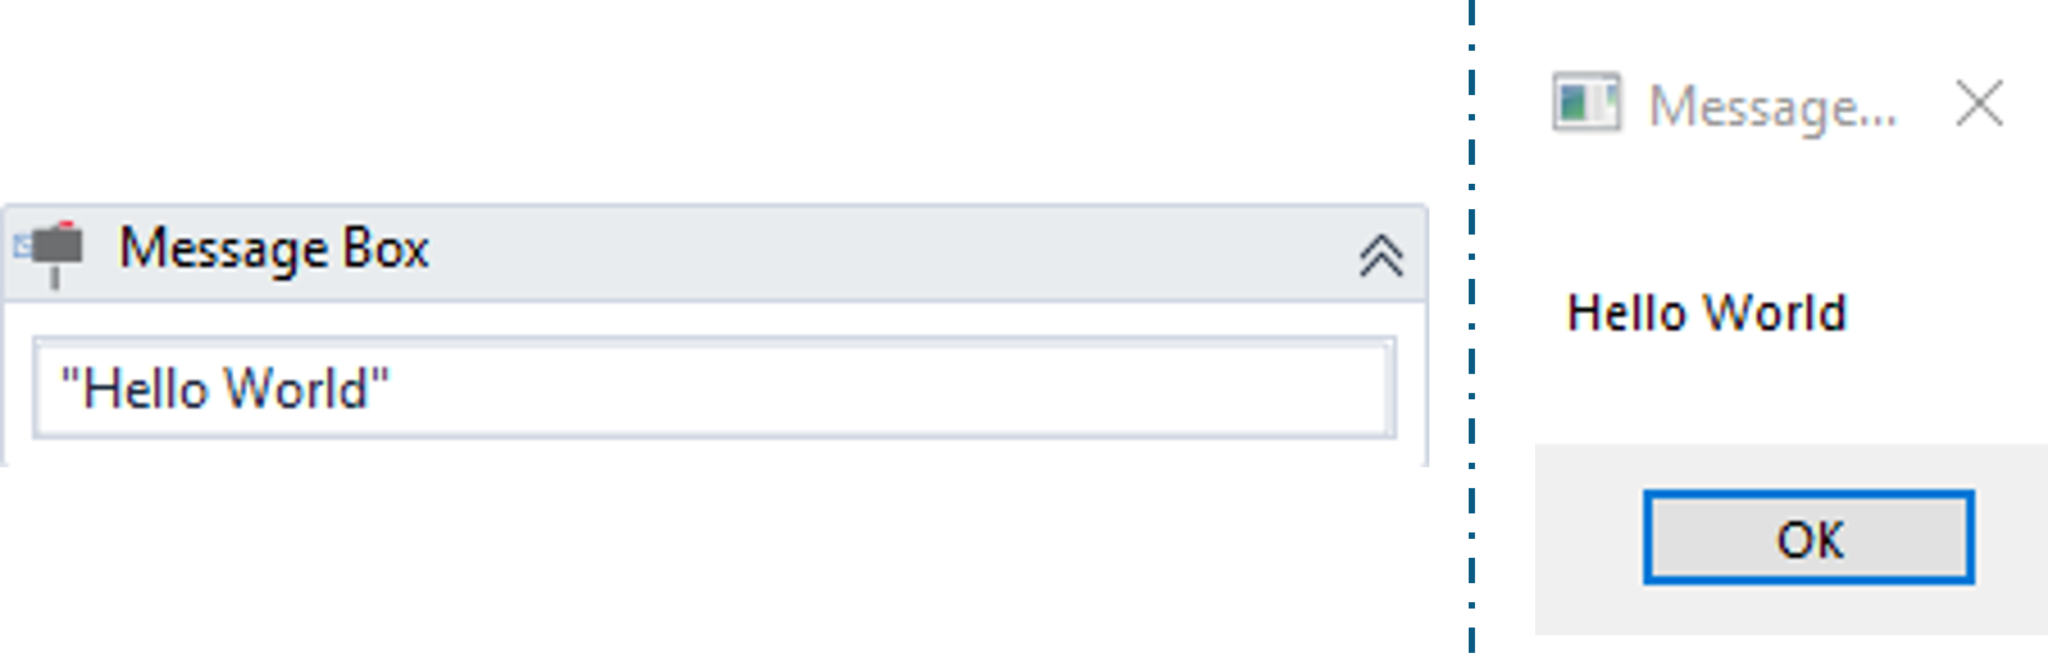
Message Box
Displays a message box with a given text that has to be shown to the user. You can either display a message in the message box directly or can display a message in a message box using variables. Let us look into them one by one.
Display a Message in Message Box directly
Drag a Message Box activity and mention the text that you wish to display in the message box. You would see an output of a message box displaying the text that you have mentioned. Refer below.

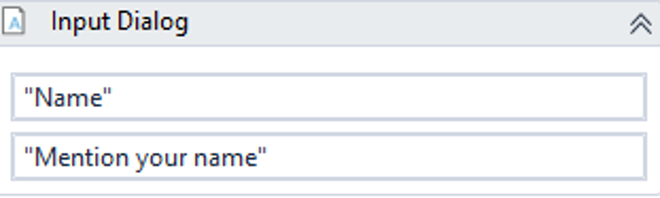
Step 1: Drag an Input Dialog and mention the Title and Label. Here I want to mention the input as name, so I have mentioned the Title as “Name” and Label as “Mention your name”. Refer below.

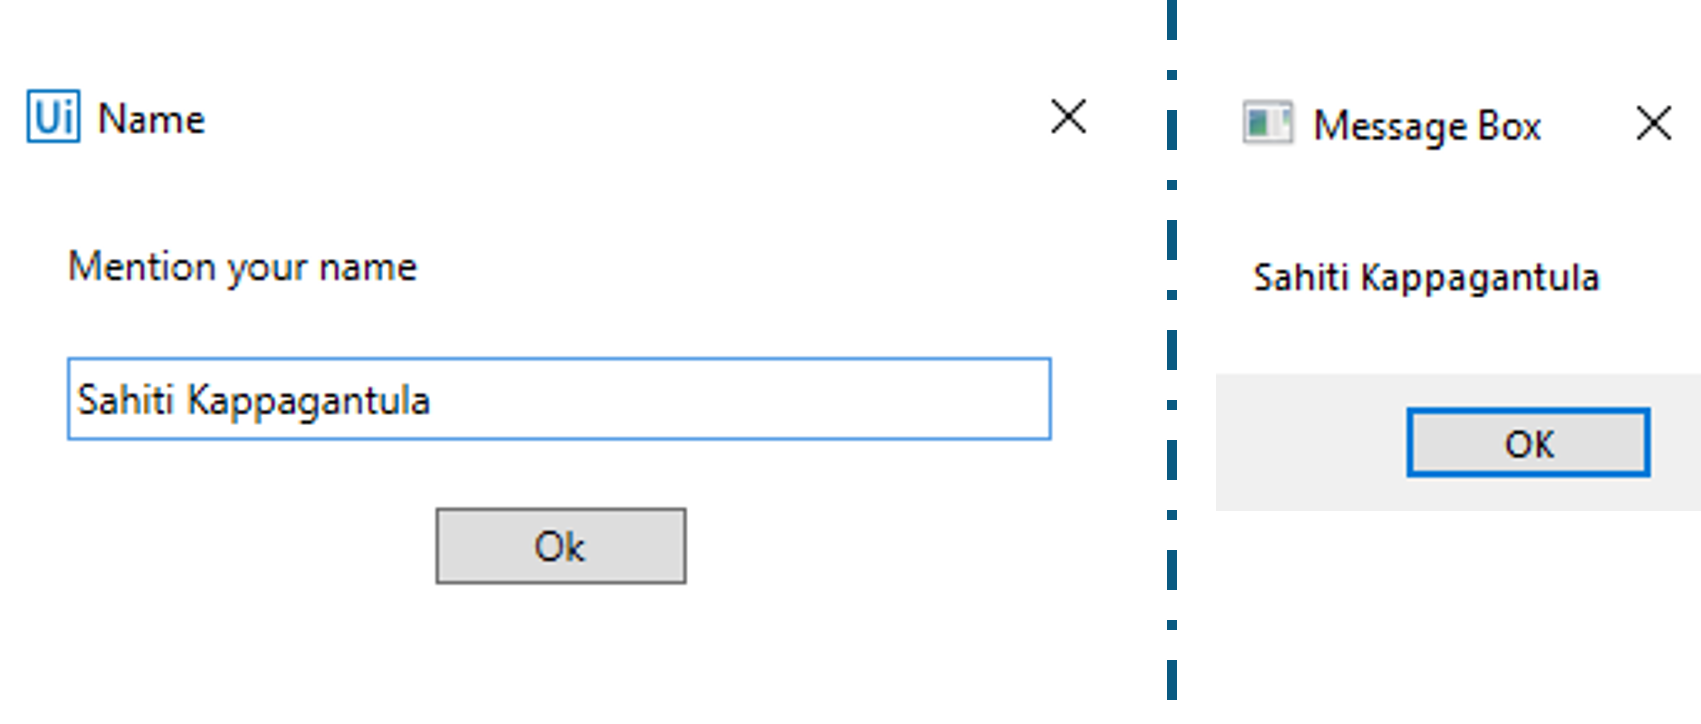
Step 3: Drag a Message Box activity and mention the variable ‘example’. You would see an output of a message box displaying the name that you must have mentioned. Refer below.

Now, let us move forward to the next activity i.e. Assign activity.
Assign Activity
This activity enables you to assign a value to a variable. To explain you the functionality of this activity, let us create an automation task to count the number of files present in a directory.
Count Number of Files
Step 1: Create the variables NumberOfFiles, sourcepath. Now, assign the default value of sourcepath variable to the Path of Source Directory. Refer below.


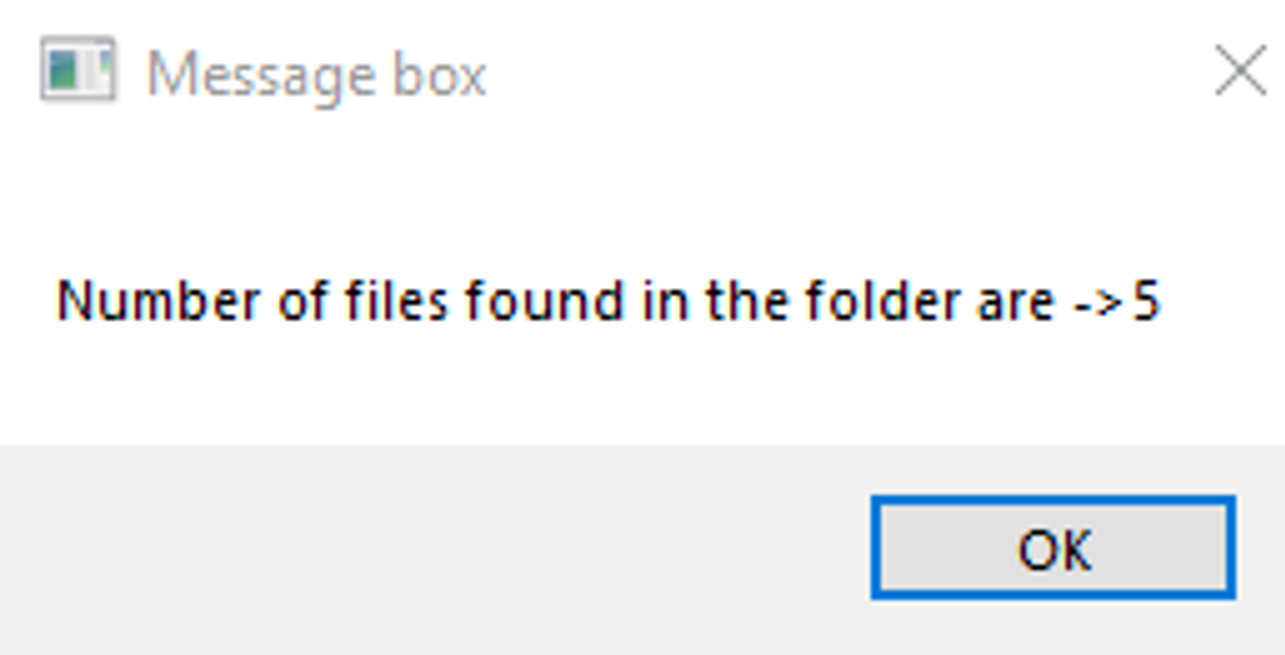
Step 2: Drag the Assign activity and assign the To section to NumberOfFiles and the value section to directory.GetFiles(sourcepath) function. This would take all the files from the source path.


So, this would display an output as below.

Now, let us move forward to the next activity i.e. Write CSV activity.
Write CSV Activity
This activity is used to save the specified DataTable to a .csv file. To explain you the functionality of this activity, let us create an automation task to store the scraped data into a Write CSV activity.
Mention the scrape data in a .csv file
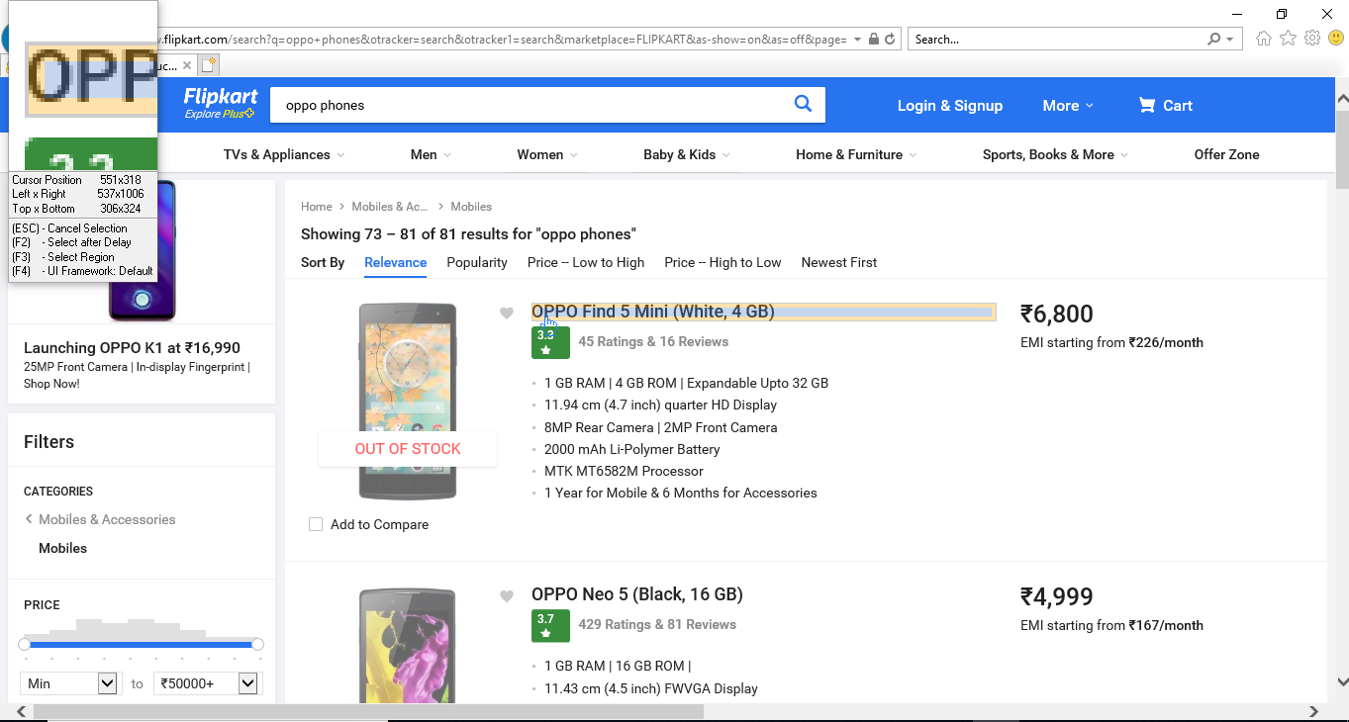
Step 1: Use the Data Scraping option from Ribbon, and scrape the data from the chosen website. Here I have chosen, Flipkart website. Press Next in the below Dialog Box.
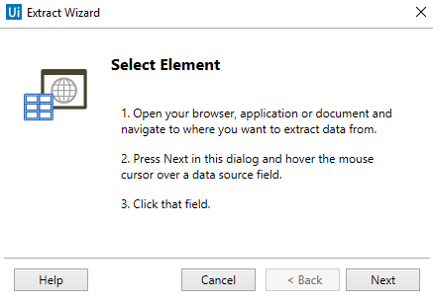

Step 2: Hover the mouse over a data source field and then click on the data source field.

Step 3: After that, you will see another Dialog box which will ask you to choose the second element to create a pattern.
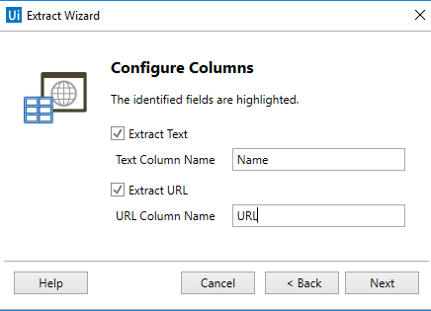
Step 4: Once you choose the second element to create a pattern, you will get an option to Configure Columns. In the Dialog Box, that opens up, you can rename the Column name and extract URL also. After that click on Next. Refer Below.

Step 5: Now, to extract other data sources from the website, click on the Extract Correlated Data option and repeat the above steps.
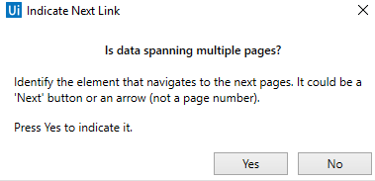
Step 6: Once you are done extracting all the required data, click on Finish. This action would open a dialog box which will ask you if you wish to span the data across multiple pages. Refer below.

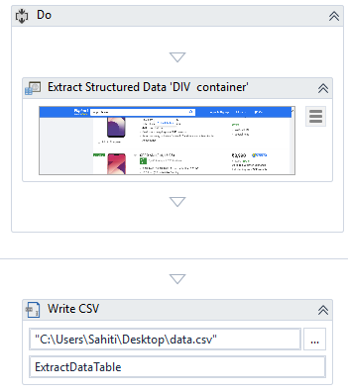
Step 8: Now to store all the extracted data into a .csv file, drag a Write CSV activity into the Do section of the Data Scraping.
Step 9: In the File Path section of this activity, mention the path of the .csv file where you want to store the extracted data and then mention the ExtractDataTable variable in the DataTable section. Refer below.

You would see an output that all the extracted data from websites is stored in the mentioned .csv file.
Now, let us move forward to the next activity i.e. If activity.
If Activity
This activity decides whether a certain activity or a block of activities will be executed or not. To explain you the functionality of this activity, let us create an automation task to find whether a number is even/odd.
Find whether a number is even/odd
Step 1: Drag a Input Dialog and mention the Title and Label. Here I want to mention the Input as number, so I have mentioned the Title as “Number” and Label as “Mention Number”. Refer below.
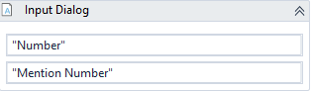

Step 3: Drag an If activity and in the condition section mention number mod 2 = 0. After that, in the Then section drag a message box and mention number.ToString + ” is a even number” and in the Else section drag a message box and mention number.ToString + ” is a odd number”. Refer below.
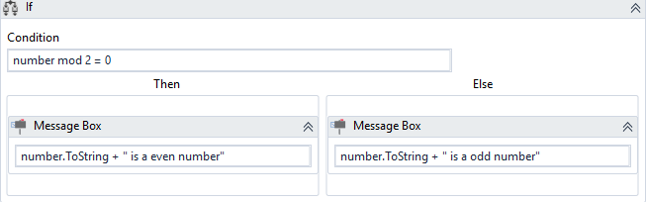

When you execute this particular sequence you would get a input dialog to enter a number.If the number which you enter is even, then you will see an output that number is even else would see an output that number is odd.


Now, let us move forward to the next activity i.e. For Each activity.
For Each Activity
This activity enables you to iterate through each and every data and process individually. To explain you the functionality of this activity, let us create an automation task to print the Fibonacci Series.
Print Fibonacci Series
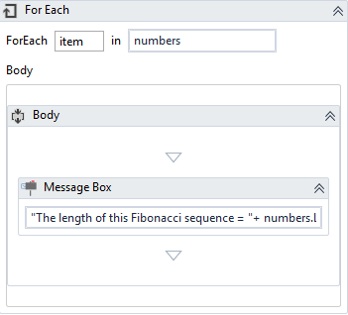
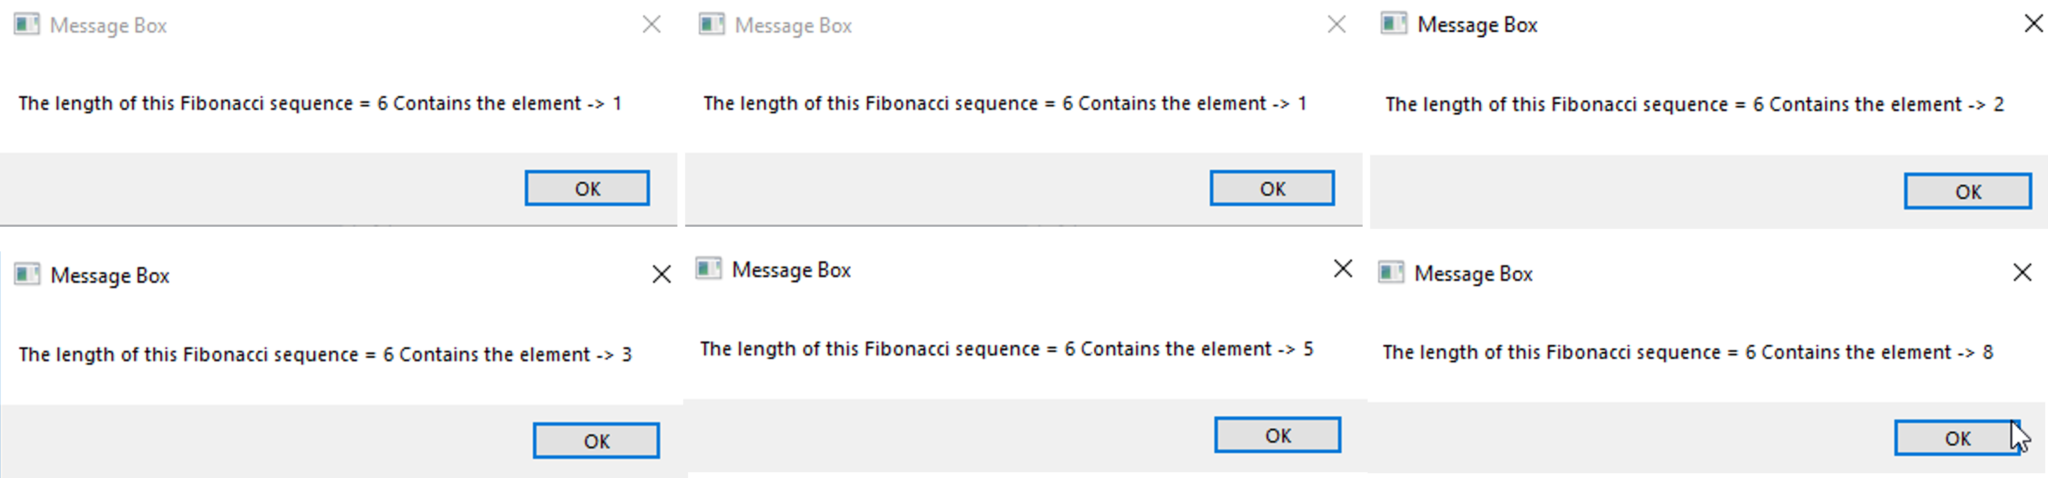
Step 1: Drag the For Each activity and in the value section mention a variable ‘numbers’. Now, before you mention the variable here, create a variable of Int32[] type and in the default value section mention the Fibonacci series. Refer below.


Now, let us move forward to the next activity i.e. While activity.
While Activity
This activity enables you to execute a specific process repeatedly, while a specific condition is met. To explain you the functionality of this activity, let us create an automation task to print the numbers 1-10.
Print Numbers 1-10
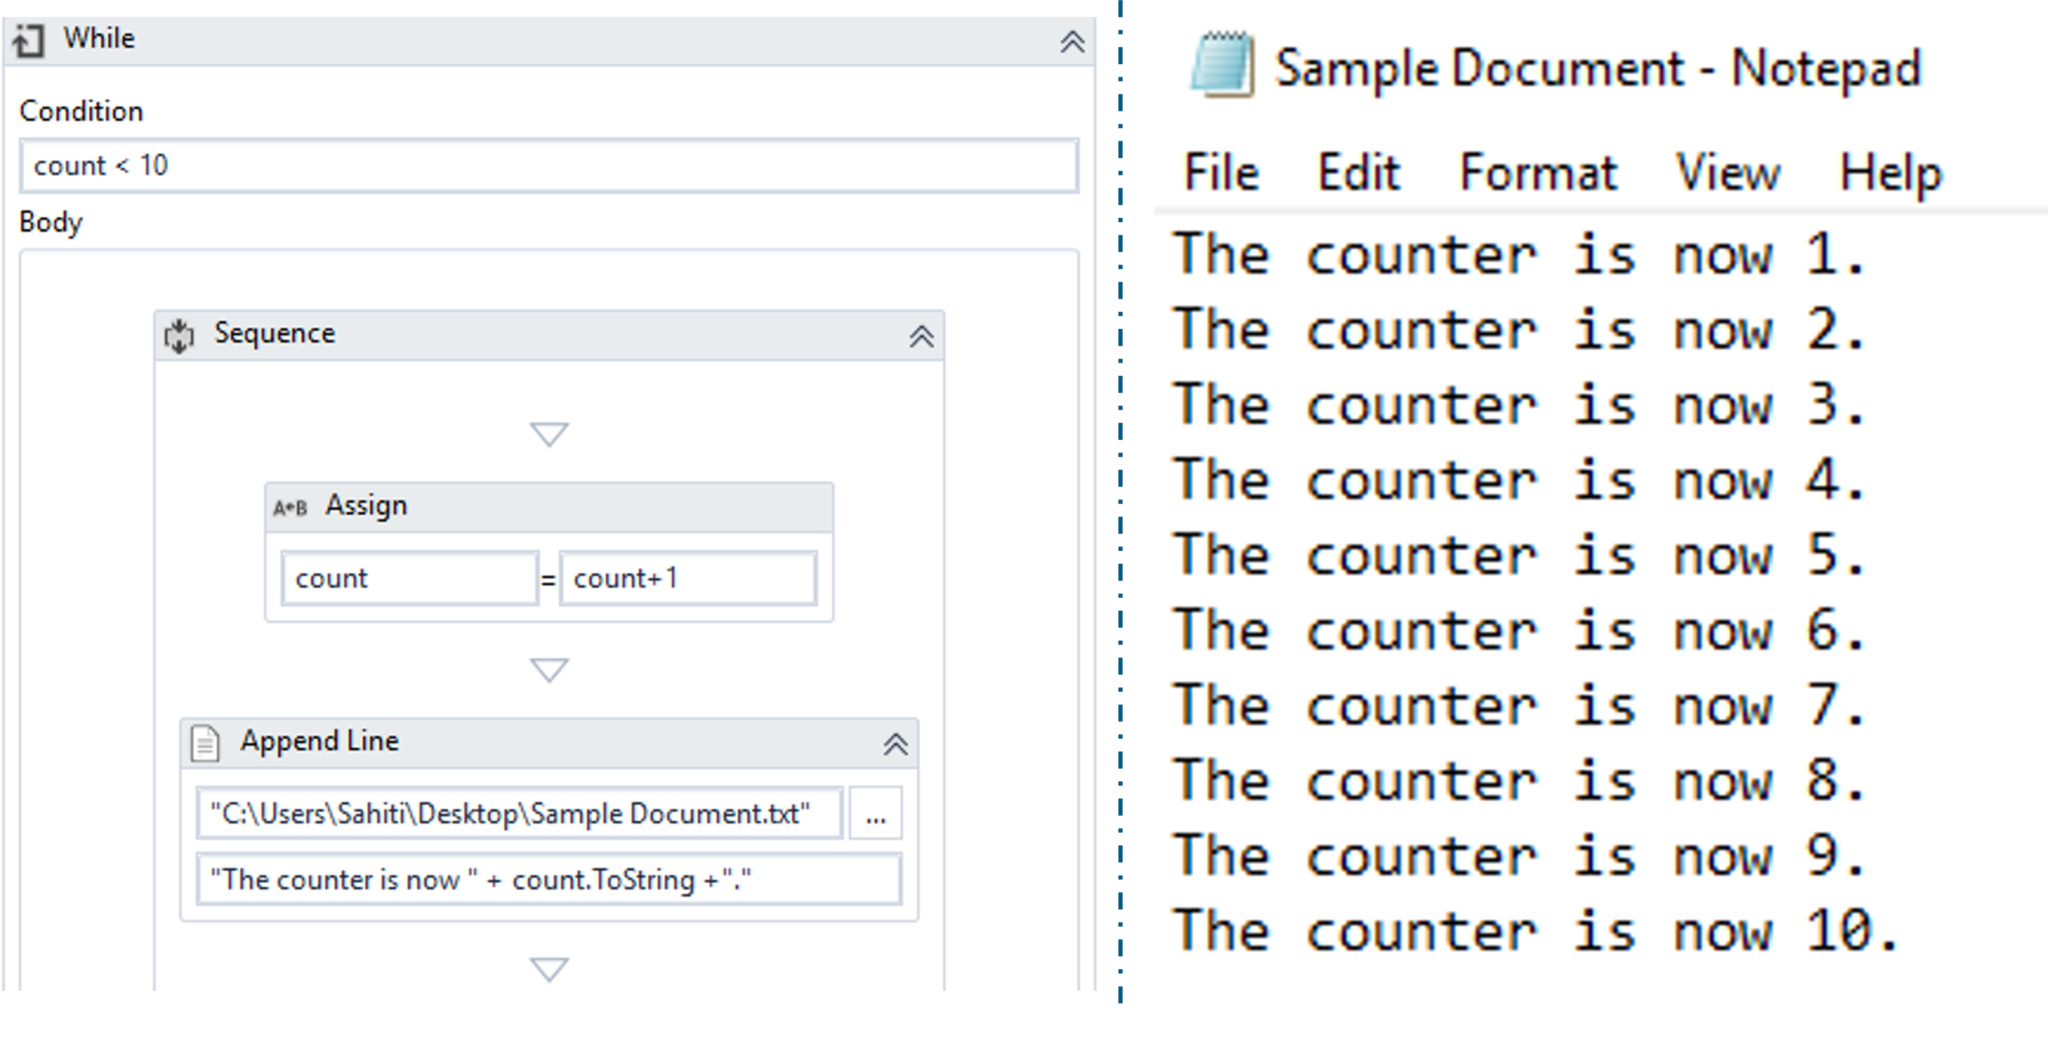
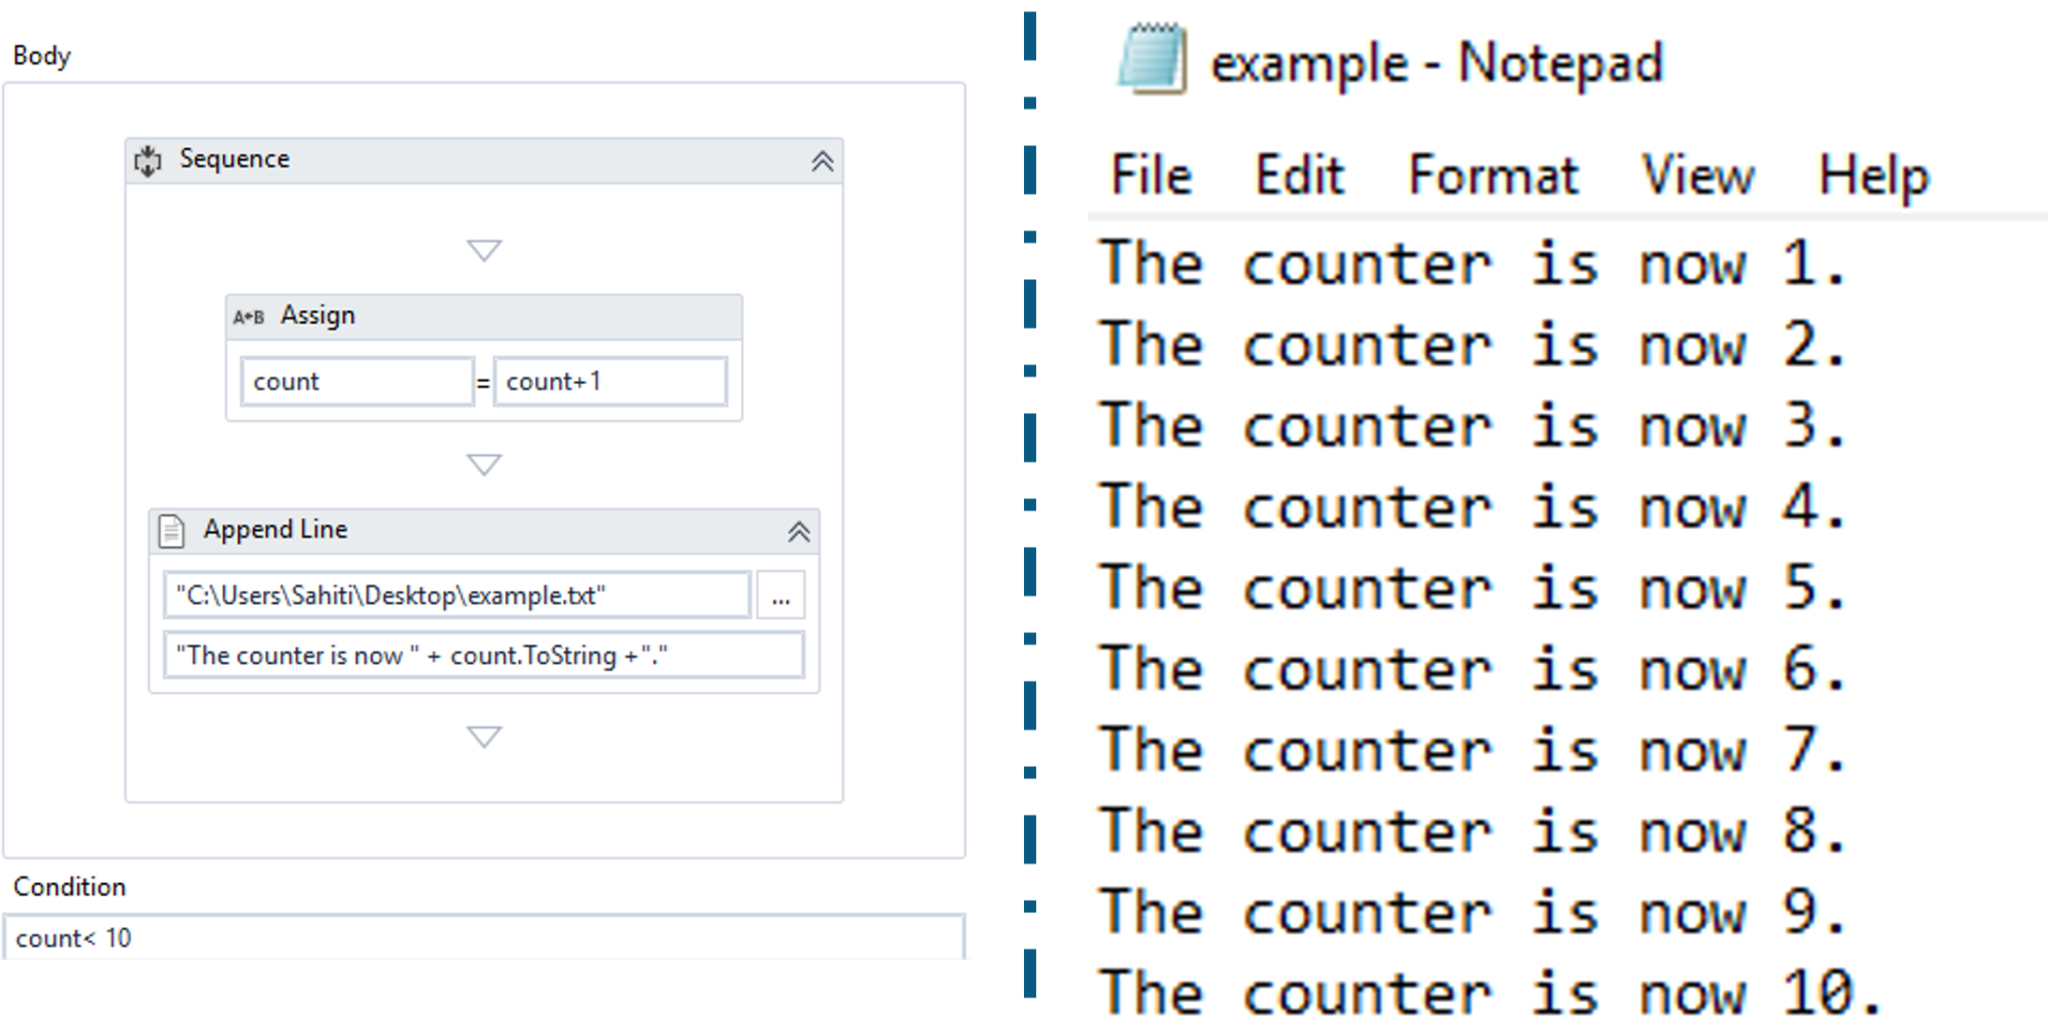
Step 1: Drag the While activity and in the condition section mention the condition count < 10. But, before that create the variable count.
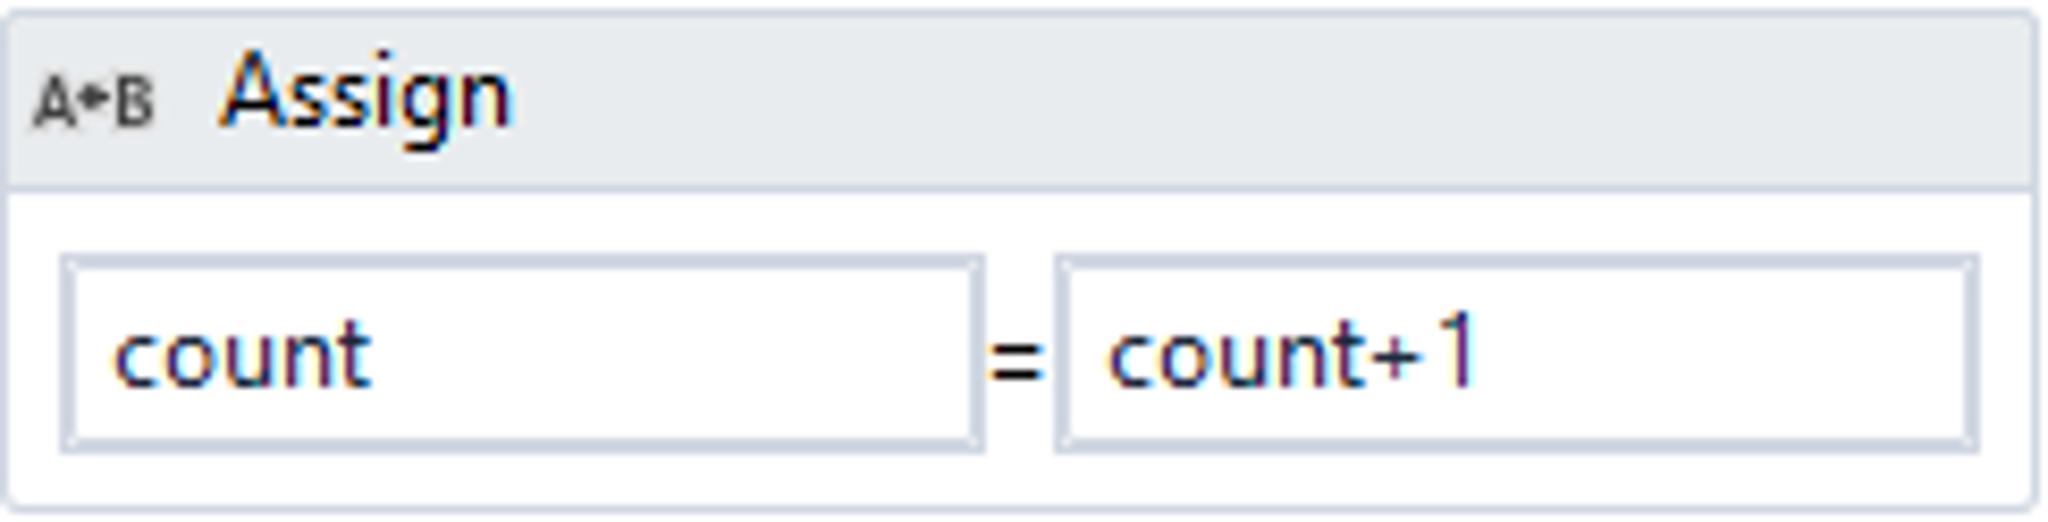
Step 2: In the Body section of this activity, drag an Assign activity, and assign the To section to count and the value section to count + 1 function. This will increase the counter by 1, until the condition is satisfied. Refer below.


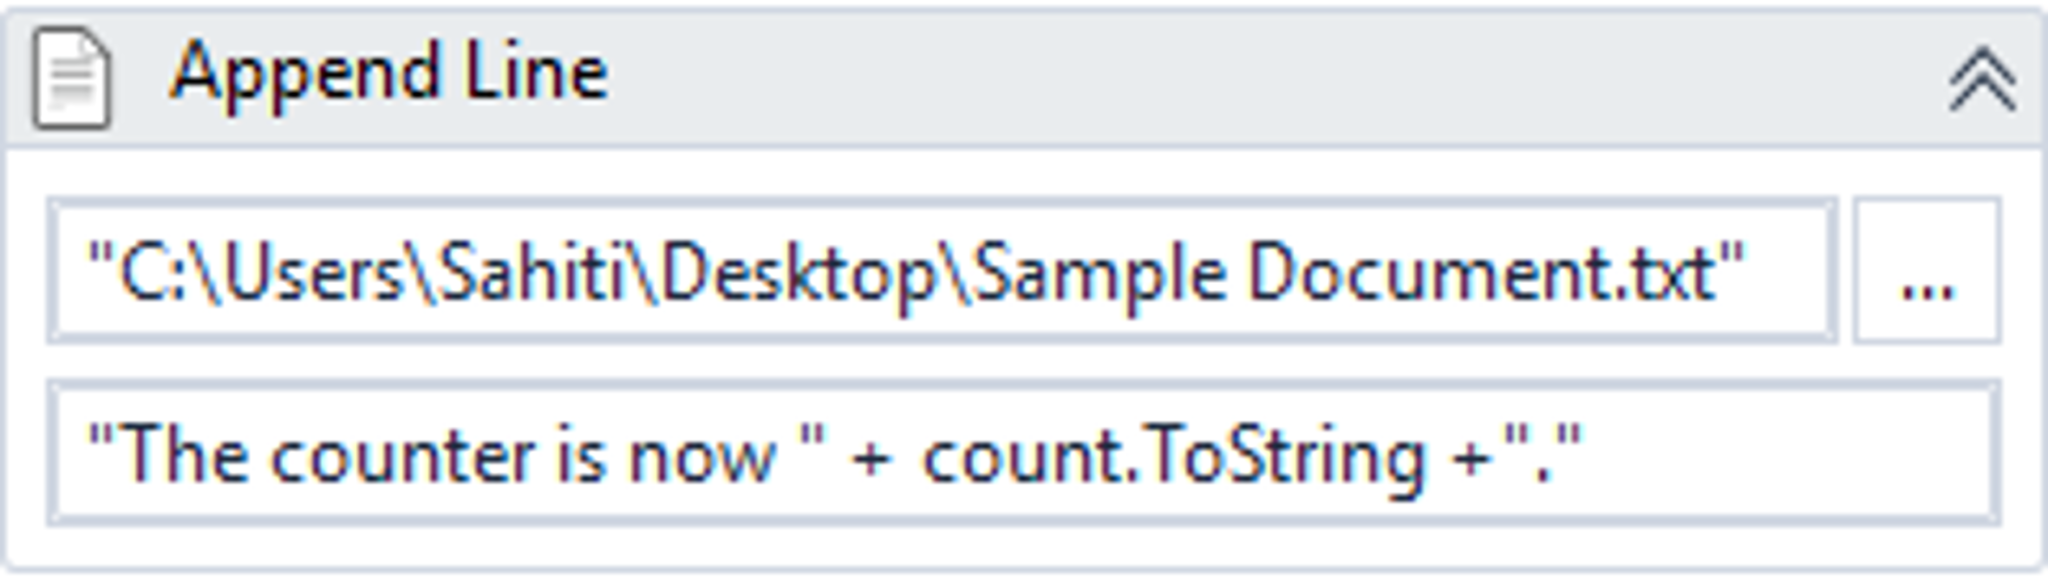

Your final flow of execution and output will look like below.

Now, let us move forward to the next activity i.e. Do-While activity.
Do While Activity
This activity enables you to execute a specified part of your automation while a condition is met. To explain you the functionality of this activity, let us create an automation task to print the numbers 1-10.
Print Numbers 1-10
Step 1: Drag the Do-While activity and condition section mention the condition count < 10. But, before that create the variable count.
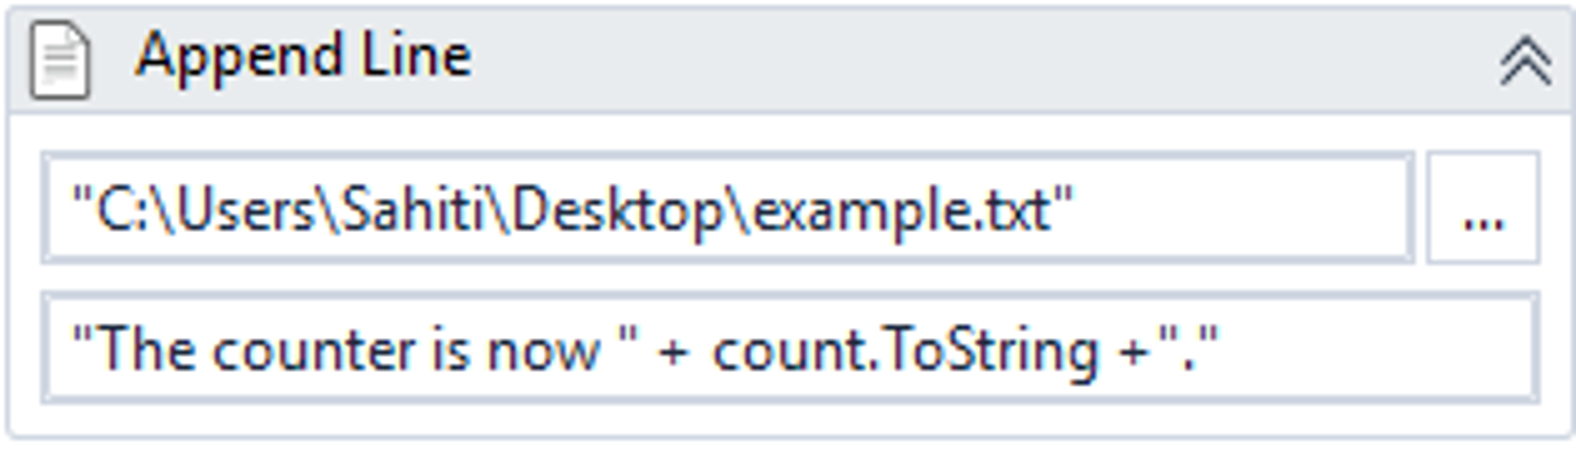
Step 2: In the Body section of this activity, drag an Assign activity, and assign the To section to count and the value section to count + 1. This will increase the counter by 1, until the condition is satisfied. Refer below.


Now, let us move forward to the next activity i.e. Switch activity.
Switch Activity
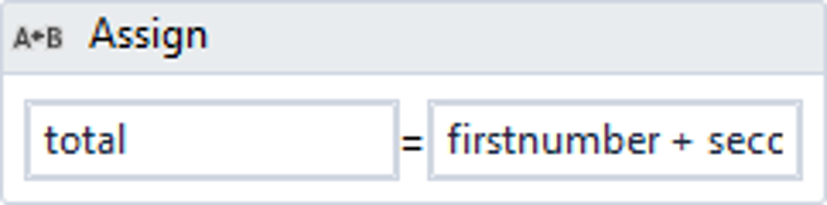
This activity enables you to enables you to select one choice out of multiple, based on the value of a specified expression. To explain you the functionality of this activity, let us create an automation task to find whether sum of two numbers is even/odd.
Sum of two numbers is even/odd
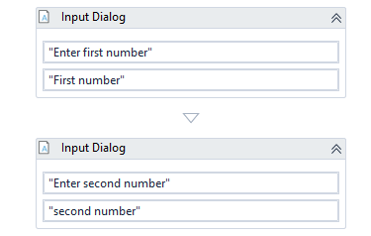
Step 1: Drag a Input Dialog and mention the Title and Label. Here I want to mention the Input as the first number, so I have mentioned the Title as “Enter first number” and Label as “First Number”.
Step 1.1: In the Properties pane of this activity, go to the output section and press on Ctrl + K to create a variable. Here I have created a variable ‘firstnumber‘ of Int32 Type.
Step 2: Drag a Input Dialog again and mention the Title and Label. Here I want to mention the Input as the second number, so I have mentioned the Title as “Enter first number” and Label as “First Number”.
Step 2.1: In the Properties pane of this activity, go to the output section and press on Ctrl + K to create a variable. Here I have created a variable ‘secondnumber‘ of Int32 Type. Refer below.


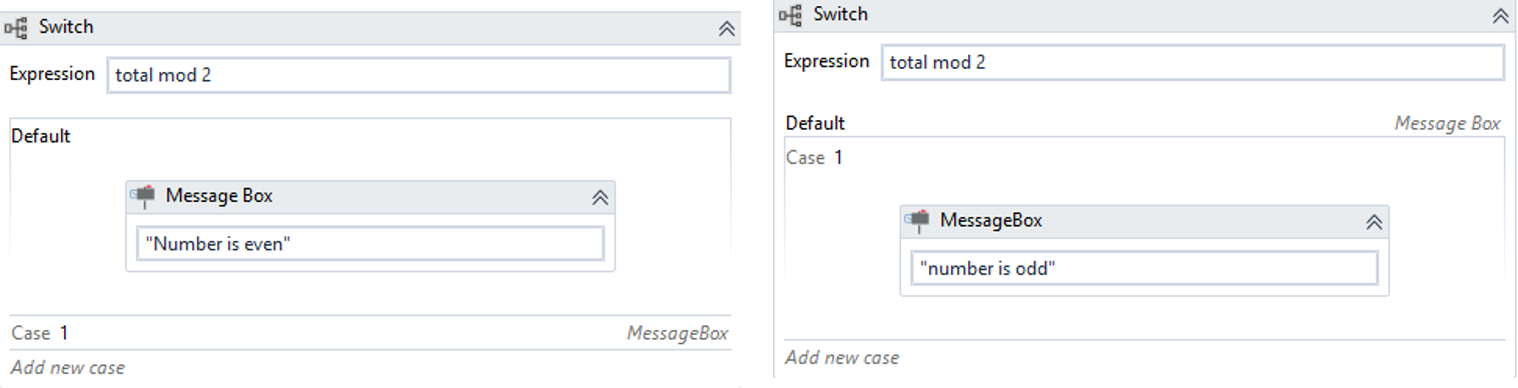

When you execute this particular sequence you would get two input dialog one after the other to to enter a number. If the sum of the numbers which you entered is even, then you will see an output that number is even else would see an output that number is odd.
So, folks this brings an end to this article on Activities, Variables, Data Types in UiPath. I hope you enjoyed reading this article learnt how to the basics of UiPath. If you wish to explore more about UiPath, then you can refer our articles on UiPath Automation Examples, UiPath PDF Data Extraction, and Error Handling in UiPath.
If you wish to further learn about Robotic Process Automation and build your career as an RPA Developer, then you can check out our course on Robotic Process Automation Using UiPath. This course will let you enhance your knowledge on RPA and will give you an extensive hands-on experience in UiPath.
Got a question for us? Please mention it in the comments section of this Activities, Variables, Data Types in UiPath article and we will get back to you.