


Did you know that by the end of 2020, around 15% of the number of jobs are going to increase? With the increase in RPA adoption, organizations are hunting for professionals with RPA online training. In the previous blog you got an introduction to RPA. Now in this UiPath Tutorial, I will get into the details of the UiPath tool i.e. types of projects, UiPath components, UiPath installation, and more, which enables you to automate the repetitive tasks and convert the tedious tasks into simpler tasks.
In this UiPath Tutorial blog, you will be going through the following topics:
- What is Robotic Process Automation?
- What is UiPath?
- How to Install UiPath?
- Types of Projects in UiPath
- UiPath Components
- Hands-On
UiPath Tutorial For Beginners | Edureka

In this video, you will get an introduction to the leading RPA tool – UiPath. Towards the end, we will also be doing hands-on using UiPath.
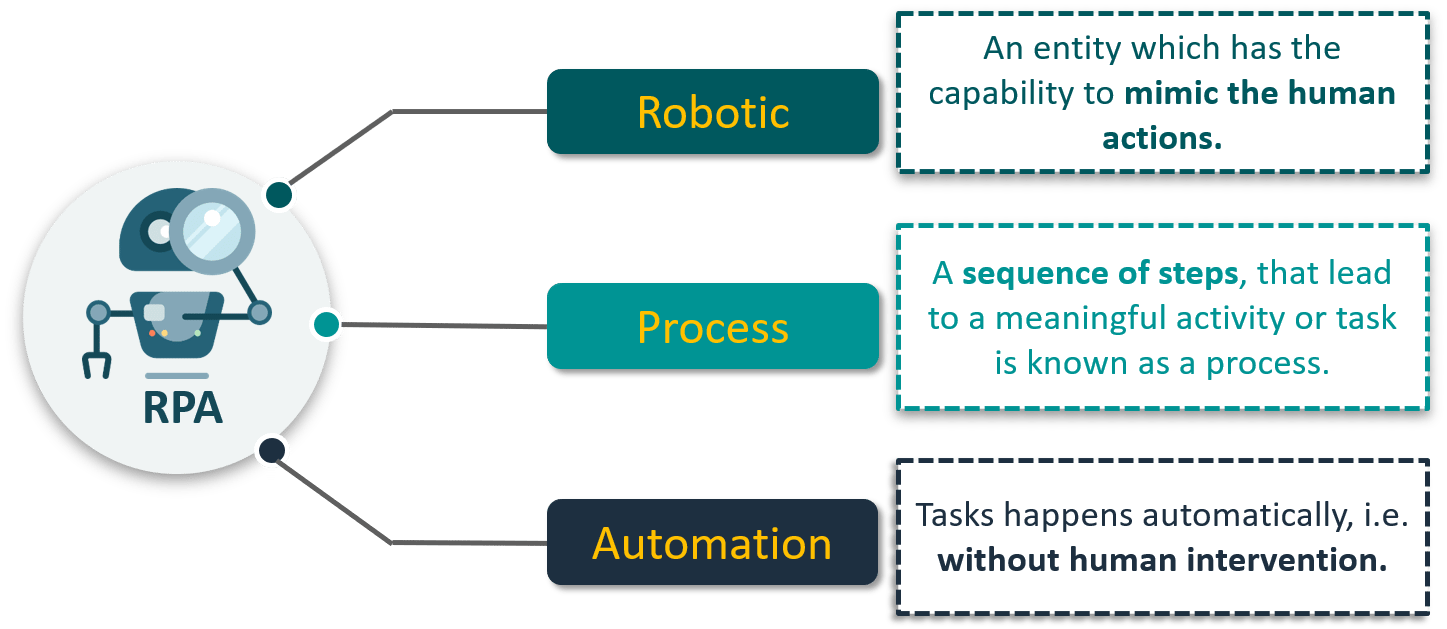
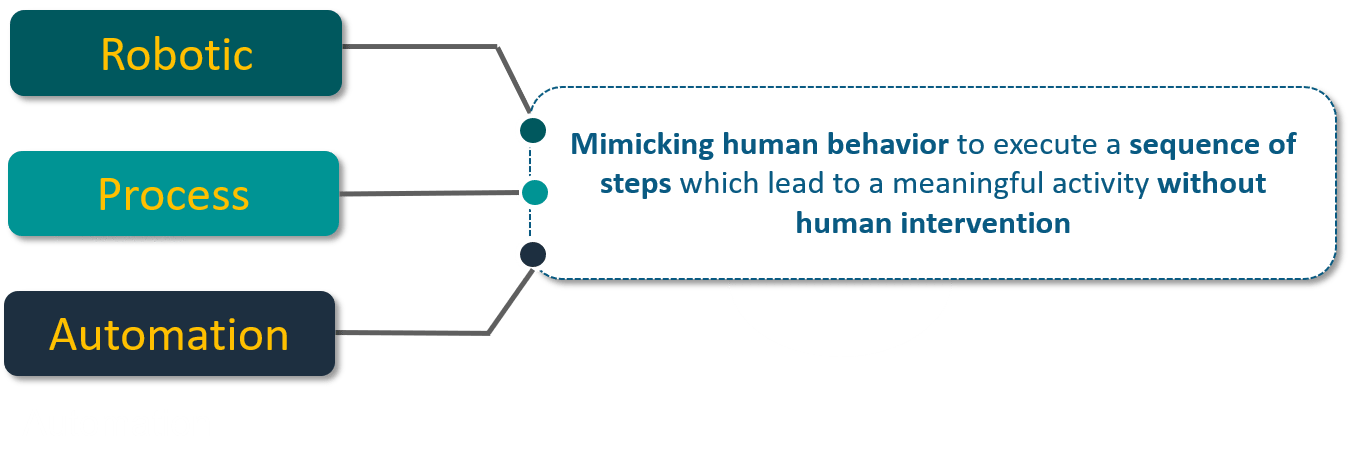
What is Robotic Process Automation?


For details, You can even check RPA earning the key concepts to design RPA solutions using UiPath Community Edition with the Uipath advanced developer certification.
Now, let me talk about one of the most popular tools for automation i.e. UiPath. So, what is UiPath and why is it used?
UiPath Tutorial: What is UiPath and Why is UiPath used?
- UiPath is a Robotic Process Automation tool that is used for Windows desktop automation.
- It is used to automate repetitive/redundant tasks and eliminates human intervention.
- The tool is simple to use and has a drag and drop functionality of activities.
- UiPath has a standard Studio version which has a trial period of 60 days.
- The best part is, UiPath also comes with a Community Edition which is free for lifetime and has most of the functionality of the Studio version.
Now that you have understood what is UiPath, let me give you a summary of the installation of UiPath studio on your system.
UiPath Tutorial: How to Install UiPath Studio?
UiPath is one of the easiest tools to install. Before installing UiPath on your system, make sure you have at least 8 GB of RAM and have Windows 7 or higher versions. After you have the basic requirements, choose the edition you wish to install. UiPath offers various editions such as Community Cloud, Studio, Enterprise Cloud, Enterprise Server. All these editions differ by their functionalities and features.
So, once you choose the edition, you can refer to the steps mention in this article for the installation of UiPath.
This is how UiPath Studio looks:


Now before moving on to the different types of projects in UiPath, let’s discuss some of the important terms/concepts in UiPath which will help you learn UiPath.
How to learn UiPath?
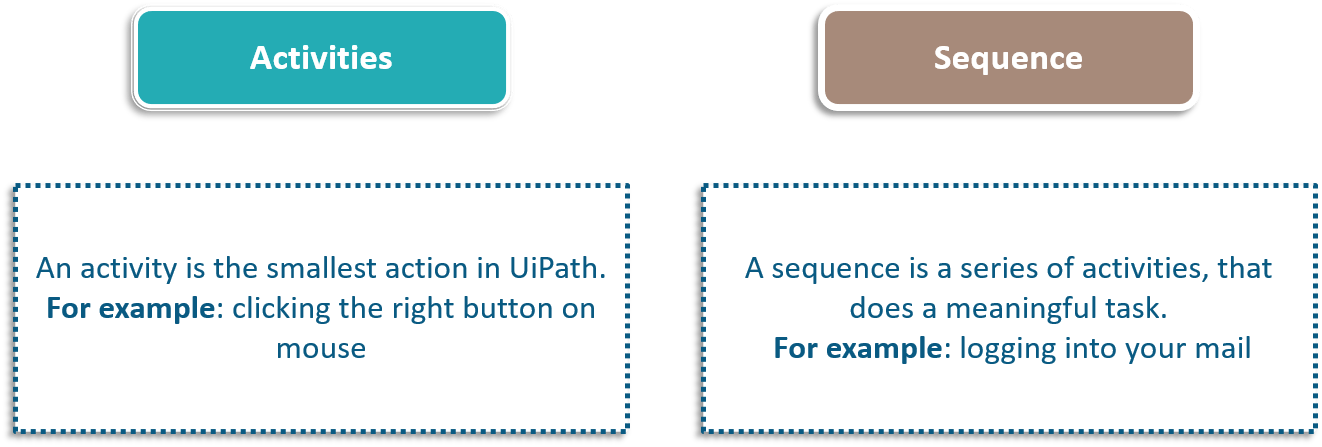
To start your journey in UiPath, you have to learn Sequence and Activities.

Next, let’s see the different types of projects in UiPath.
UiPath Tutorial: Types of Projects and Templates in UiPath
Projects
- Process
- Library
Templates
- Orchestration Process
- Background Process
- Robotic Enterprise Framework
- Trigger Based Attended Automation
- Transactional Process
Projects
Process
This type of project is used to create a simple blank project to design various types of automation projects. Refer below.

Library
This type of project is used to create reusable components and then publish them together as a library. The libraries created can be further added as dependencies to automation processes. Refer below.

Well, that was about projects. Now, let us look into the various templates offered by UiPath.
Templates
Orchestration Process
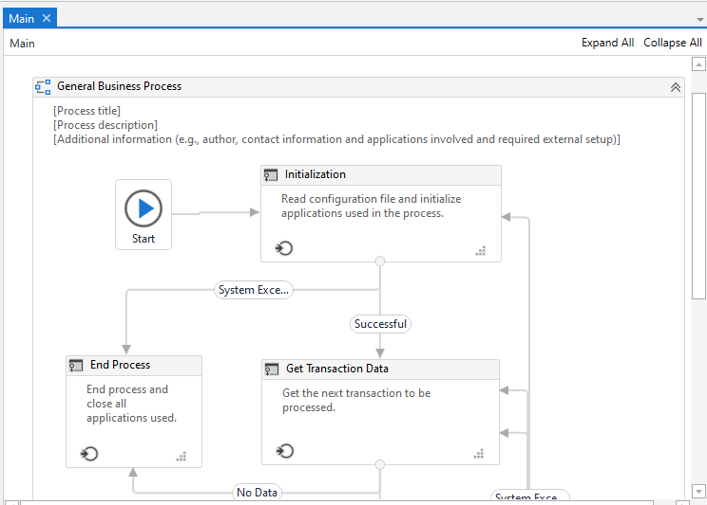
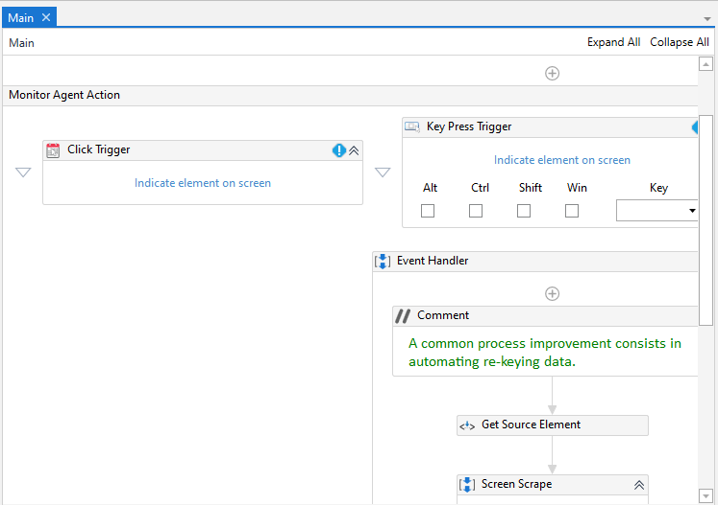
This type of template is used to implement a process through service orchestration and long transactions. Refer below.
Background Process
The Background Process is used to create a process that does not require user interactions and can run as a background process. Also, multiple background processes can run simultaneously on the same robot. Refer below.

Robotic Enterprise Framework
This type of project template is used to create a business process suitable for large scale deployments.

Trigger Based Attended Automation
As the name suggests, this type of project is used to trigger automation in response to a keyboard or mouse user events.

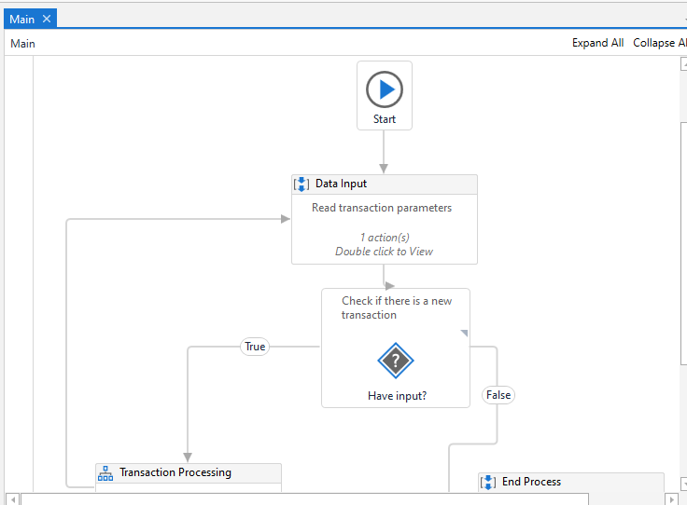
Transactional Process
This template is used to model the automation workflow as a flowchart.

UiPath Tutorial: UiPath Components
UiPath is generally divided into 2 components:
- UiPath Platform Components
- UiPath Studio Components
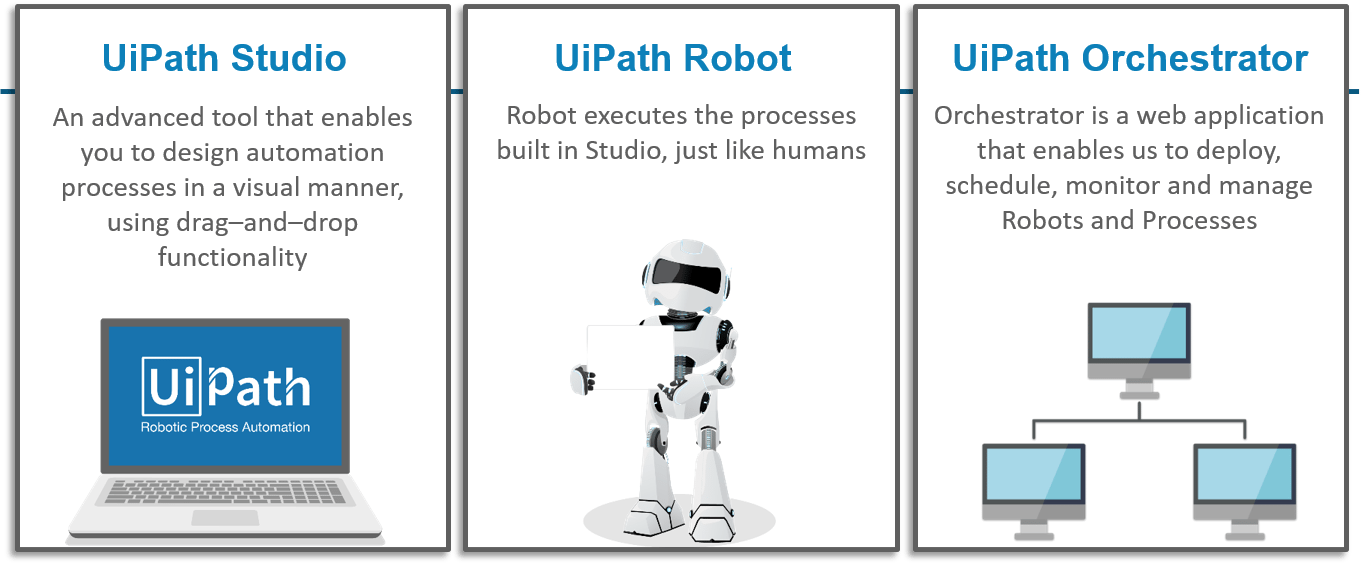
1. UiPath Platform Components
UiPath Platform consists of three main components:
- UiPath Studio
- UiPath Robot
- UiPath Orchestrator

2. UiPath Studio Components
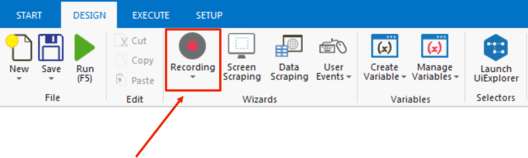
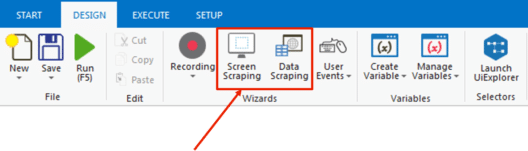
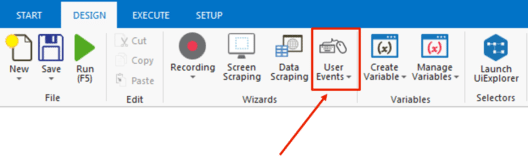
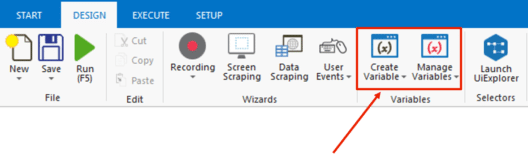
1.Ribbon:
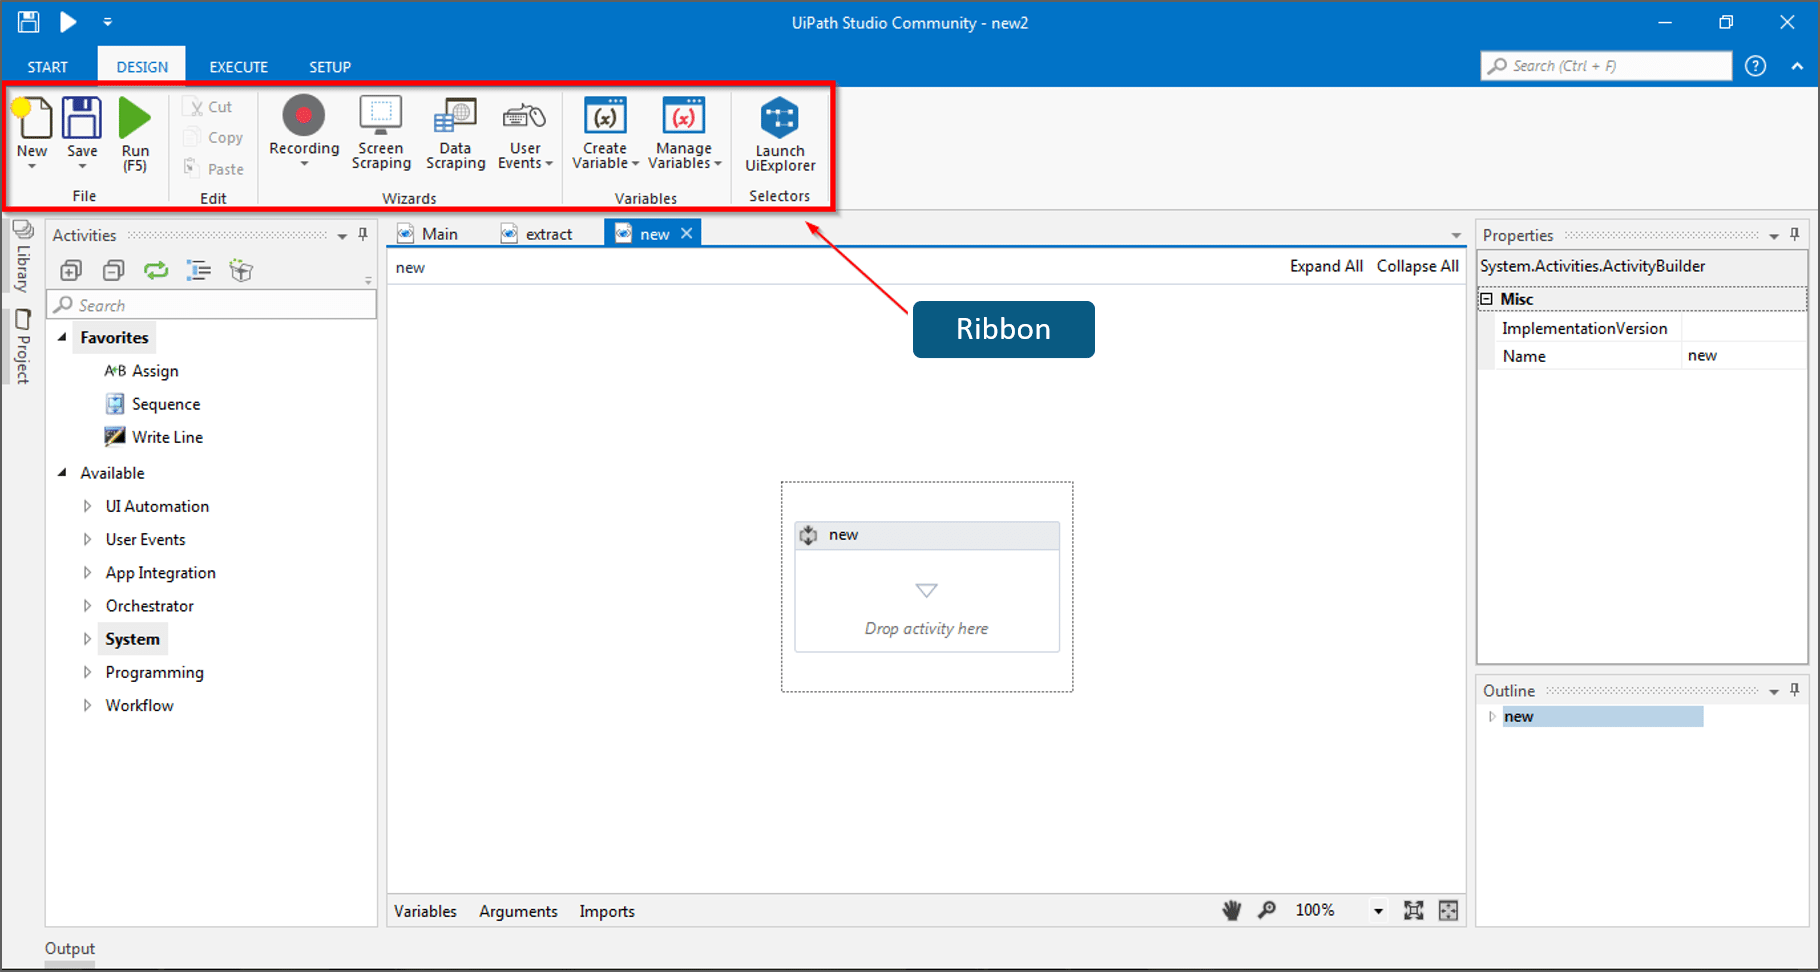

Ribbon Components:
Recording: This UiPath’s Recorder allows users to record UI mouse movements and keyboard activities to generate automation scripts.

Screen Scraping and Data Scraping: Scraping made easy with Screen Scraping and Data Scraping

User Events: This Captures User Events. For eg. Mouse Click, Keypress etc.

Variables: This helps you to Create and Manage Variables.

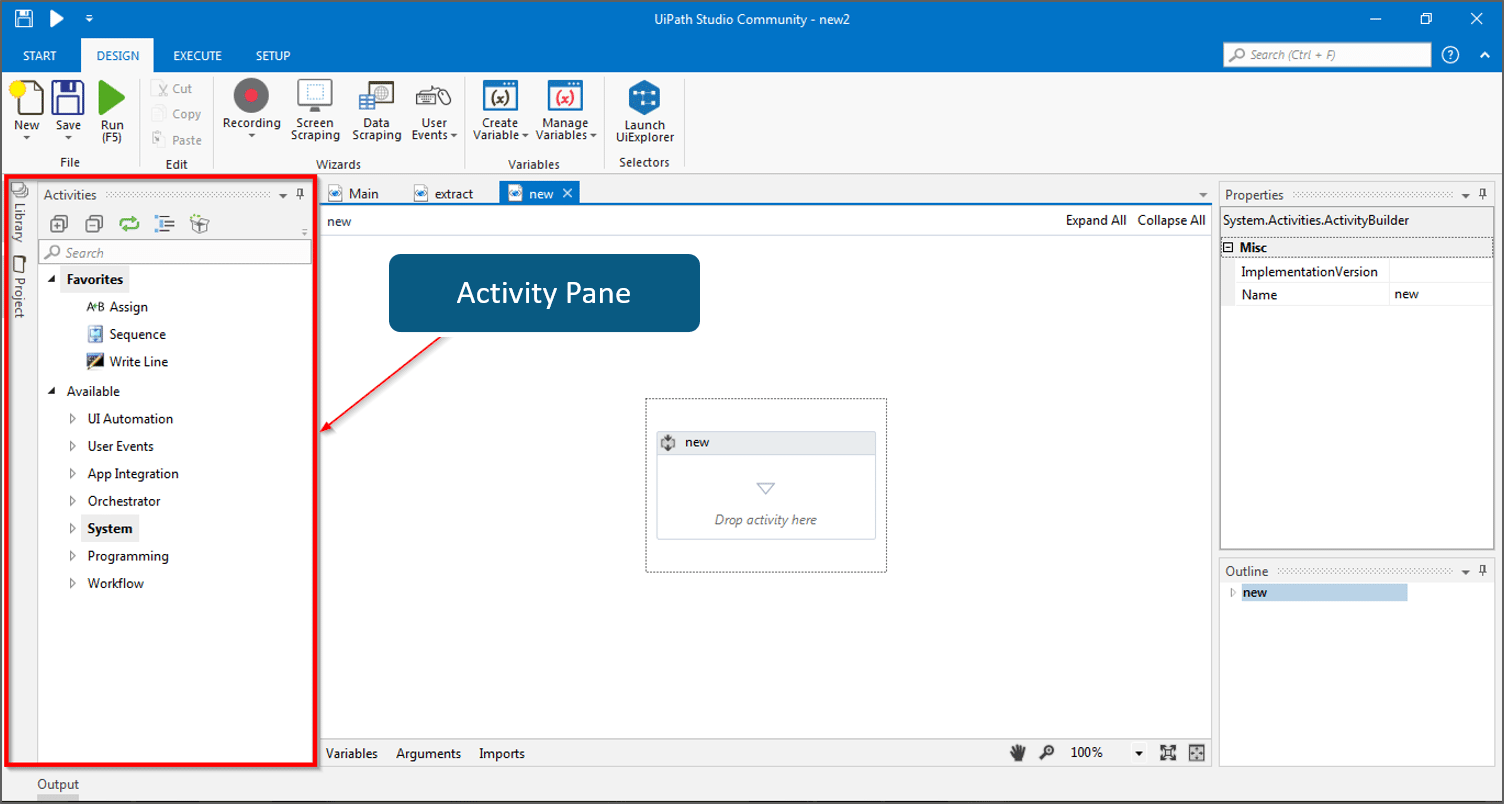
2.Activity Pane: On the left side you have the activity pane where all the small tasks are present. All you have to do is just drag and drop it in the workspace and configure it so that it works according to the requirement for every activity.

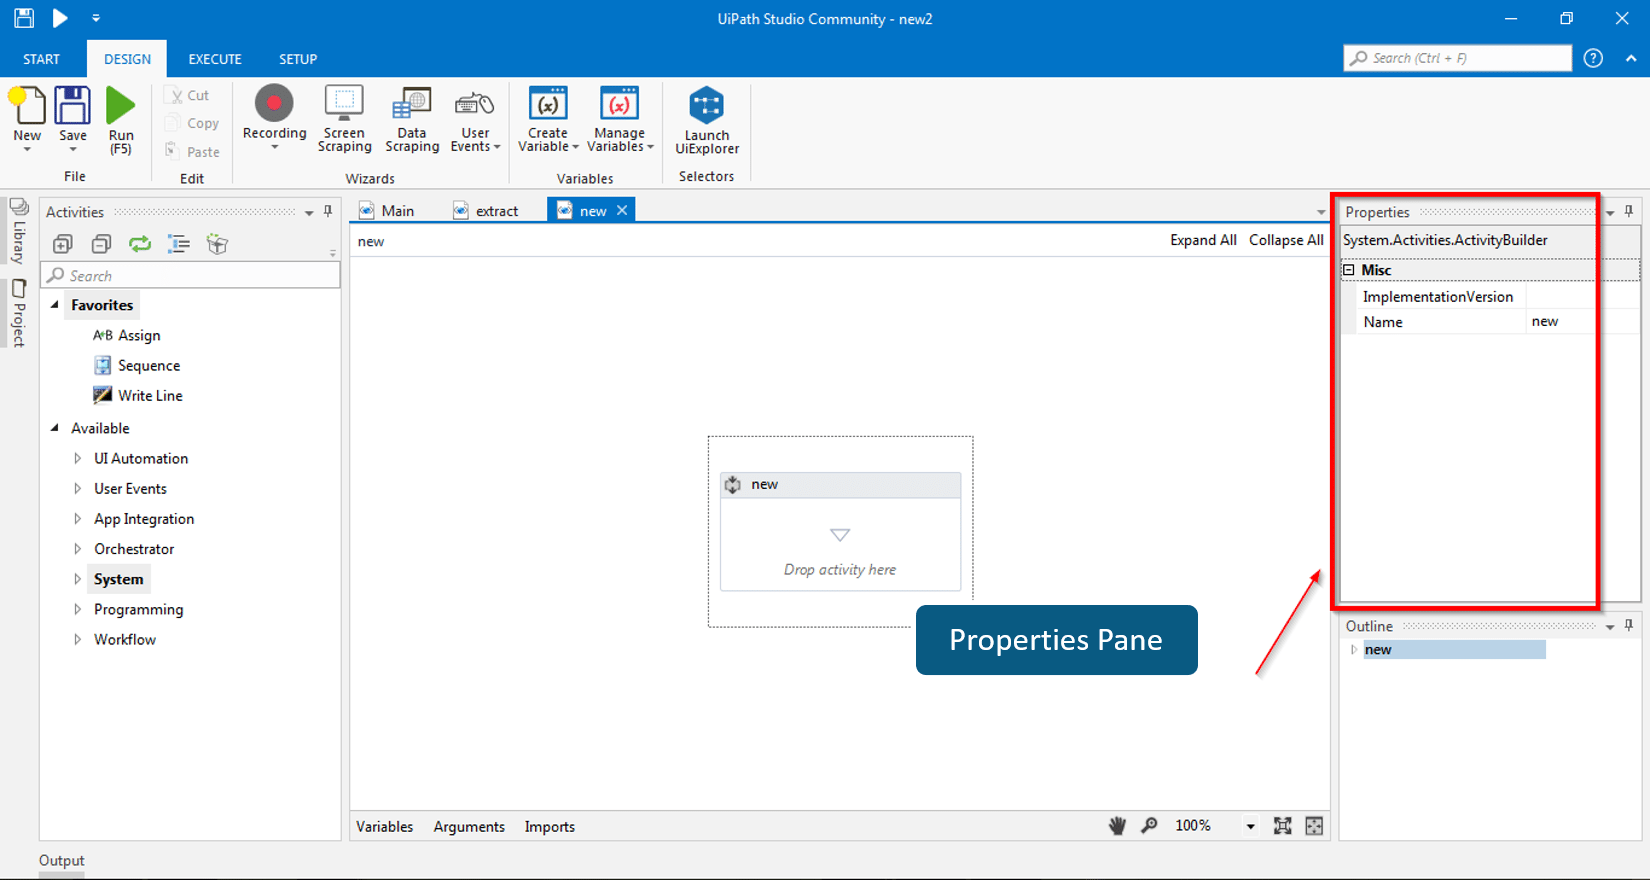
3.Properties Pane: The configuration can be handled here in the properties pane, like setting the output of a particular activity or the task.

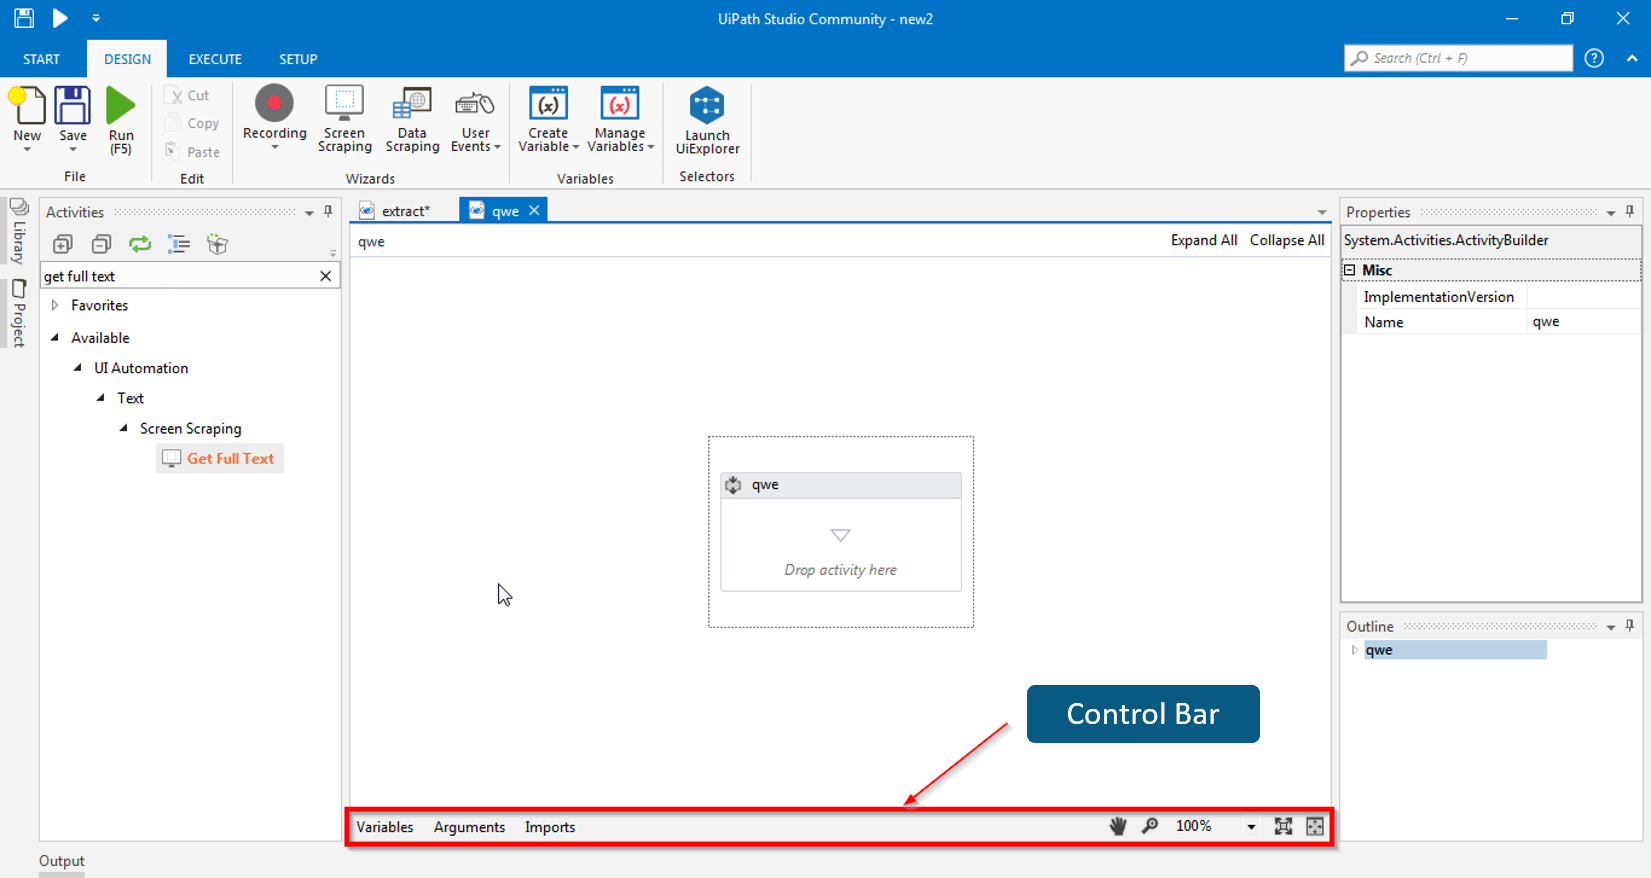
4.Control Bar/Pane: If you see the bottom section of the UI path tool, it has variables, arguments, and imports. This is the section wherein you can create variables, delete variables, and also can deal with arguments.

Now that we have understood the basic concepts of UiPath, let us implement these concepts in the UiPath and understand how to get started with it.
UiPath Tutorial: Hands-On
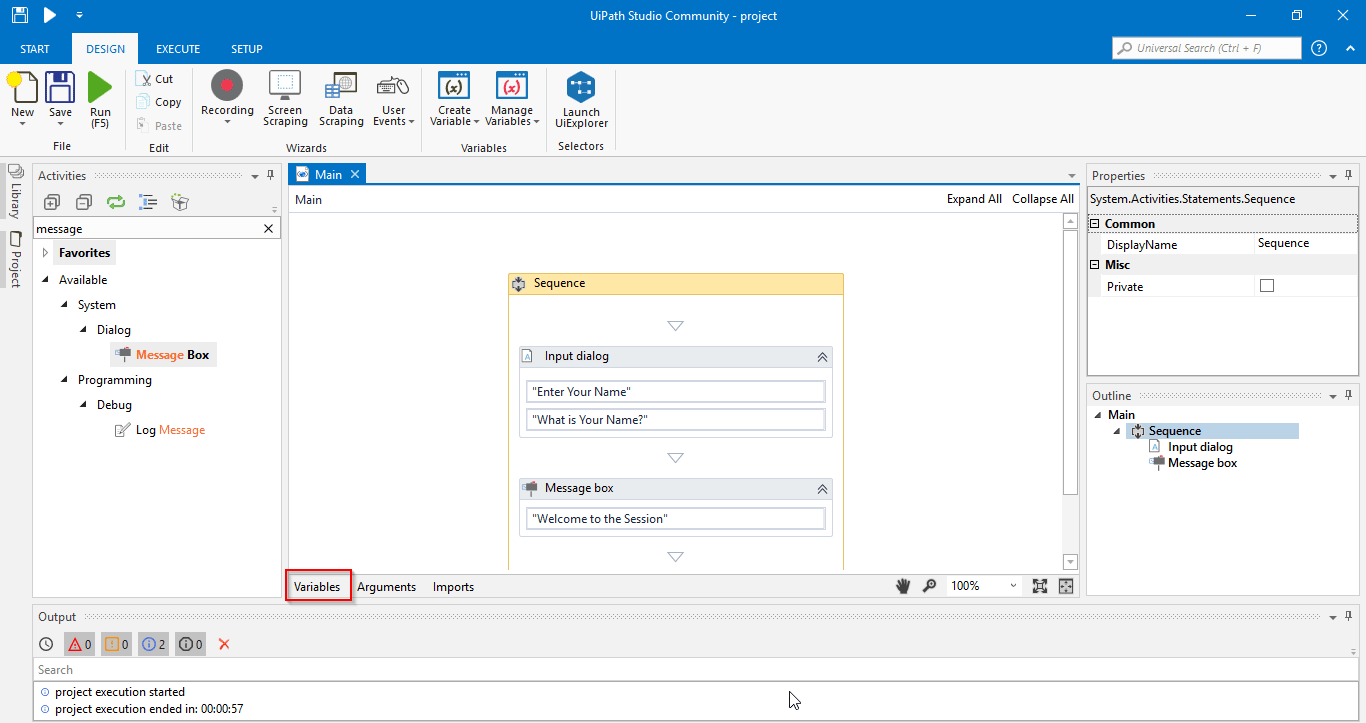
Let’s create a simple project which will greet you with the name i.e. “Welcome to the Session Samarpit“
Step 1: Open your UiPath Studio and click on “Process project.
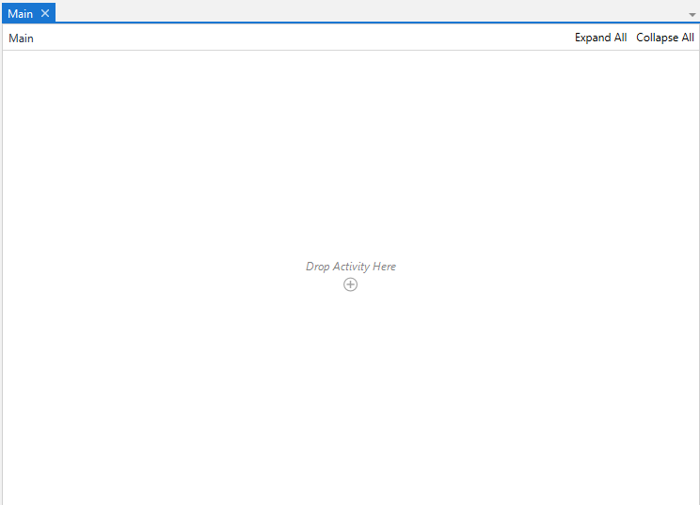
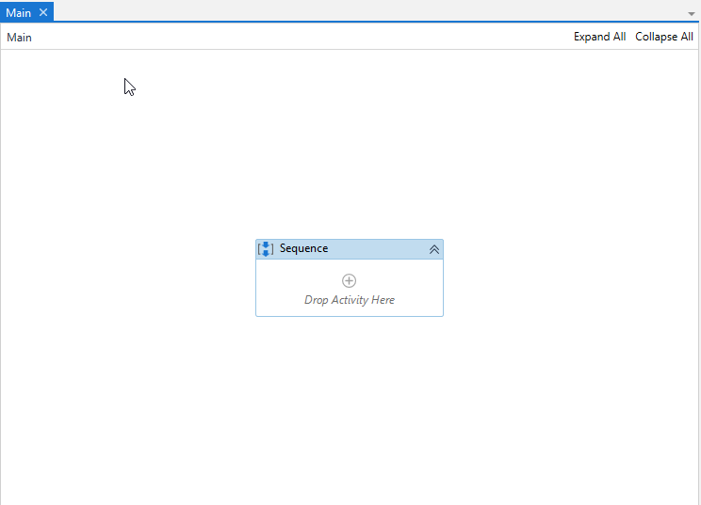
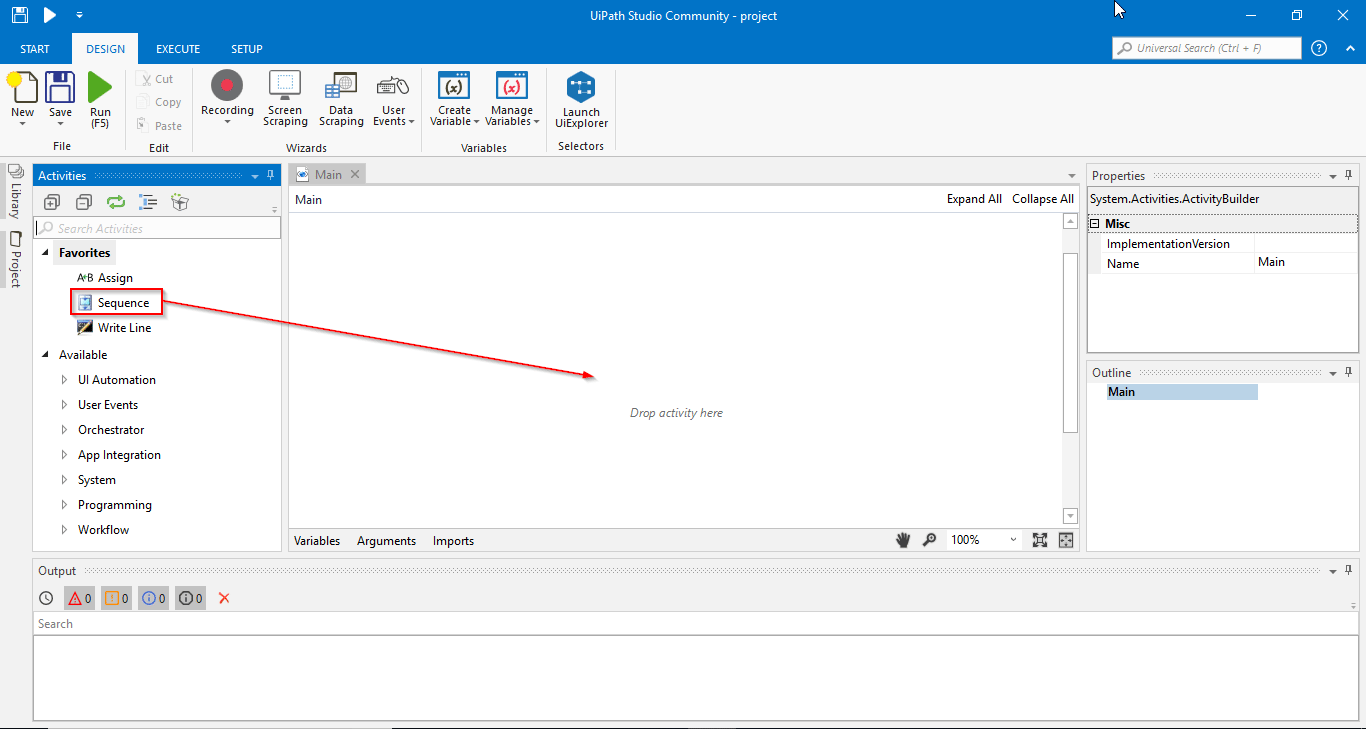
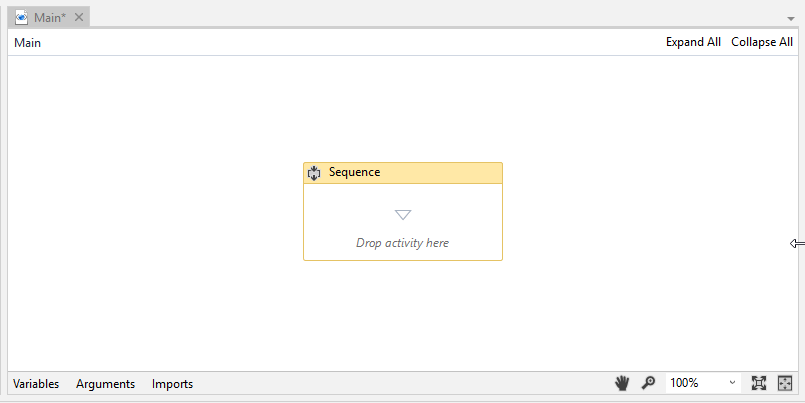
Step 2: First drag-and-drop the sequence in the workspace.

This is how it looks like after drag and drop.

Step 3: So, we want our program to ask my name. For that, I’ll search for the input dialog and then drag and drop it in the sequence activity.
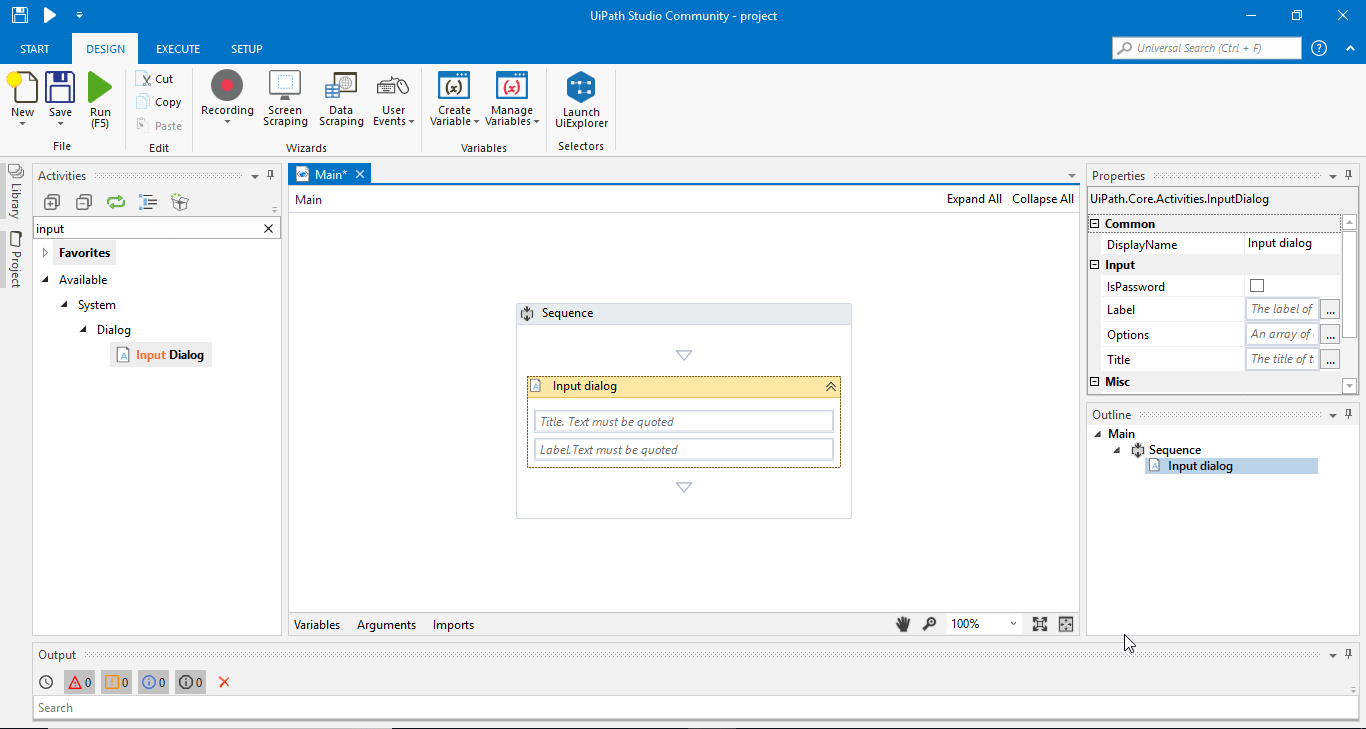
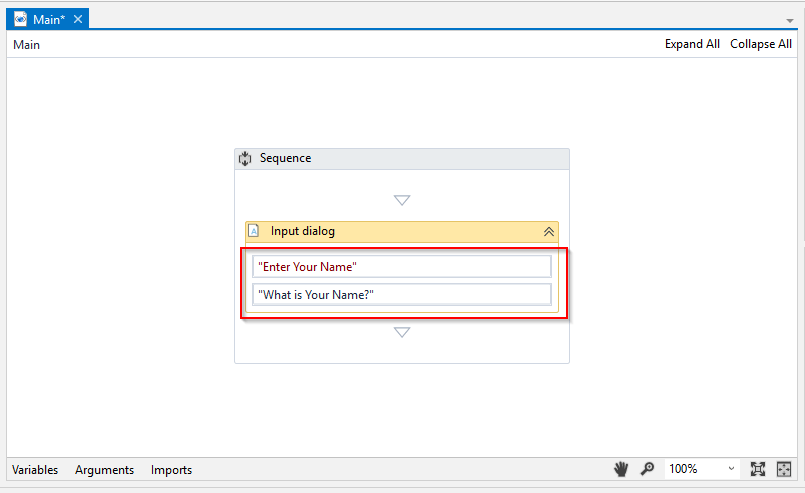
Step 4: For the title let’s just say “Enter Your Name”. Then to fill in the label we will type in “What is your Name”.
Note: Every text that you use in the UiPath should be under double quotes(” “). When you’re using variables or numbers, you won’t be using double quotes(” “).

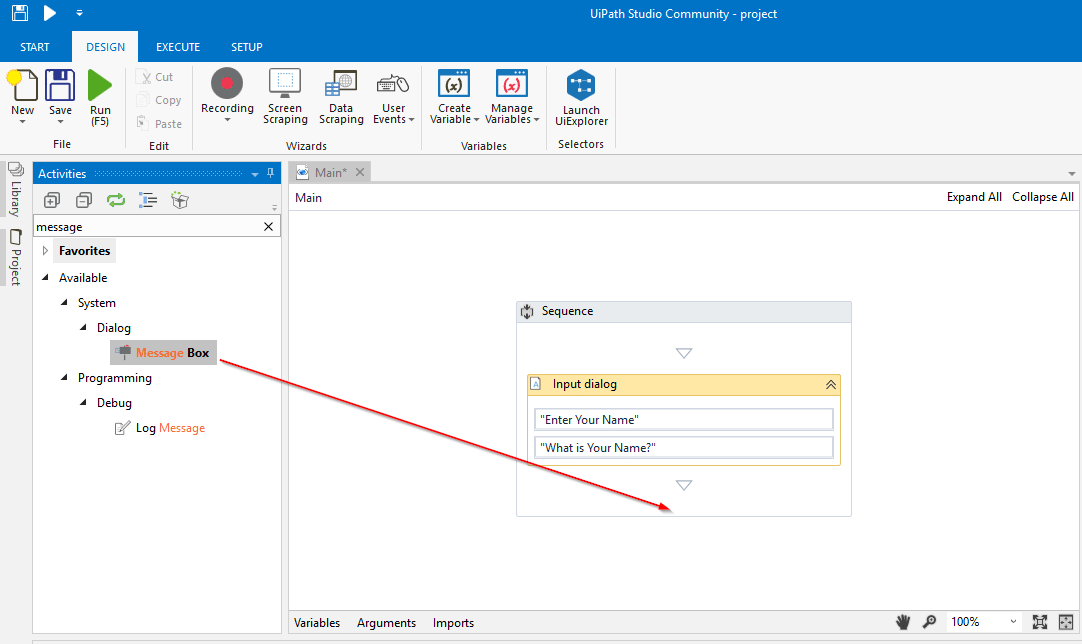
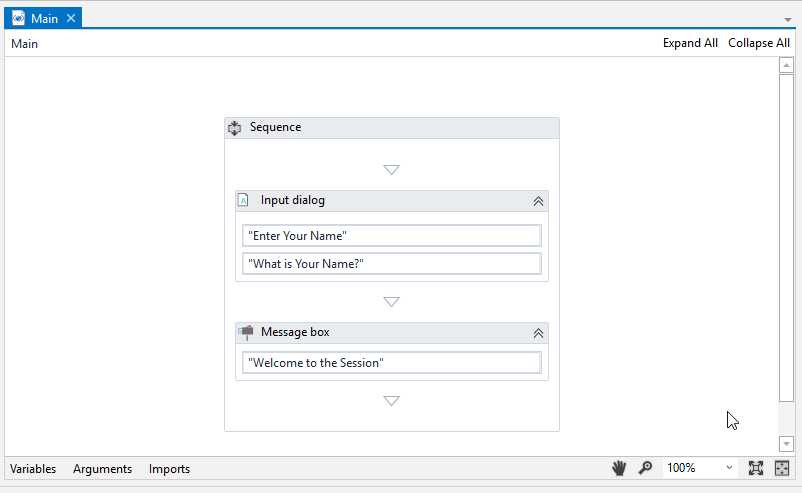
Step 5: Once it asks my/your name, We want it to display a message saying “Welcome to the Session”. For that drag and drop it under the Input dialog box activity.

This is how it looks like after drag and drop.
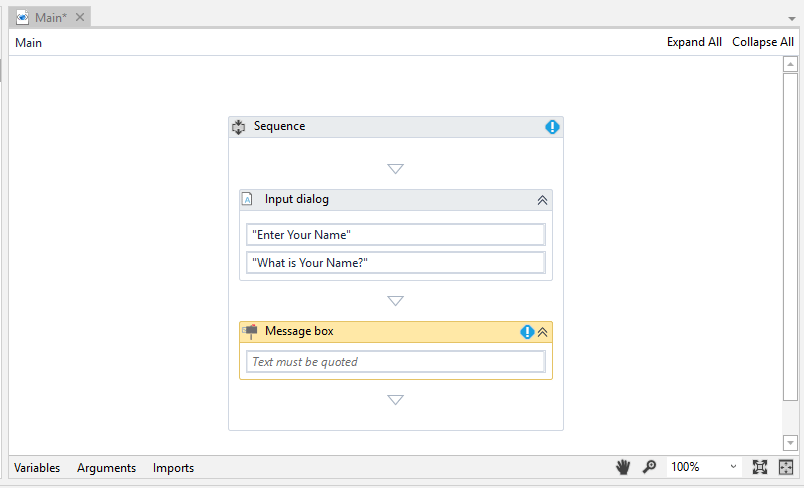

Step 6: Once the above steps are done. Type in the text in the message box so that it displays you “Welcome to this Session”. Then run the program.

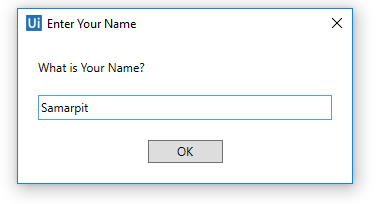
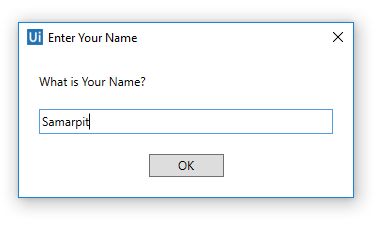
Step 7: When you run this program you will get a dialog box with the title entered as “Enter Your Name”. Enter your name in the dialog box and click on OK.


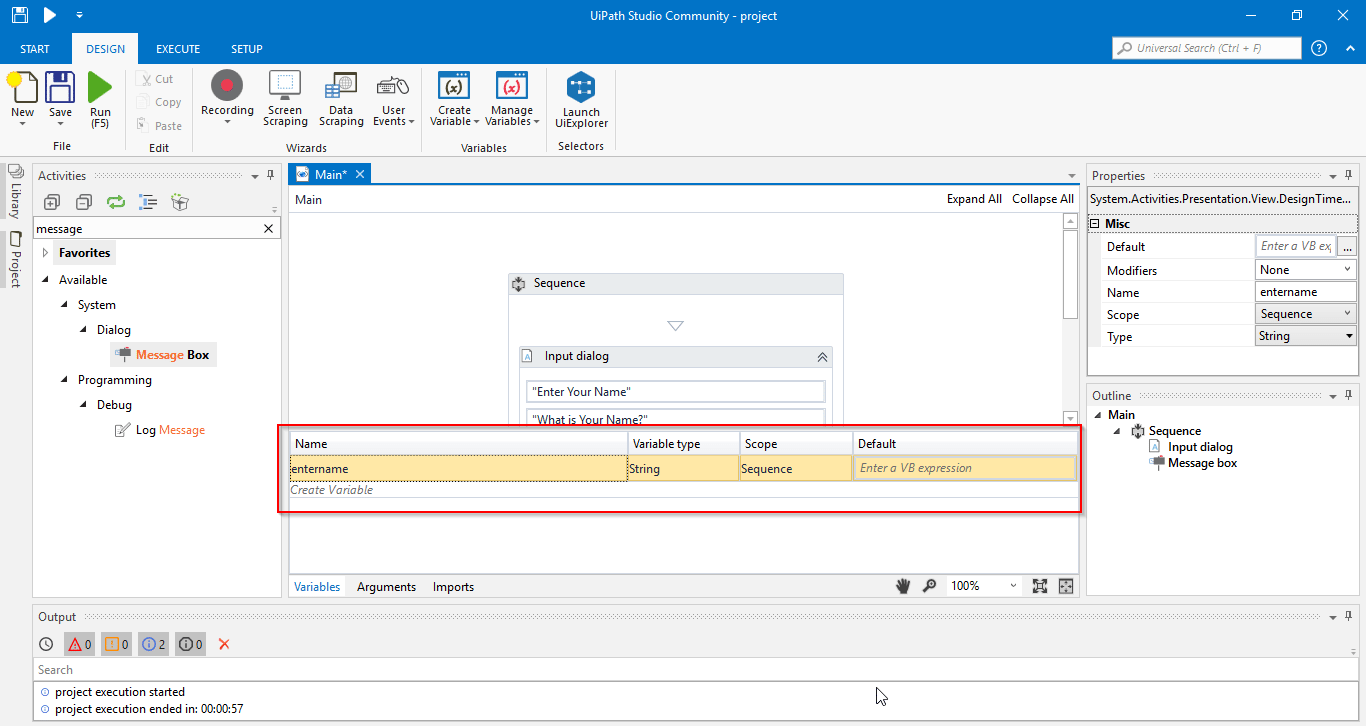
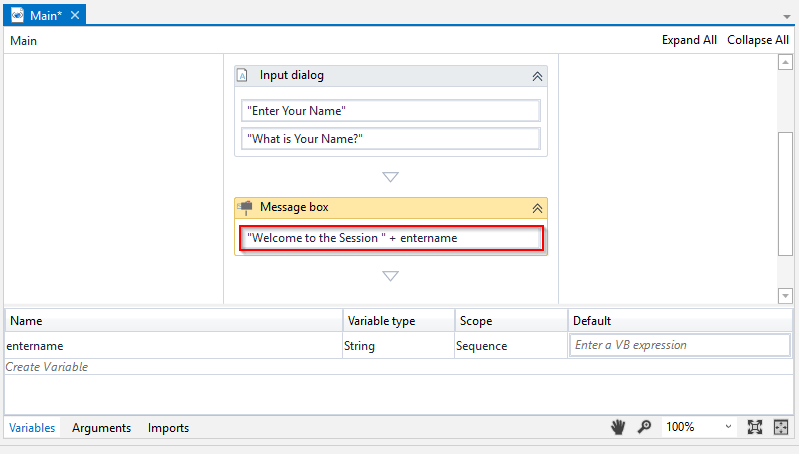
Step 8: We will create a variable “entername” of type string.

This is how it looks like after creating a variable.

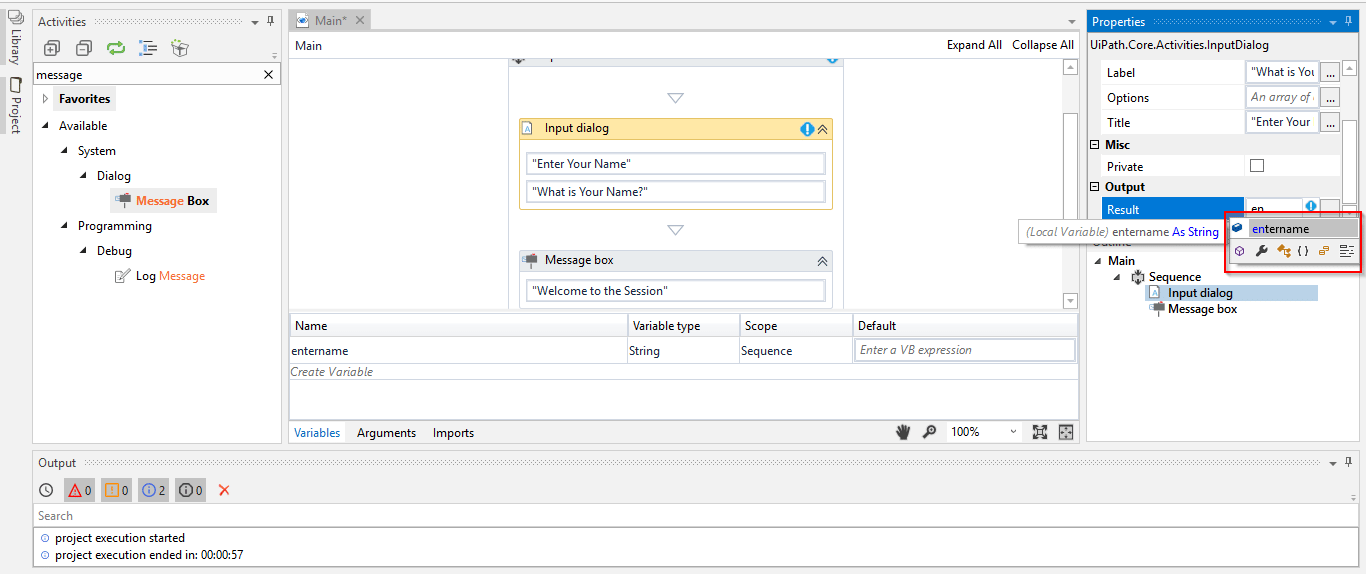
Step 9: Go to the property section of the input dialog and Enter “entername” in the Result.
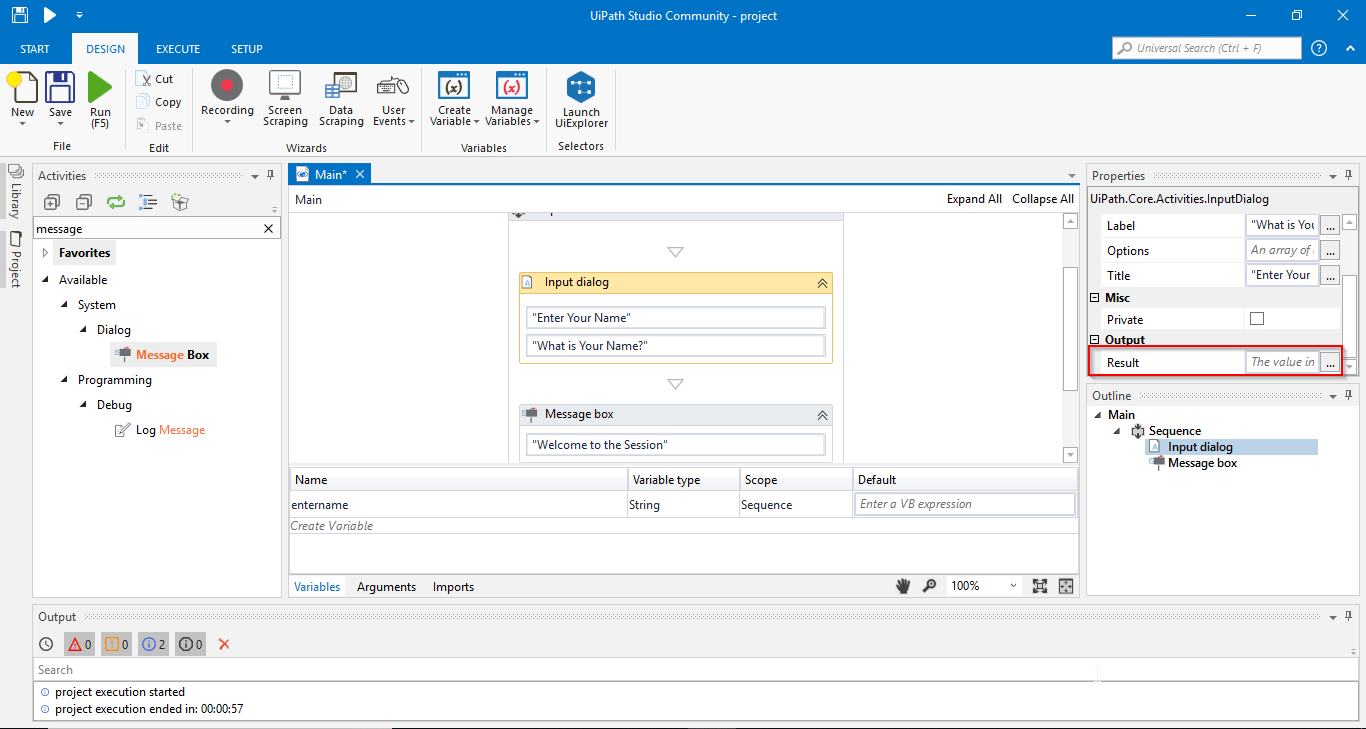
This is how it looks like after assigning the value to the Result.

Step 10: Once it is done. Type in the text “Welcome to the Session” and use “+” operator for appending the text. Then add the variable and run the program.

Step 11: Enter your name in the dialog box.

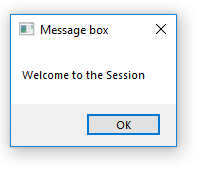
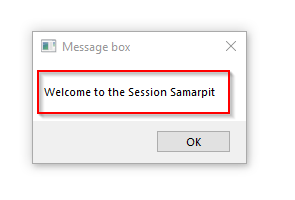
It will display a message with your Name.

So, this was all about the UiPath tutorial. If you are further interested in learning about Robotic Process Automation, this blog series will be updated frequently.
Subscribe to our youtube channel to get new updates..!
We at edureka! also offer Robotic Process Automation Training using UiPath. If you are interested in shifting your career to RPA, you can enroll for the course here, and get started.
Got a question for us? Please mention it in the comments section of this UiPath blog and we will get back to you.