What is recording in UiPath? Which type of actions can be recorded in UiPath? What are the various types of recording?
I believe you must have wondered what could be the answers to these questions. Well, in this article on UiPath Recording, I am going to answer all your questions on how you can use UiPath’s recording feature to record various kinds of actions and get a hands-on experience in mastering the tool.![]()
The following topics will be covered in this article:
- What is Recording in UiPath?
- Manual Recording
- Automatic Recorder and its Types
- Difference between Basic and Desktop Recording
- Example of Automatic Recording
So, lets get started folks!
What Is Recording In UiPath?
While automating business, you may often need to save few actions which can be performed automatically, right?
Well, recording is one such feature in UiPath, which will enable you to capture user’s actions on the screen and then eventually convert them into sequences. The recorded projects can be then modified as per the users need and can be used to replay-reuse them as many times as the user wants.
During recording any action all the user interface elements are highlighted to ensure that you choose the correct fields. Refer to the image towards the right.
Now, to record actions in UiPath, you have to use the Recording option in UiPath. Before I tell you the types of recording(Automatic Recorder), let us look into the manual recording, and the various features of its toolbar.
Manual Recording
Manual Recording is mainly used to achieve automation in single actions. These actions cannot be recorded by automatic recording. Let us look into the types of Single Actions.
Start and Stop a Application
 This option enables you to either open or close an app, by pointing and clicking on them.
When you select an app you have to mention the arguments in the dialog box that pops up. After that choose the option Yes to save the recorded output and you will be redirected to the generated sequence.
Click

Click type of single actions will enable you to record the clicks on your machine. It could either be selecting an option from a drop-down list, or selecting a checkbox or a radio button, or even clicking on a running application.
When you choose this feature, click on the option ‘Click’ from the toolbar. After that, choose Yes to save the recorded output and you will be redirected to the generated sequence.
Type
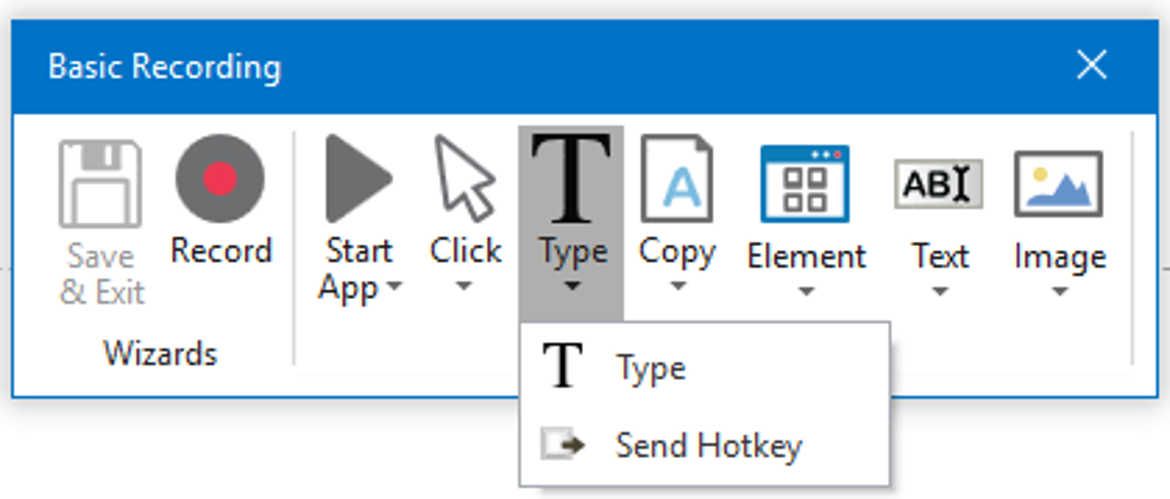
This type of single actions are those types of actions which require input from the keyboard(shortcuts and press on keys).
When you choose this option you will select the area where you want to use this feature and then you will get a pop-up based on the option you choose. If you choose Type then the pop-up will ask you to type the desired value and then press on Enter. If you choose the second option Send Hotkey, then the pop-up will ask you to choose the hotkey.

Copy
This type of action lets you copy a selected text from a web browser or an application. In this menu, either you can use the Copy Text option to copy only Text, or you can use the Screen Scraping option to extract both text and images.
Mouse Element
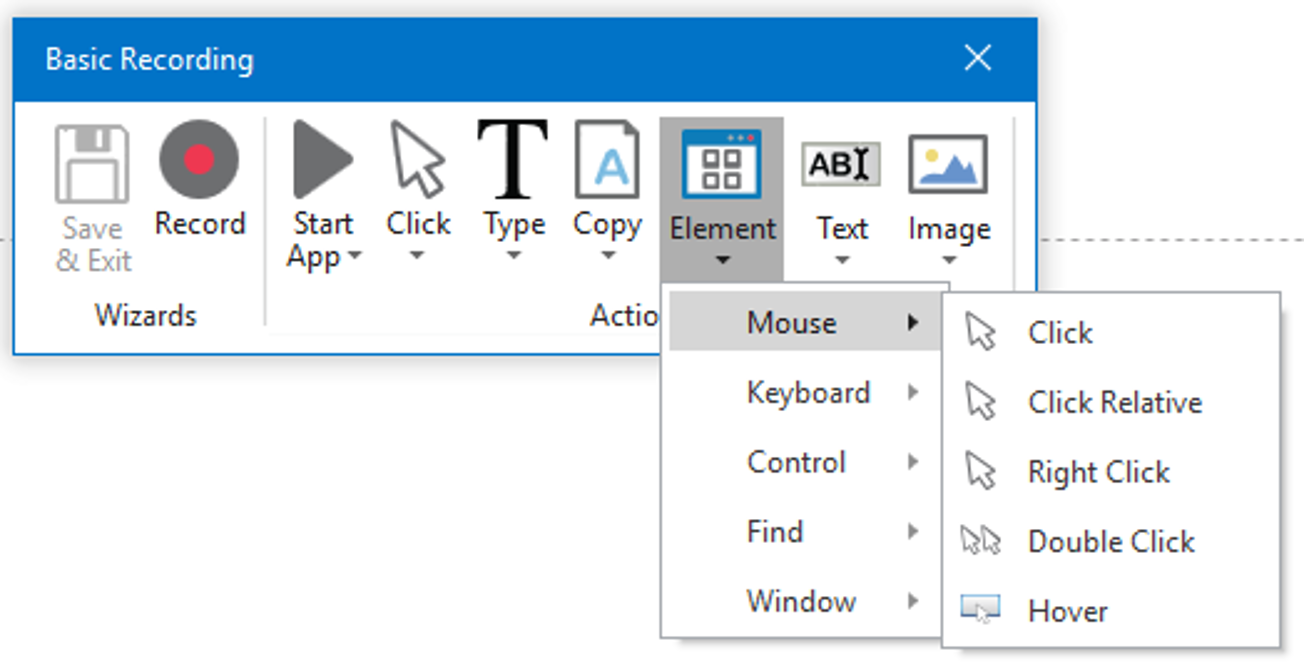 The Mouse Element actions enables you to control the mouse movements such as right-clicking, double-clicking and hovering the mouse over an element.
When you choose an option from the menu, for example Click, you have to next indicate on the screen where you want the Click operation to be performed by dragging your mouse over the area. After that, choose Yes to save the recorded output and you will be redirected to the generated sequence.
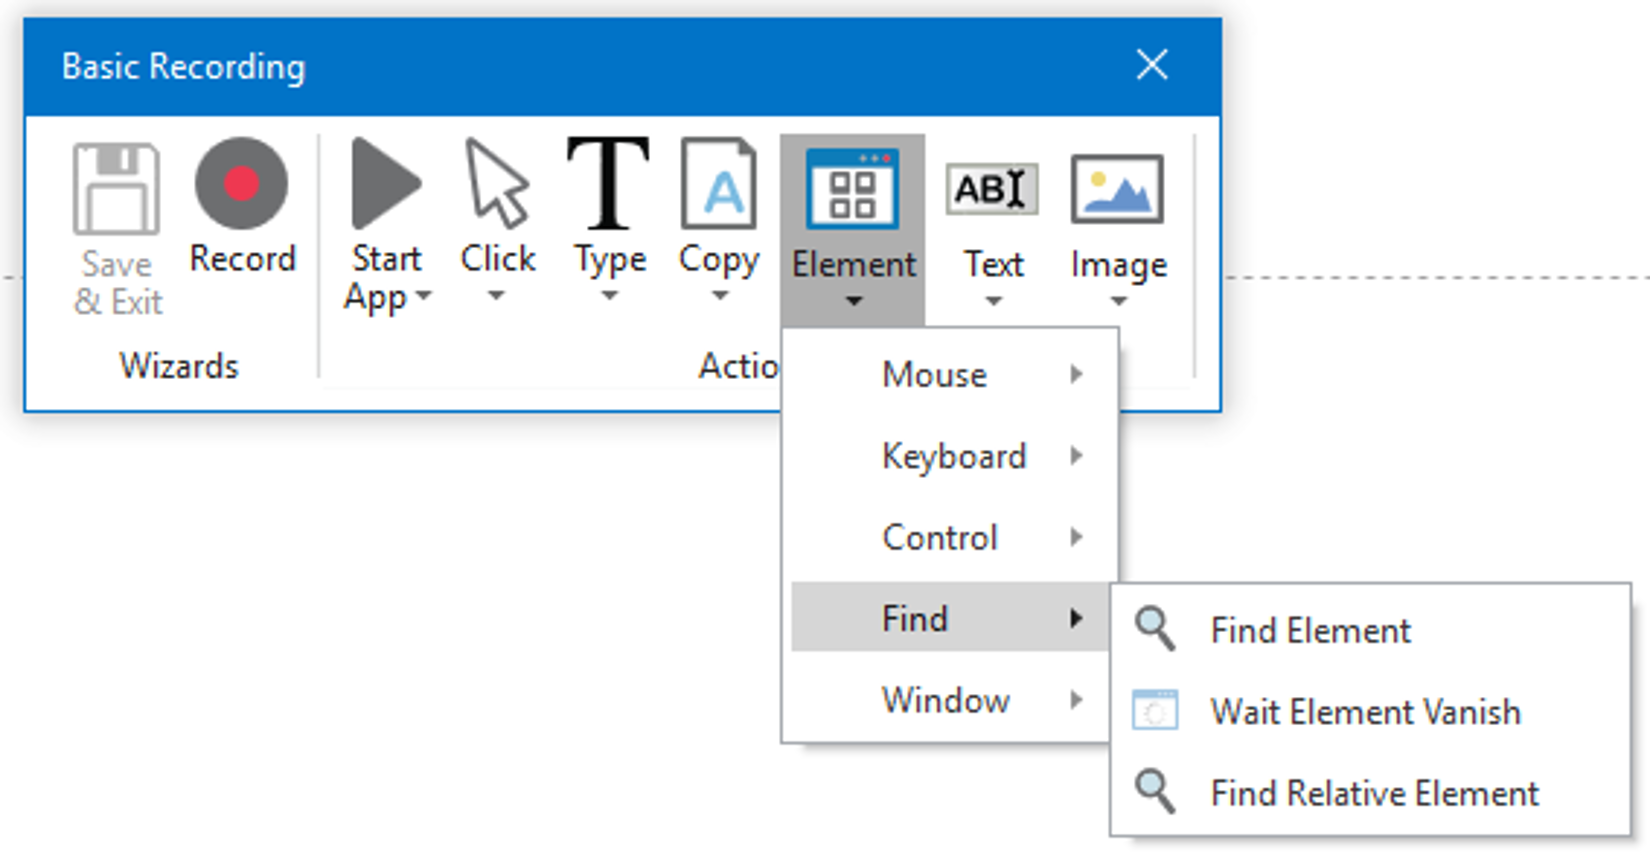
Find Element
This type of single actions helps you identify specific UI elements, find relative elements, pause an automation until a UIelement vanishes or a window closes.
When you choose an option from the menu, for example, the Find Element, then you have to indicate on the screen which element you wish to find. After that, choose Yes to save the recorded output and you will be redirected to the generated sequence.
Window Element
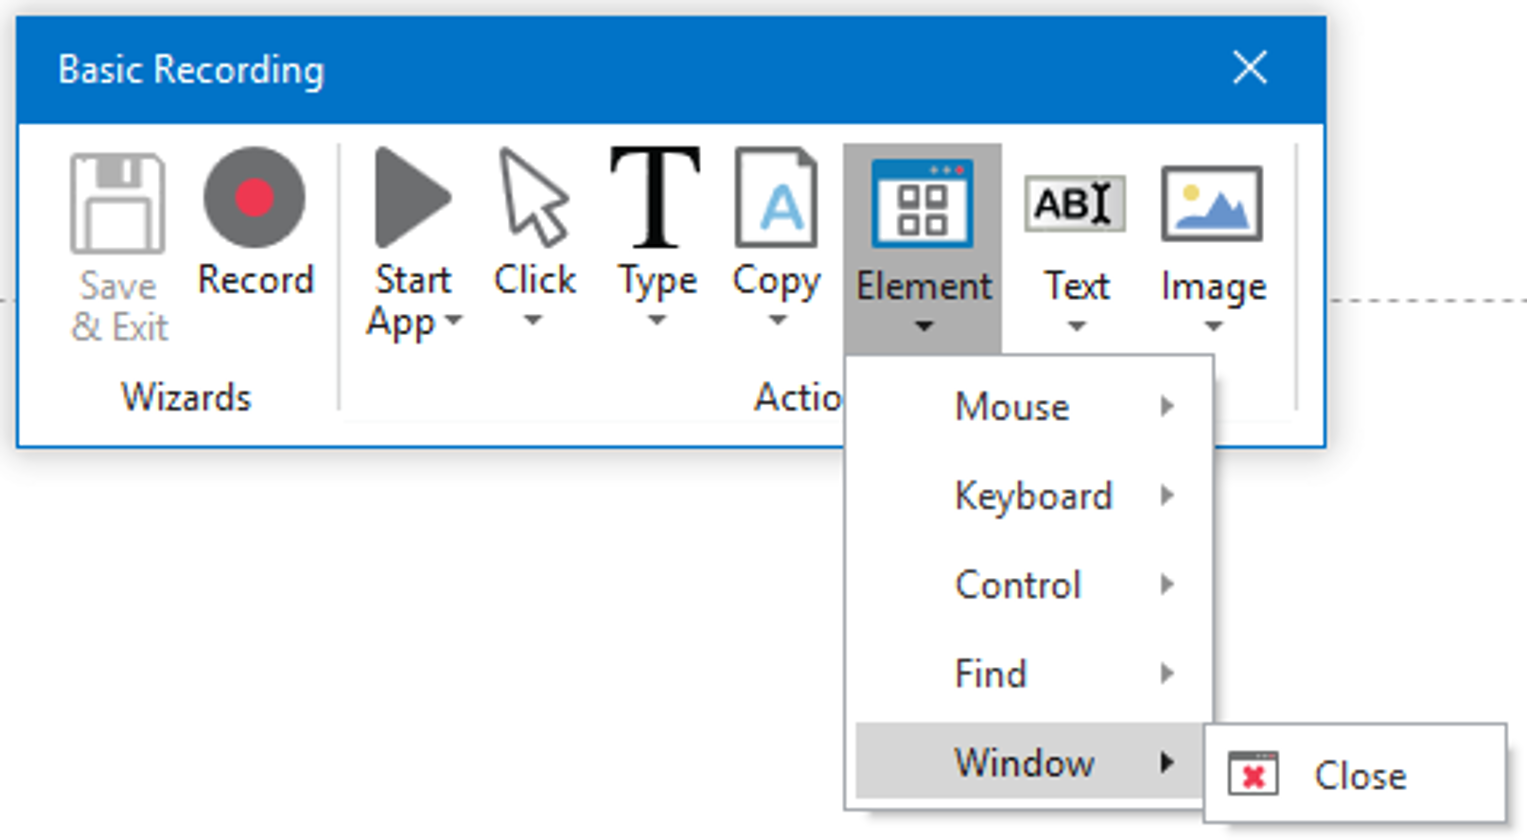 This action enables you to close a specific window. The UiPath Studio does this attaching in the operating system. This makes sure that the application is closed.
When you choose the Close option from menu, you have to indicate the element on the screen which closes the window. After that, choose Yes to save the recorded output and you will be redirected to the generated sequence.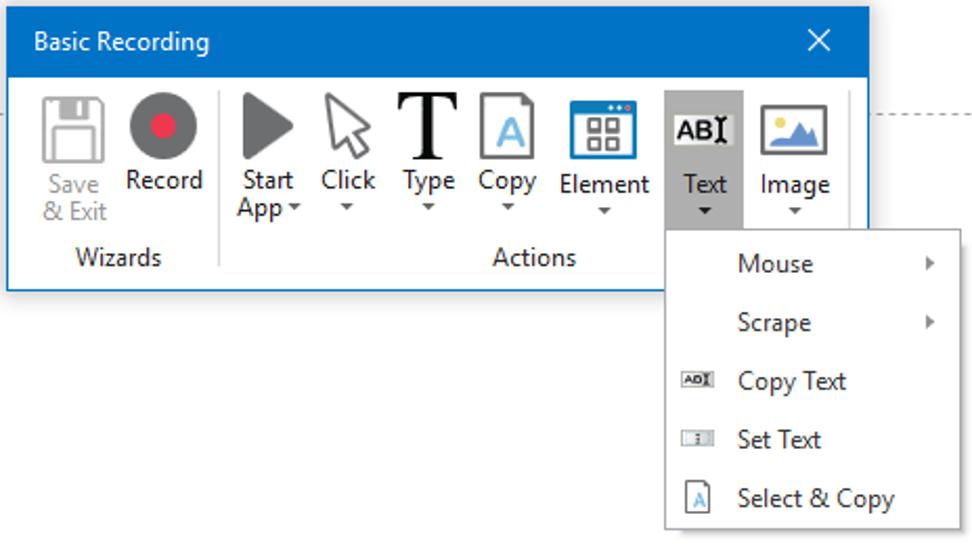
Text
This type of single actions lets you select or hover over the text to scrape data. The Text single actions also lets you copy and paste the text, set text and control various options for mouse controls.
When you choose any option from the menu of Text, you have to indicate the element on the screen on which you want to perform the action. After that, choose Yes to save the recorded output and you will be redirected to the generated sequence.
Image
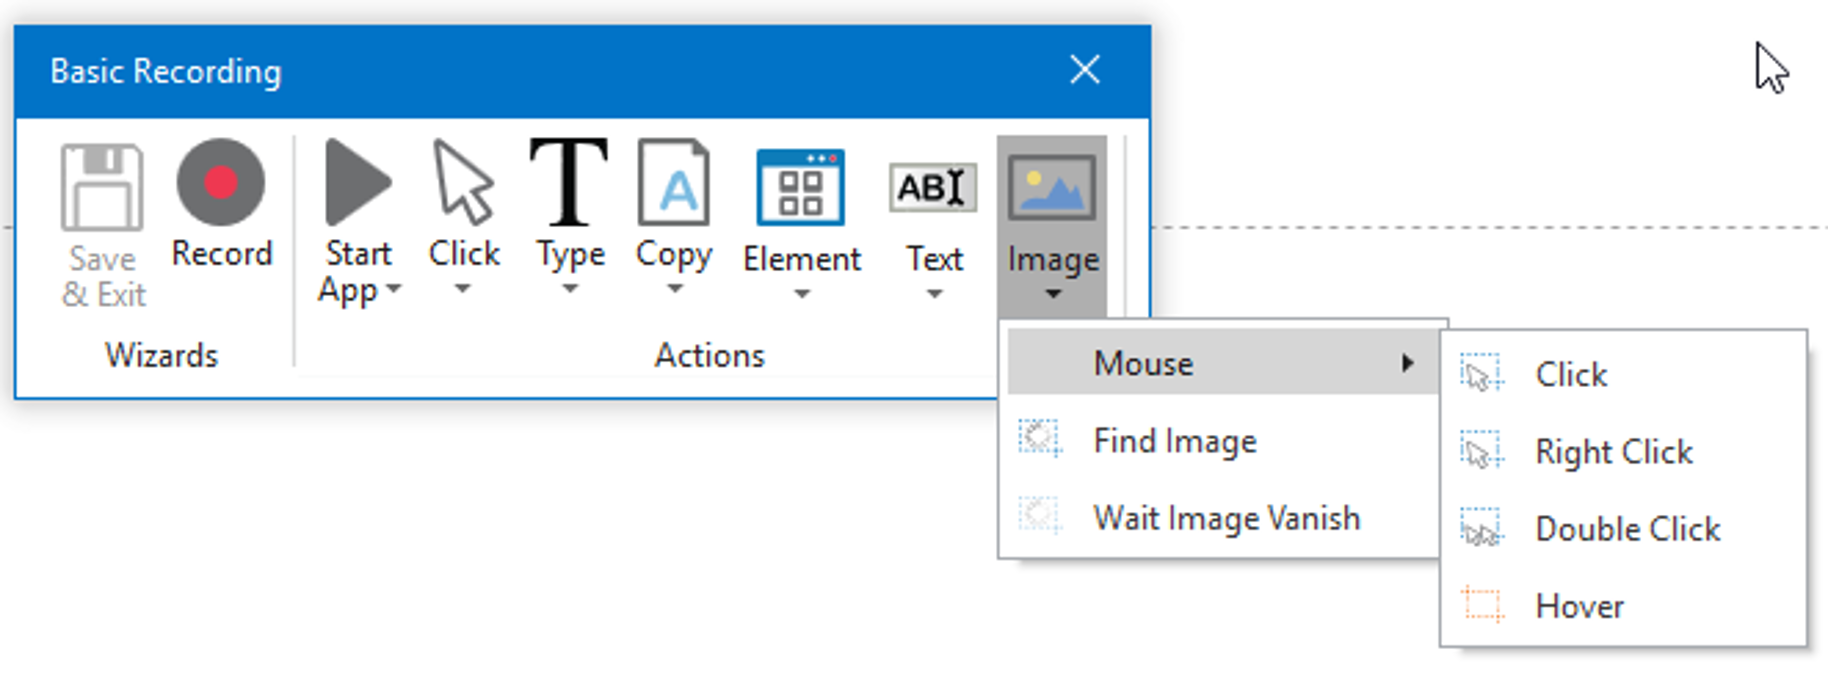
Image type of single actions enables you to hover over a specific image, find an image in an application or web-browser or wait for an image to vanish. This type of manual recording is useful for elements which cannot be highlighted as normal fields or texts.
When you choose any option from the menu, you have to indicate the element on the screen from where you either want to find an image, wait for an image to vanish or hover over an image.
Now, that you know all the options which you can see in the toolbar, let us now deep dive into the various types of Automatic Recording.
Automatic Recorder and its Types
There are four types of recordings available in UiPath Studio:
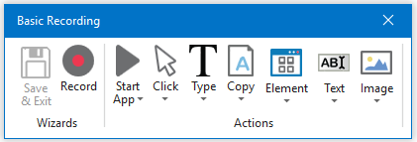
- Basic – This type of recorder generates a full selector for each and every activity. This activity mainly is useful for single activities.
- Desktop – The Desktop recorder is suitable for all types of Desktop apps and multiple actions. This type of recorder generated partial selectors for each activity.
- Web -Web Recorder is designed for recording the actions in web applications and browsers. This recorder used the Type/Click input method by default.
- Citrix – This type of recorder is used to record actions for virtualized environments. This type of recorder only allows image, text and keyboard automation.
 Basic – This type of recorder generates a full selector for each and every activity. This activity mainly is useful for single activities.
The toolbar for Basic, Desktop, and Web Recording offer quite similar options, but the Web Recorder has an extra option to Open Browser. The options on the toolbar enables you to do the following:
- Record multiple actions automatically
- Manual record single actions such as the following:
- Selecting a check box
- Open or close an application
- Select options from the drop-down menu
- Control the simulation of keyboard shortcuts
- Finding an image
The toolbar for Citrix is a little bit different when compared to the toolbar of the other three recorders. The options on the toolbar enable you to do the following: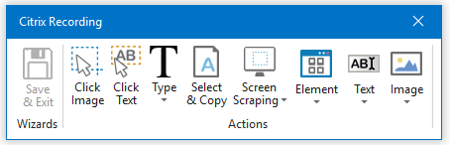
- Click an image or text
- Scrape UI elements
- Find elements or wait for them to vanish
- Select and copy text from a window
- Control the simulation of keyboard shortcuts
- Activate window
| Manual Recorder | Automatic Recorder |
Manual Recorder is used for keyboard shortcuts, hovering the mouse, extracting text, finding images and elements, copy and paste to clipboard. | Automatic Recorder is used for activating windows, typing text, clicking on buttons, choosing an option in check boxes and drop-down lists. |
Now, apart from the above confusion, people often tend to get confused between the terms Basic and Desktop Recording. So, next in this article on UiPath Recording, let me clarify the same.
Difference between Basic and Desktop Recording
To explain you the differences between Basic and Desktop Recording, let us consider a scenario.
Consider a scenario where you have to record the actions of filling in details in a Google Form. Now, let us record this action first by using the Basic Recorder and then by Desktop Recorder.
Record actions using the Basic Recorder
When you record actions using the Basic recorder, you will observe that full selectors are generated for each and every activity. Refer to the snapshot below for the sample sequence and the selectors generated for a Type Into activity.
Record actions using the Desktop Recorder
 Record actions using the Desktop Recorder
Similarly, when you record the actions of filling details in a google form, using a Desktop Recorder, you will observe that the workflow will contain an attach window activity. This activity will have a top level window of the selector. Refer to the snapshot below for the sample sequence and the attach window activity.
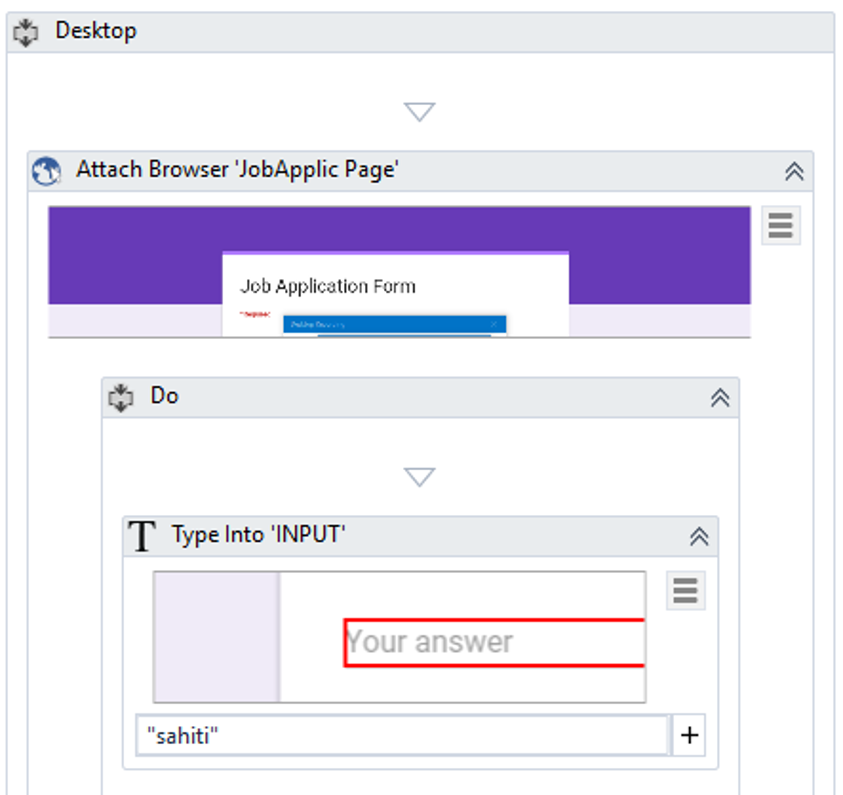 Now, in the Do block of the attach window activity, all the activities will be present with the partial selectors. These partial selectors will not contain the top level window. So, the top window element in the UI hierarchy will be just identified once in the beginning and then it is used for every element.
So, the differences between the Basic and Desktop Recorder can be as follows:
| Basic Recorder | Desktop Recorder |
| Used when you have to do only one action. | Used when you have to do more than one action. |
| Slower as it identifies the element starting from the parent window. | Faster when compared to the basic recorder |
Now, next in this article on UiPath Recording, let us look into a simple example of Automatic Recording.
Example of Automatic Recording
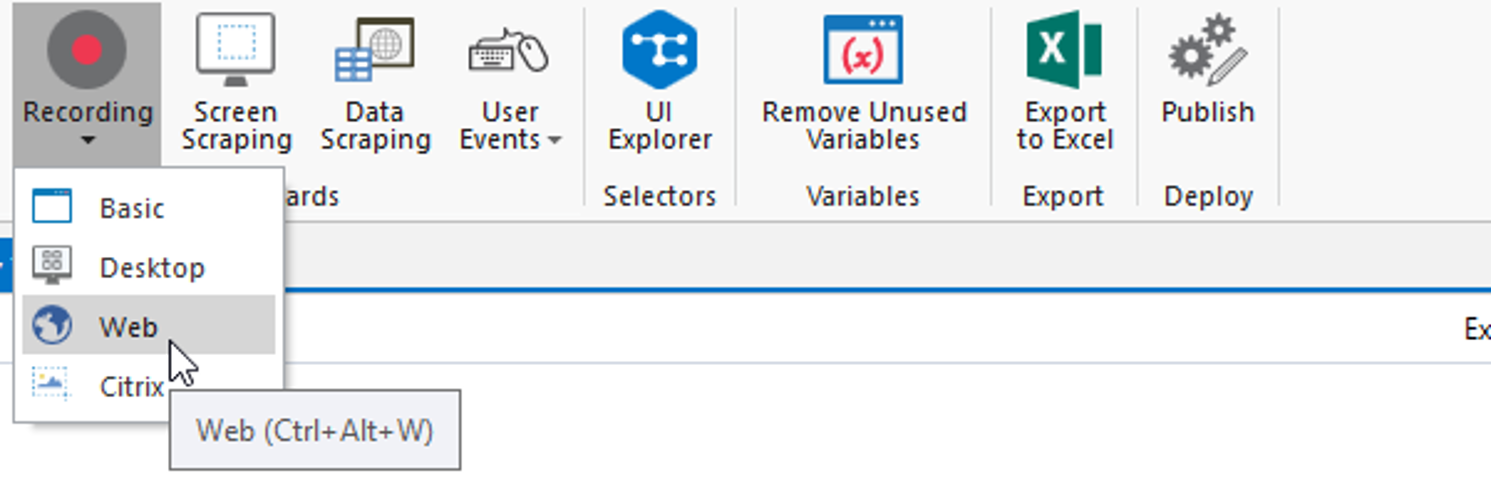
Task: Our task is to record the action of logging into your edureka account. To achieve this task, we have to use the web recorder from the recording options. So from the Ribbon , go to the Recording option and choose Web.
Steps To Achieve Automation
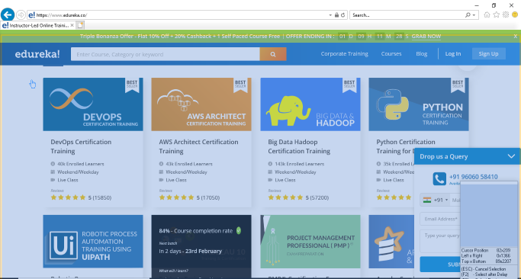
Step 1: Open the web browser(Internet Explorer) and mention the url: https://www.edureka.co
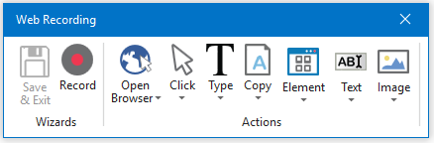
Step 2: Now, in the UiPath Studio choose the Web Recorder and then you will see the following toolbar.
Step 3: Now, choose the Click option from the above toolbar and in the menu again choose the Click option. After that highlight the element where you want to click. Here I want to click on the Login option. Refer below.

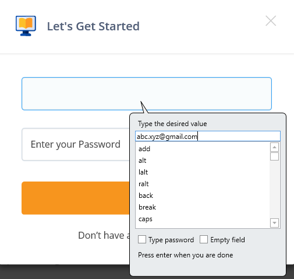
Step 4: Now, choose the Type option from the toolbar and choose the Type option from the menu. Then highlight the element in which you to fill in the text. Here I want to enter the email address, so I have highlighted that section. Refer below.

Step 4.1 As soon as you click on the highlighted section, you will see the following pop up, wherein you have to mention the required text. Once you mention the required text, press on Enter.
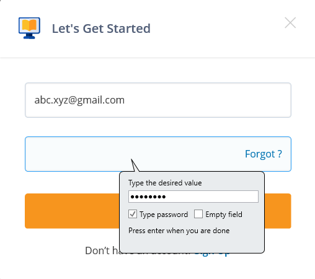
 Step 4.2: Similarly repeat the above steps to enter the password. But, in the Type Into pop-up displayed for your password, make sure that you select the Type Password check box, to make your password displayed is encrypted. Refer below.
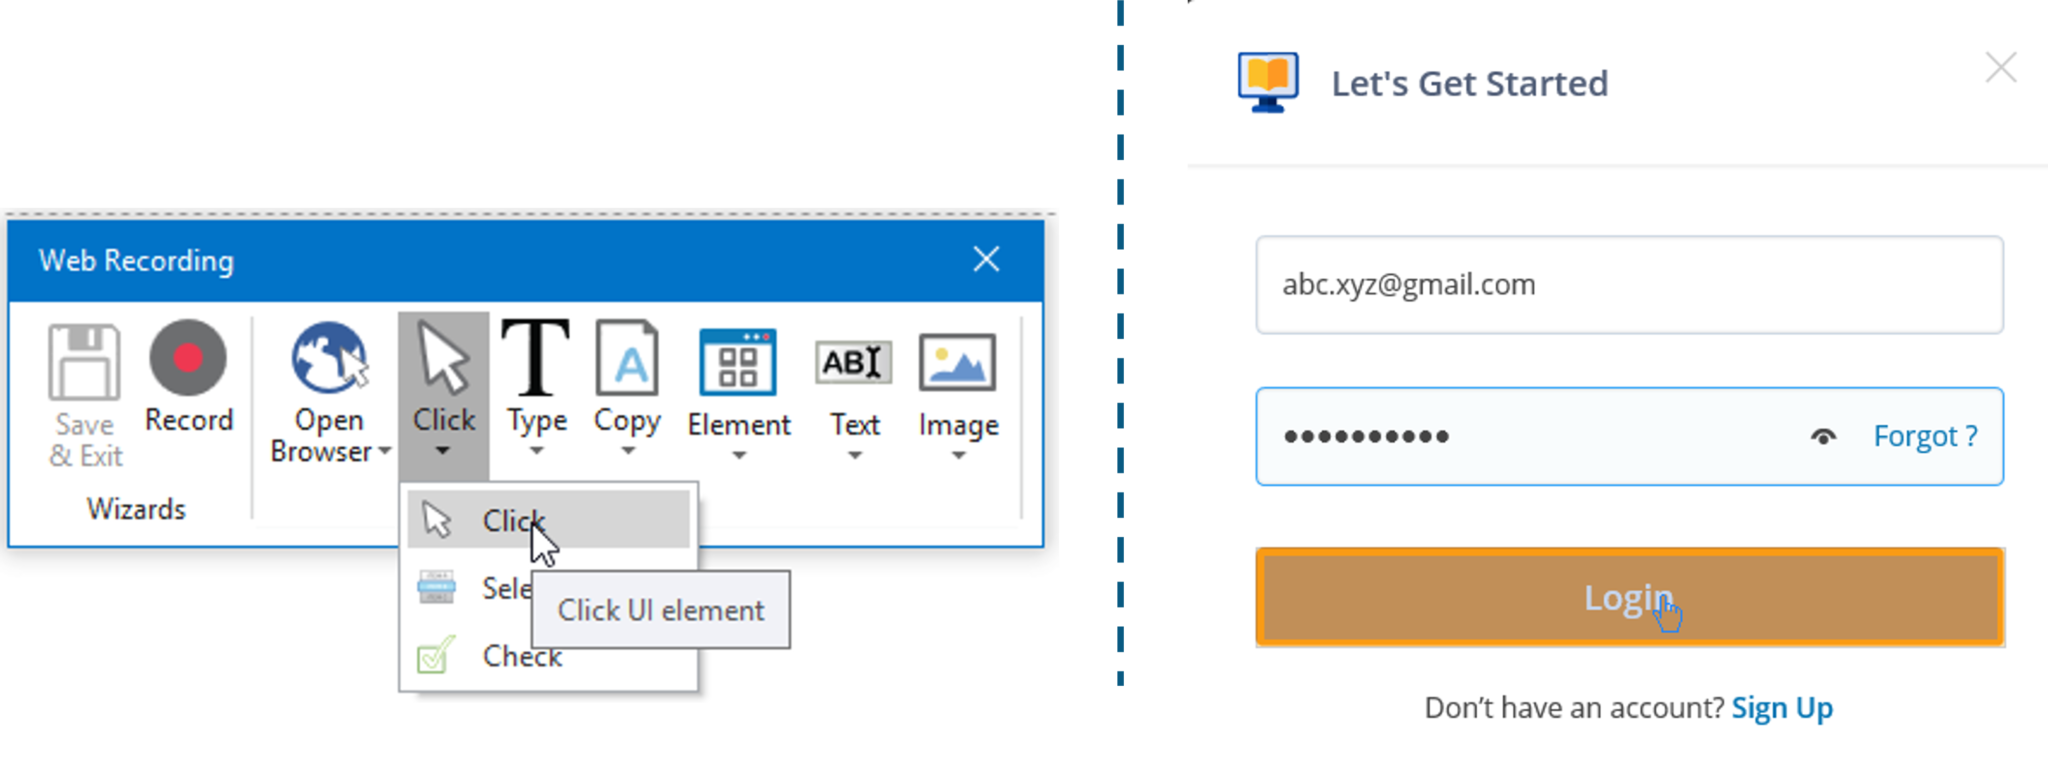
Step 5: Now, choose the Click option from the tool bar and then from the menu choose the Click option. After that highlight the element where you want to click. Here I want to click on the Login option. Refer below.
Step 6: Now click on the Save & Exit option from the toolbar to save the recording and generate a sequence. After that execute the automation to see the results by clicking on Run.
You will see that the Login details are filled automatically and the user is logged in.
So, folks, that’s an end to this article on UiPath Recording. I hope you enjoyed reading this article on UiPath Recording and learned how to use the Recording feature of UiPath. If you wish to further learn about Robotic Process Automation and build your career as an RPA Developer, then you can check out our course on Robotic Process Automation Using UiPath. This course will let you enhance your knowledge on RPA and will give you an extensive hands-on experience in UiPath.
Got a question for us? Please mention it in the comments section of this UiPath Recording article and we will get back to you.