
UiPath RPA Training Course
- 35k Enrolled Learners
- Weekend/Weekday
- Live Class
(13750)


 Copy Link!
UiPath is one of the most popular tools in the RPA market. This tool offers drag and drop functionality to automate repetitive tasks without any human intervention so as to ensure scalability and reliability. In this article on UiPath Orchestrator, you will learn how the complete digital workforce can be controlled and managed in a single place.
The following topics will be covered in this article on UiPath Orchestrator:
UiPath is a Robotic Process Automation tool used mainly for Windows Desktop Automation. This tool offers a Community Edition, which is free for lifetime and works on the feature of Drag and Drop functionalities.
UiPath offers various products to cater our needs such as UiPath Enterprise Platform, UiPath Studio, UiPath Robots and UiPath Orchestrator.
So, now, let us understand what is an orchestrator.
Orchestrator is a product of UiPath which enables you to orchestrate the UiPath robots in continuously executing repetitive process on various platforms.
Orchestrator follows the below process:
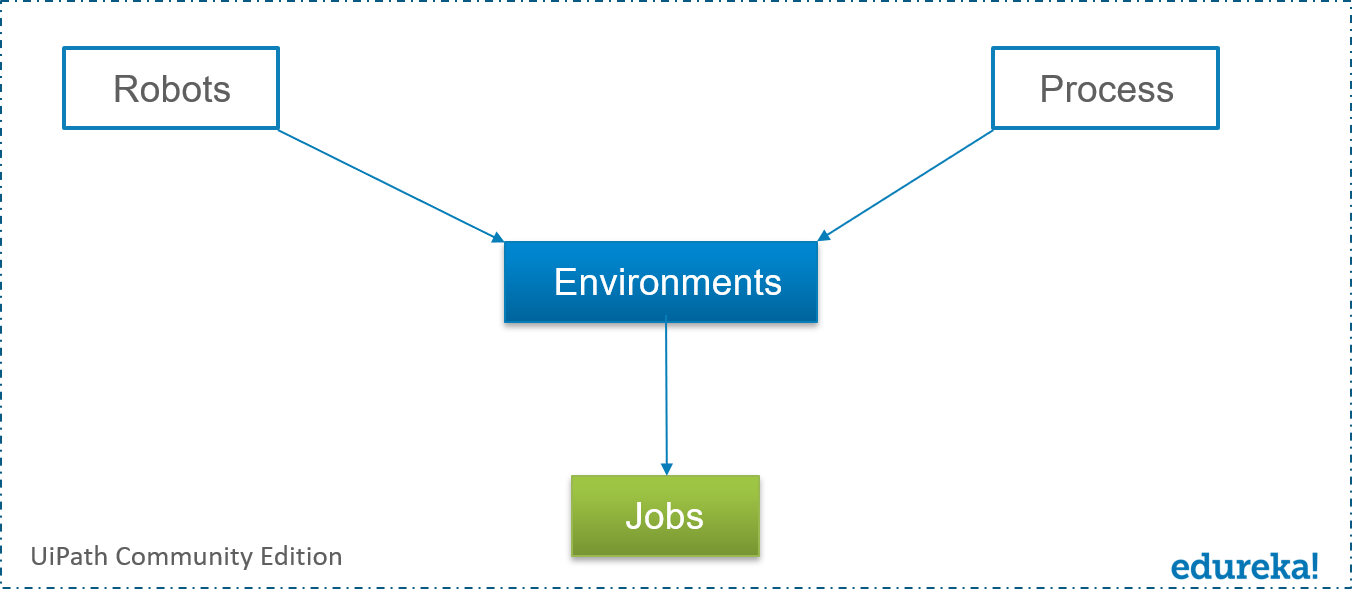 First you have to create robots to execute your task. Then you have to create a Project and Publish it, so that you can use it as a process. Once you create a process, you have to assign a robot to execute this process in a specific environment, and this will create a Job.
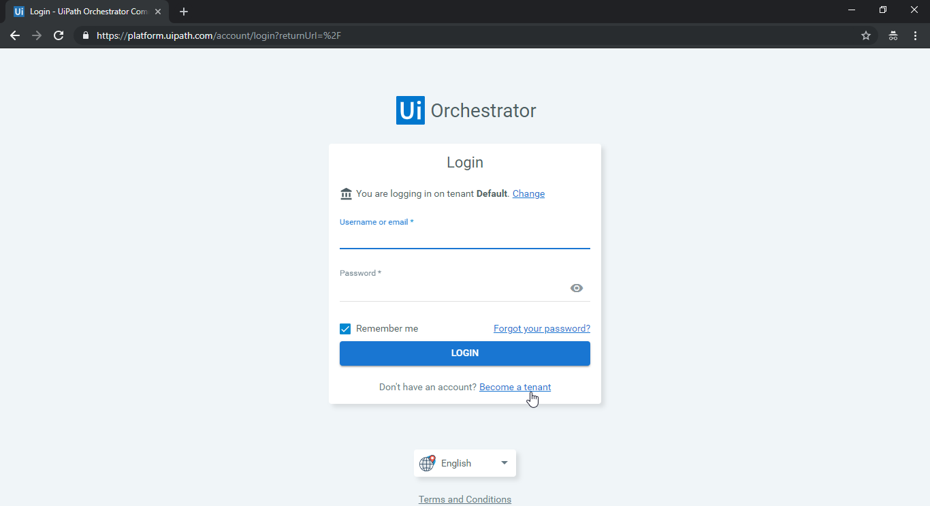
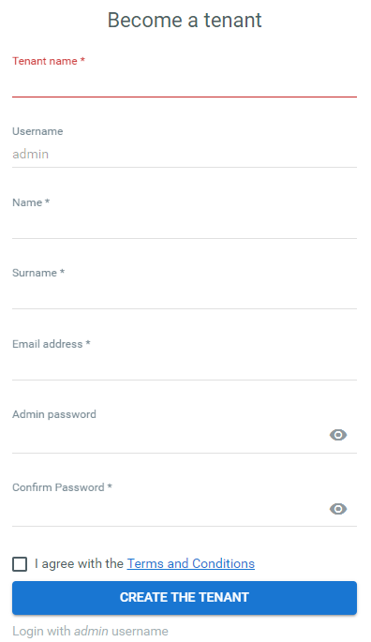
Step 3: Once you become a Tenant, go back to Login Page and mention your Username and Password. After that, click on Login. This step will log in to your Orchestrator.

Once you Login to your account in Orchestrator, you will see the dashboard. This dashboard consist of various option for you to create and know the processes, queues, machines, jobs etc.
Now, that I have told you how to Login to UiPath’s Orchestrator, let me show you next how you setup robots, process, environment and jobs.
To understand the working of Orchestrator let us consider a sample project of asking a user for details and displaying those details in a Message Box.
I will show you, how to create this automation task, further in the Process section. But, before that, let me first show you how to add a Machine and then we will create a Robot.
To create Machine, go to the Machines Tab, and click on the “+” option. When you click on the Plus option, you will see the following three options:
You can choose to create any of the above two options, as per your need. Here I will be creating a Standalone Machine.
To add your machine, you have to mention the machine name. Now, to know your machine name, go to the Properties of My Computer, and your computer name will be the machine name. Then click on Provision to add your machine.

Once your Machine has been added to Orchestrator, your next step is to create Robots. Next, in this article, let us look into how to create robots.
To create Robots, go to the Robots Tab, and click on the “+” option. When you click on the Plus option, you will see the following three options:
You can choose to create any type of robots, as per your need. Here I will be creating a Standalone Robot.
So, once you choose the option to create a Standalone robot, you have to mention the Machine Name, Name, Domain Name, Password, Choose Type and Description. Then click on Create.
NOTE: To know the Domain Name, you can go to the Command Prompt and type the command “whoami“. Refer below.
 This will create your Robot. The next step is to enable UI Robot.
Since UI Robot is not enabled by default, you have to enable it. To enable the UI Robot, you have to go the directory where UiPath has been installed. Then Double-Click on the UI Robot.
The above step will enable the UI Robot. Now, the next step is to activate the robot.
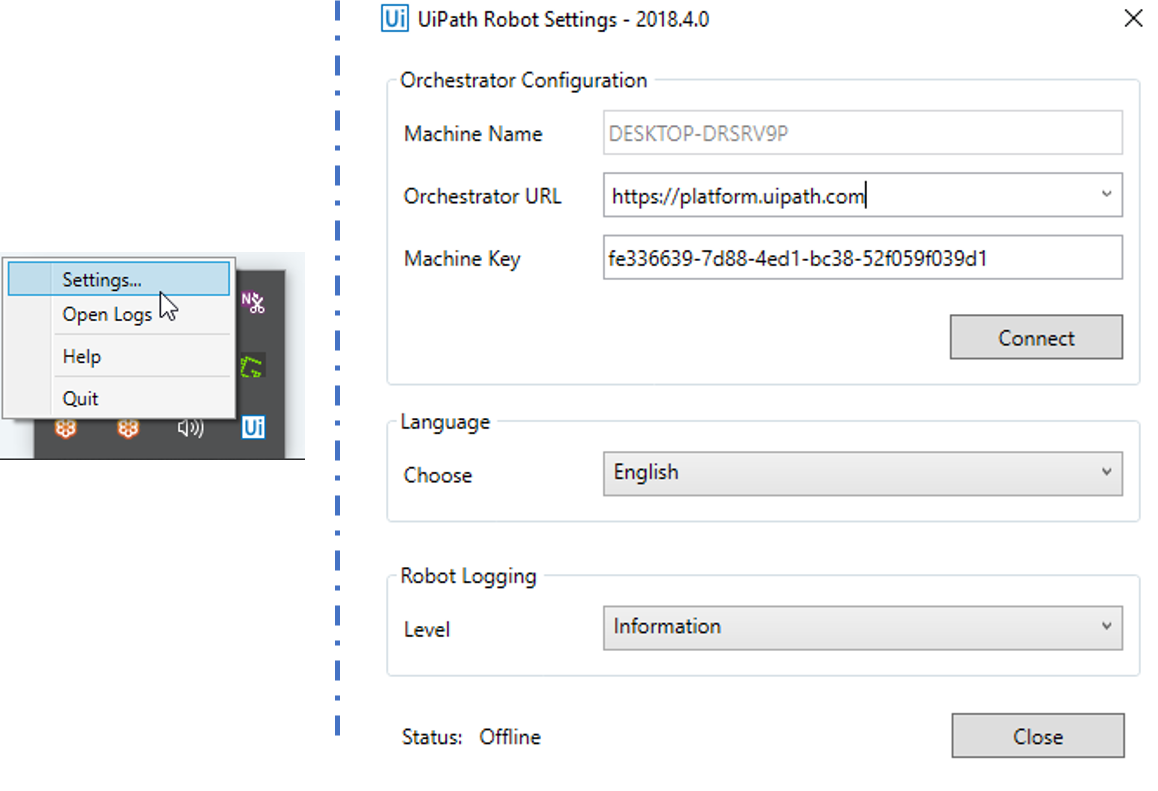
To activate your robot, you have to Right-Click on the UI Robot symbol and then you have to go to Settings.
In the Settings on UI Robot, mention the Orchestrator URL and the Machine Key. Then click on Connect. This will activate your UI Robot. Refer below.
If you wish to check whether your Robot is available or not, you can go to the https://platform.uipath.com/robots and see the status to be Available. Refer below.

NOTE: UI Robot is not enabled by default. To enable the UI Robot, you have to go to the directory where UiPath has been installed. Then Double-Click on the UI Robot.
Now that your Robot is available, the next step is to create an Environment.
To create Robots, go to the Environments Tab, and click on the “+” option. When you click on the Plus option, you will see the following dialog box to create a Environment. Mention the Name and Description as below, and then click on Create.

Once you Click on Create, you will see another Dialog Box, wherein you have to select the Robot which will execute tasks in the created environment. Then click on Update.

This will create your Environment. Now, that you have created an Environment, the next step is to create a Process.
To create a Process in Orchestrator, you first have to create a project in the UiPath Studio and then Publish it.
So, to do that let us consider a Project wherein, we are asking the user for Details and then we will display the details in a Message Box. Refer below for the sequence.

NOTE: While you are saving your project, remember to save it with starting 0’s as Orchestrator does not list down all the projects which are Published. So, to make sure your project is listed in the Orchestrator give your project name starting with 0s’ and then end with a name. Here, I have named by Project 0000000001_edureka.
Now, once your project is saved, publish your project, by choosing the Publish option in the Ribbon Tab. This will publish your project to the orchestrator.
Once your project is published, the next step is to create a Process.
To create a Process, go to the Process Tab, and click on the “+” option. When you click on the Plus option, you will see the following dialog box to create a Process. Mention the following:
Once you mention all these details, click on Create to create a process. Refer below.

The above step will create a process. Now, once your process has been created, your next step is to create a Job to execute your task.
To create a Job in Orchestrator, you have to click on the play button. Then you have to mention the Process for which you want to schedule a Job and choose the robot which will execute the task. Then click on Start.

Once you have click on Start, your Job will start executing automatically. Here, I have to mention, the Input in the Dialog Box, and you will see the mentioned input as output in the Message Box.

Once your Job is Executed, you will see the status as successful. Refer below.

By this, I come to the end of this post on UiPath Orchestrator. If you are further interested in learning about Robotic Process Automation, this blog series will be updated frequently, please subscribe. We at edureka! also offer Robotic Process Automation Training using UiPath. If you are interested in shifting your career to RPA, you can enroll for the course here, and get started.
Got a question for us? Please mention it in the comments section of ”UiPath Orchestrator” and I will get back to you.


 Thank you for registering Join Edureka Meetup community for 100+ Free Webinars each month JOIN MEETUP GROUP
I really like the way you post the articles about RPA Uipath.I have read all your posts in this blog.They are very easy to understand for beginners with clear explanation