


A Spring Boot project can be created in many ways. It’s a crucial concept required for Microservices Certification and is an integral part of its course curriculum. In this Spring Boot Eclipse and CLI Setup blog, I would be exploring two different options for creating Spring Boot projects with Eclipse & Maven.
At the end of the blog, I would also be showcasing a Hello World example using Spring Boot.
Install Spring Boot CLI & Spring Tool Suite | Hello World Example | Edureka

Let us now explore the first option.
Install Spring Tool Suite (STS) in Eclipse
Step 1: To use Eclipse on Windows, you need to first install Java Development Kit (JDK). You can download JAVA from the Oracle site.
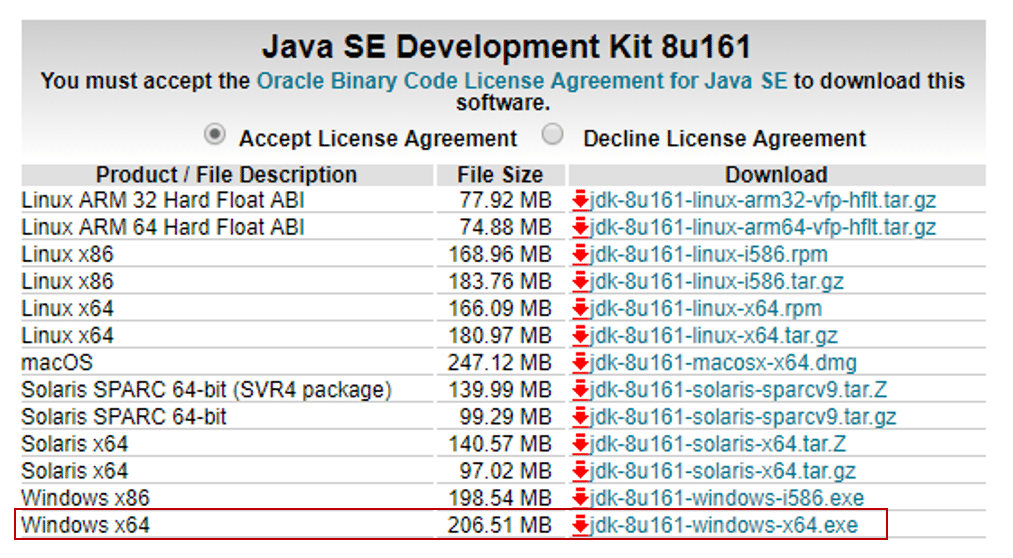
Step 2: Accept the License Agreement and choose the executable file for the operating system. Here I would be downloading for Windows with 64 bit. Refer to the snapshot below.

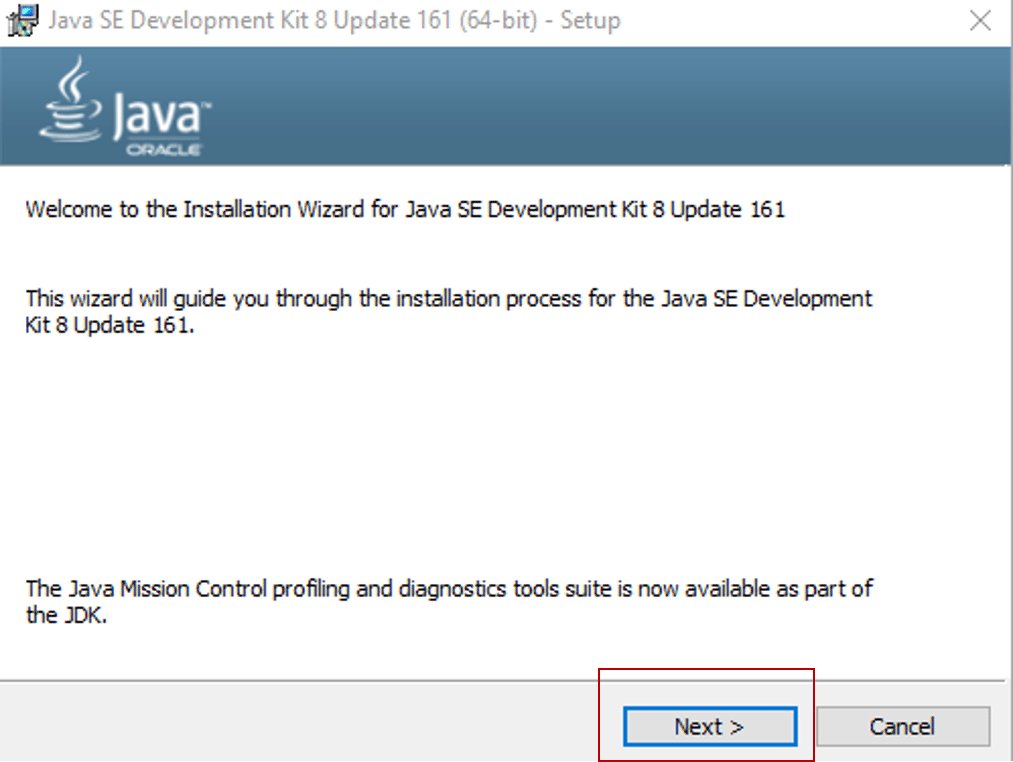
Step 3: Once the download is complete, run the exe for install JDK. and click Next. Refer to the snapshot below.

Step 4: After the installation is complete click on Close.
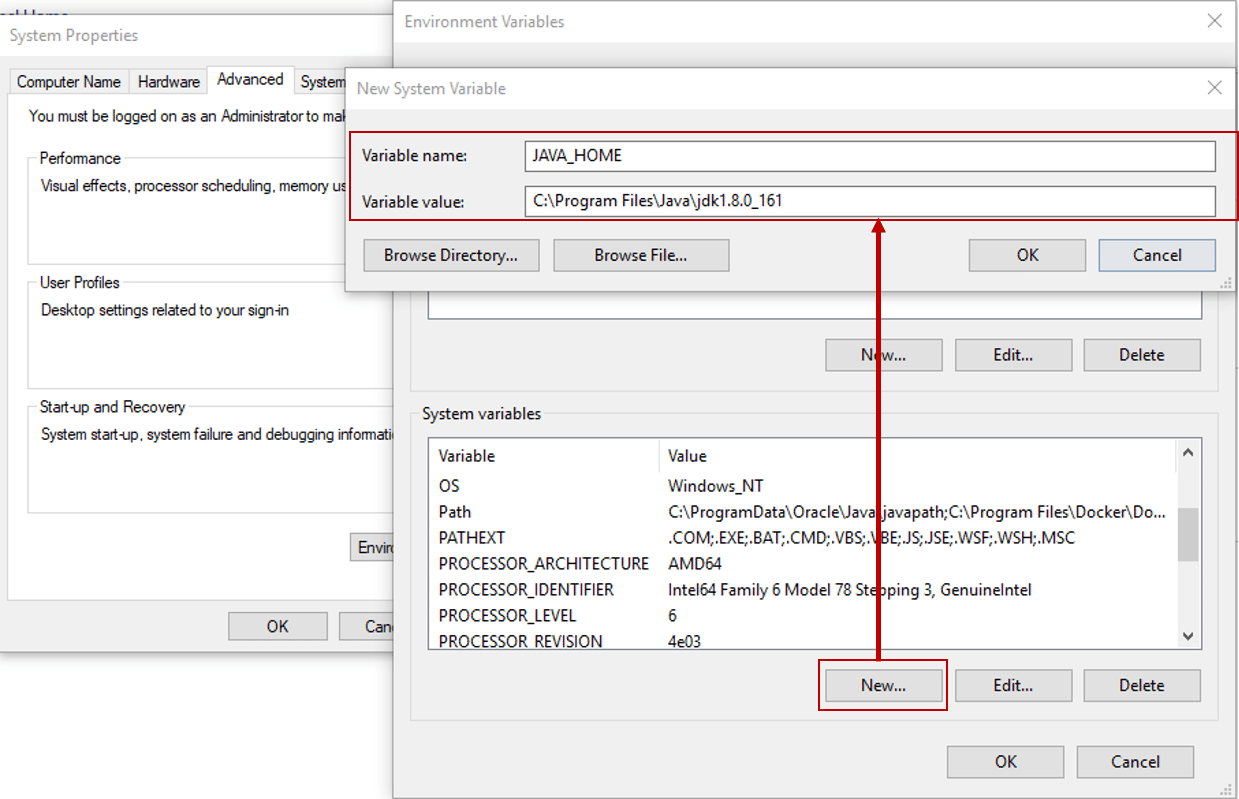
Step 5: Now, set the environment variables in Java.
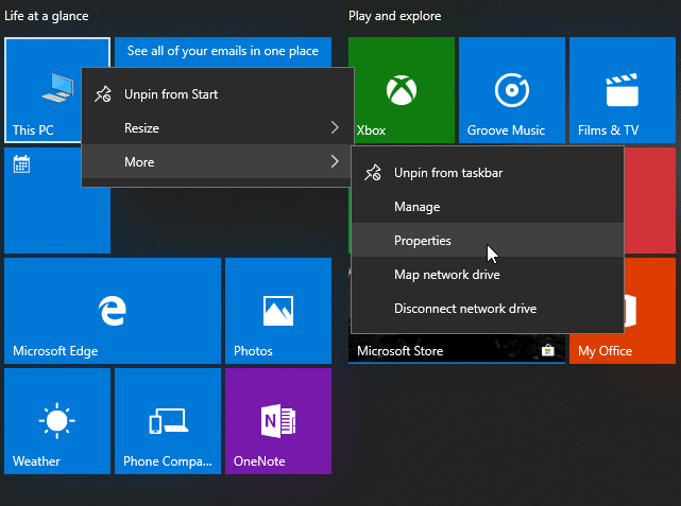
Step 5.1: Right-click on My Computer/This PC -> More -> Properties.

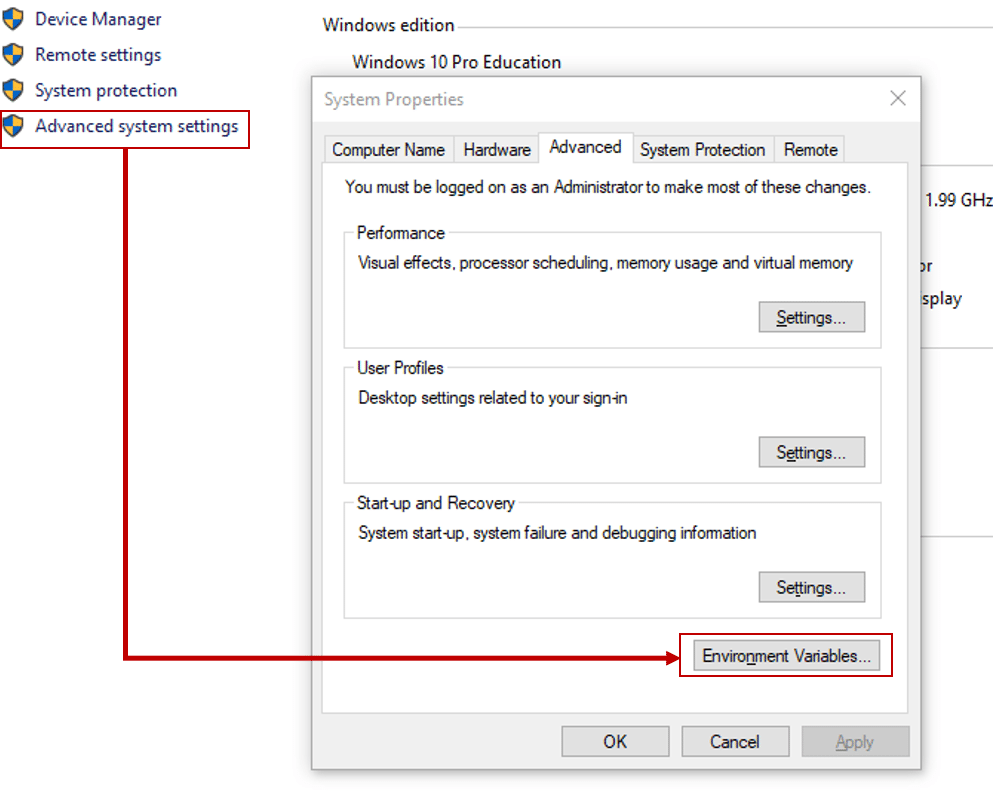
Step 5.2: Go to Advanced System Settings -> Environment Variables.

Step 5.3: Add JAVA_HOME variable in the Windows environment, and point it to your Java JDK folder. Refer to the snapshot below.

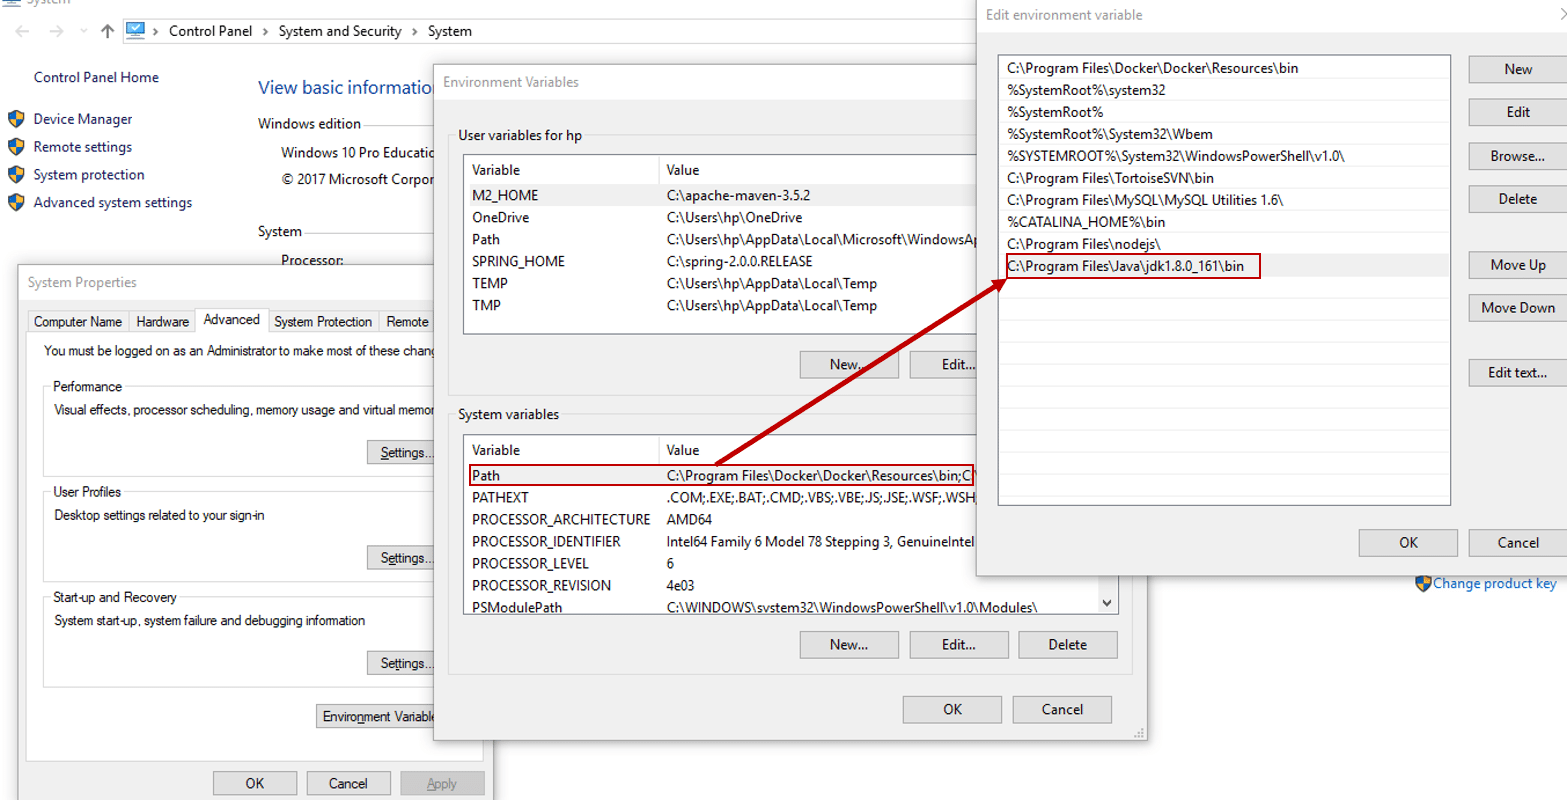
Step 5.4: Update the PATH variable, and append the Java bin folder. Refer to the snapshot below.

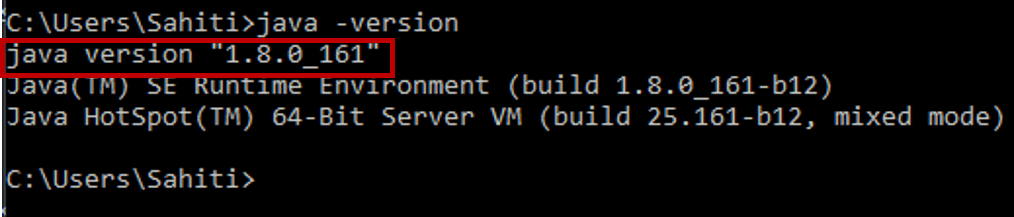
Step 5.6: To verify if Java is installed or not, type java -version on the command prompt.

Step 6: After JAVA has been configured in your PC, you can download Eclipse IDE for JAVA JEE Developers and extract these files to a specific folder.
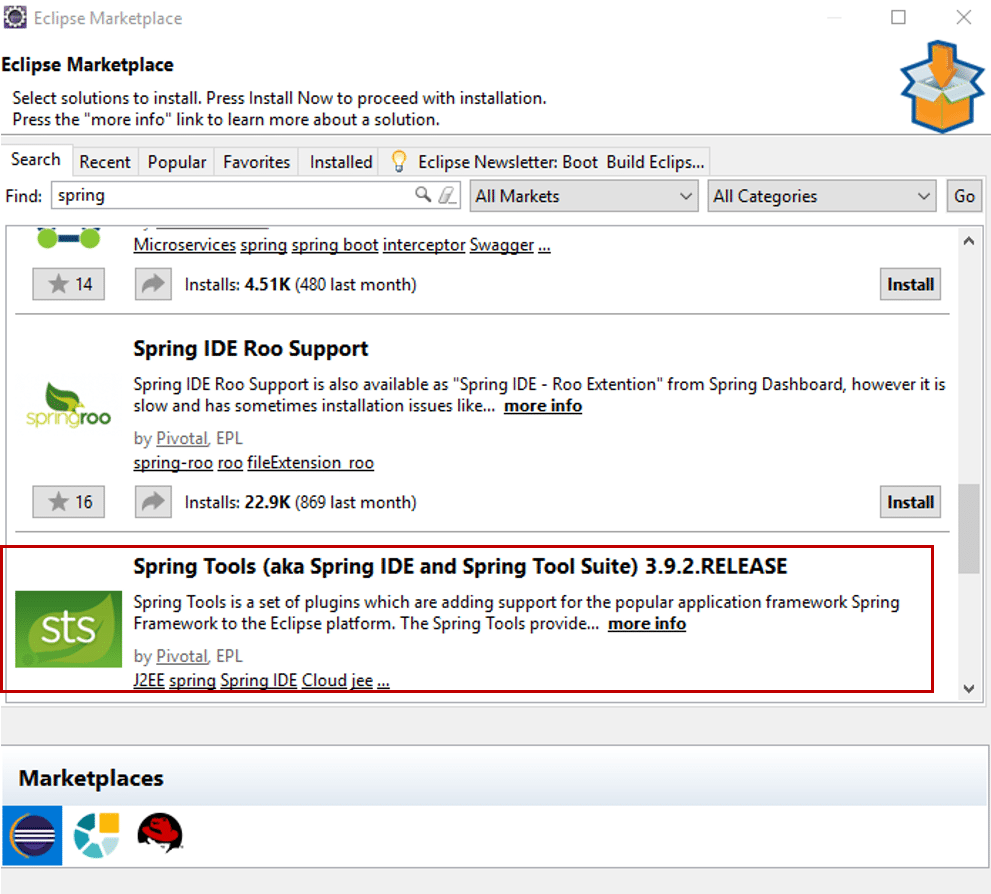
Step 7: Once you are done installing Eclipse on your PC, go to Help -> Eclipse MarketPlace. A dialog box opens up with a list of all the available software. Search for Spring Tool Suite (STS) and Install it.

Step 8: Once the tool is installed, click on File -> New -> Other. A dialog box opens up. In that, select Spring Boot Starter Project under the Spring Boot option and click Next.
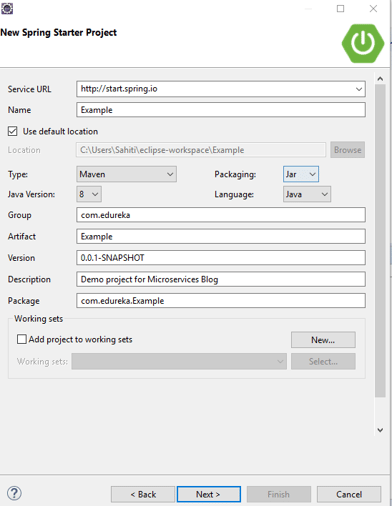
Step 9: In the next screen that opens up, choose the following for your project:
- Group ID
- Artifact ID
- Root package
- Version
- Description
- Java version
- Language
- Packaging
Here, make sure you select Maven as Type and click Next. Refer to the snapshot below.

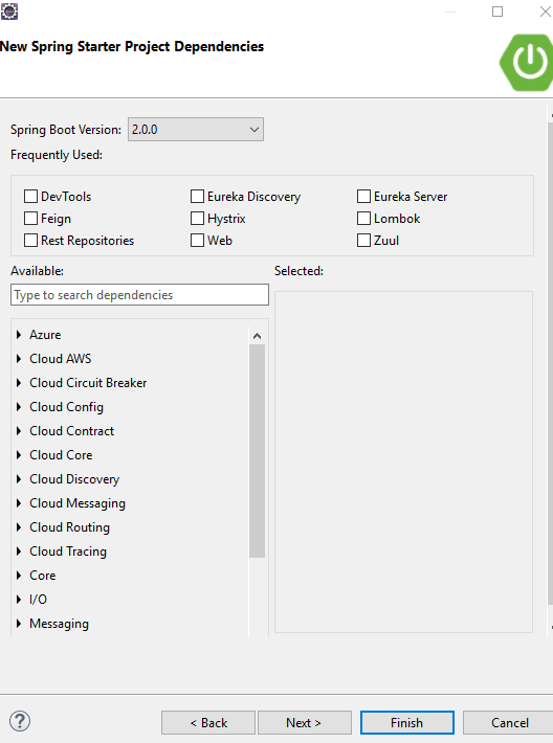
Step 10: In the next dialog box that shows up, select the dependencies that you want to add to your Spring Boot Eclipse Project and click Finish. Refer the snapshot below.

Step 11: Now, you will observe that your SpringBoot Eclipse project has been created on the left-hand side of the Eclipse IDE.
Step 12: After the project is created, configure the classes for your application according to your needs.
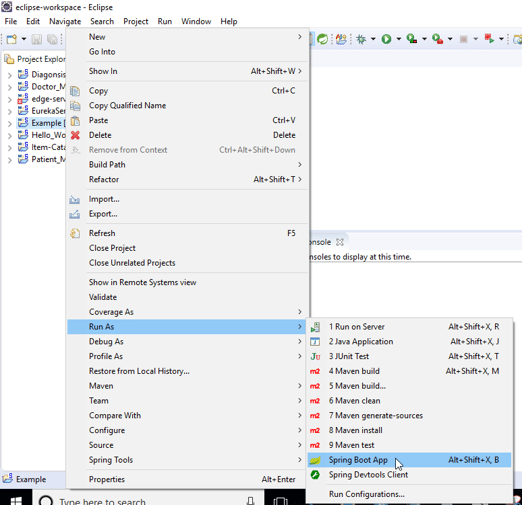
Step 13: To run this newly created Spring Boot Eclipse project, right-click on the project, and select Run As – > Spring Boot App. Internally this method creates an instance of the embedded Tomcat server at the default port of 8080 and runs the application in it. Refer to the snapshot below.

Subscribe to our youtube channel to get new updates..!
Now, let us explore the second option.
Spring Boot CLI Setup
Step 1: To create Spring Boot Eclipse project first download Apache Maven and Spring Boot CLI from their respective official sites.
Step 2: Download Apache Maven
Step 2.1: Visit Maven official website and download the Maven zip file, for example, apache-maven-3.5.2-bin.zip.
Step 2.2: Unzip it to the folder you want to install Maven.
Assume that you unzip to this directory C:pache-maven-3.5.2.
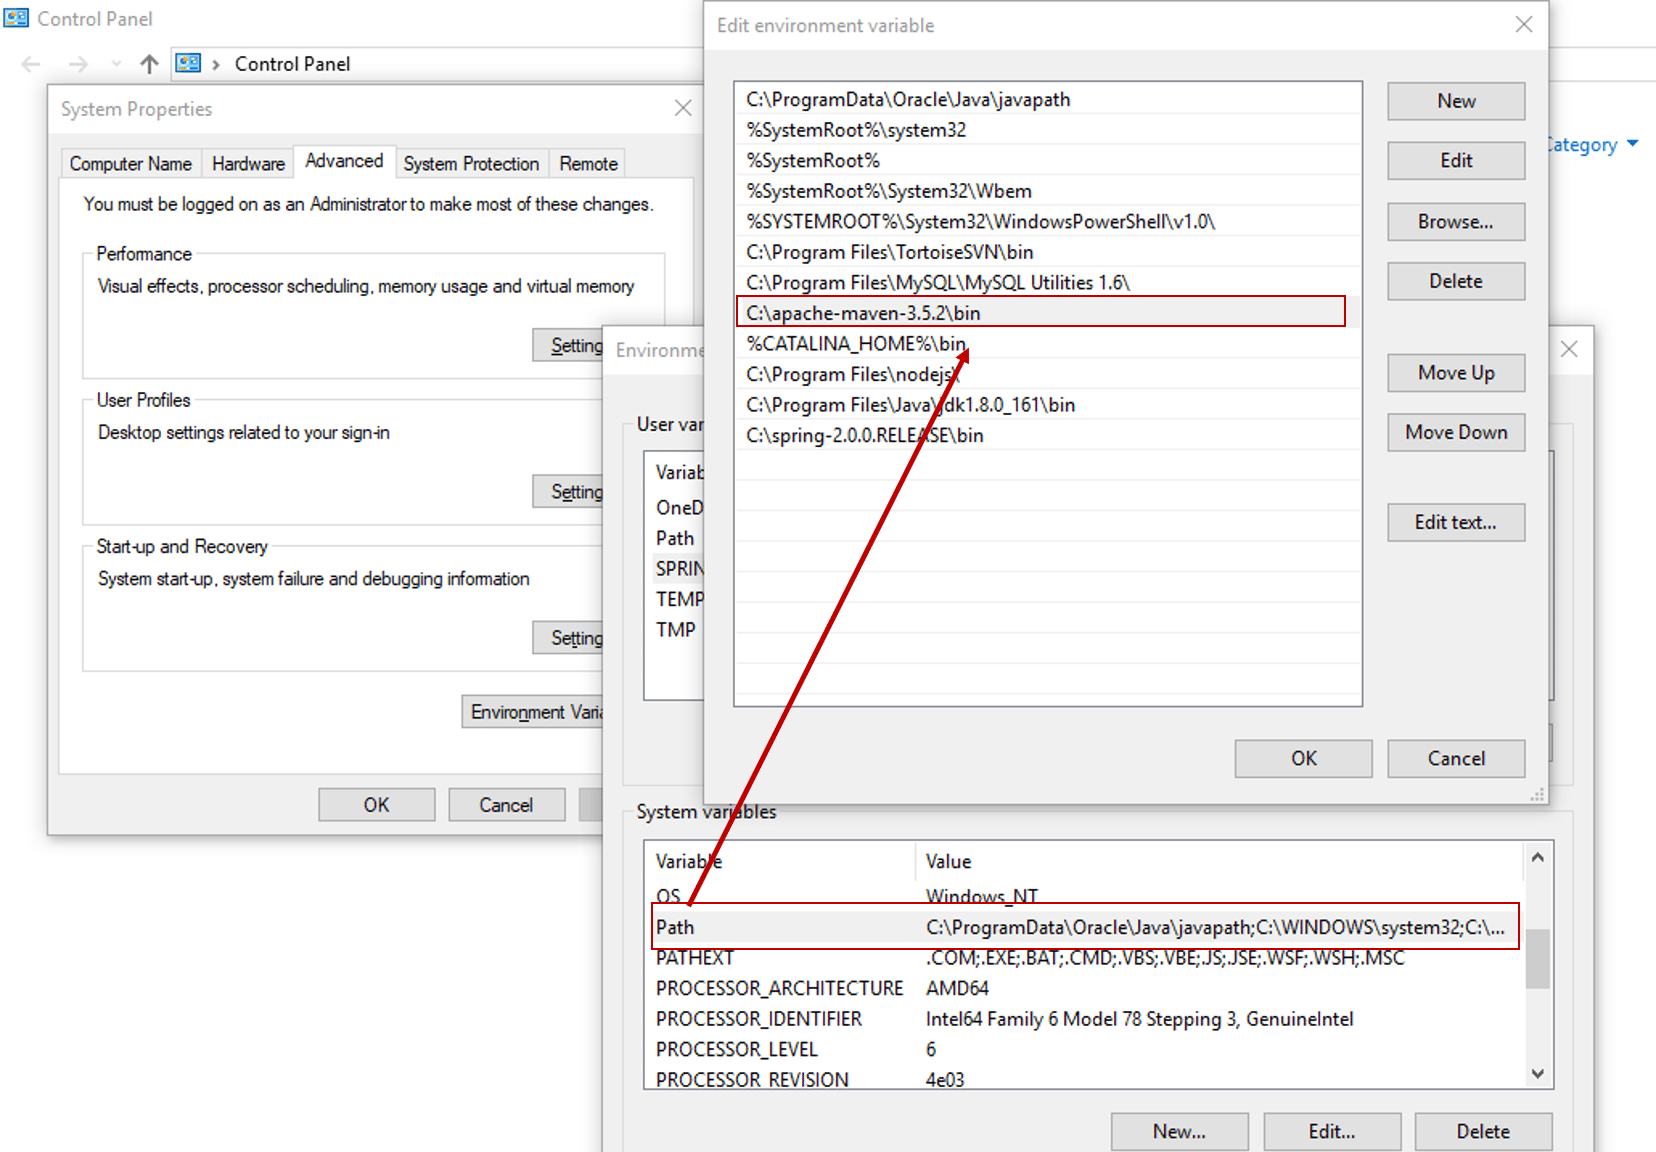
Step 2.3: Add M2_HOME and MAVEN_HOME variables in the Windows environment, and point it to your Maven folder.
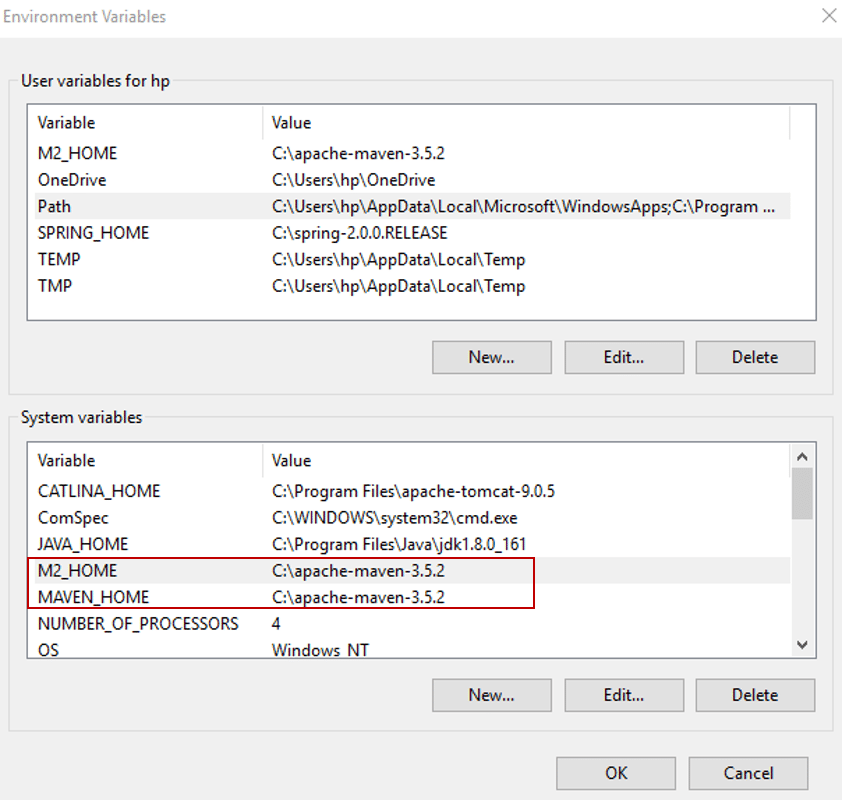

Step 2.4: Update the PATH variable, and append the Maven bin folder –C:pache-maven-3.5.2in.Refer to the snapshot below.

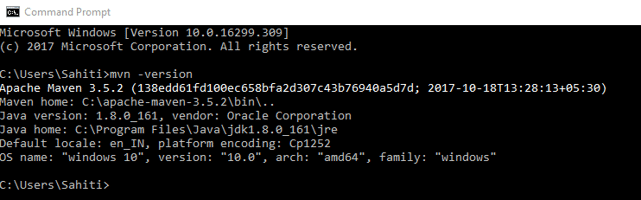
Step2.5: Verify whether maven is installed or not, with mvn -version command in the command prompt.

Step 3: Download the Spring Boot CLI tool
Step 3.1: Download Spring Boot CLI from its official website.
Step 3.2: Unzip the downloaded file the folder you want to install Spring CLI.
Assume that you unzip it to this directory C:spring-2.0.0.RELEASE.
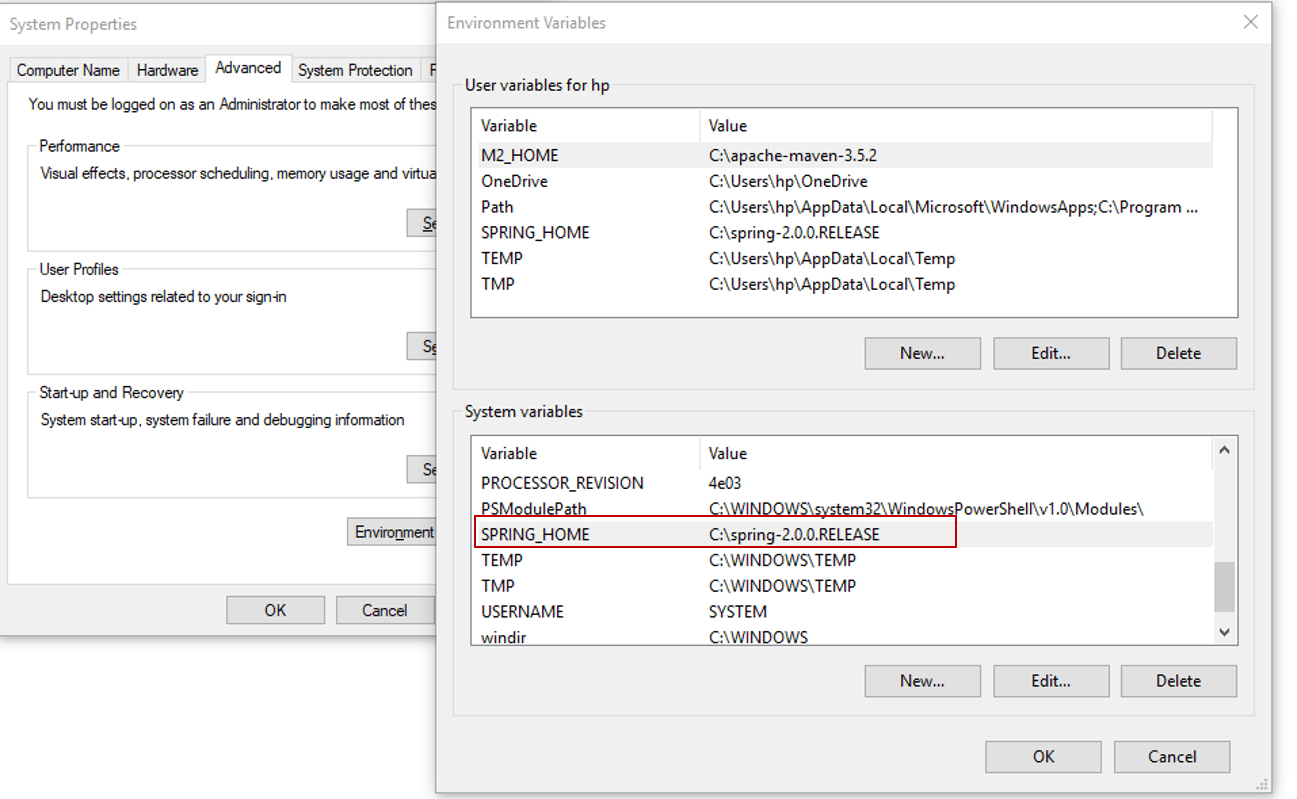
Step 3.3: Add SPRING_HOME variable in the Windows environment, and point it to your Spring folder. Refer to the snapshot below.

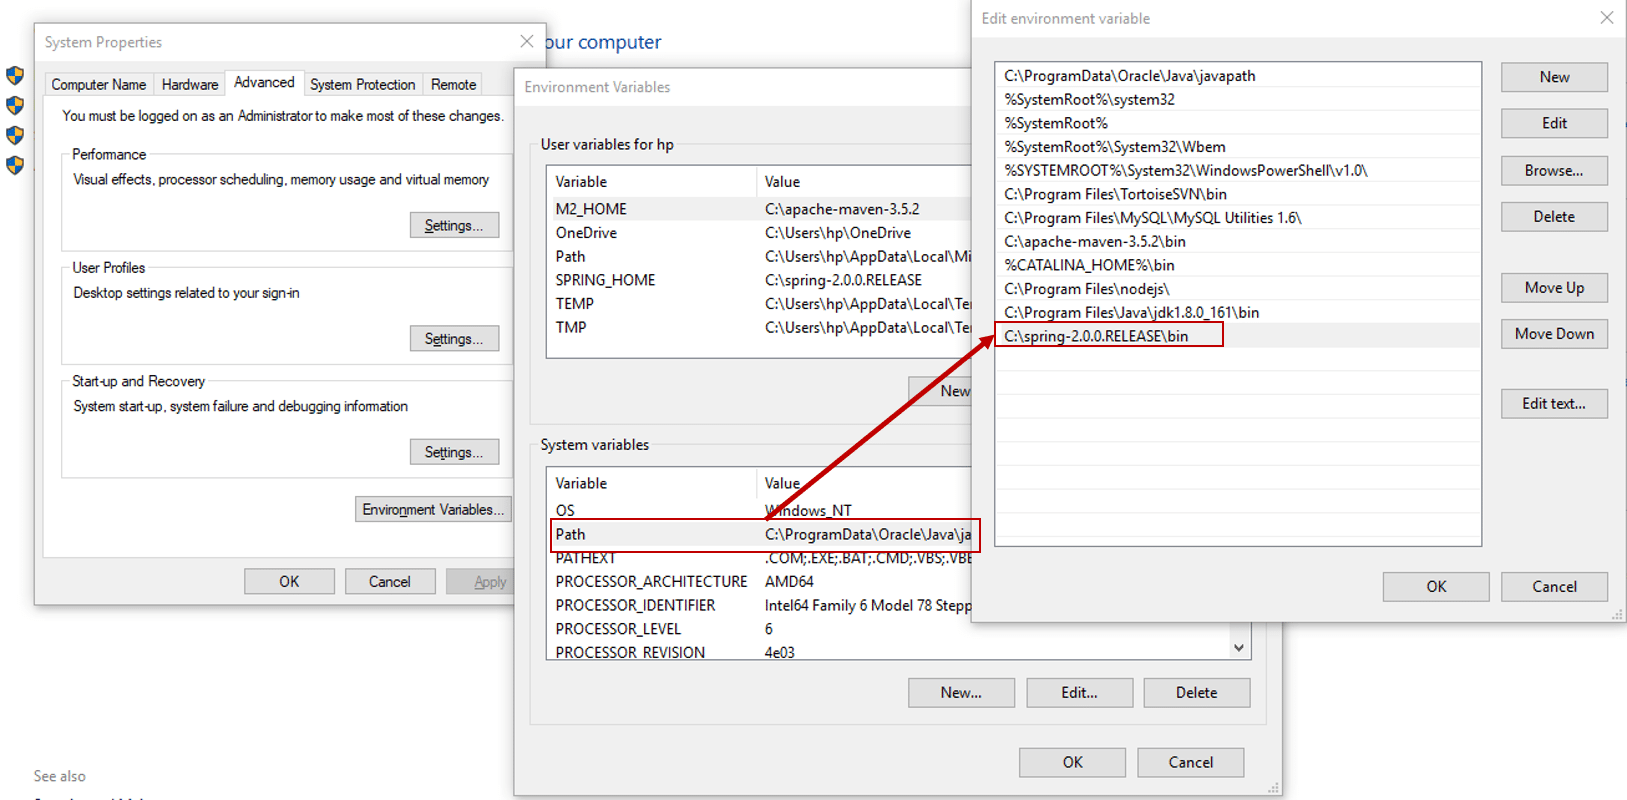
Step 3.4: Update the PATH variable, and append the Spring bin folder – C:spring-2.0.0.RELEASEin. Refer to the snapshot below.

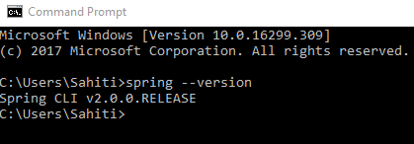
Step 3.5: Verify whether Spring is installed or not, with spring –version command in the command prompt.

Step 4: Now go to your project directory where you have created the Spring project and copy the path.
Step 5: Change the working directory to the project path on the command prompt using the command cd. Assume here the path is C:UsersSahitiDesktopExample.


Step 6: Run the project using the command mvn spring-boot:run


Now let us create a Hello World Application in both the ways.
Spring Boot Hello World Example
Initially, let us create a maven project by choosing Spring Starter project wizard from the file menu of Eclipse IDE with the name HelloWorld_Example and select the required dependencies.
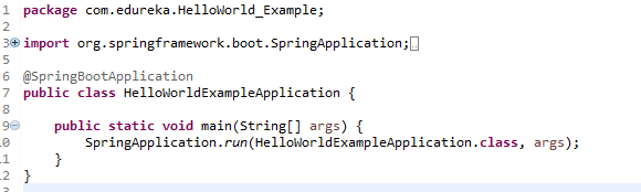
This application has an auto-created Java file.This Java file acts an entry point for the application. It imports classes and uses annotations. Refer to the snapshot below.

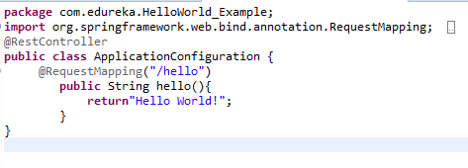
Even though this application acts ready as a stand-alone application, we will still add a configuration file to it. This will help us handle the HTTP requests. Refer to the snapshot below.

Now, run the application as a Spring Boot App. You observe that the application has started and produces the following output on the console.
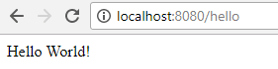
This application runs on 8080. So, if we pass /hello request to the following port number, then it produces the message returned from the requested method in the configuration file. Refer to the snapshot below.

If you want to run this project using the Spring Boot CLI, then open the command prompt and change your working directory to the project path.
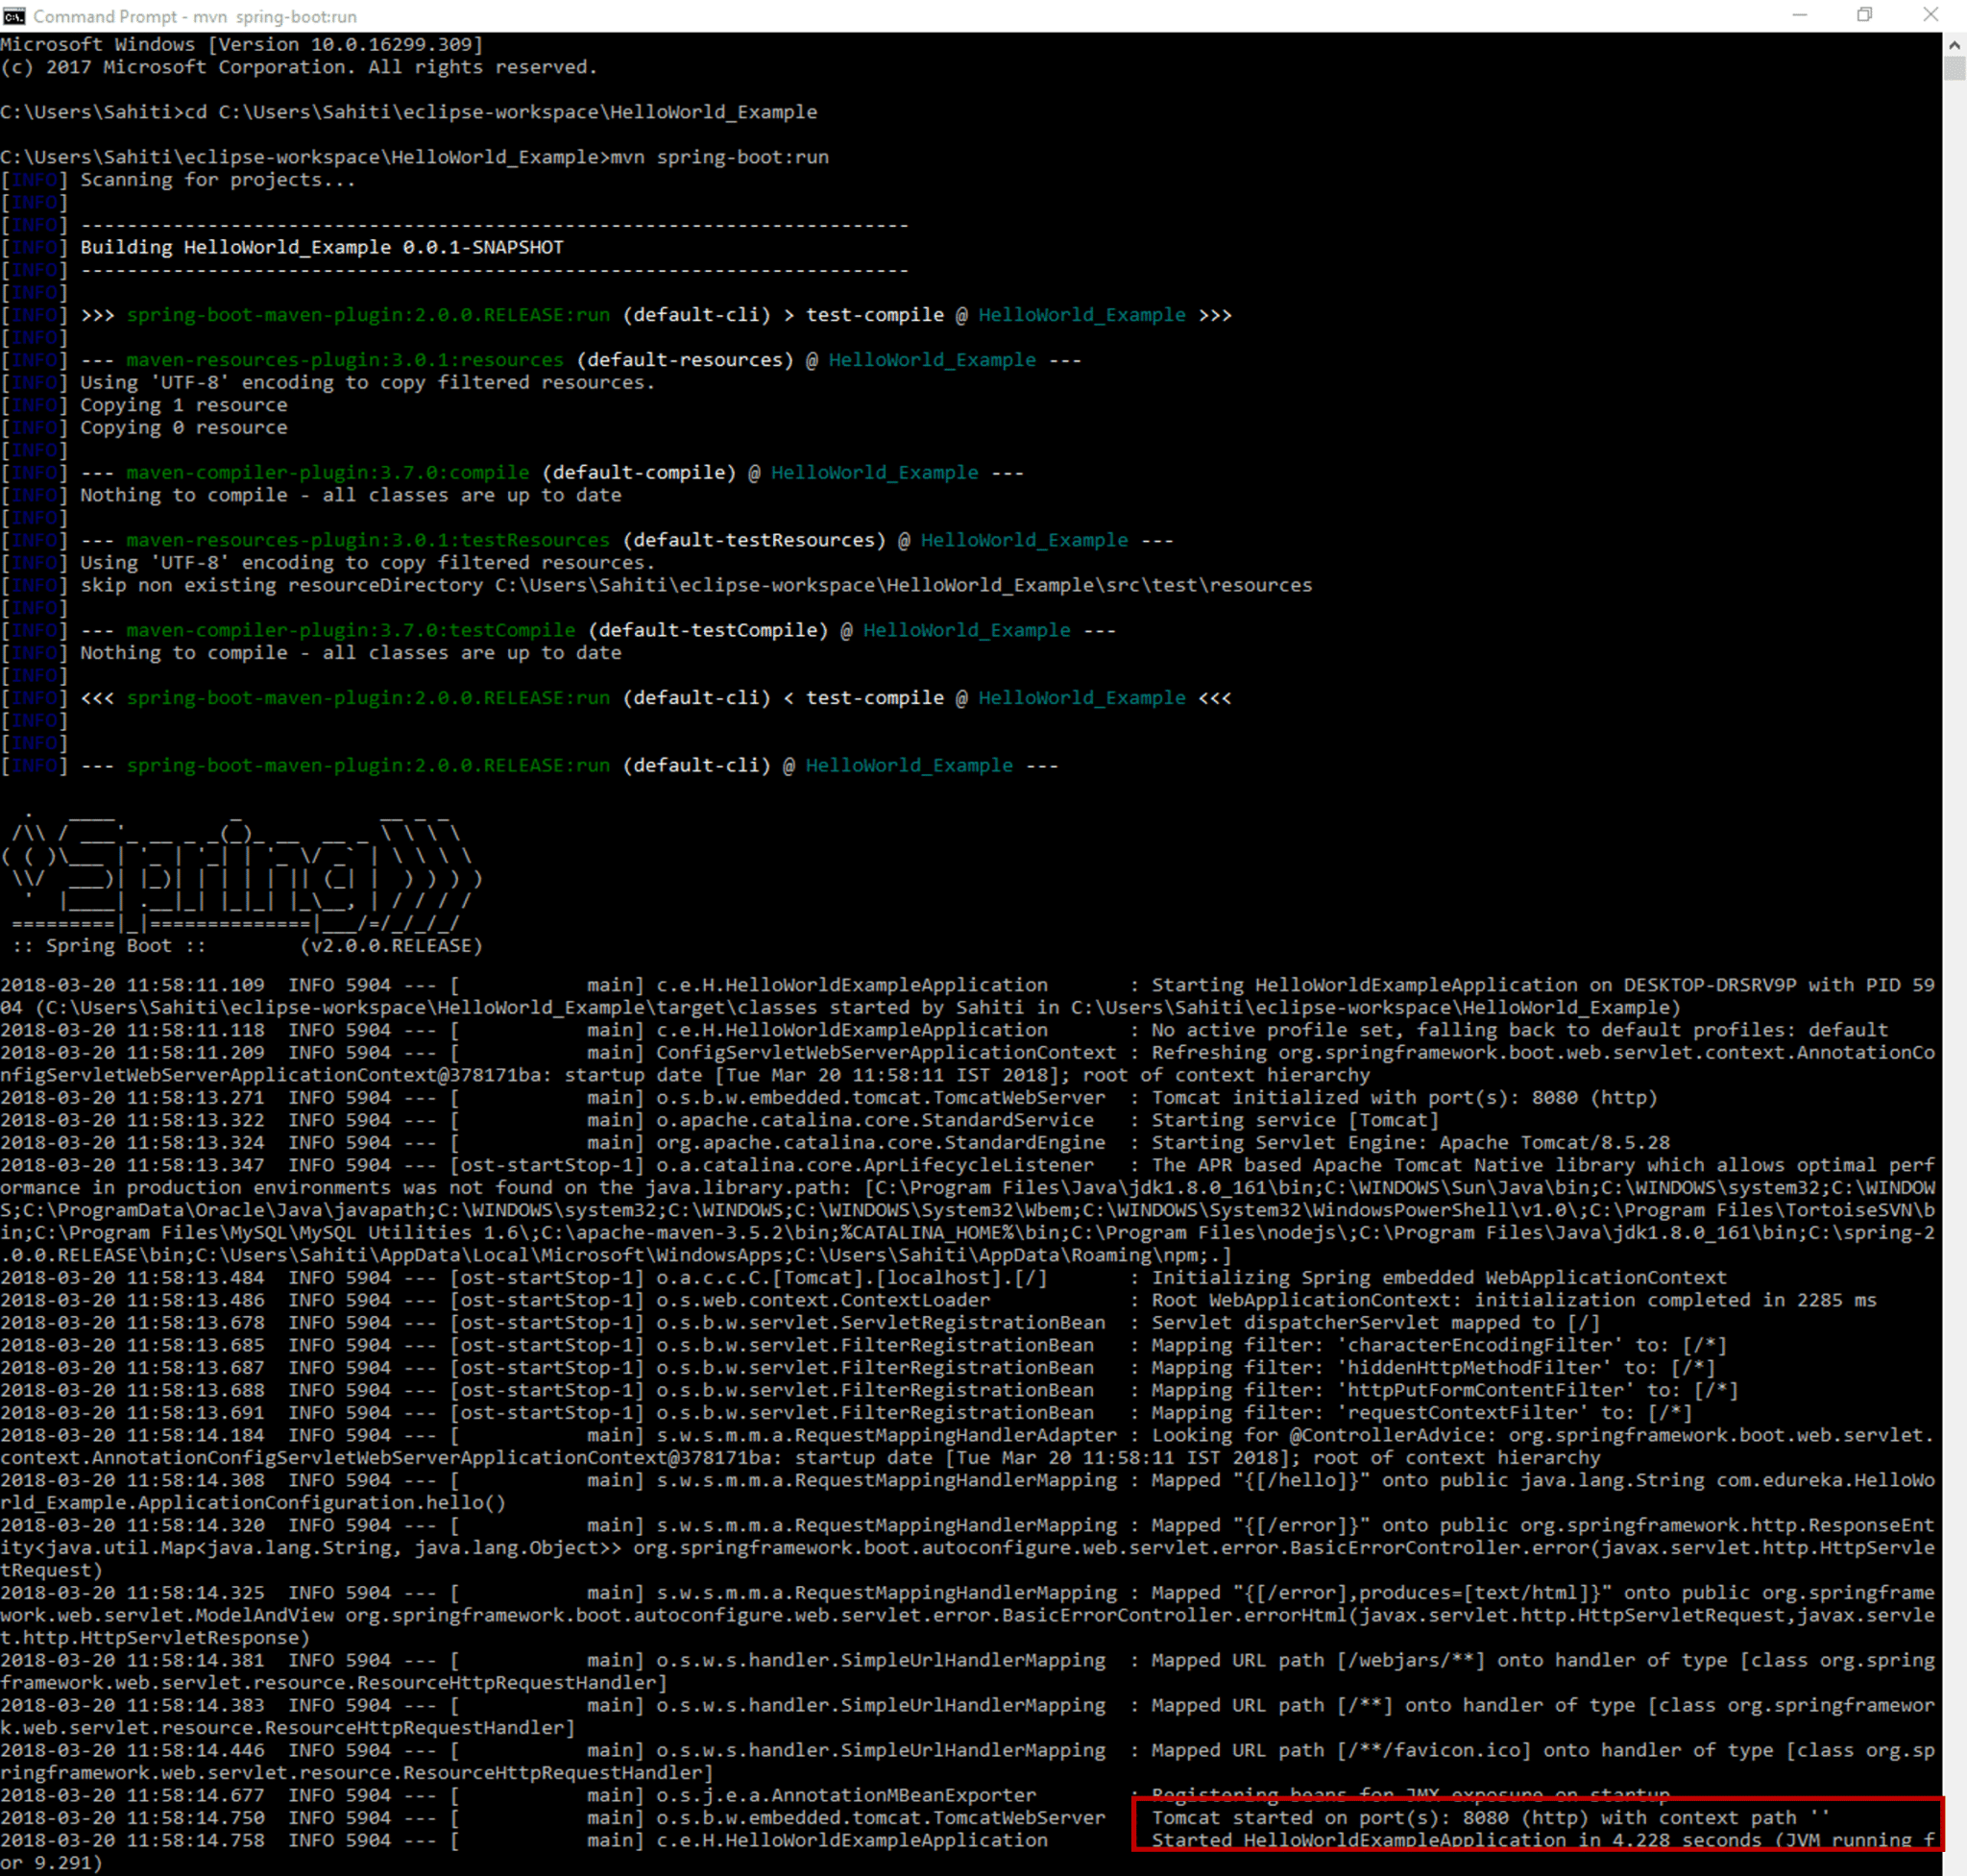
Now type mvn spring-boot:run to run this project. This will give you the following output indicating whether the application has started or not.

Now you can run on the browser and it this produces the same output as the previous.
Preparing for your Spring Boot interview? Check out these 50 essential Spring Boot interview questions to ace your upcoming interview!
If you wish to learn Spring frameworks and build your own applications, then check out our Spring Framework course which comes with instructor-led live training and real-life project experience. This training will help you understand in depth and help you achieve mastery over the subject. To know more about Spring Frameworks, enroll for this Spring Course online.
Got a question for us? Please mention it in the comments section of ” Spring Boot Setup Installation For Microservices” and I will get back to you.