


The key to beginning with Selenium is to install and familiarize yourself with it. To help you out, I have created an article on Selenium Installation. This article will guide you through the simple steps to configure and install Selenium on your system.
How to Install Selenium in Eclipse?
The process of installing Selenium involves 3 steps, namely:
- Install Java
- Install Eclipse IDE
- Install Selenium WebDriver
Selenium supports various programming languages like Java, Python, C#, Perl, Ruby, etc. Java is one of the most widely used languages for Selenium. Let’s begin by understanding the process of Java Installation. The very first step needed for Java installation is to configure the Java environment so that later, Java codes can be used to drive Selenium.
How to install selenium web driver for java in eclipse | Edureka

This Edureka video on “How to install selenium web driver for java in eclipse” will give you an introduction to software versions. It will give you complete insights into the working and advantages of using Selenium for testing.
Related Learning: Selenium Interview Questions about Installation in Java
1. Download and Install Java
Follow the below steps to complete your Java installation.
- Go to the Java Downloads Page and click on the option for Java Platform (JDK).
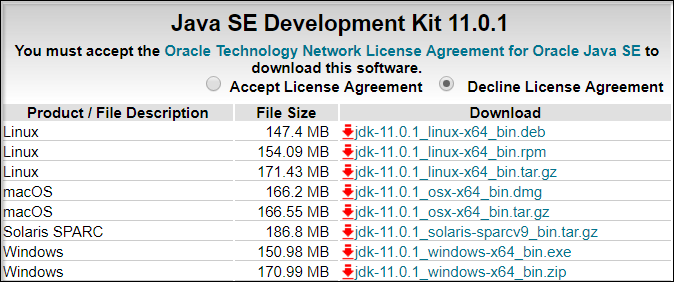
- Go to the Java Downloads Page and click on the option for Java Platform (JDK).

- In the next page, select the Accept License Agreement radio button, accept it and click the download link against your matching system configuration.
- You can run the installer once the download is over and follow the onscreen instructions.
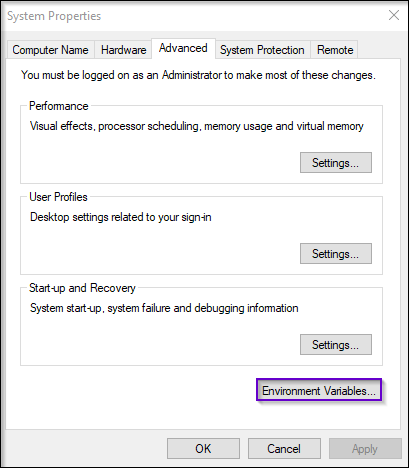
- Go to start and search for ‘System’
- Click on ‘System’
- Click on ‘Advanced system settings’
- Click on ‘Environment Variables’ under ‘Advanced’ tab as shown below:
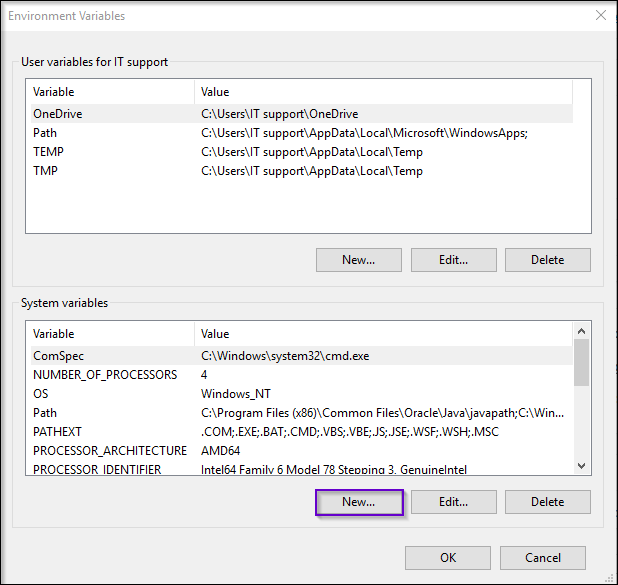
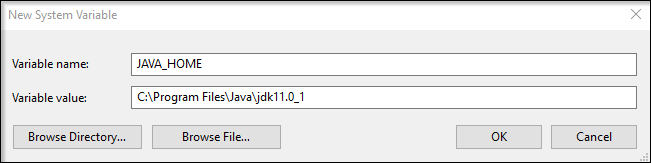
- Next, under system variables choose new and enter the variable name as ‘JAVA_HOME’ and the full path to Java installation directory as per your system as shown below:
- Below figure depicts the configuration of environment variable name and value.
- Next thing that you have to do is to configure your environment variables. Let’s see how to do that. Here, you have to edit the path of the system variable as shown below.
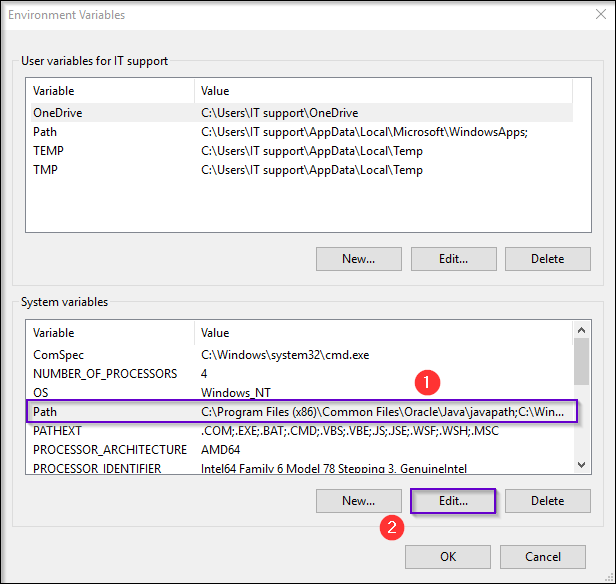


- Under ‘Variable value’, at the end of the line, enter the following path – %JAVA_HOME%bin;
Now, you can click ‘OK’ and you are done. - Now to cross-check the installation, just run following command in cmd – java -version. It should display the installed version of Java in your system.
Find out our Automation Engineer Course in Top Cities/Countries
| India | USA | Other Cities/Countries |
| Bangalore | New York | UK |
| Hyderabad | Chicago | London |
| Pune | Dallas | Canada |
| Chennai | Atlanta | Australia |
| Charlotte | Singapore | |
| Washington | UAE |
2. Install Eclipse
Follow the below steps to configure Eclipse on your system:
- Navigate to the following URL – https://www.eclipse.org/downloads/ and select the download link depending on your system architecture – (32 Bit or 64 Bit) and download it.
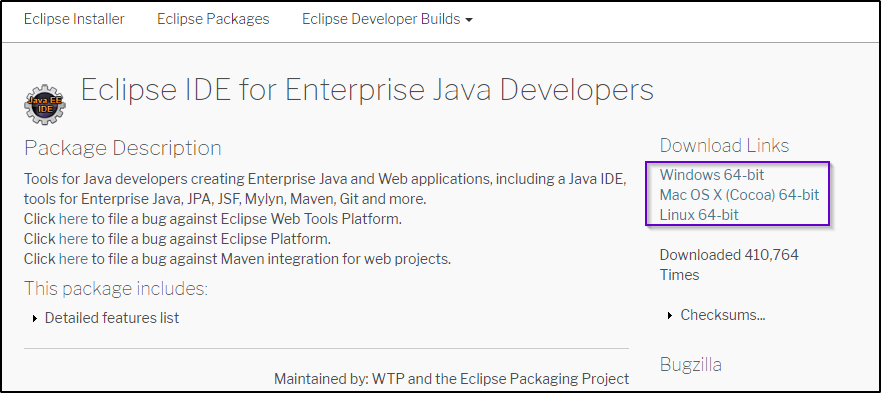
- Navigate to the following URL – https://www.eclipse.org/downloads/ and select the download link depending on your system architecture – (32 Bit or 64 Bit) and download it.

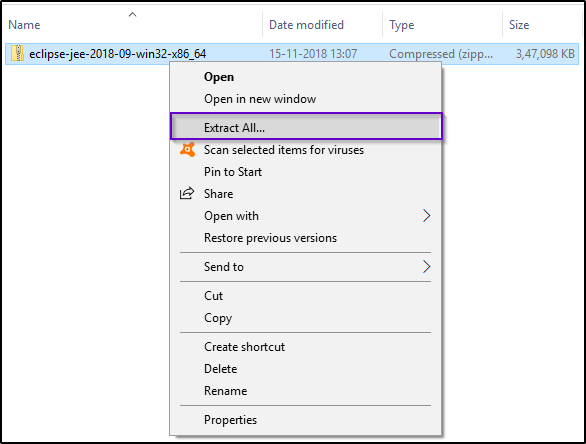
- Once the download is over, extract the zipped file and save it to any directory. The root folder is the eclipse.


Now, the last step is to install Selenium. Let’s see how to install selenium and configure it in your system.
Learn more about Blockchain and its concepts from the Software testing course certification.
3. Install Selenium Web Driver
- Open the browser and navigate to http://www.seleniumhq.org.
- Click ‘Download’ menu and choose ‘Download version’. i.e. x.y.z
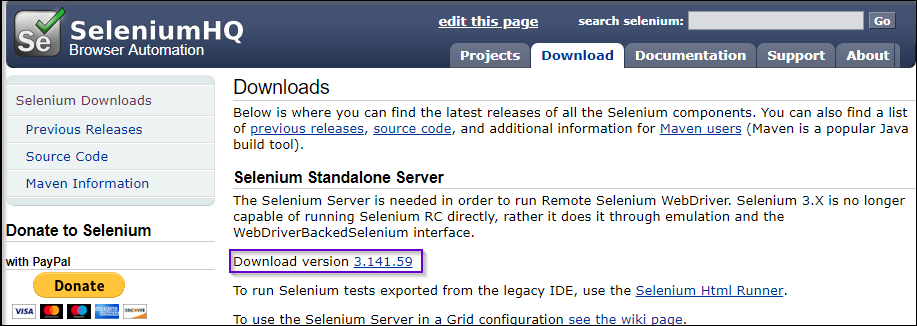

- The download should get started for ‘selenium-server-standalone-x.y.z.jar’. Save this JAR in “C:Selenium”.
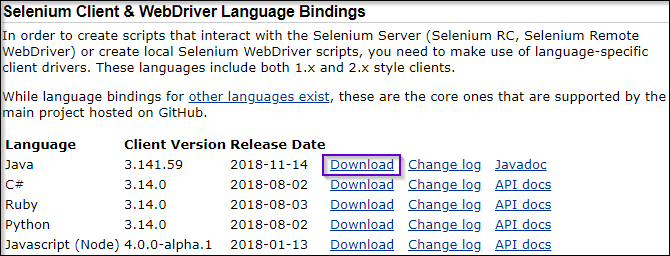
- Next, you have to download Selenium Java Client. In the same downloads page, scroll down and you will find a section called Selenium Client and WebDriver Language. Now, click on Download link under Java as shown below.

- Extract the zip file and save it in your selenium folder.
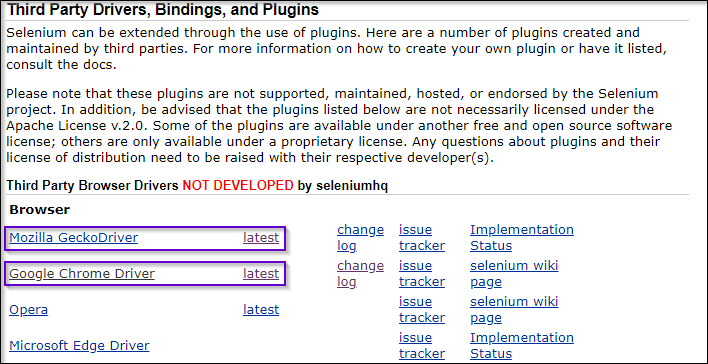
- Next, you have to download Chrome Driver for Google Chrome and Gecko Driver if you are using Mozilla Firefox.
- In the same downloads page, scroll further down and you will find third-party drivers section. There you will find options for downloading gecko driver and chrome driver as shown in the below figure.

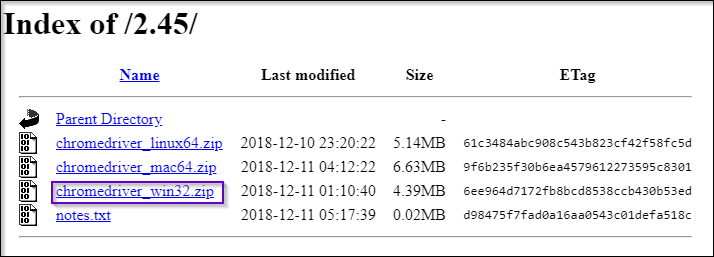
- In the next page, you will find the latest version available. You can choose that and download based on your system configuration. You can refer the below image for your OS configuration.
- In the next page, you will find the latest version available. You can choose that and download based on your system configuration. You can refer the below image for your OS configuration.

- You can simply download the driver, extract the zip file and save it in any location. Similarly, you can download the latest version of gecko driver and save it if you are using the Mozilla browser.
- Next, you can simply create a new project in Eclipse IDE and add all the external selenium jar files from selenium lib directory.
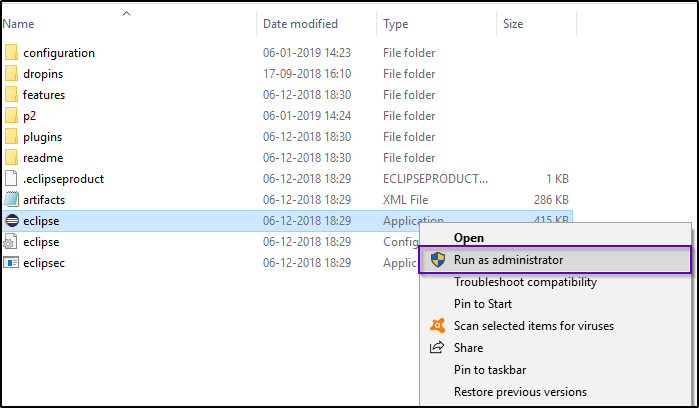
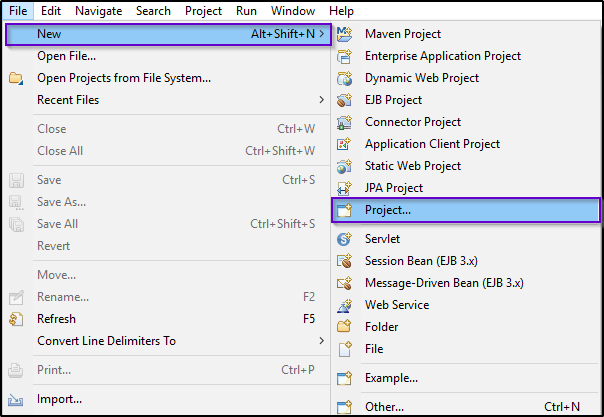
- First, launch Eclipse and create new project as shown below.
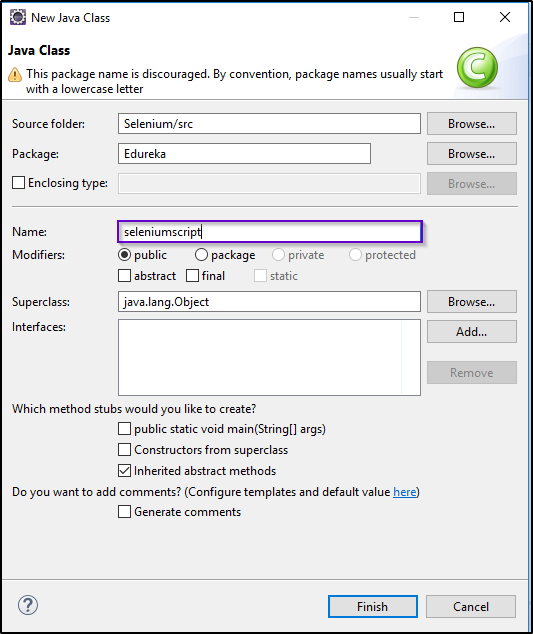
- Next, specify the name of the project and create a class.

- First, launch Eclipse and create new project as shown below.


- Let’s create a class file and give public access modifier.
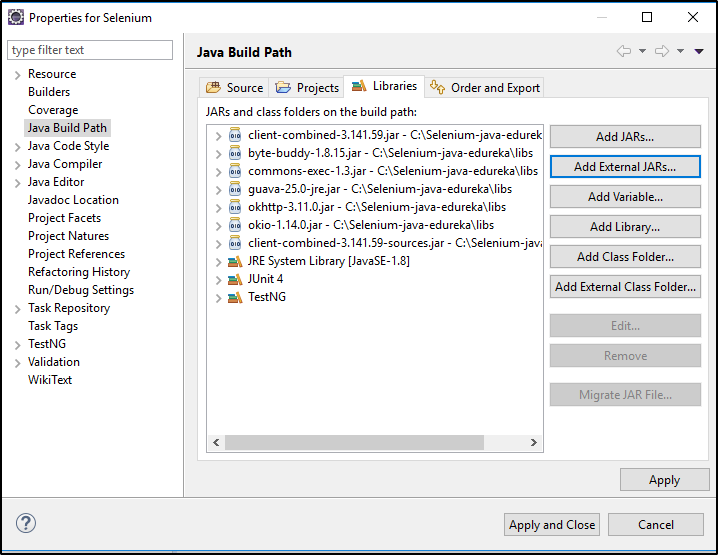
- Next, you should add referenced libraries to your project. Click on your project -> Build Path -> Configure Build Path and add external JARs as shown in the figure.
- Now you are all set to execute the first Selenium program. You can run the below script and check the output.


package Edureka;
import java.util.concurrent.TimeUnit;
import org.openqa.selenium.By;
import org.openqa.selenium.WebDriver;
import org.openqa.selenium.WebElement;
import org.openqa.selenium.chrome.ChromeDriver;
import org.openqa.selenium.support.ui.ExpectedConditions;
import org.openqa.selenium.support.ui.WebDriverWait;

public class FirstSeleniumScript {
public static void main(String[] args) throws InterruptedException{
System.setProperty("webdriver.chrome.driver", "C:Selenium-java-edurekachromedriver_win32chromedriver.exe");
WebDriver driver = new ChromeDriver();
driver.manage().window().maximize();
driver.manage().deleteAllCookies();
driver.manage().timeouts().pageLoadTimeout(40, TimeUnit.SECONDS);
driver.manage().timeouts().implicitlyWait(30, TimeUnit.SECONDS);
driver.get("https://login.yahoo.com/");
driver.findElement(By.xpath("//input[@id='login-username']")).sendKeys("edureka@yahoo.com");
}
}
You can also refer to the below video to execute your first Test Case on Selenium.
How to Write & Run a Test Case in Selenium

This video will help you Write & Run your First Test Case in Selenium.
If you are interested in Automation Testing and want to master Selenium, Edureka’s Selenium Testing Course would be the right choice.
Find out our Selenium Training in Top Cities/Countries
| India | Other Cities/Countries |
| Bangalore | US |
| Hyderabad | UK |
| Pune | Canada |
| Chennai | Australia |
| Mumbai | Singapore |
| Kolkata | Edinburgh |
If you wish to learn Selenium and build a career in the testing domain, check out our interactive, live-online Selenium Course. It comes with 24 7 support to guide you throughout your learning period.
Do you have a question for us? Please mention it in the comments section of the “Selenium Installation” article, and we will respond to you.