


Are you tired of juggling between different codebases to build your mobile apps for iOS and Android? Say hello to React Native, the game-changing framework that allows you to build high-performance, native-like apps with just one codebase. With React Native, you can leverage the power of JavaScript and React to create apps that are not only cost-effective but also have a sleek and polished look and feel. Whether you’re a seasoned mobile developer or just starting out, React Native is a must-know tool for building cutting-edge mobile apps. So why wait? Start exploring the world of React Native today by reading this React Native Tutorial!


Brief history of React Native
React Native was first released by Facebook in 2015. It is an open-source framework for building cross-platform mobile applications using JavaScript and React. The goal of React Native is to allow developers to build native mobile apps for iOS and Android platforms with a single codebase.
2015: React Native was first introduced by Facebook and released as an open-source project.
2016: React Native became popular among developers for its ability to build native mobile apps using JavaScript and React.
2017: React Native saw increased adoption from companies and organizations such as Airbnb, Walmart, and Tesla.
2018: Facebook released React Native version 0.57, which improved the framework’s performance and stability.
2019: React Native version 0.60 was released, which introduced the auto-linking of native modules, making it easier for developers to use third-party libraries in their projects.
2020: React Native continued to grow in popularity and saw increased adoption by companies of all sizes.
2021: React Native version 0.64 was released, which improved the framework’s compatibility with iOS and Android and added new features such as the ability to use hooks in components.
Web Development Full Course for Beginners

What is React Native?


fig 1. React native tutorial
For the purpose of creating a true, native mobile application for iOS and Android, React Native is a JavaScript framework. To create a mobile application, only JavaScript is used. It is comparable to React, which uses native components in place of web components as its building blocks.
React Native is built on React, the Facebook JavaScript library, and XML-like markup (JSX) for creating the user interface. It is made for mobile devices rather than the browser. You can easily learn the language by signing up for Edureka’s React JS certification Training..
Also Read: React Redux Tutorial – Complete Step-by-Step Guide
Comparison between React Native and Native App Development
React Native and Native App Development are both used for developing mobile applications. However, there are some key differences between the two:


fig 2. React native tutorial
React Native:
- Based on JavaScript and React library
- Cross-platform, allowing for code reuse on iOS and Android
- Offers hot reloading for faster development
- Large and active community, with many available components
Native App Development:
- Uses platform-specific programming languages (e.g. Swift or Objective-C for iOS, Java or Kotlin for Android)
- Offers better performance and access to device-specific features
- Typically requires separate codebases for iOS and Android
- Steep learning curve for each platform, requires knowledge of platform-specific programming languages and development tools
In summary, React Native offers faster development and cross-platform compatibility, while Native App Development offers better performance and platform-specific capabilities. The choice between the two will depend on the specific requirements of your project.
Take your design skills to the next level with our new UI UX design course.
Setting up the Development Environment
Installing NodeJS


fig 3. React native tutorial
In order to install Node.js, do the following:
- Visit the Node.js website’s official download page at https://nodejs.org/ to do so.
- To finish the installation process, run the installer file and adhere to the on-screen directions.
- Once Node.js has been installed, open a terminal or command prompt window and type “node -v” to see the version number and confirm that it has been installed.
Note that Linux, macOS, and Windows all support Node.js. Verify that the version you download is the right one for your operating system.
Installing React Native CLI
Follow these steps to install React Native CLI:
- Open a command prompt window or a terminal.
- Execute the upcoming command:
- npm install -g react-native-cli
- Watch for the installation to be finished.
- To check that the React Native CLI has been installed and to display the version number, run react-native -v after the installation is complete.
- React Native CLI installation must precede the installation of Node.js on your computer. By entering node -v in the terminal, you can see if Node.js is already installed.
Creating a new React Native project
To create a new React Native project, follow these steps:
- Open a terminal or command prompt window.
- Run the following command to create a new React Native project:
react-native init [project_name]
- Replace [project_name] with the name you want to give to your project.
- Once the project is created, navigate to the project directory by running the following command:
cd [project_name]
- To run the project on an emulator or physical device, use the following command:
react-native run-android # for Android
react-native run-ios # for iOS
Note: Running the project on an iOS device requires a Mac with Xcode installed. Running the project on an Android device requires the Android SDK and a physical device or an emulator setup.
Understanding the Basics of React Native
Components in React Native
The UI of your application is constructed using components in React Native. Components are complete units that can be used repeatedly throughout your application.
Components in React Native fall into one of two categories:
- React Native offers built-in components, such as View, Text, Image, TextInput, etc., that are predefined and ready to use. You can build a user interface right out of the box using these components.
- Custom components are user-defined parts that can be made by combining pre-existing parts. Your code will become more modular and reusable if custom components are created to encapsulate particular functionality and aesthetics.
Both JavaScript and TypeScript are supported for the creation of components in React Native. Each component has the ability to have both its own props—information passed to the component from its parent—and its own state, which is an object that stores data that can change over time. Additionally, components have the ability to control their own logic and render their own UI based on state and props.
Because React Native employs a declarative approach to UI development, you can specify how your UI should appear at any given time, and React will handle the rendering. This makes it simpler to comprehend, troubleshoot, and maintain your code.
Props and State in React Native
Props and state are two ideas used in React Native to manage the data and behaviour of components.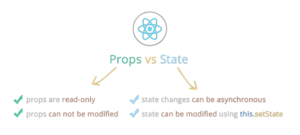

fig 4. React native tutorial
The term “properties” refers to information that is transferred from a parent component to its child components. Since props are read-only, a child component cannot change the props it receives from a parent component. The use of props makes it possible to reuse components and increases their flexibility and reusability by passing information between them.
A component’s state management system controls an object that stores dynamic data. State can be changed within a component, unlike props, and changes to state can result in UI updates for the component. Direct manipulation of state, however, is discouraged; instead, state changes should be brought about by invoking setState, a React-provided method.
Whether the data should be managed as state or passed down as props should be taken into account when designing components. Data that is passed down from a parent component and doesn’t change within the component is best stored in props. The best use of state is for data that alters within a component and has an impact on how it behaves or renders.
JSX in React Native


fig 5. React native tutorial
JSX (JavaScript XML) is a syntax extension for JavaScript that allows you to write HTML-like code in your JavaScript files. In React Native, JSX is used to define the component’s structure and to describe how the component should render its UI based on its props and state.
JSX makes it easy to see the component’s structure and how it is related to its props and state, and it also makes it easier to write reusable components. Additionally, using JSX can improve the performance of your application because React can optimize the rendering of components using a technique called “virtual DOM”.
Here is an example of how to use JSX in a React Native component:
import React, { Component } from 'react';

import { View, Text } from 'react-native';

class MyComponent extends Component {

render() {

return (

<View>

<Text>Hello, {this.props.name}!</Text>

</View>

);

}

}

export default MyComponent;
In this example, the component uses JSX to define its structure, which consists of a View component that contains a Text component. The Text component displays the value of the name prop passed down from the parent component.
Style in React Native

fig 6. React native tutorial
In React Native, styles are used to control the appearance of the UI elements in your application. There are two ways to apply styles to a component in React Native: inline styles and stylesheets.
- Inline styles: Inline styles are styles that are defined directly within the component’s JSX code. Inline styles are useful for applying one-off styles to a specific component and for conditionally styling components based on their state or props.
Here is an example of using inline styles in React Native:
import React, { Component } from 'react';

import { View, Text } from 'react-native';

class MyComponent extends Component {

render() {

return (

<View style={{ backgroundColor: 'red', padding: 20 }}>

<Text style={{ color: 'white', fontSize: 20 }}>

Hello, {this.props.name}!

</Text>

</View>

);

}

}

export default MyComponent;
- Stylesheets: Stylesheets are styles that are defined in separate JavaScript files. Stylesheets are useful for organizing your styles into reusable and modular blocks, making your code easier to manage and maintain.
Here is an example of using stylesheets in React Native:
// MyStyles.js
import { StyleSheet } from 'react-native';

export default StyleSheet.create({

container: {

backgroundColor: 'red',
padding: 20

},

text: {

color: 'white',

fontSize: 20

}
});

// MyComponent.js

import React, { Component } from 'react';

import { View, Text } from 'react-native';

import MyStyles from './MyStyles';

class MyComponent extends Component {

render() {

return (

<View style={MyStyles.container}>

<Text style={MyStyles.text}>Hello, {this.props.name}!</Text>

</View>

);

}

}

export default MyComponent;
Both inline styles and stylesheets use a similar syntax to CSS, but with some differences, such as the use of camelCase instead of kebab-case for property names, and the use of pixels (‘px’) instead of points (‘pt’) for font sizes.
Building Your First React Native App
Creating a basic UI using components
To create a basic UI in React Native using components, you must first import the required components from the react-native library. The components can then be used to define the structure of your UI.
Here’s an example of a simple UI built with React Native components:
import React, { Component } from 'react';

import { View, Text, StyleSheet } from 'react-native';

const styles = StyleSheet.create({

container: {

flex: 1,

justifyContent: 'center',

alignItems: 'center'

},

text: {

fontSize: 20,

textAlign: 'center'

}

});

class MyComponent extends Component {

render() {

return (

<View style={styles.container}>

<Text style={styles.text}>Hello, {this.props.name}!</Text>

</View>

);

}

}

export default MyComponent;
The View and Text components from the react-native library are used in this example to define the UI structure. The Text component displays the value of the name prop passed down from the parent component, and the View component acts as a container for it. The components’ styles are defined in a StyleSheet and applied using the style prop.
Implementing navigation using React Navigation


fig 7. React native tutorial
A well-liked library for adding navigation to React Native applications is React Navigation. It offers a versatile and user-friendly API for switching between screens in your app.
Here is an illustration of how to use React Navigation for navigation:
import React from 'react';
import { View, Text, Button } from 'react-native';
import { createStackNavigator, createAppContainer } from 'react-navigation';
class HomeScreen extends React.Component {
render() {
return (
<View style={{ flex: 1, alignItems: 'center', justifyContent: 'center' }}>
<Text>Home Screen</Text>
<Button
title="Go to Details"
onPress={() => this.props.navigation.navigate('Details')}
/>
</View>
);
}
}
class DetailsScreen extends React.Component {
render() {
return (
<View style={{ flex: 1, alignItems: 'center', justifyContent: 'center' }}>
<Text>Details Screen</Text>
</View>
);
}
}
const AppNavigator = createStackNavigator({
Home: {
screen: HomeScreen
},
Details: {
screen: DetailsScreen
}
});
export default createAppContainer(AppNavigator);
Two screens—HomeScreen and DetailsScreen—are defined in this example. Using a createStackNavigator from the react-navigation library, the navigation between these two screens is defined. Utilizing createAppContainer from the react-navigation library, the navigation stack is built, and the resulting navigation container is exported as the module’s default component.
When the button is pressed in the HomeScreen, the DetailsScreen is navigated to using the Button component. The component’s props.navigation object, which is passed down to it by React Navigation, is used to perform the navigation using the navigate method.
Fetching data from an API using Axios
Axios is a popular library for making HTTP requests in JavaScript, including in React Native applications. Here is an example of fetching data from an API using Axios:
import React, { Component } from 'react';

import { View, Text, StyleSheet } from 'react-native';

import axios from 'axios';

const styles = StyleSheet.create({

container: {

flex: 1,

justifyContent: 'center',

alignItems: 'center'

},

text: {

fontSize: 20,

textAlign: 'center'

}

});

class MyComponent extends Component {

constructor(props) {

super(props);

this.state = {

data: null

};

}
componentDidMount() {

axios.get('https://jsonplaceholder.typicode.com/posts')

.then(response => {

this.setState({ data: response.data });

})
.catch(error => {
console.error(error);

});

}
 render() {

const { data } = this.state;

if (!data) {

return (

<View style={styles.container}>

<Text style={styles.text}>Loading...</Text>

</View>

);

}

return (

<View style={styles.container}>

<Text style={styles.text}>Data: {JSON.stringify(data)}</Text>

</View>

);

}

}

export default MyComponent;
In this example, the component fetches data from the https://jsonplaceholder.typicode.com/posts API using Axios in the componentDidMount lifecycle method. The fetched data is stored in the component’s state using setState. The component’s render method then displays the fetched data, or a loading message if the data has not been fetched yet.
Displaying data using FlatList
FlatList is a component in React Native for efficiently rendering large lists of data. Here is an example of using FlatList to display data fetched from an API:
import React, { Component } from 'react';

import { View, Text, StyleSheet, FlatList } from 'react-native';

import axios from 'axios';

const styles = StyleSheet.create({

container: {

flex: 1,

padding: 20

},

item: {

padding: 10,

fontSize: 18,

height: 44

}

});

class MyComponent extends Component {

constructor(props) {

super(props);

this.state = {

data: null

};

}

componentDidMount() {

axios.get('https://jsonplaceholder.typicode.com/posts')

< .then(response => {

this.setState({ data: response.data });
})

.catch(error => {

console.error(error);

});

}

render() {

const { data } = this.state;

if (!data) {

return (

<View style={styles.container}>

<Text style={styles.text}>Loading...</Text>

</View>

);
}

return (

<FlatList

style={styles.container}

data={data}

renderItem={({ item }) => (

<Text style={styles.item}>{item.title}</Text>

)}

keyExtractor={item => item.id.toString()}

/>

);

}

}

export default MyComponent;
In this illustration, the component uses Axios in the componentDidMount lifecycle method to retrieve data from the https://jsonplaceholder.typicode.com/posts API and stores it in the component’s state. The displayed data is then shown using a FlatList component in the render method.
The data prop that the ‘FlatList’ component accepts is set to the fetched data kept in the component’s state. An item from the data array is passed to the renderItem prop, which then functions to return a component to render for that item. In order to optimise rendering, FlatList uses the keyExtractor prop, a function that extracts a single key for each item from the data array.
Advanced Features of React Native
Animations in React Native
Animations in React Native can be implemented using the ‘Animated’ module. The Animated module provides a way to animate values over time using techniques such as interpolation, spring, and decay. Here is an example of using Animated to animate the position of a view:
import React, { Component } from 'react';

import { View, Animated, TouchableWithoutFeedback, StyleSheet } from 'react-native';

const styles = StyleSheet.create({

container: {

flex: 1,

alignItems: 'center',
justifyContent: 'center'

},

 box: {

width: 150,

height: 150,

backgroundColor: 'tomato'

}

});

class MyComponent extends Component {
constructor(props) {

super(props);

this.state = {
animation: new Animated.Value(0)

};

}

startAnimation = () => {

Animated.timing(this.state.animation, {

toValue: 300,

duration: 500

}).start();

}

render() {

const animatedStyles = {
transform: [

{ translateY: this.state.animation }

 ]

};

return (

<View style={styles.container}>

<TouchableWithoutFeedback onPress={this.startAnimation}>

<Animated.View style={[styles.box, animatedStyles]} />

</TouchableWithoutFeedback>

</View>

);

}
}

export default MyComponent;
In this illustration, the component’s state contains an Animated.Value that is used to animate a view’s position. The startAnimation function is called when the user taps the view, and it animates the value of the animation state for 500 milliseconds. The Animated.View component is then rendered using a transform style that moves the view along the Y-axis using the animation value.
The value of the animation state is animated using the Animated.timing method. The animation will animate the animation value from its current value to 300 over the specified duration because the toValue prop is set to 300.
This is merely a simple illustration; the Animated module offers many more sophisticated animation techniques.
Push Notifications in React Native
React Native’s Animated module can be used to implement animations. Using methods like interpolation, spring, and decay, the Animated module offers a way to animate values over time. Here is an illustration of how to use animated to animate a view’s position:
A library like react-native-firebase or react-native-onesignal can be used to implement push notifications in React Native. These libraries give you a quick and effective way to control push notifications in your React Native application. Using react-native-firebase, the following example shows how to configure push notifications in a React Native app:
- Get the react-native-firebase library installed:
npm install @react-native-firebase/app
npm install @react-native-firebase/messaging
- Link the library to your app:
import messaging from '@react-native-firebase/messaging';

// Request permission to show notifications

async componentDidMount() {
const { status } = await messaging().requestPermission();

console.log('Notification permission status:', status);

}

// Listen for messages received in foreground

messaging().onMessage(async remoteMessage => {

console.log('Message received in foreground:', remoteMessage);

});
- A push notification service like Firebase Cloud Messaging can be used to send a push notification to your app (FCM).
This is merely a simple illustration; push notification management in a React Native app can incorporate many more sophisticated features. If you require more complex functionality, such as sending push notifications to particular users or scheduling notifications to be sent at a specific time, you might also need to set up a backend service or use a third-party service to manage push notifications.
Accessing Native Features using React Native Modules
Using React Native modules, you can access native functionality in your app. A React Native module serves as a connection point between your React Native app and the underlying native platform. React Native modules can be used to gain access to device-specific APIs such as camera, geolocation, and others.
Here is an example of how to use the react-native-camera module to access the camera in a React Native app:
- Install the react-native-camera library by following these steps:
npm install react-native-camera
- Connect the native modules to your React Native app by doing the following:
react-native link react-native-camera
- In your React Native app, add the Camera component as follows:
import { RNCamera } from 'react-native-camera';

<RNCamera

ref={ref => {

this.camera = ref;

}}

style={styles.preview}

type={RNCamera.Constants.Type.back}

flashMode={RNCamera.Constants.FlashMode.on}

androidCameraPermissionOptions={{

title: 'Permission to use camera',

message: 'We need your permission to use your camera',

buttonPositive: 'Ok',

buttonNegative: 'Cancel',

}}

androidRecordAudioPermissionOptions={{

title: 'Permission to use audio recording',

message: 'We need your permission to use your audio',

buttonPositive: 'Ok',

buttonNegative: 'Cancel',

}}

>

<Text style={styles.capture} onPress={takePicture.bind(this)}>

[CAPTURE]

</Text>

</RNCamera>
This is merely one example; there are numerous additional native modules readily available for a range of purposes, including geolocation, image picker, and more. In addition, you can develop your own modules to access native features that aren’t covered by pre-existing ones.
Deploying Your React Native App
Building and Deploying to iOS and Android
Building and deploying a React Native app to iOS and Android requires a few steps, but the process is relatively straightforward once you have set up your development environment.
Here are the general steps for building and deploying a React Native app:
- Building the app:
react-native run-ios
react-native run-android
Deploying to iOS:
- Open the Xcode project located in the ios folder of your React Native app
- Connect your iOS device to your Mac
- Select the device in Xcode and click “Run”
Deploying to Android:
- Connect your Android device to your computer
- Enable Developer mode on your device
- Run the following command:
react-native run-android
Note: You may need to configure the Android emulator or your physical Android device for deployment, depending on your setup. Additionally, for both iOS and Android, you may need to sign your app and create a distribution build for deployment to app stores. This process can vary depending on the platform and the specific requirements of the app store you are deploying to.
Deploying to App Stores
To deploy a React Native app to the Apple App Store or Google Play Store, you need to follow a specific set of steps that are required by each app store. Here are the general steps for deploying a React Native app to each store:
Deploying to the Apple App Store:
- Create an Apple Developer account
- Create an App ID and sign your app with an Apple-issued certificate
- Create a distribution provisioning profile for your app
- Archive and export your app using Xcode
- Submit your app for review using the iTunes Connect portal
Deploying to the Google Play Store:
- Create a Google Play Developer account
- Sign your app using a keystore
- Build and upload a signed APK to the Google Play Developer Console
- Fill out the app’s listing information, including description, screenshots, and pricing
- Publish your app to the Google Play Store
Note: The exact steps for deploying to each app store can vary depending on the platform and the specific requirements of each app store. It is recommended to follow the official documentation provided by Apple and Google for the most up-to-date information on deploying your app.
Conclusion
Let’s see the recap of what you have learned in this react native tutorial
In this lesson, you have studied React Native and how it differs from creating native apps. Additionally, you have also learned how to set up a development environment, create a React Native project, use components, props, and state, style, work with JSX, fetch data from APIs, implement animations, push notifications, and access native features, as well as build and deploy an app to iOS and Android as well as publish it to app stores.
To summarise, React Native is a well-known framework for developing cross-platform mobile apps with JavaScript and React. It enables developers to create apps for both iOS and Android with a single codebase and gives them access to native features and APIs via React Native modules. Setting up the development environment, creating a project, working with components and APIs, implementing animations and notifications, and deploying to app stores are all steps in building and deploying a React Native app.
Our suggestions for further learning
Here are some suggestions for further learning about React Native:
Official React Native documentation: The official React Native documentation is a great place to start learning about the framework. It provides comprehensive guides and tutorials on how to build apps using React Native.
React Native courses and tutorials: There are many online courses and tutorials available that cover the basics and advanced concepts of React Native. Some popular platforms for learning include Udemy, Coursera, and Pluralsight.
Open-source projects: Contributing to open-source React Native projects is a great way to gain hands-on experience with the framework and learn from other experienced developers.
Building real-world apps: Building real-world apps is the best way to solidify your knowledge of React Native and learn how to use it in practical scenarios. You can start by building simple apps and gradually increase the complexity as you gain more experience.
Attend React Native meetups and conferences: Attending React Native meetups, and conferences is a great way to stay up-to-date with the latest developments in the framework and connect with other React Native developers.
Read blogs and articles: There are many blogs and articles available online that provide insights and tips on React Native development. Stay up-to-date with the latest developments by reading these resources regularly.
This brings us to the end of this article, where we have learned React Native. I hope you have a clear understanding of everything that has been shared with you in this blog. If you have additional questions or suggestions, please leave a comment below, and we will get back to you as soon as possible.
If you come across any questions, feel free to ask all questions in the comments section of the “React Native tutorial,” and our team will be glad to answer.