Advanced DevOps Certification Training with G ...
- 24k Enrolled Learners
- Weekend
- Live Class
(7990)


 Copy Link!
Every Kubernetes cluster needs two things – one, a way to expose the service deployed on the container and, two, a way to balance the load/traffic on these deployed services. In this blog, we’re going to discuss how Kubernetes Ingress helps us in achieving these.
If you wish to master Kubernetes in-depth, Edureka’s Kubernetes Certification would be your go-to option.
Before understanding what Kubernetes Ingress is, let’s have an overview of what is Kubernetes. Kubernetes is an open source platform that automates container operations such as deploying containers, scaling up, scaling down of containers, load balancing etc. You can just cluster the hosts running containers and Kubernetes will help you easily and efficiently manage these clusters. Have a look at this blog for a detailed explanation on what is Kubernetes.
Once you’ve deployed your application on the container, you need a way to expose it outside the cluster to get the external traffic, or in simpler words expose it to the internet so the world can access it.
There are three ways to get this done:
ClusterIP is the default Kubernetes service type. Using this service type, a Global IP called ClusterIP is assigned to that cluster which is alive till when the cluster is alive. Using this IP, we can access all the services associated with that cluster. So basically, we use this type of service when we want to expose a service to other pods only within the same cluster. This service is accessed using Kubernetes proxy.
When using service type as NodePort, a port is opened on every node that is part of the cluster and the application can be deployed on that node or the outside traffic is routed to that NodePort even if the application is not running on that node. We can either explicitly mention the port that is to be activated or the Kubernetes assigns a NodePort by default.
Using service type as LoadBalancer, it automatically creates an external load balancer that points to a Kubernetes cluster, this external load balancer is associated with a specific IP address and routes external traffic to the Kubernetes service in the cluster. Implementation of load balancer depends on your cloud service provider.
Kubernetes ingress is not a service but a collection of routing rules that govern how the external users access services running on the Kubernetes cluster. Ingress sits in front of the cluster and acts as a smart router. This is always implemented using a third party called a proxy. Traffic routing is done by an ingress controller.
I’m sure you guys are wondering what an ingress controller is but don’t worry as that’s the topic we’re going to discuss in detail further in this blog but first let’s see what brings us to the needs of Kubernetes Ingress.
When you have an application deployed on your cluster, you obviously want to expose it to the internet to get inbound traffic otherwise what is the deployment for, right? Kubernetes Ingress is a built-in load balancing framework for routing external traffic.
There are two main reasons why we use Kubernetes Ingress:
By now you would have understood that Kubernetes Ingress is a collection of routing rules that govern how external users access services running on the Kubernetes cluster.
Functionalities provided by Kubernetes Ingress:
Let’s get further into the details. Ingress is split into two main parts – Ingress resources and ingress controller
Routing using ingress is not standardized i.e. different ingress controller have different semantics (different ways of routing).
At the end of the day, you need to build your own ingress controller based on your requirements and implementations. Ingress is the most flexible and configurable routing feature available.
The first thing that’s needed to deploy any kind of service/application on Kubernetes, is a cluster. Every cluster consists of one master and single or multiple nodes depending on the requirement. In this demo, I’m going to show you how to create a Kubernetes cluster on AWS.
Step 1: Create an instance, name it kubectl. We’re going to deploy the cluster using this instance. This instance only has the kubectl tool installed that will interact with the master, it does not have Kubernetes installed on it.
Note: We have three services in AWS that we’ll be using here – s3 bucket which stores all the files, EC2 which is used to create an instance and deploy the service and IAM which is used to configure permissions. These three pictures have no clue about each other’s existence and hence Roles come into the picture.
Step 2: Create a Role in the IAM section

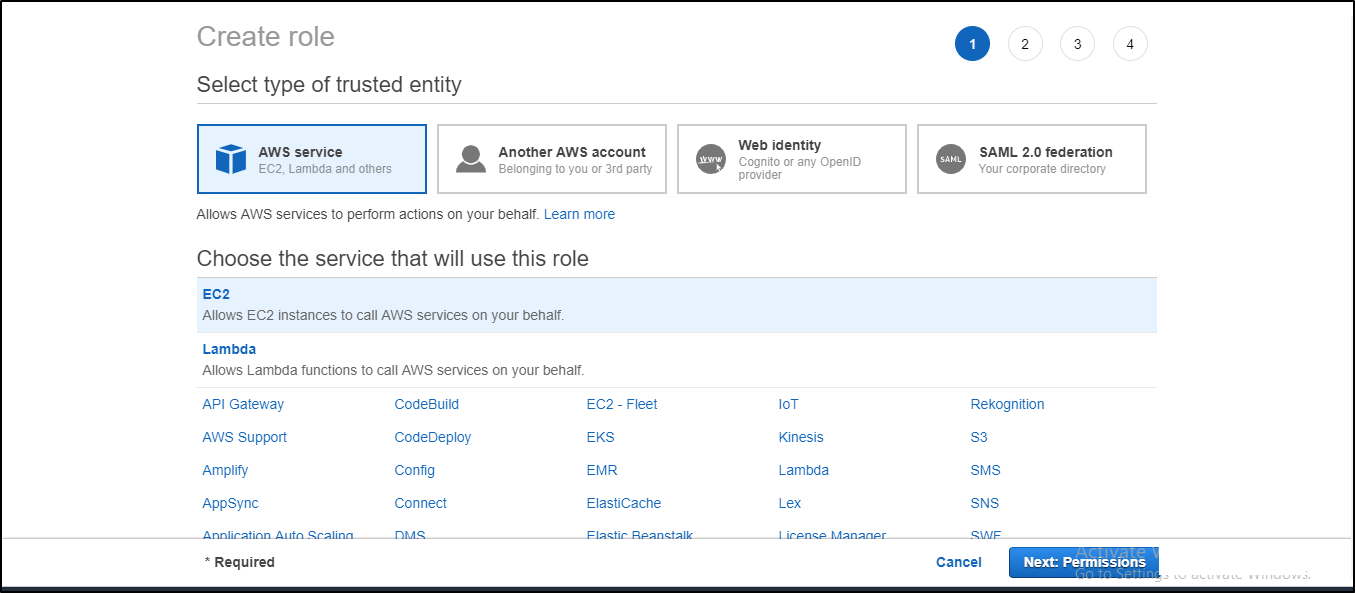
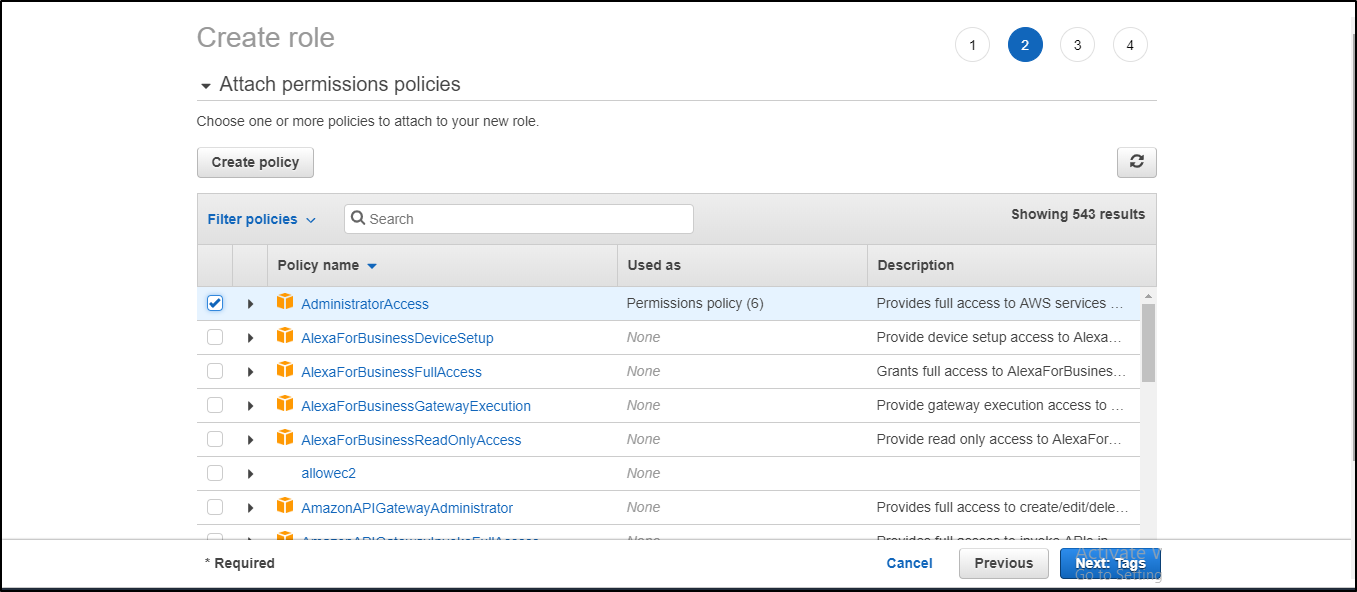
Attach the appropriate policy to your Role (for this example admin access is given)
Next, it’ll ask you to add tags which are optional. In my case, I haven’t attached any tags.
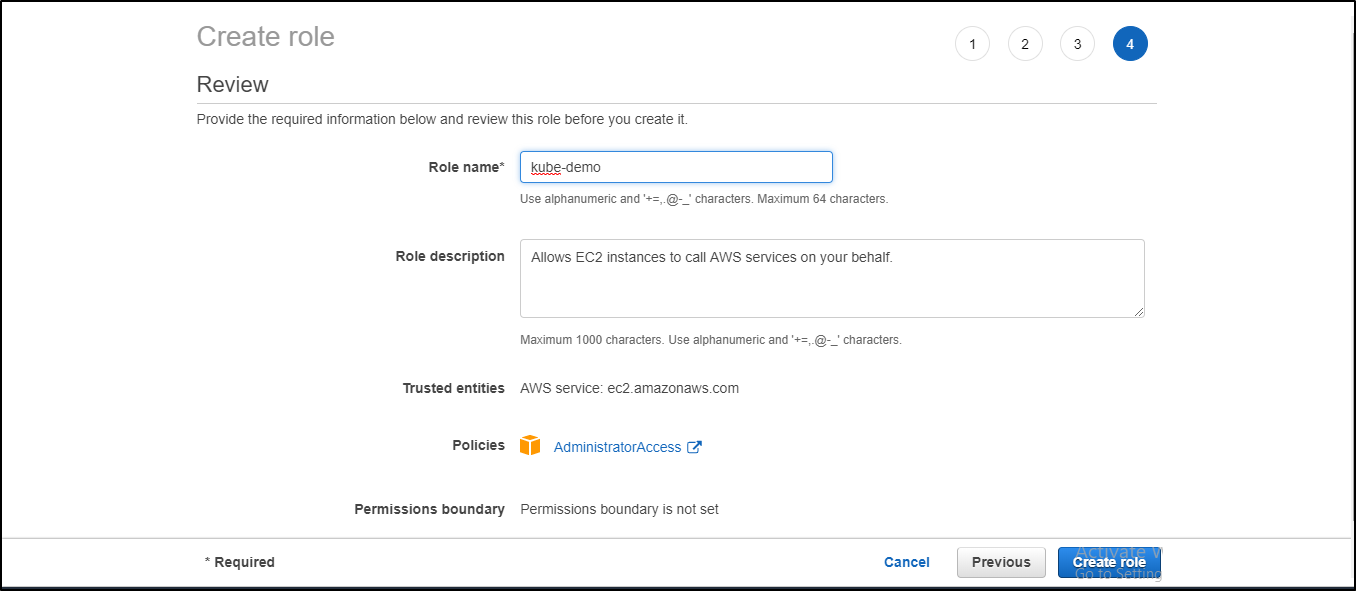
Give your Role a name and review the policies assigned to it and then press Create role.
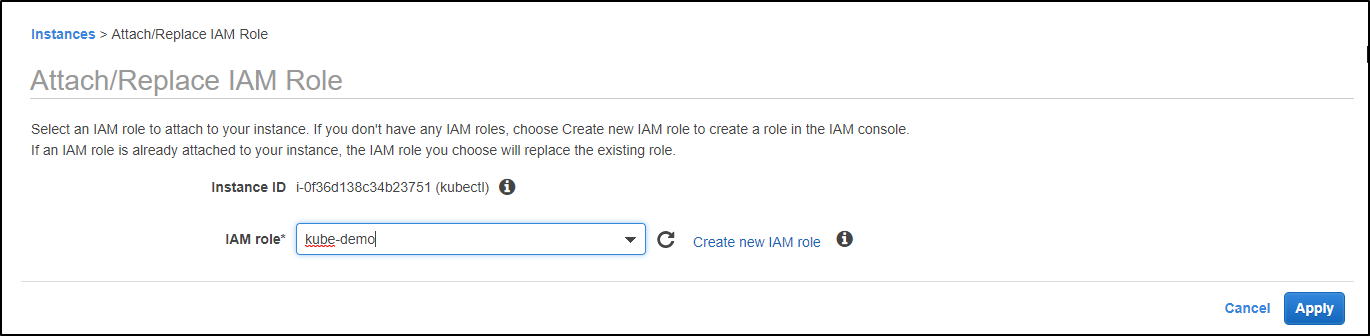
Step 3: Attach the role to the instance. Go to instance settings -> Attach/Replace IAM role -> attach the role you’ve created and then click on Apply.
Step 4: Once you’ve created the instance and attached the role, open the command emulator i.e. cmder or putty and connect to the AWS instance. I’ll be using cmder for this demo. Once you’ve connected to the instance, update the repository and install aws-cli using the following commands:
$ sudo apt-get install
$ sudo apt-get install awscli
Step 5: Install and set up kubectl using the following commands:
$ sudo apt-get update && sudo apt-get install -y apt-transport-https
$ curl -s https://packages.cloud.google.com/apt/doc/apt-key.gpg | sudo apt-key add -
$ echo "deb http://apt.kubernetes.io/ kubernetes-xenial main" | sudo tee -a /etc/apt/sources.list.d/kubernetes.list
$ sudo apt-get update
$ sudo apt-get install -y kubectl
Step 6: Install Kops on the system using the following commands:
$ wget https://github.com/kubernetes/kops/releases/download/1.10.0/kops-linux-amd64
$ chmod +x kops-linux-amd64
$ mv kops-linux-amd64 /usr/local/bin/kops
Step 7: With Kops installed, you must configure a domain for your cluster to access it from outside. Create a hosted zone for it
Services-> Route53-> Hosted zones-> Create Hosted Zone

Add a domain name for your cluster, change the type from Public Hosted Zone to Private Hosted Zone for Amazon VPC and copy your instance VPC ID from the instance page to the VPC ID column and add the region you want to create your hosted zone in.
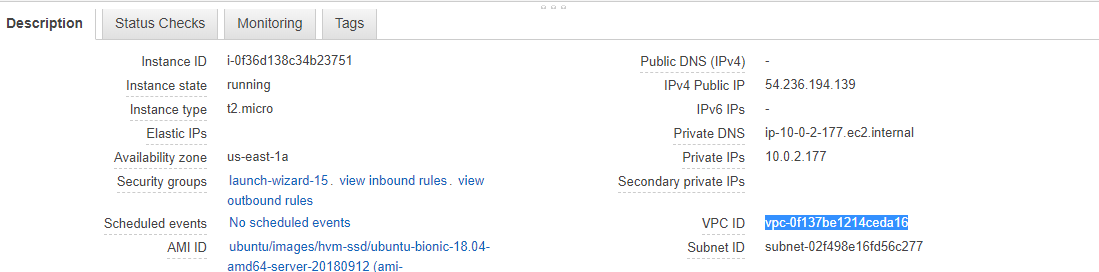
Copy the VPC ID
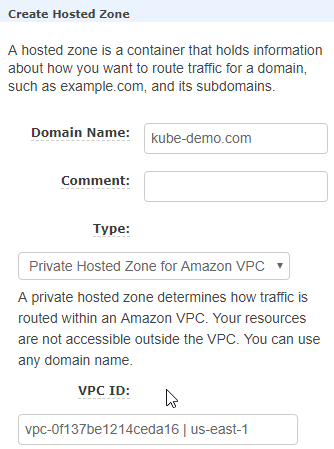
The above screenshot shows where to add Domain name and VPC ID
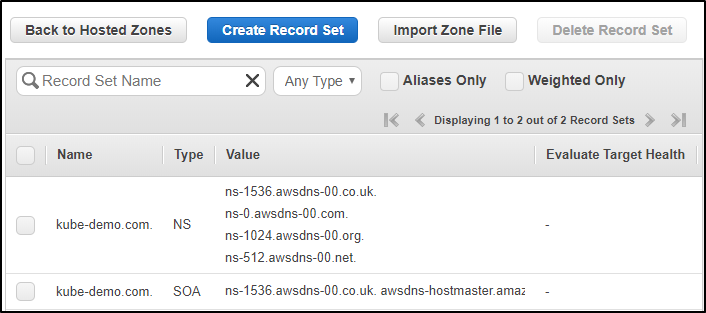
You can now see your Hosted Zone is created.
Step 8: Create a bucket as the same name as domain name using the following command:
$ aws s3 mb s3://kube-demo.com
Once you’ve created the bucket, execute the following command:
$ export KOPS_STATE_STORE=s3://kube-demo.comStep 9: Before you create the cluster, you’ll have to create SSH public key.
$ ssh-keygenEnter file where you want your key pair to be saved and create a password to access the ssh public key. In this case, I’ve chosen the default location and used no password.
Step 10: Now that you’ve created the SSH key, create the cluster using the following command:
$ kops create cluster –cloud=aws –zones=us-east-1a –name=useast1.kube-demo.com –dns-zone=kube-demo.com –-dns private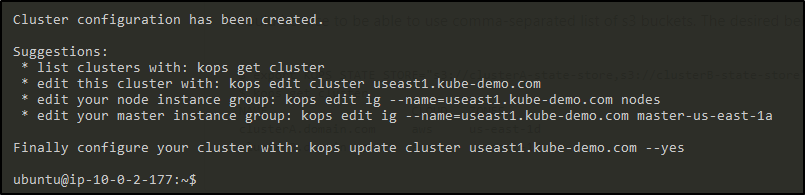
And then update the cluster
$ kops update cluster useast1.kube-demo.comThis will create the resources needed for your cluster to run. It will create a master and two node instances.
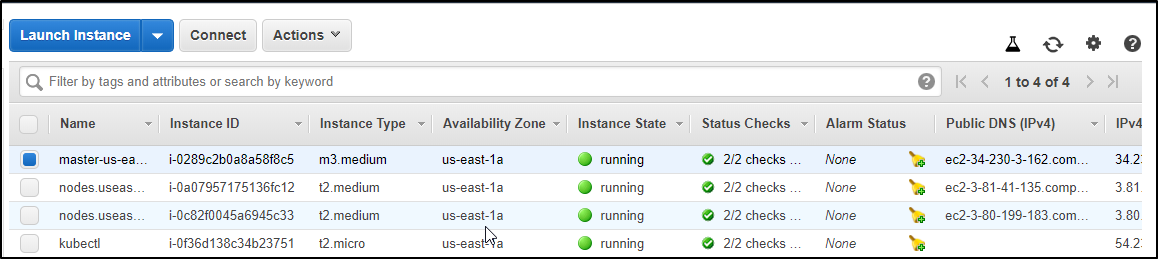
Now when you check your instances, you would see three new instances that would have got created. One of them will be your master node and the other two your worker nodes and TADA! Your cluster is created.
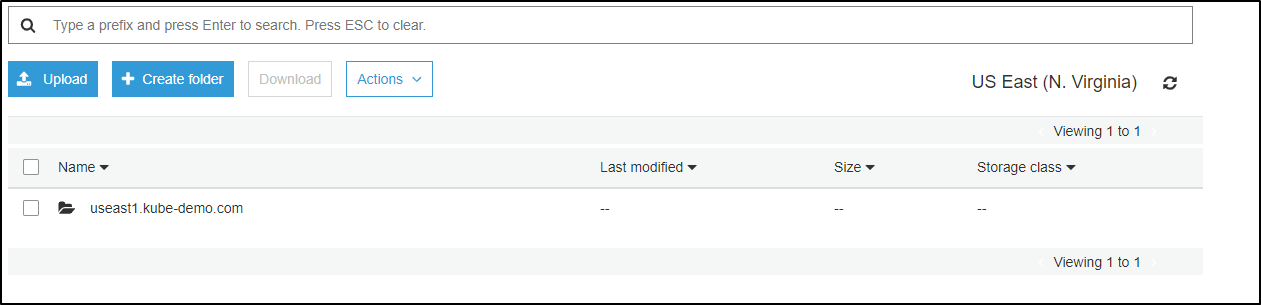
Your s3 bucket will now have some folder in it, which is basically your cluster configuration file.
Step 11: Now if you ssh into your master node and do a kubectl get nodes, you should find your nodes in the ready state.
$ ssh  -i .ssh/id_rsa admin@ipv4-public-ip-of-master
$ kubectl get nodes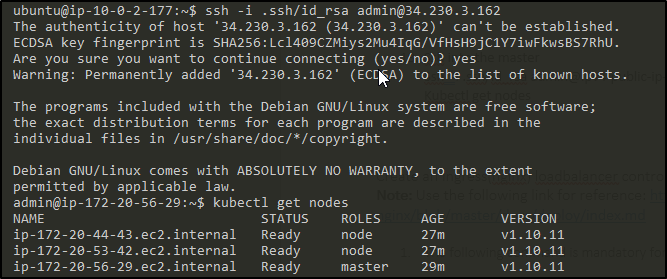
Step 1: The following command is mandatory for all configurations
$ kubectl apply -f https://raw.githubusercontent.com/kubernetes/ingress-nginx/master/deploy/mandatory.yaml
Step 2: Now the next command depends upon the environment you’re using your cluster in.
For this example we’re going to use AWS L4 configuration:
$ kubectl apply -f https://raw.githubusercontent.com/kubernetes/ingress-nginx/master/deploy/provider/aws/service-l4.yaml
$ kubectl apply -f https://raw.githubusercontent.com/kubernetes/ingress-nginx/master/deploy/provider/aws/patch-configmap-l4.yaml

Step 3: Check your pods to see all the Ingress pods are up and running
$ kubectl get pods --all-namespaces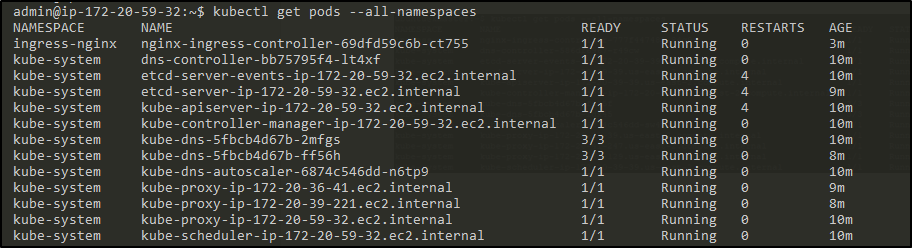
Step 4: Check the services to verify Ingress service is working
$ kubectl get svc --all-namspaces
Step 5: Now create a deployment like we did before
Here we’re using an httpd deployment as an example
Step 6: Create an httpd clusterip service
$ kubectl create service clusterip httpd --tcp=80:80

Step 7: Curl the service IP to make sure it is attached to the pods
$ curl <Cluster IP address>
Step 8: Now, create an ingress rule for your service so you can access the service at /test to route the external traffic.
$ vi ingress.yamlapiVersion: extensions/v1beta1
kind: Ingress
metadata:
name: test-ing
annotations:
nginx.ingress.kubernetes.io/rewrite-target: /
spec:
rules:
- http:
paths:
- path: /test
backend:
serviceName: httpd
servicePort: 80Step 9: Deploy the Ingress rule
$ kubectl apply -f ingress.yaml


Step 10: Now copy the Ingress service external IP and add /test to it in your browser to verify

This exact same thing can be done on other cloud platforms as well. I have used this Installation guide for my environment setup which also has a detailed explanation of the installations on other platforms.
Of course, this was a small demo of routing traffic but if implemented well, it can do wonders. Games like Pokémon Go are deployed on Kubernetes and uses Ingress. I’m sure all of you must have heard, if not played the highly trending game, Pokémon Go. Now the traffic shot up beyond the company’s expectations and the only reason they were able to handle so much traffic because of Kubernetes.
So with this, we come to the end of this Kubernetes Ingress blog. I hope you’ve found this informative. Doubts are most welcome in the comment section.
To learn more about Kubernetes sign-up for the Docker and Kubernetes training that covers a wide breadth of topics starting from the introduction to a hands-on demo of deploying, exposing, scaling and updating applications on Kubernetes, federations, auditing and debugging kubernetes along with security best practices.


 Thank you for registering Join Edureka Meetup community for 100+ Free Webinars each month JOIN MEETUP GROUP