


Jenkins is one of the most important tools in DevOps. Jenkins is used in the Continuous Integration stage of DevOps. In this blog, I am going to talk about the Jenkins Master and Slave architecture. The pointers that I will cover are as follows:
- What is Jenkins?
- Jenkins Architecture
- How does Jenkins Master Slave architecture work?
- Setting up Slaves with Jenkins Master
So let us begin with our first topic.
What is Jenkins?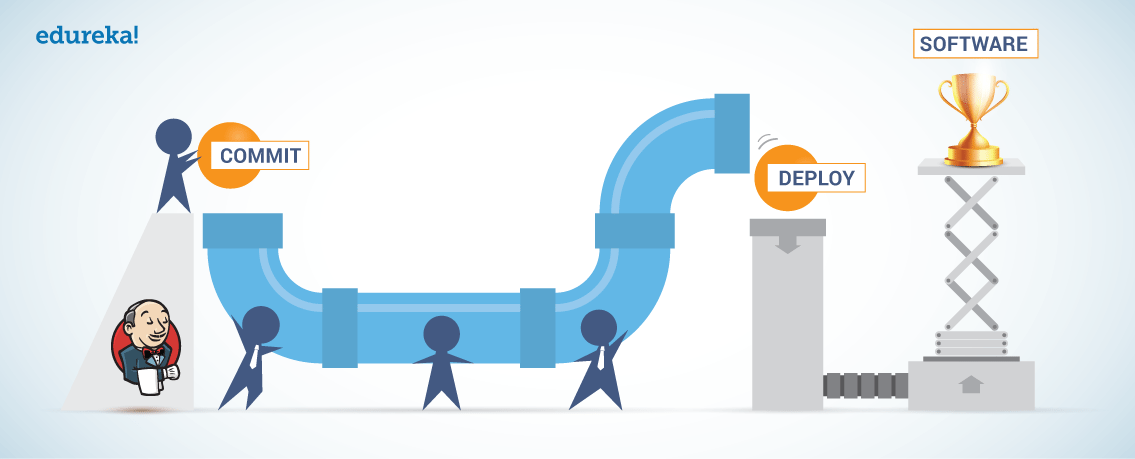

Jenkins is an open-source automation tool written in Java with plugins built for Continuous Integration purposes. Jenkins is used to build and test your software projects continuously making it easier for developers to integrate changes to the project, and making it easier for users to obtain a fresh build. It also allows you to continuously deliver your software by integrating with a large number of testing and deployment technologies.
With Jenkins, organizations can accelerate the software development process through automation. Jenkins integrates development life-cycle processes of all kinds, including build, document, test, package, stage, deploy, static analysis and much more.
Jenkins achieves Continuous Integration with the help of plugins. Plugins allow the integration of Various DevOps stages. If you want to integrate a particular tool, you need to install the plugins for that tool. For example Git, Maven 2 project, Amazon EC2, HTML publisher, etc.
Advantages of Jenkins include:
- It is an open-source tool with great community support.
- Too easy to install.
- It has 1000+ plugins to ease your work. If a plugin does not exist, you can code it and share it with the community.
- It is free of cost.
- It is built with Java and hence, it is portable to all the major platforms.
Jenkins Architecture
Let us have a look at the Jenkins Architecture below diagram depicts the same.

This single Jenkins server was not enough to meet certain requirements like:
Sometimes you might need several different environments to test your builds. This cannot be done by a single Jenkins server.
If larger and heavier projects get built on a regular basis then a single Jenkins server cannot simply handle the entire load.
To address the above-stated needs, Jenkins distributed architecture came into the picture.
Jenkins Distributed Architecture
Jenkins uses a Master-Slave architecture to manage distributed builds. In this architecture, Master and Slave communicate through TCP/IP protocol.
Jenkins Master
Your main Jenkins server is the Master. The Master’s job is to handle:
Scheduling build jobs.
Dispatching builds to the slaves for the actual execution.
Monitor the slaves (possibly taking them online and offline as required).
Recording and presenting the build results.
A Master instance of Jenkins can also execute build jobs directly.
Jenkins Slave
A Slave is a Java executable that runs on a remote machine. Following are the characteristics of Jenkins Slaves:
It hears requests from the Jenkins Master instance.
Slaves can run on a variety of operating systems.
The job of a Slave is to do as they are told to, which involves executing build jobs dispatched by the Master.
You can configure a project to always run on a particular Slave machine or a particular type of Slave machine, or simply let Jenkins pick the next available Slave.
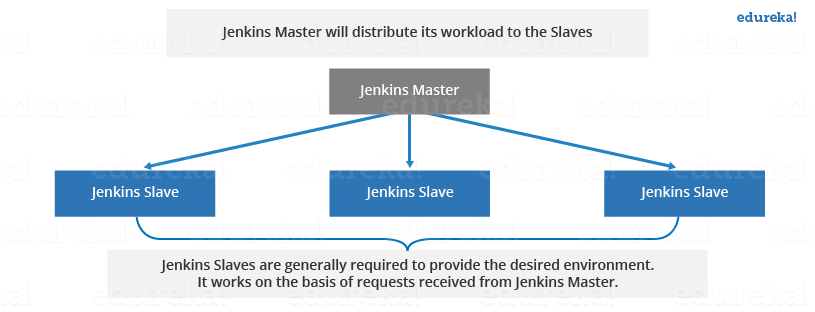
The diagram below is self-explanatory. It consists of a Jenkins Master which is managing three Jenkins Slave.

How Jenkins Master and Slave Architecture works?
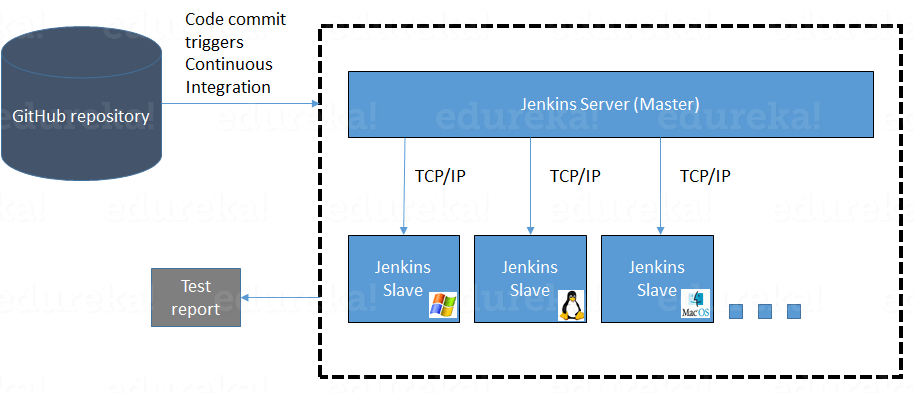
Now let us look at an example in which we use Jenkins for testing in different environments like Ubuntu, MAC, Windows, etc.
The diagram below represents the same:

The above image represents the following functions:
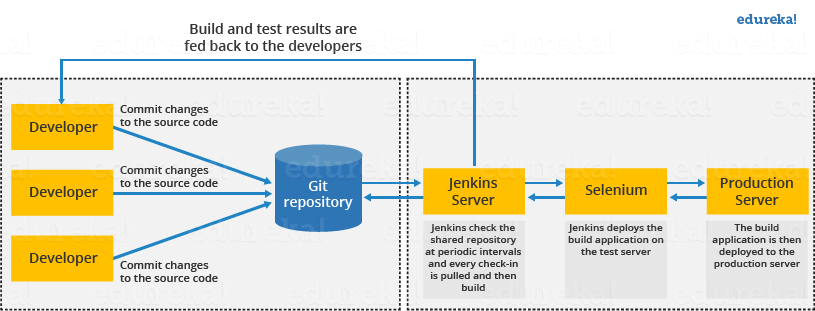
Jenkins checks the Git repository at periodic intervals for any changes made in the source code.
Each builds requires a different testing environment which is not possible for a single Jenkins server. In order to perform testing in different environments, Jenkins uses various Slaves as shown in the diagram.
Jenkins Master requests these Slaves to perform testing and to generate test reports.
How to setup Jenkins Master and Slaves?
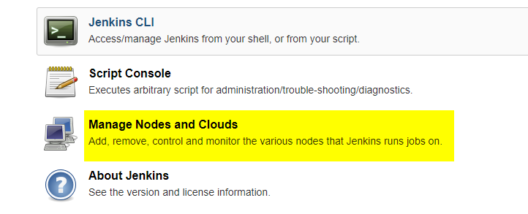
- Go to the Manage Jenkins section and scroll down to the section of Manage Nodes.


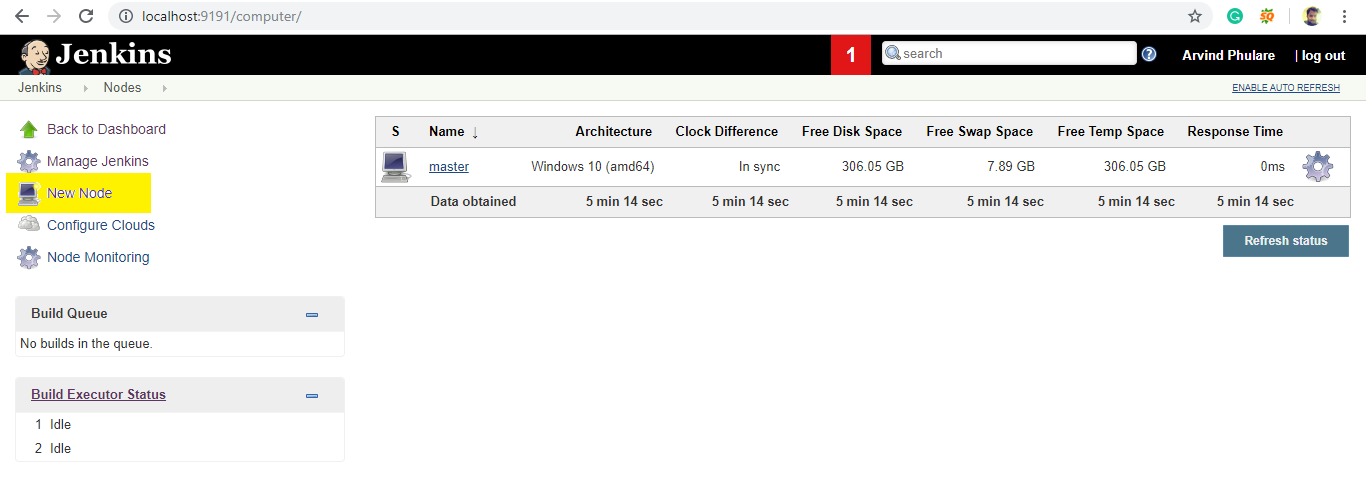
2. Click on New Node


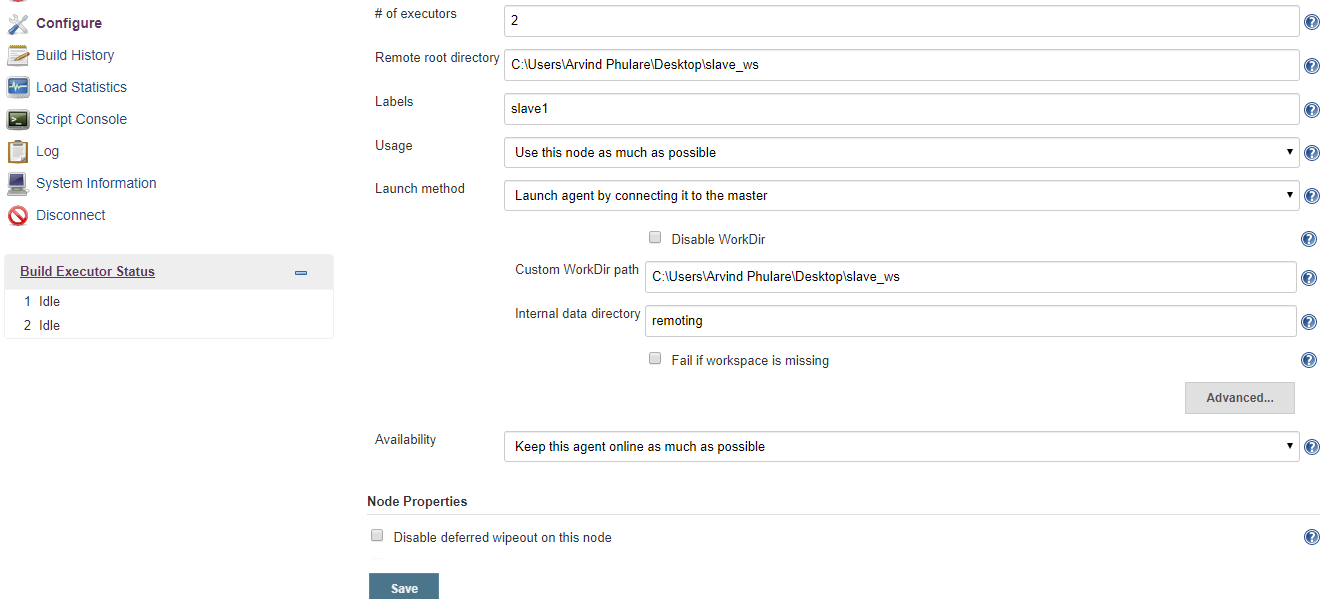

Once you complete the above steps, the new node machine will initially be in an offline state but will come online if all the settings in the previous screen were entered correctly. One can at any time make the node slave machine offline if required.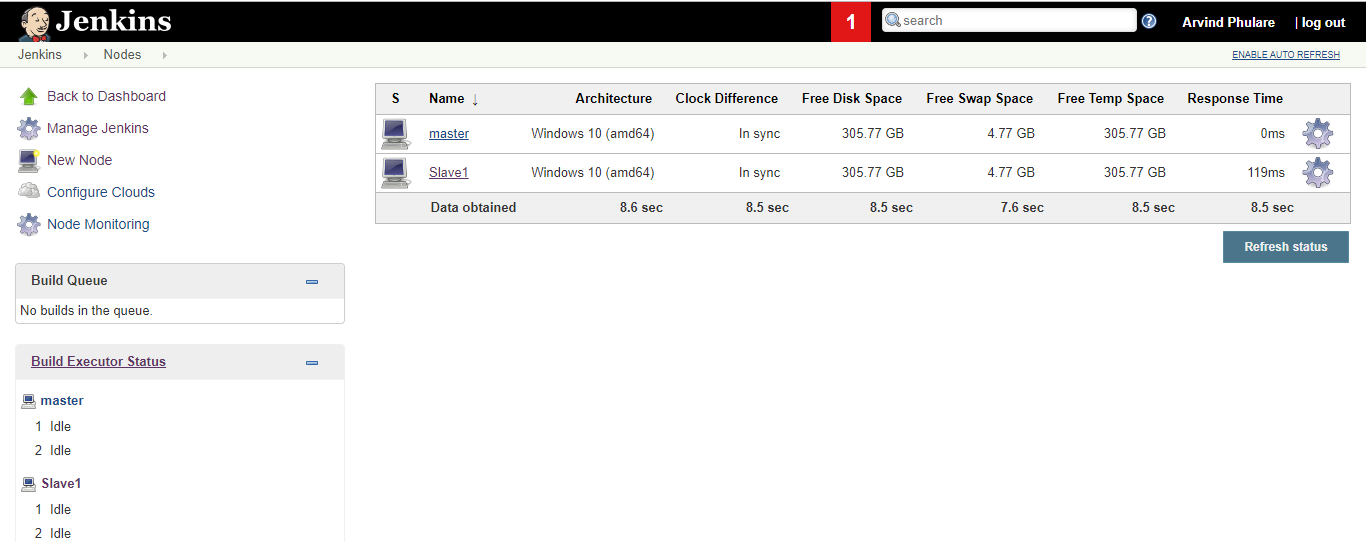

5. Now since your slave is up and running, lets execute a job on slave. For that I already have an existing job and I will run this job on this slave. Open this job and click on configure. Now here in the General section, click on “Restrict where this project can be run”. Here in Label Expression, enter the name of the slave and save it. Now click on Build now and see the output of this job. Everything is correct you will see the output as Success.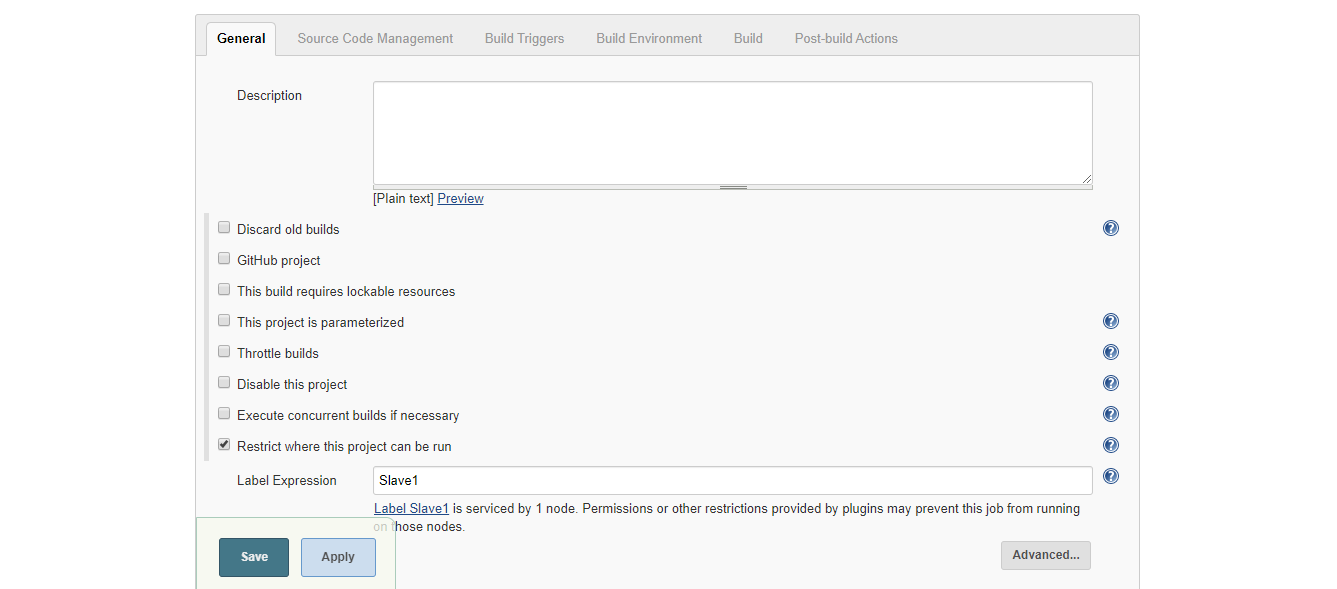

So with this, we have come to the end of this blog on Jenkins Master and Slave Architecture. I hope you have understood all the concepts explained here.
Now that you have understood what Jenkins Master and Slave Architecture is, check out this DevOps Course by Edureka, a trusted online learning company with a network of more than 250,000 satisfied learners spread across the globe. The Edureka DevOps Certification Training course helps learners to understand what is DevOps and gain expertise in various DevOps processes and tools such as Puppet, Jenkins, Nagios, Ansible, Chef, Saltstack and GIT for automating multiple steps in SDLC.
Got a question for us? Please mention it in the comments section and we will get back to you