


Before going through this IoT Tutorial blog, I would like to draw your attention a bit towards how IoT is trying to revolutionize the world. IoT is creating a giant network where all the devices are connected to each other and providing them with the capability to interact with each other. This is driving the automation to a next level where devices will communicate with each other and make decisions on their own without any human interventions.
Following are a few stats that reflect the growth in the demand for IoT certification training quite accurately:
According to the Gartner report, by 2020 connected devices across all technologies will reach to 20.6 billion.
As per the Cisco report, IoT will generate $14.4 trillion in value across all industries in the next decade.
Unknowingly, IoT applications are becoming an important aspect of our life. In this IoT tutorial we will be covering:
You may go through this recording of IOT Tutorial where our instructor has explained the topics in a detailed manner with examples that will help you to understand this concept better.
IoT Tutorial for Beginners | Internet of Things (IoT) | IoT Training | IoT Technology | Edureka
IoT Tutorial: Birth of IoT
Let me start this IoT tutorial by introducing the person who coined the term “Internet of Things“. The term “The Internet of Things” (IoT) was coined by Kevin Ashton in a presentation to Proctor & Gamble in 1999. He is a co-founder of MIT’s Auto-ID Lab. He pioneered RFID (used in bar code detector) for the supply-chain management domain. He also started Zensi, a company that makes energy sensing and monitoring technology.
So, let me first take you through a quote by Kevin Ashton, which he wrote in 2009 for RFID journal. This will help you in understanding IoT from its core.
If we had computers that knew everything there was to know about things—using data they gathered without any help from us—we would be able to track and count everything, and greatly reduce waste, loss and cost. We would know when things needed replacing, repairing or recalling, and whether they were fresh or past their best.
We need to empower computers with their own means of gathering information, so they can see, hear and smell the world for themselves, in all its random glory.
The above Kevin’s quote would have given you an idea about the ideologies behind the development of IoT. Let’s now try to further simplify this term and understand IoT fundamentally. After this, we will be moving forward and looking towards the benefits of IoT.
IoT Tutorial: Introduction to IoT
The ‘Thing’ in IoT can be any device with any kind of built-in-sensors with the ability to collect and transfer data over a network without manual intervention. The embedded technology in the object helps them to interact with internal states and the external environment, which in turn helps in decisions making process.
IOT Tutorial: What is IoT?
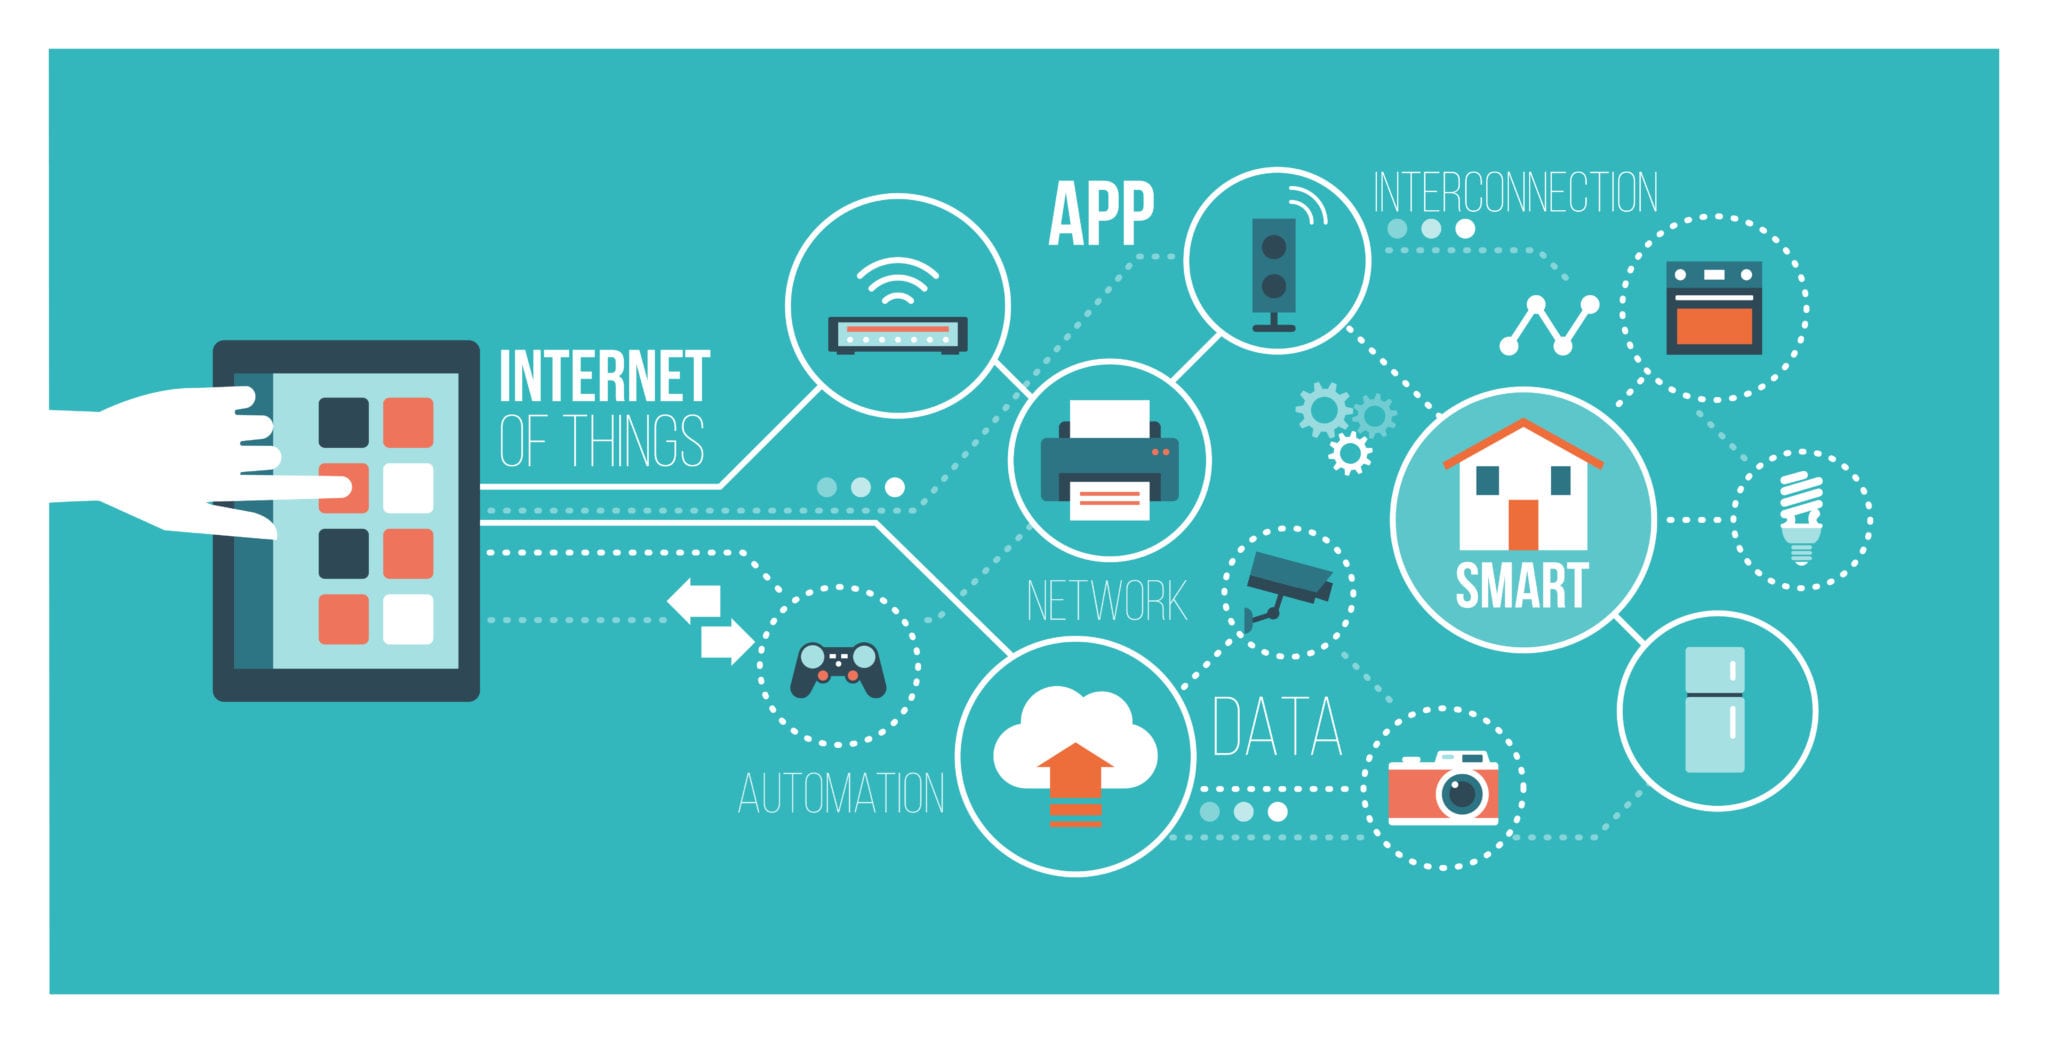
In a nutshell, IoT is a concept that connects all the devices to the internet and let them communicate with each other over the internet. IoT is a giant network of connected devices – all of which gather and share data about how they are used and the environments in which they are operated.
By doing so, each of your devices will be learning from the experience of other devices, as humans do. IoT is trying to expand the interdependence in human- i.e interact, contribute and collaborate to things. I know this sounds a bit complicated, let’s understand this with an example.
A developer submits the application with a document containing the standards, logic, errors & exceptions handled by him to the tester. Again, if there are any issues Tester communicates it back to the Developer. It takes multiple iterations & in this manner a smart application is created.
Similarly, a room temperature sensor gathers the data and send it across the network, which is then used by multiple device sensors to adjust their temperatures accordingly. For example, refrigerator’s sensor can gather the data regarding the outside temperature and accordingly adjust the refrigerator’s temperature. Similarly, your air conditioners can also adjust its temperature accordingly. This is how devices can interact, contribute & collaborate.
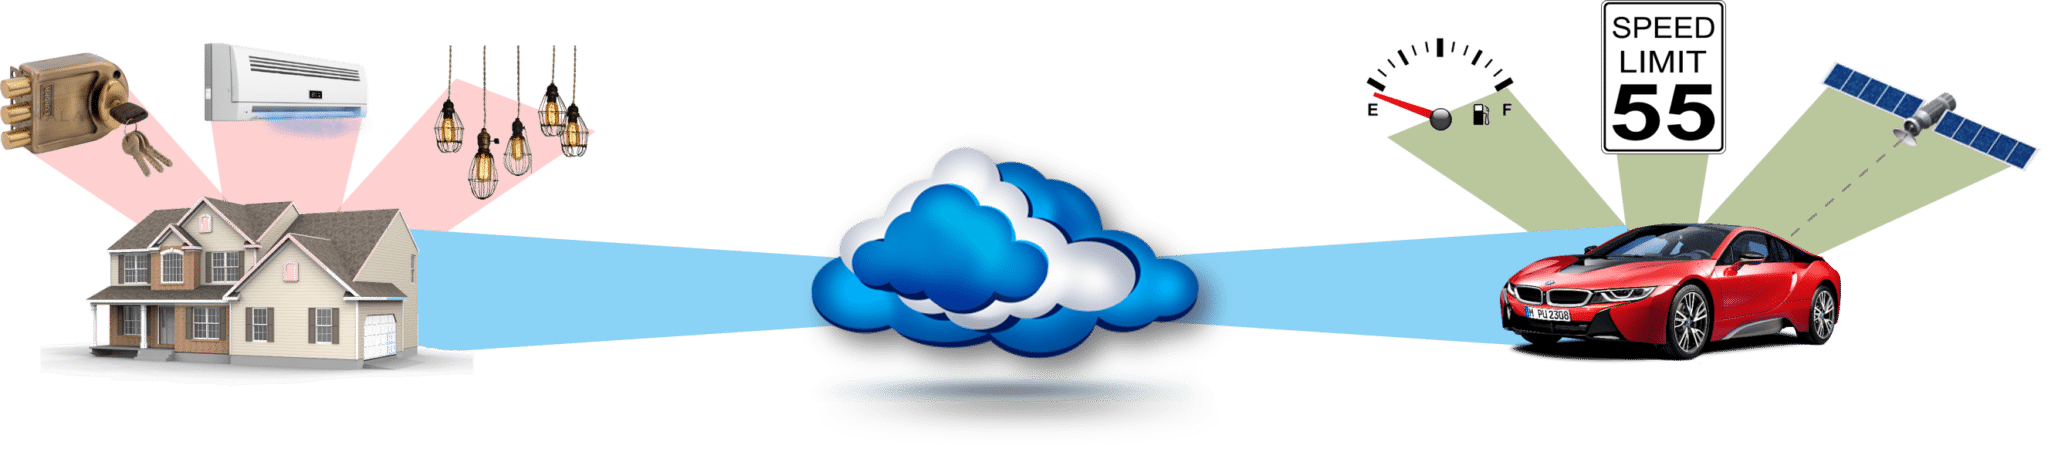
IOT Tutorial: Connecting multiple devices
I hope that now you would have got an idea of what IoT really is. Now advancing in our IoT tutorial, we will discuss the benefits of IoT and the hardware used in IoT application.
IoT Tutorial: Benefits of IoT
Since IoT allows devices to be controlled remotely across the internet, thus it created opportunities to directly connect & integrate the physical world to the computer-based systems using sensors and internet. The interconnection of these multiple embedded devices will be resulting in automation in nearly all fields and also enabling advanced applications. This is resulting in improved accuracy, efficiency and economic benefit with reduced human intervention. It encompasses technologies such as smart grids, smart homes, intelligent transportation and smart cities. The major benefits of IoT are:
- Improved Customer Engagement – IoT improves customer experience by automating the action. For e.g. any issue in the car will be automatically detected by the sensors. The driver, as well as the manufacturer, will be notified about it. Till the time driver reaches the service station, the manufacturer will make sure that the faulty part is available at the service station.
- Technical Optimization – IoT has helped a lot in improving technologies and making them better. The manufacturer can collect data from different car sensors and analyze them to improve their design and make them much more efficient.
- Reduced Waste – Our current insights are superficial, but IoT provides real-time information leading to effective decision making & management of resources. For example, if a manufacturer finds fault in multiple engines, he can track the manufacturing plant of those engines and can rectify the issue with manufacturing belt.
Nowadays, we are surrounded by lots of IoT enabled devices which are continuously emitting data and communicating through multiple devices. Moving ahead, let’s discuss the required hardware for building an IoT application. We will also look at the IoT devices which we are using in our day to day life.
IoT Tutorial: IoT Hardware
Now you would be wondering what is the required hardware for preparing an IoT solution. The answer to this question is, you’ll first require sensors that will sense the environment, then you require a remote dashboard to monitor your output and display it in a clearer & conceivable form. At last, you will require a device with the capability of serving & routing. The key task of the system would be detecting specific conditions and taking actions accordingly. One thing to keep in mind is securing the communication between the devices and the dashboard.
Some of the common sensors that you are surrounded by are accelerometers, temperature sensors, magnetometers, proximity sensors, gyroscopes, image sensors, acoustic sensors, light sensors, pressure sensors, gas RFID sensors, humidity sensors & micro flow sensors.
Nowadays we also have many wearable devices like smartwatches, shoes & 3D glasses. This is the best example of a smart solution. 3D glasses adjust television’s brightness and contrast according to your eye and your smartwatches keeps track of your daily activities and fitness.
But I feel the most important device which has tremendously contributed to IoT are the cell phones. Mobile apps have immensely contributed to revolutionizing the technology world. Cell phones are already encased with applications and sensors that reveals lots of information about its user. It has Geo-location information, it can sense and trace light condition, the orientation of your device and a lot more information. It also comes with multiple connectivity options like Wi-Fi, Bluetooth and cellular that helps them to communicate with other devices. Thus, due to these default qualities of cell phones, it is the core of the IoT ecosystem. Today, Smartphone can interact with smartwatch and fitness band to further ease and enhance the user experience.
IoT uses multiple technologies and protocols to communicate with devices based on the requirements. The major technologies & protocols are Bluetooth, wireless, NFC, RFID, radio protocols and WiFi-Direct.
IoT applications are flourishing across all industries & market. The IoT has a multitude of expansion over various industries. It spans over all groups of users, from those who are trying to reduce & conserve energy in their home to large organizations who want to improve their business operations. IoT has not only proved itself useful in optimizing critical applications in many organisations, but also have boosted the concept of advanced automation which we have imagined a decade before. Let’s understand the capabilities of IoT across different industries and look how they are revolutionizing them.
IoT Tutorial: IoT Across Various Domains
Energy Applications: The energy rates have raised to a great instinct. Individuals and organisations, both are searching ways to reduce and control the consumption. IoT provides a way to not only monitor the energy usage at the appliance-level but also at the house-level, grid level or could be at the distribution level. Smart Meters & Smart Grid are used to monitor energy consumption. It also detects threats to the system performance and stability, which protect appliances from downtime and damages.
Healthcare Application: Smartwatches and fitness devices have changed the frequency of health monitoring. People can monitor their own health at regular intervals. Not only this, now if a patient is coming to the hospital by ambulance, by the time he or she reaches the hospital his health report is diagnosed by doctors and the hospital quickly starts the treatment. The data gathered from multiple healthcare applications are now collected and used to analyze different disease and find its cure.
Education: IoT provides education aids which helps in fulfilling the gaps in the education industry. It not only improves the quality of education but also optimizes the cost and improves the management by taking into consideration students response and performance.
Government: Governments are trying to build smart cities using IoT solutions. IoT enhances armed force systems and services. It provides better security across the borders through inexpensive & high-performance devices. IoT helps government agencies to monitor data in real-time and improve their services like healthcare, transportation, education etc.
Air and Water Pollution: Through various sensors, we can detect the pollution in the air and water by frequent sampling. This helps in preventing substantial contamination and related disasters. IoT allows operations to minimize the human intervention in farming analysis and monitoring. Systems automatically detect changes in crops, soil, environment, and more.
Transportation: IoT has changed the transportation sector. Now, we have self-driving cars with sensors, traffic lights that can sense the traffic and switch automatically, parking assistance, giving us the location of free parking space etc. Also, various sensors in your vehicle indicate you about the current status of your vehicle, so that you don’t face any issues while travelling.
Marketing your product: Using IoT, organizations can better analyze & respond to customer preferences by delivering relevant content and solutions. It helps in improving business strategies in the real-time.
Now that we are aware of the powerful IoT solutions that have been astoundingly impacting various domains, let’s take a deep dive and understand Raspberry Pi, which is commonly used to prepare IoT solutions. After understanding Raspberry Pi we will be creating an IoT application.
IoT Tutorial: Raspberry Pi
The Raspberry Pi is a small credit-card sized computer developed in the United Kingdom by the Raspberry Pi Foundation. Their primary motive was to support & promote the teaching of basic computer science in schools and in developing countries. Far more than expected, it did wonders in many fields, such as robotics. More than 5 million Raspberry Pis have been sold before February 2015, according to the Raspberry Pi Foundation.
The current version is RPi 3 which was released in February 2016. The below figure gives a physical demonstration of it.
 IOT Tutorial: Raspberry Pi
CPU speed ranges from 700 MHz to 1.2 GHz for the Pi 3 & has 1 GB of RAM. SD cards are used to store the operating system and program memory. It has four USB slots, HDMI and composite video output, and a 3.5 mm phone jack for audio. For lower level output it has a number of GPIO pins which support common protocols like I²C. Pi 3 is also equipped with Wi-Fi 802.11n and Bluetooth.
It is used for multiple purposes. It could be used as a general computer, for browsing the internet, playing HD videos, making spreadsheets & word-processing or playing games. But nowadays it is mostly being used for making IoT projects like infra-red cameras, security systems, music machines & detectors for weather stations. As we earlier discussed, Raspberry Pi is getting immense popularity in the field of robotics due to its portable size and good processing power required for standalone systems.
There is a list of operating systems supported by Raspberry Pi like RISC OS Pi, FreeBSD, NetBSD, Plan 9 from Bell Labs, Windows 10 IoT Core, xv6, Haiku, HelenOS, Genode OS Framework and many more. The Raspberry Pi Foundation recommends the use of Raspbian, a Debian-based Linux operating system. To install Raspian on your Raspberry Pi follow the steps:
- Download NOOBS from the official website of the Raspberry Pi Foundation.
- Extract the files in the SD card which you will be using for the storing the operating system and the program memory.
- Put the SD Card in Raspberry Pi SD Card slot.
- Follow the installation steps.
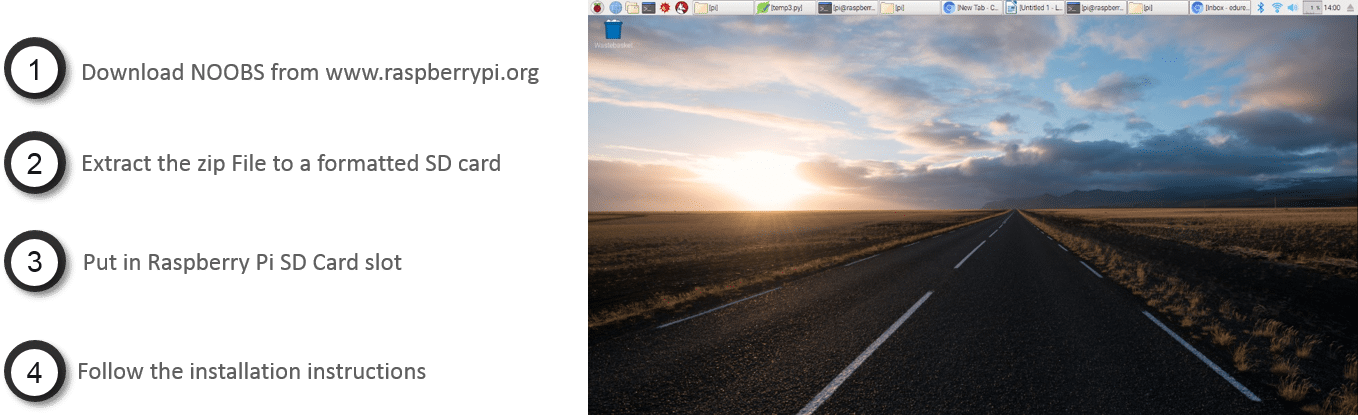
IOT Tutorial: Installing Raspian on Raspberry Pi
After this, you can use it as your general computer. Raspberry Pi comes with a lot of accessories which could be installed on Raspberry Pi and enable it with multiple sensors and additional functionalities. Some of the most commonly used are:
- HAT (Hardware Attached on Top) expansion boards – Together with the Model B+, inspired by the Arduino shield boards, the interface for HAT boards was devised by the Raspberry Pi Foundation. Each HAT board carries a small EEPROM containing the relevant details of the board. Raspberry Pi’s OS is informed of the HAT and the technical details of it.
- Camera – On 14 May 2013, the launched the Raspberry Pi camera board alongside a firmware update. It is an 8-megapixel camera which has a flexible flat cable that plugs into the CSI connector. The connector is located between the Ethernet and HDMI ports. The user has to enable the use of the camera board by running Raspi-config. It produces 1080p, 720p and 640x480p quality of video.
- Infrared Camera – In October 2013, the foundation started producing camera module without an infrared filter, called the Pi NoIR.
- Gertboard – This device is designed for educational purposes. It expands the Raspberry Pi’s GPIO pins to allow interface with & control of LEDs, switches, analogue signals, sensors and other devices. It includes an optional Arduino compatible controller to interface with the Pi.
We will be talking more about Raspberry Pi in detail with the hardware configuration in our upcoming Raspberry Pi blog. Now in this Iot tutorial, let us take a look at a practical in which we are using HAT and sensing the environment (i.e. Temperature, Humidity & Pressure) and sending it as an Android notification. RPi & HAT are used in real time by astronauts for keeping the track of the environment around them and adjusting accordingly. You can extend this application with your air conditioners and refrigerators to adjust their temperature accordingly.
IoT Tutorial: IoT Application – Sensing the Environment & Notifying
In this demo, we are using a Python program to allow our Raspberry Pi to first sense the environment around it using HAT, printing temperature on the LED matrix and then, based on certain triggers it would send notifications using InstaPush API on your android phone.

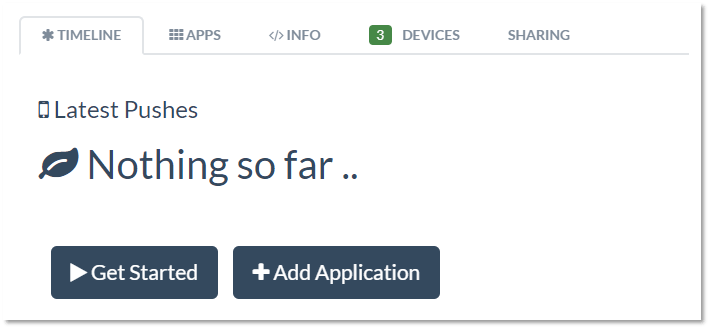
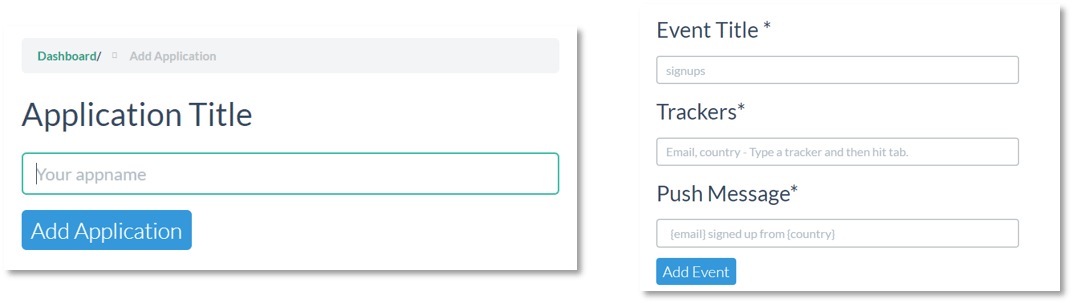
First, you need to create an InstaPush ID and then create an application. Then you need to create an event in that application which will be sending notifications as shown in the below image. While creating events it will ask for Event Title, Trackers and Push Message, where Push message is the message pushed to your Android devices. You need to mention message variable in trackers and the same in your Push Message with curly braces.
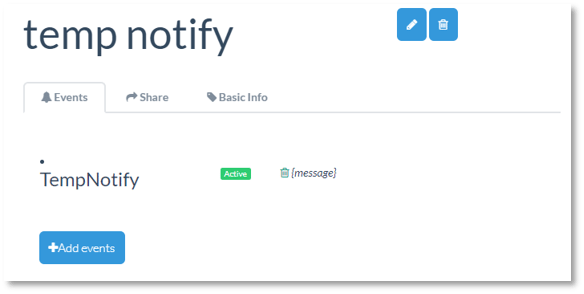
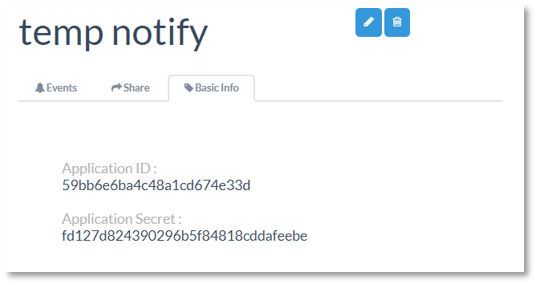
Now, as you have created an event successfully in your application, download the InstaPush application on your android phone and sign in with the same account, as the notification will be sent only to the same account from which the application and event are created. Also note down the Application ID and Application Secret present in your Application details tab, as shown in the figure below. These parameters are required while using InstaPush API so that it can send notifications to that specific event.
 Now taking a deep dive, let us take a look at the python program. First of all you need to import packages as shown in the below image:

Importing json module allows you to encode python objects as JSON strings, and decode JSON strings into python objects. We will be using this for sending push messages. Then the next one is pycurl, which is a Python interface to libcurl, the multiprotocol file transfer library. Similar to the urllib Python module, pycurl can be used to fetch objects identified by a URL from a Python program. Rpi.GPIO is for basic Raspberry Pi input-output operations and using Sense_hat we can control out HAT sensors and display the data over the LED matrix.
![]()
Now here we have defined the hot and cold temperature after which the event will be triggered and notification will be sent. Led matrix has 8 * 8 i.e. 64-pixel positions. OFFSET form left and the top is defined to leave the number columns & rows simultaneously from top & left as shown in the figure below.
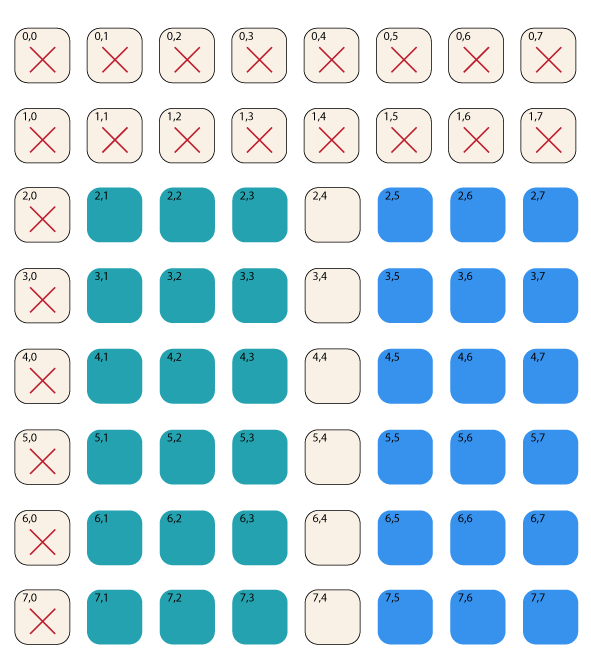
IOT Tutorial: HAT LED Matrix
The NUMS matrix contains 3*5 i.e. 15 pixels, i.e. 3 columns and 5 rows. The numbers tell that which pixel should be on & which pixel should be off. We will display 2 digits, ones digit will be displayed in the blue region as shown in the above figure and tens digit will be displayed in the green region. Now let us know how to write the logic for displaying single as well as a two-digit number.
 The first function explains how to display a digit. It accepts arguments as the number, offset added in the default offset to their x and y-axis, and RGB code in which the pixel needs to be displayed. Then the offset variable in the show_digit function declared here, is to skip the pixels of above number and only pick 15 pixels of the corresponding number from the NUMS matrix. xt is modulo 3 as we have only three pixels in each row. At the last set_pixel function will display pixels on the LED matrix.
Now for displaying two-digit number, first we are separating tens and ones digit and then calling show_digit function both tens digit and ones digit. We are adding 4 columns for displaying ones digit to separate ones and tens digit.
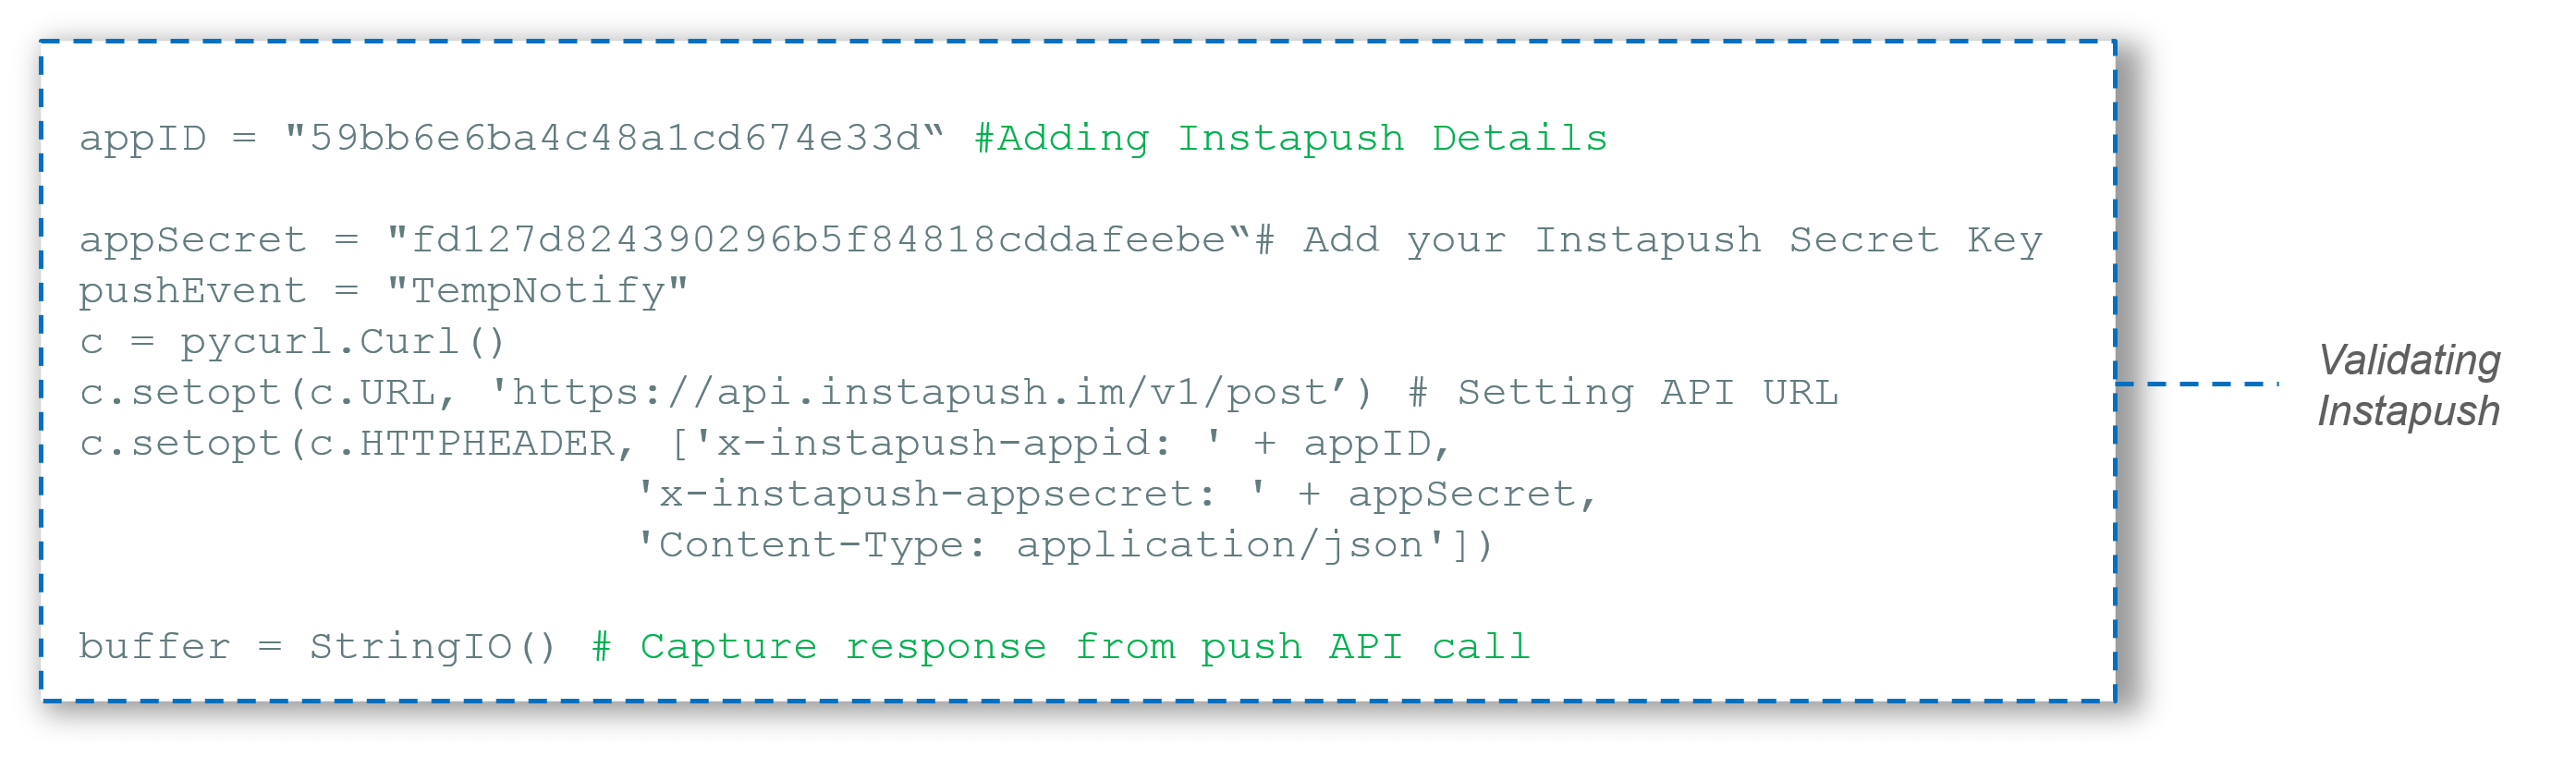
Then, in our next step, we are creating a pycurl instance and passing all the required details to connect to the InstaPush API like app ID, app Secret in the header.

Now, we are specifying data which will be transmitted over the InstaPush API like the name of the push Event & trackers message. Afterwards, we are dumping the data. VERBOSE allows us to see the status of a transmitted message.
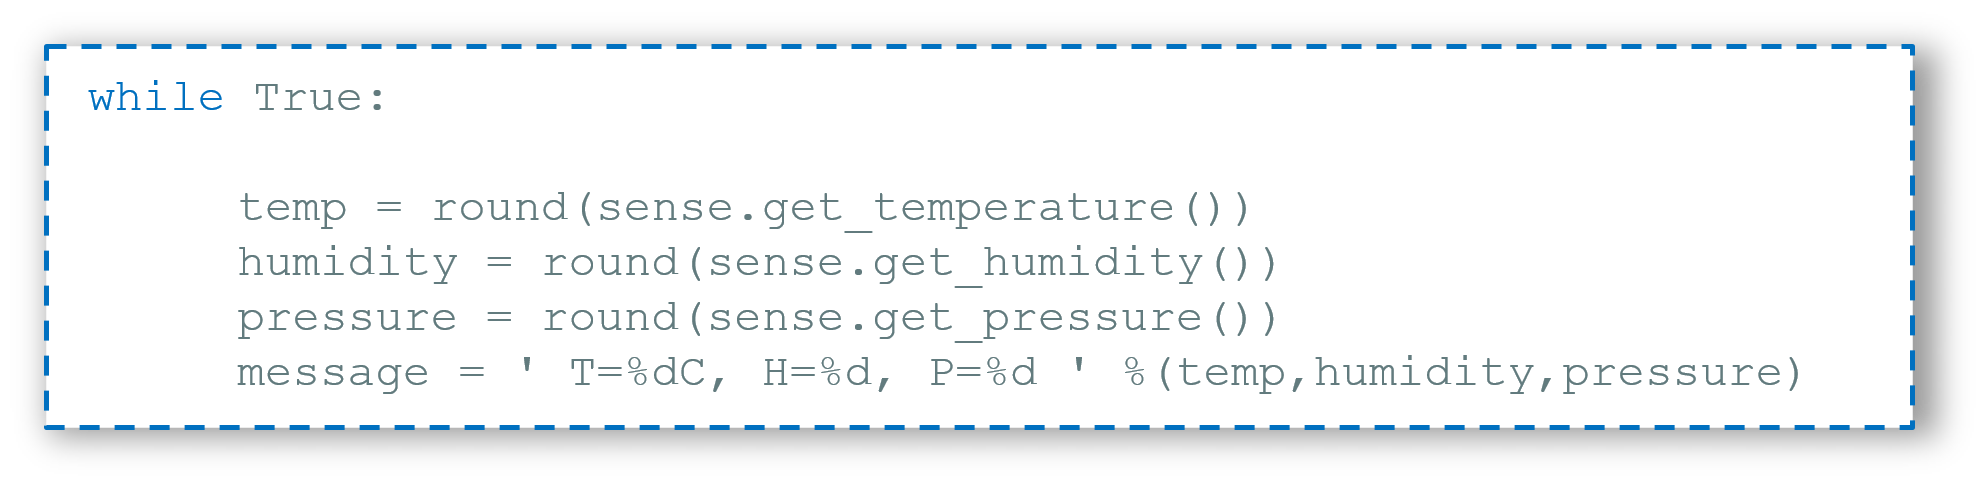
As we are all set with our InstaPush API for sending notification & logic for displaying numbers on the LED matrix, this is high time to sense the environment using HAT sensors for temperature, humidity and pressure. From the above image, you can see the functions used to get each of them respectively. round() function rounds off the obtained value to a whole number. At last, the message contains all the details regarding the environment which needs to be transmitted.
 As we were sensing environment continuously, so here we are specifying the conditions which will trigger the event and send notification over the android phone. Now let us take a look at the whole code.
import pycurl, json
from StringIO import StringIO
import RPi.GPIO as GPIO
from sense_hat import SenseHat
import time
from time import asctime

sense = SenseHat()
sense.clear()

cold = 37
hot = 40
pushMessage = ""

################################################
# Code for displaying number on LED Matrix

OFFSET_LEFT = 1
OFFSET_TOP = 2

NUMS =[1,1,1,1,0,1,1,0,1,1,0,1,1,1,1, # 0
0,1,0,0,1,0,0,1,0,0,1,0,0,1,0, # 1
1,1,1,0,0,1,0,1,0,1,0,0,1,1,1, # 2
1,1,1,0,0,1,1,1,1,0,0,1,1,1,1, # 3
1,0,0,1,0,1,1,1,1,0,0,1,0,0,1, # 4
1,1,1,1,0,0,1,1,1,0,0,1,1,1,1, # 5
1,1,1,1,0,0,1,1,1,1,0,1,1,1,1, # 6
1,1,1,0,0,1,0,1,0,1,0,0,1,0,0, # 7
1,1,1,1,0,1,1,1,1,1,0,1,1,1,1, # 8
1,1,1,1,0,1,1,1,1,0,0,1,0,0,1] # 9

# Displays a single digit (0-9)
def show_digit(val, xd, yd, r, g, b):
offset = val * 15
for p in range(offset, offset + 15):
xt = p % 3
yt = (p-offset) // 3
sense.set_pixel(xt+xd, yt+yd, r*NUMS[p], g*NUMS[p], b*NUMS[p])

# Displays a two-digits positive number (0-99)
def show_number(val, r, g, b):
abs_val = abs(val)
tens = abs_val // 10
units = abs_val % 10
if (abs_val > 9): show_digit(tens, OFFSET_LEFT, OFFSET_TOP, r, g, b)
show_digit(units, OFFSET_LEFT+4, OFFSET_TOP, r, g, b)

##############################################################

temp = round(sense.get_temperature())
humidity = round(sense.get_humidity())
pressure = round(sense.get_pressure())
message = " T=%dC, H=%d, P=%d " %(temp,humidity,pressure)

#setup InstaPush variables
# add your Instapush Application ID
appID = "59bb6e6ba4c48a1cd674e33d"

# add your Instapush Application Secret
appSecret = "fd127d824390296b5f84818cddafeebe"
pushEvent = "TempNotify"

# use Curl to post to the Instapush API
c = pycurl.Curl()

# set API URL
c.setopt(c.URL, 'https://api.instapush.im/v1/post')

#setup custom headers for authentication variables and content type
c.setopt(c.HTTPHEADER, ['x-instapush-appid: ' + appID,
'x-instapush-appsecret: ' + appSecret,
'Content-Type: application/json'])

# use this to capture the response from our push API call
buffer = StringIO()
# # # # # # # # # # # # # # # # # # # # # # # # #

def p(pushMessage):
# create a dict structure for the JSON data to post
json_fields = {}

# setup JSON values
json_fields['event']=pushEvent
json_fields['trackers'] = {}
json_fields['trackers']['message']=pushMessage
#print(json_fields)
postfields = json.dumps(json_fields)

# make sure to send the JSON with post
c.setopt(c.POSTFIELDS, postfields)

# set this so we can capture the resposne in our buffer
c.setopt(c.WRITEFUNCTION, buffer.write)

# see the post sent
c.setopt(c.VERBOSE, True)

# setup an indefinite loop that looks for environment
while True:

temp = round(sense.get_temperature())
humidity = round(sense.get_humidity())
pressure = round(sense.get_pressure())
message = ' T=%dC, H=%d, P=%d ' %(temp,humidity,pressure)
time.sleep(4)
log = open('weather.txt',"a")
now = str(asctime())
temp = int(temp)
show_number(temp, 200, 0, 60)
time.sleep(5)

if temp >= hot:
pushMessage = "Its hot: " + message
p(pushMessage)
c.perform()
# capture the response from the server
body= buffer.getvalue()
pushMessage = ""

elif <= cold:
pushMessage = "Its cold: " + message
p(pushMessage)
c.perform()
# capture the response from the server
body= buffer.getvalue()
pushMessage = ""

# reset the buffer
buffer.truncate(0)
buffer.seek(0)

# cleanup
c.close()
sense.clear()
GPIO.cleanup()
After executing this program, if the temperature drops or rises you will receive notifications as shown in the below figure.
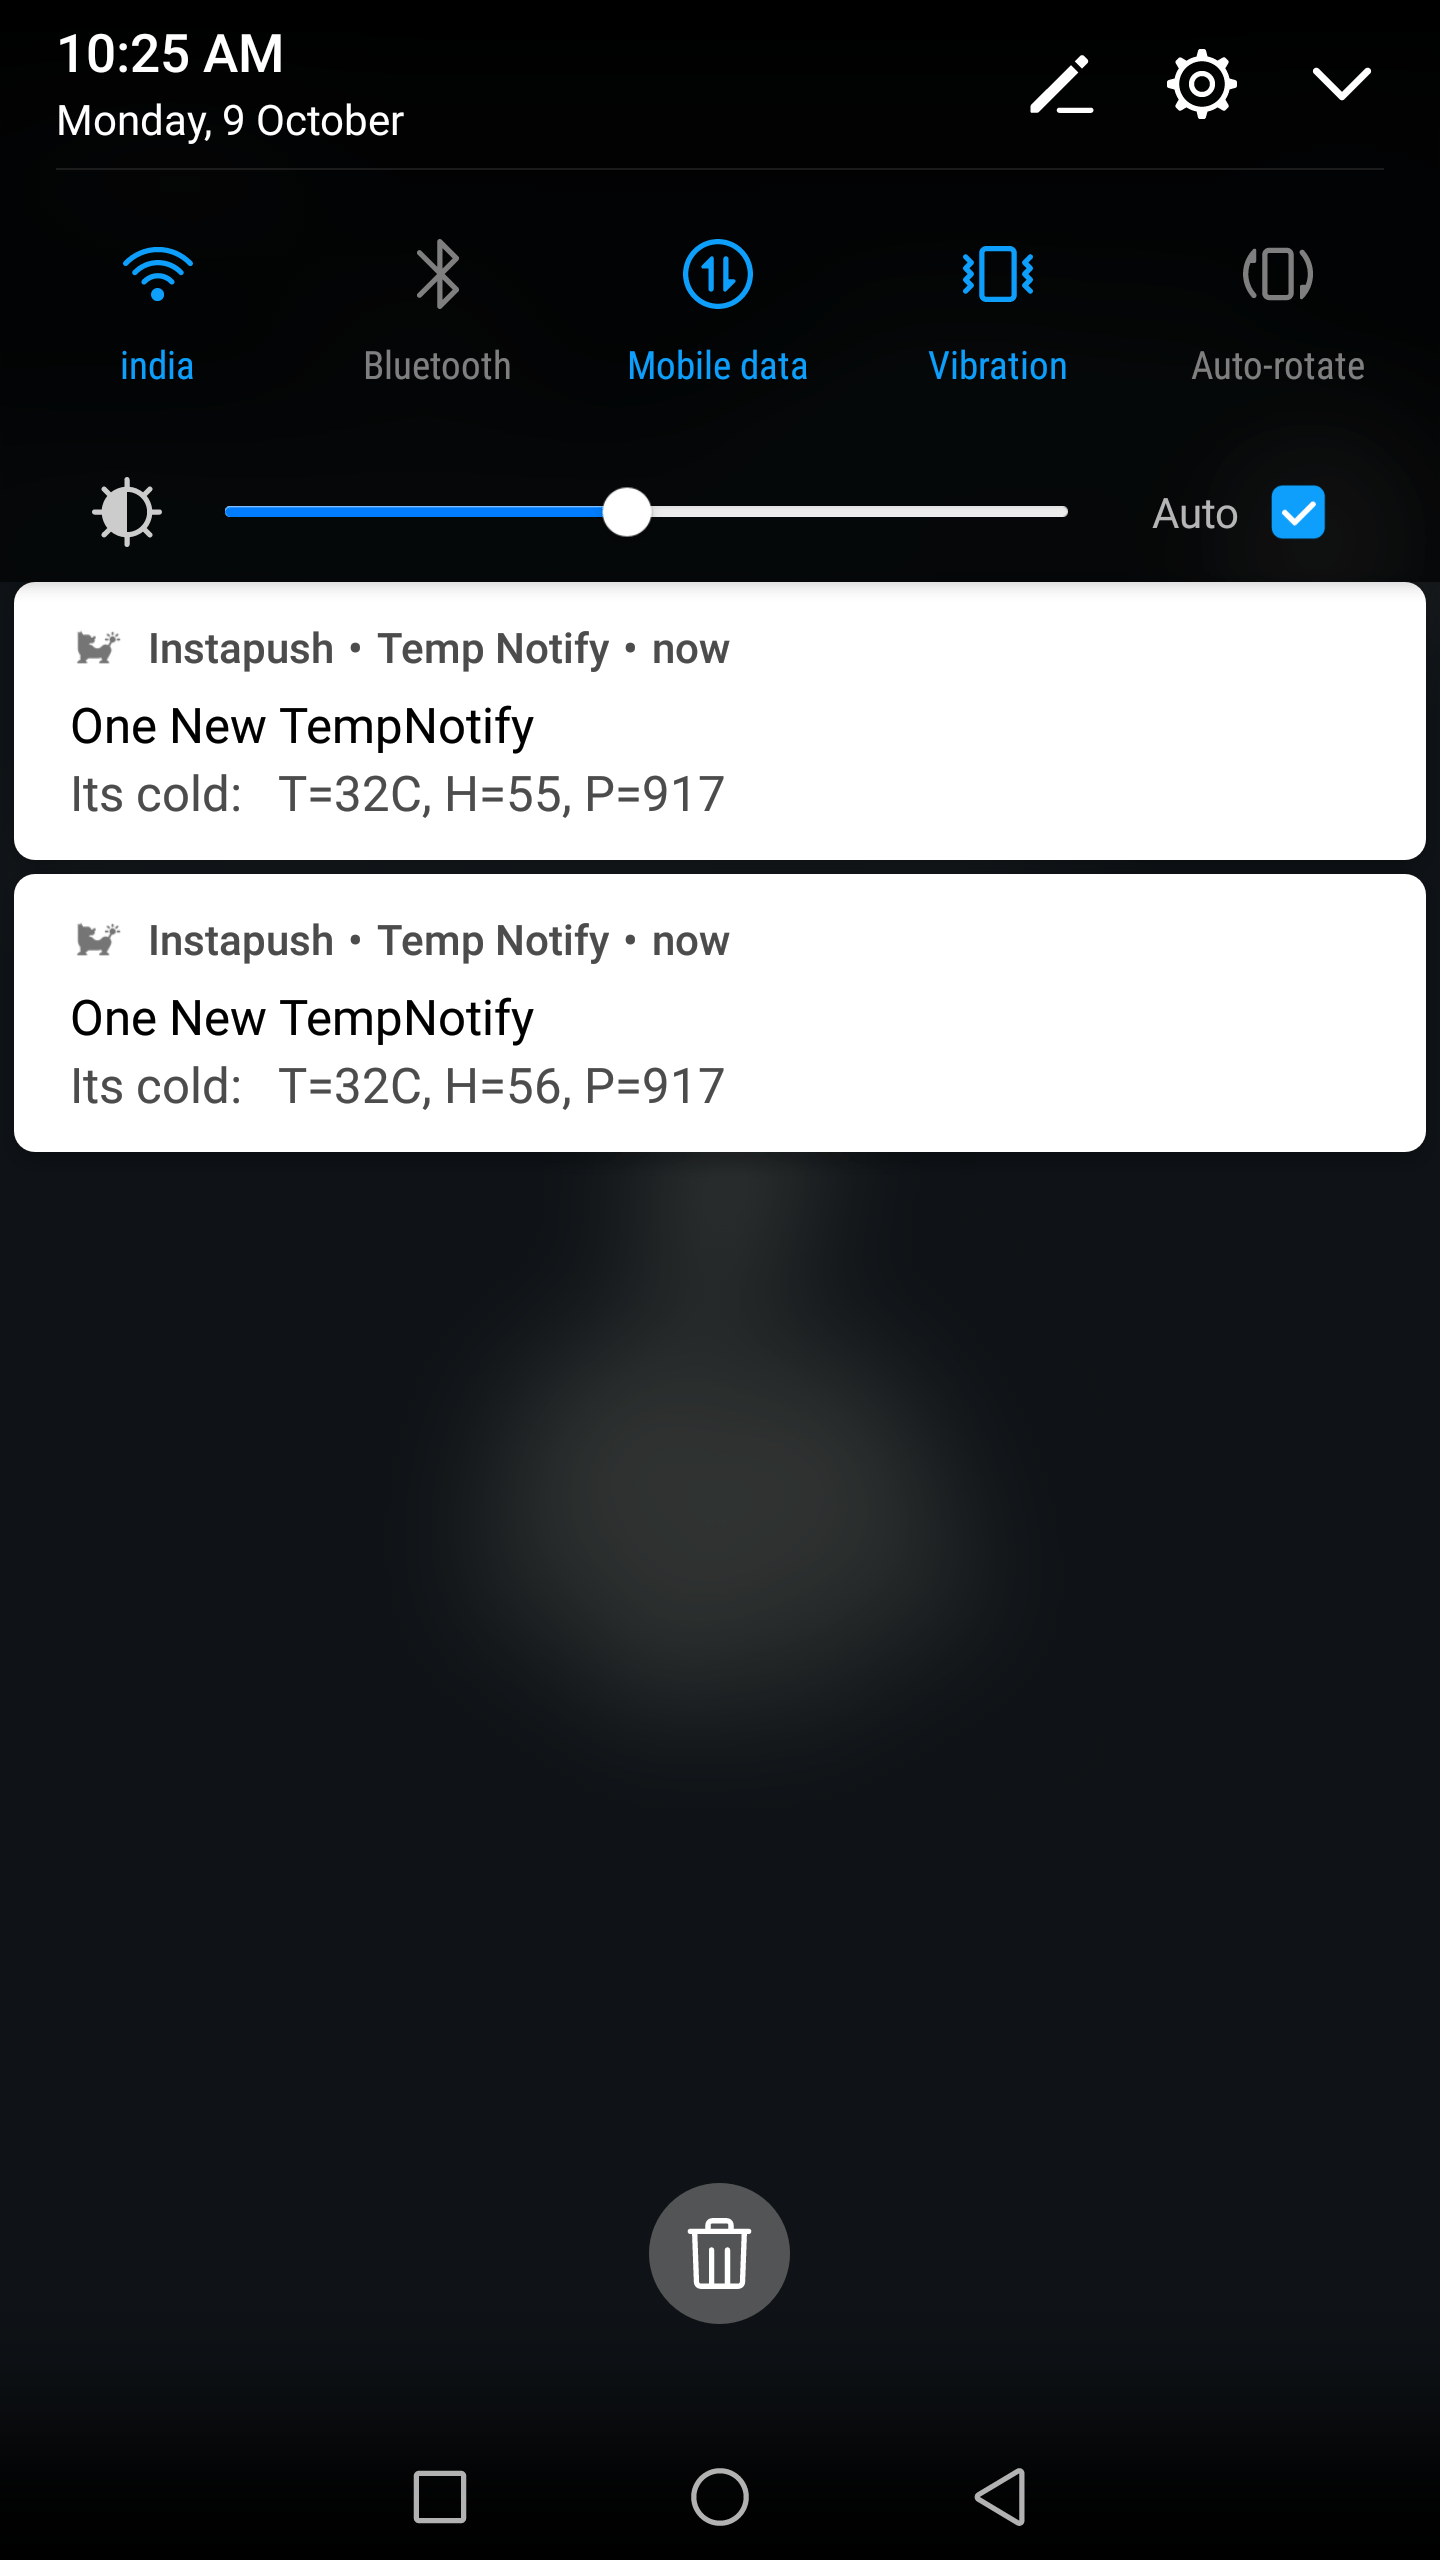
IOT Tutorial: Notification in Android
I hope this example would have added value to your knowledge. We will be talking more about Raspberry Pi and discussing more practical aspect in our next blog on Raspberry Pi. I hope you would have found this IoT tutorial blog informative and helpful in getting an idea how IoT is revolutionizing the modern world. I would recommend you to stay tuned to Edureka channel to learn more about IoT applications.
Now that you have gone through our IoT Tutorial blog,you can check out Edureka’s IoT Training Using Azure. As per the Cisco report, IoT will generate $14.4 trillion in value across all industries in the next decade. All of this will lead to better job opportunities. Edureka’s IoT Certification Training aims at covering all these new concepts around the Enterprise IoT Application Development.
Got a question for us? Please mention it in the comments section and we will get back to you.


Nice Blog, Its very useful!
TLAB offers international level training solutions, and value added post-educational grooming and shaping for on-demand job openings in the recent technological fields such as Embedded, IOT, Linux Internals, Core PHP, Big Data, Cloud computing and many more.
Thanks for the information, lots of info here.
Would love to connect.
Do check out our training platform at Experfy — www.experfy.com/training
We are a Harvard-incubated company and the biggest data science/AI/machine learning/Java marketplace for enterprises.
Hope to connect.
Cheers,
Kavita Lalwani
Hey, I really appreciate your blog, this blog had valuable content, This is very useful to that person who needs to know about IoT Internet of Things. Thanks for sharing this blog and waiting for your next blog.
This Blog has so much information about IoT. Internet of Things is a topic which people hardly know in depth. Thank you for sharing this blog. People will get a better understanding of IOT.