


How do I Download and Install Git?
Let me guide you through the process to install Git in your system through this blog. In case you want to know more about Git don’t forget to checkout this blog. Git is a key skill required for DevOps Certification Training and multiple job roles.
In this Install Git blog you will learn:
Before you move ahead, check out this video on GIT installation.
Git Installation Tutorial for Beginners | Git Installation On Linux | DevOps Tools | Edureka

Install Git On Windows
Step 1:
To download the latest version of Git, click on the link below:
Great! Your file is being downloaded.
Step 2:
After your download is complete, Run the .exe file in your system.


Step 3:
After you have pressed the Run button and agreed to the license, you will find a window prompt to select components to be installed.
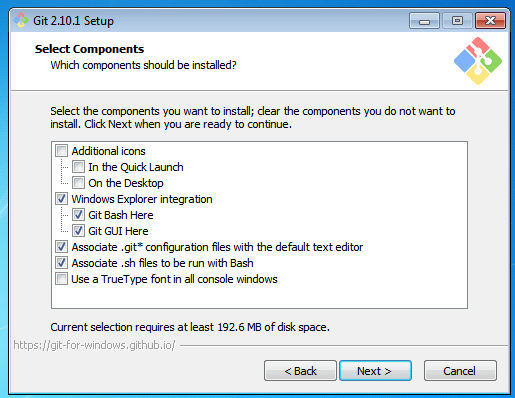

After you have made selection of your desired components, click on Next>.
Step 4:
The next prompt window will let you choose the adjustment of your path environment. This is where you decide how do you want to use Git.
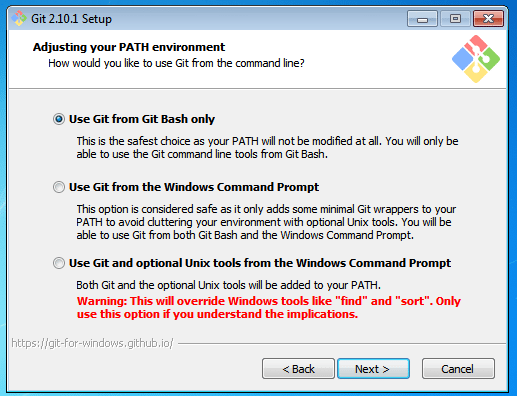

You can select any of the three options according to your needs. But for beginners, I recommend using Use Git From Git Bash Only
Step 5:
The next step is to choose features for your Git. You get three options and you can choose any of them, all of them or none of them as per your needs. Let me tell you what these features are:
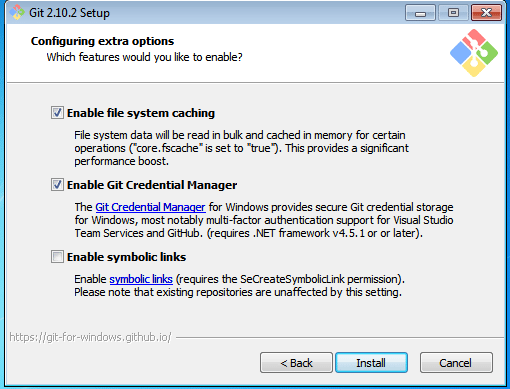

The first is the option to Enable file system caching.
Caching is enabled through Cache manager, which operates continuously while Windows is running. File data in the system file cache is written to the disk at intervals determined by the operating system, and the memory previously used by that file data is freed.
The second option is to enable Git Credential Manager.
The Git Credential Manager for Windows (GCM) is a credential helper for Git. It securely stores your credentials in the Windows CM so that you only need to enter them once for each remote repository you access. All future Git commands will reuse the existing credentials.
The third option is to Enable symbolic links.
Symbolic links or symlinks are nothing but advanced shortcuts. You can create symbolic links for each individual file or folder, and these will appear like they are stored in the folder with symbolic link.
I have selected the first two features only.
Step 6:
Choose your terminal.
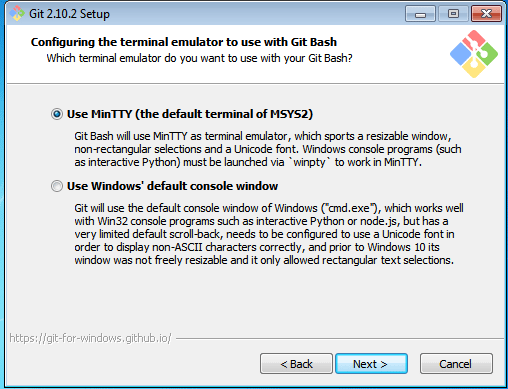

You can choose one from the options.
The default terminal of MYSYS2 which is a collection of GNU utilities like bash, make, gawk and grep to allow building of applications and programs which depend on traditionally UNIX tools to be present.
Or you can choose the window’s default console window (cmd.exe).
Step 7:
Now you have got all you need. Select Launch Git Bash and click on Finish.


This will launch Git Bash on your screen which looks like the snapshot below:


Step 8:
Let us proceed with configuring Git with your username and email. In order to do that, type the following commands in your Git Bash:
git config - - global user.name "<your name>"

git config - - global user.email "<your email>"


It is important to configure your Git because any commits that you make are associated with your configuration details.
If you want to view all your configuration details, use the command below:
git config - - list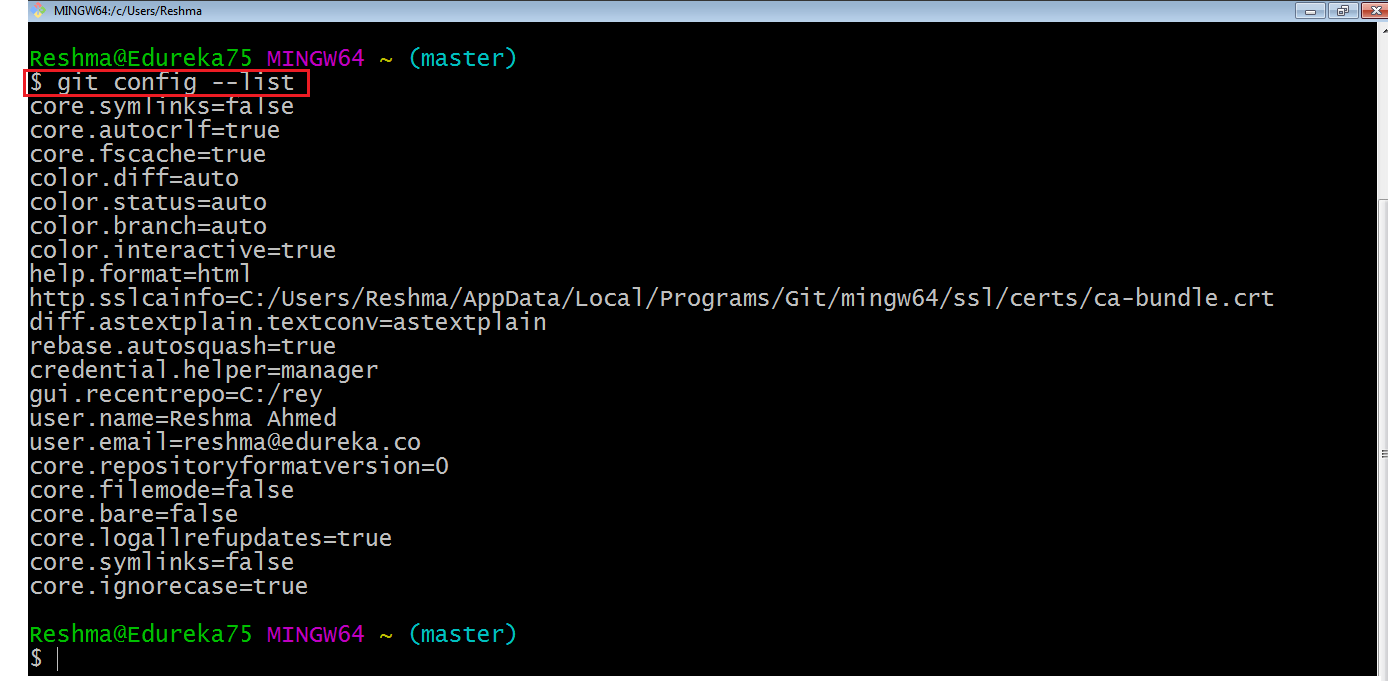

This is how you install and setup GIT on Windows.
Install Git on CentOS
Step 1:
First we need to install the software that Git depends on. These dependencies are all available in default CentOS repository.
Use the command:
sudo yum groupinstall "Development Tools"

It will ask for your confirmation to download the tools.
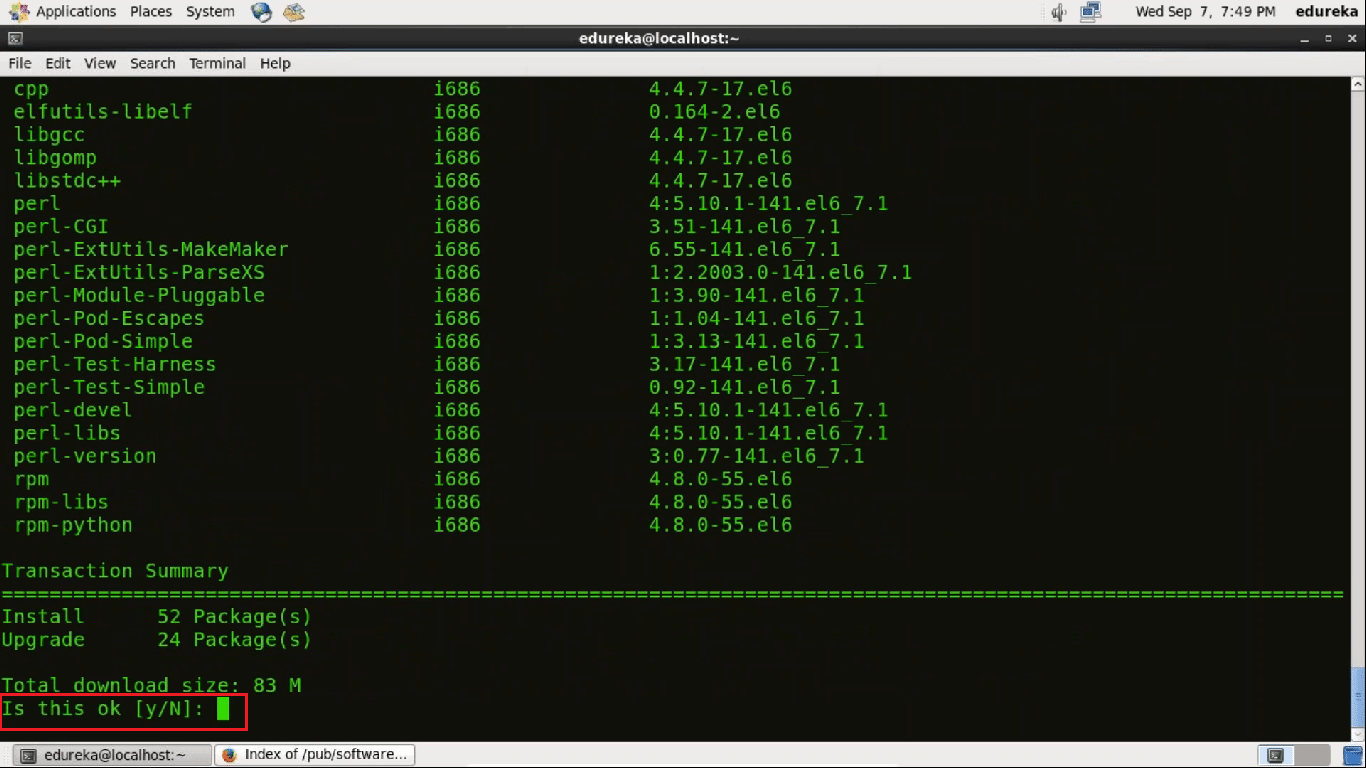

Press Y for Yes.
The “Development tools” which is a yum group, is a predefined bundle of software that can be installed at once, instead of having to install each application separately. The Development tools will allow you to build and compile software from source code.
Now use the command:
sudo yum install gettext-devel openssl-devel perl-CPAN perl-devel zlib-devel

Enter your password. It will ask for your confirmation to download the package.
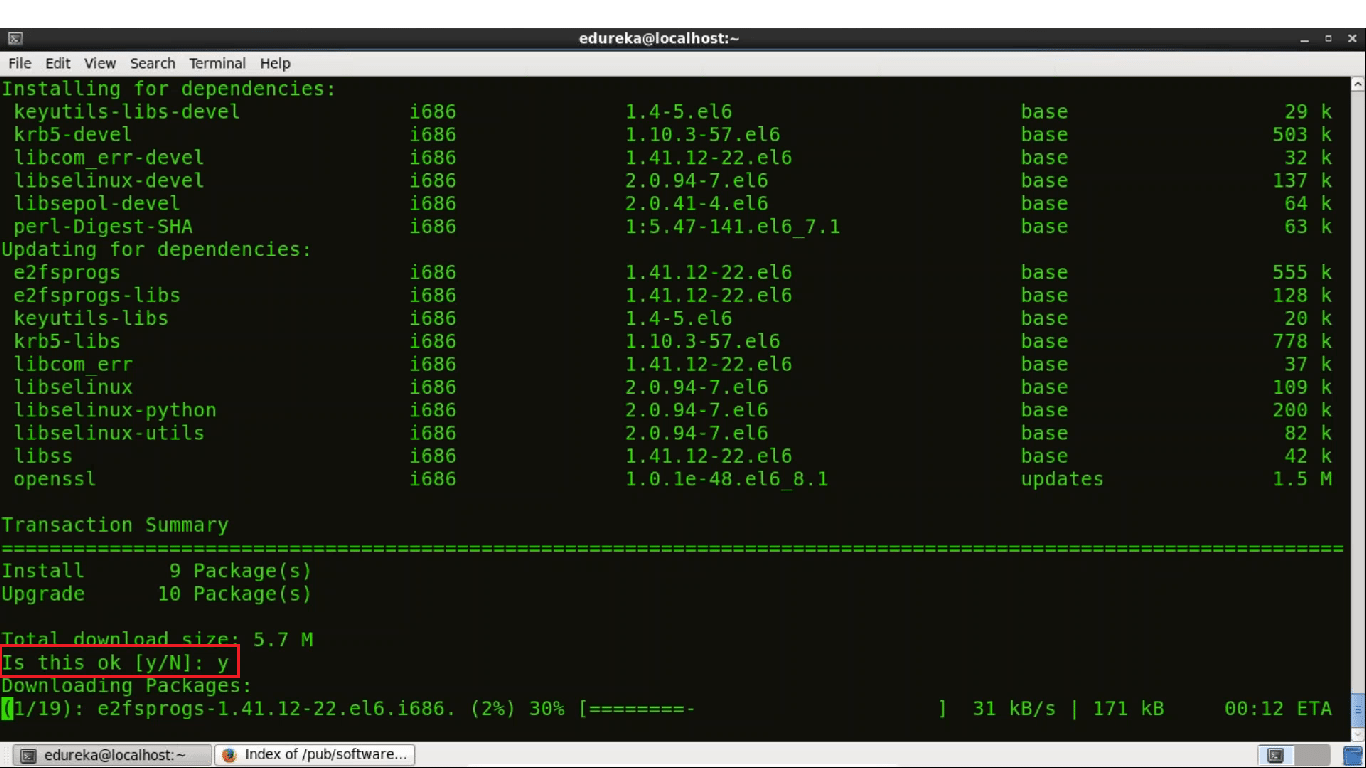
Press y.
Now we are ready with the prerequisites. Lets proceed towards Git installation.
Step 2:
Now we are going to use wget command to download a specific version of Git.
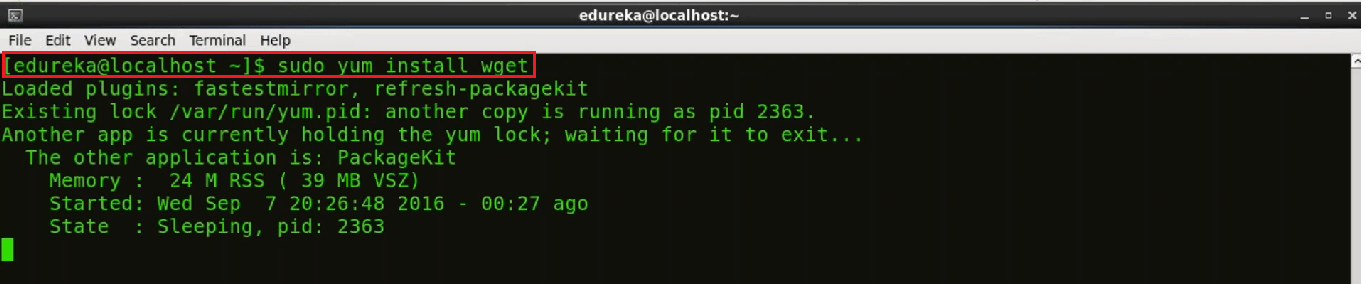

But first we need to copy the link of the version that we want to install. For that go to this website.
You will find the following webpage:
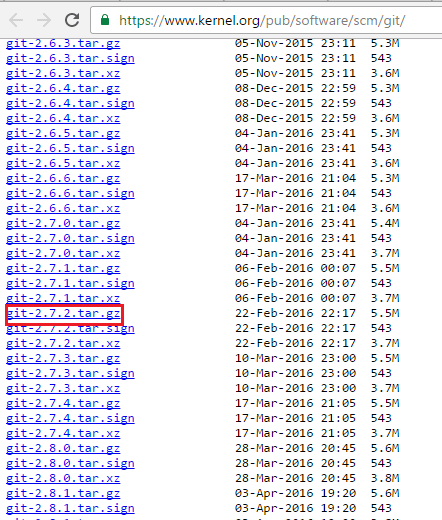

I am downloading git-2.7.2.tar.gz version of Git.
Now use the wget command with the link of the Git version you have chosen to install. Use the command below:
wget https://github.com/git/git/archive/v2.7.2.tar.gz -O git.tar.gz
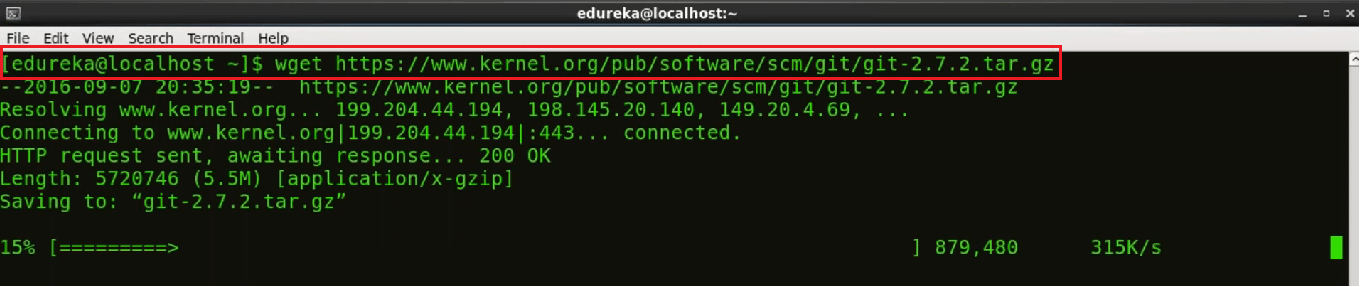

This downloaded file will be available in my directory.
Step 3:
Once the download is complete we will extract the file from the downloaded Git Tar file. For that we will use Tar command.
tar -zxf git.tar.gz

Lets see the extracted folder.


There it is! :-)
Step 4:
Now lets change the directory to Git.
Use the command cd git


Step 5:
We are in the source folder we can begin the source build process. For that first type in the command:
make configure

Now use the following command:
./configure --prefix=/usr/local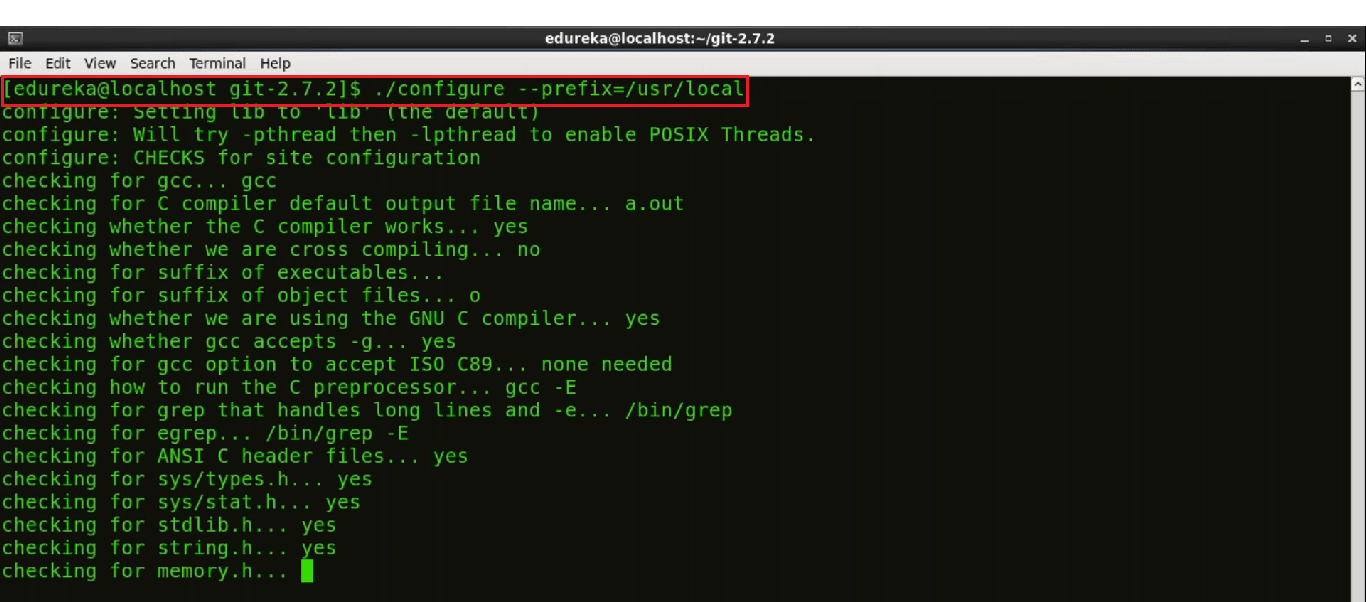

The configure script is responsible for getting ready to build the software on your specific system. It makes sure all of the dependencies for the rest of the build and install process are available once configure has done its job, we can invoke make to build the software.
Step 6:
Now that the software is built and ready to run, the files can be copied to their final destinations. Use the command below:
sudo make install

The make install command will copy the built program, and its libraries and documentation, to the correct locations.
Step 7:
Now to check the version of Git installed we will use the command:
git --version

Step 8:
Before we go ahead you need to submit some information about yourself so that commit messages will be generated with the correct information attached.
We need to provide Name and Email address that we would like to embed into our commits, to do that we will use following commands:
git config --global user.name "Your Name"

git config --global user.email "you@example.com"


To confirm that these configurations are added successfully we will use the command:
git config --list 

Step 9:
Now we need to generate a SSH key.
SSH is a secure protocol used as the primary means of connecting to Linux servers remotely. Now to generate a new SSH key we will use:
ssh-keygen -t rsa -b 4096 -C "your_email@example.com"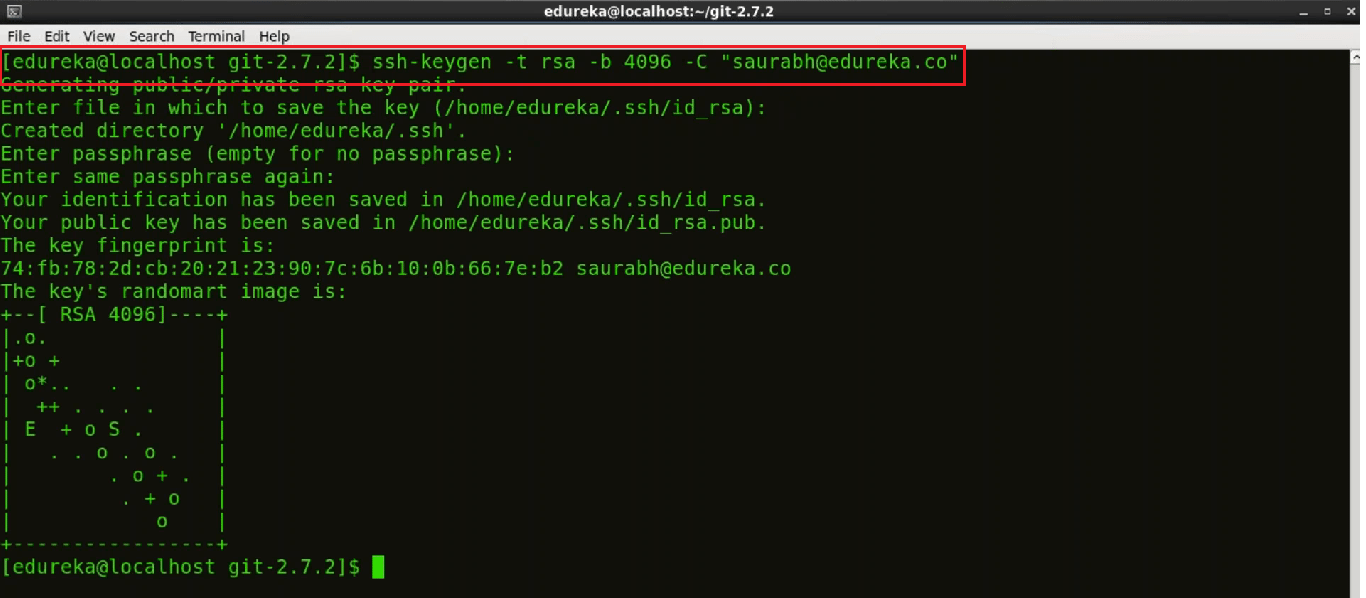

It will ask you to enter the file name where you want to save the key. If you want it saved in your default directory press ‘Enter’. Enter blank passphrase if you want to and then enter the same again.
There is a program called ssh-agent that runs the duration of a local login session. It stores unencrypted keys in memory, and communicates with SSH clients using a Unix domain socket. So to ensure that SSH agent is enabled we will use this command below:
eval "$(ssh-agent -s)"

To add SSH key to the SSH agent we will use
ssh-add ~/.ssh/id_rsa

To add SSH key to our GitHub account we will use:
cat ~/.ssh/id_rsa.pub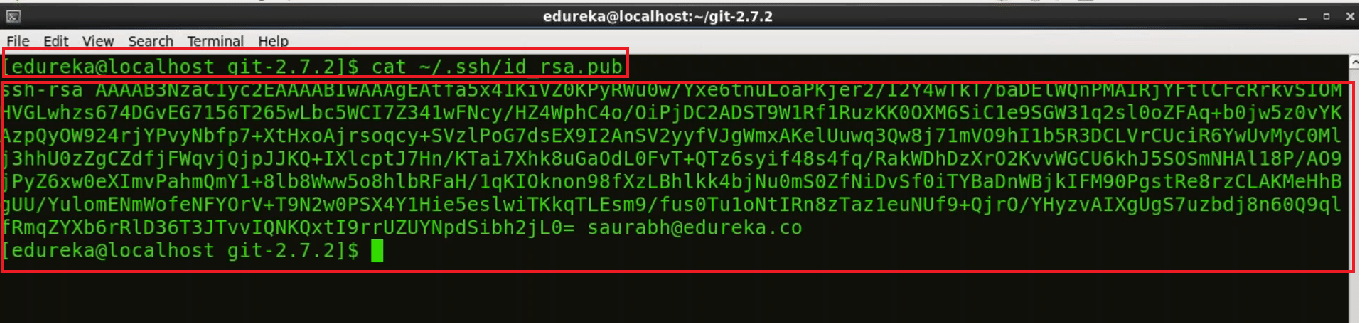

The gibberish you see on screen is actually the SSH key. ;-)
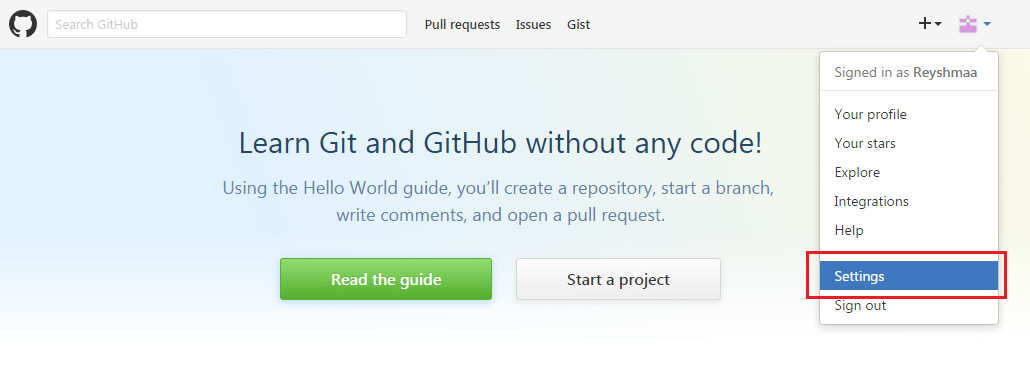
Finally we need to copy the SSH key and then we need to go to the GitHub account and click on settings.
(P.S. If you don’t have a GitHub repository and want to learn how to create it , skip here )

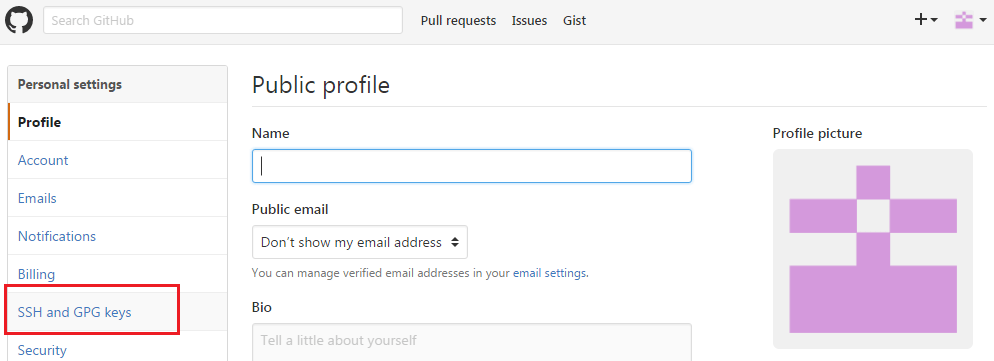
and then go to SSH and GPG keys option on the left.

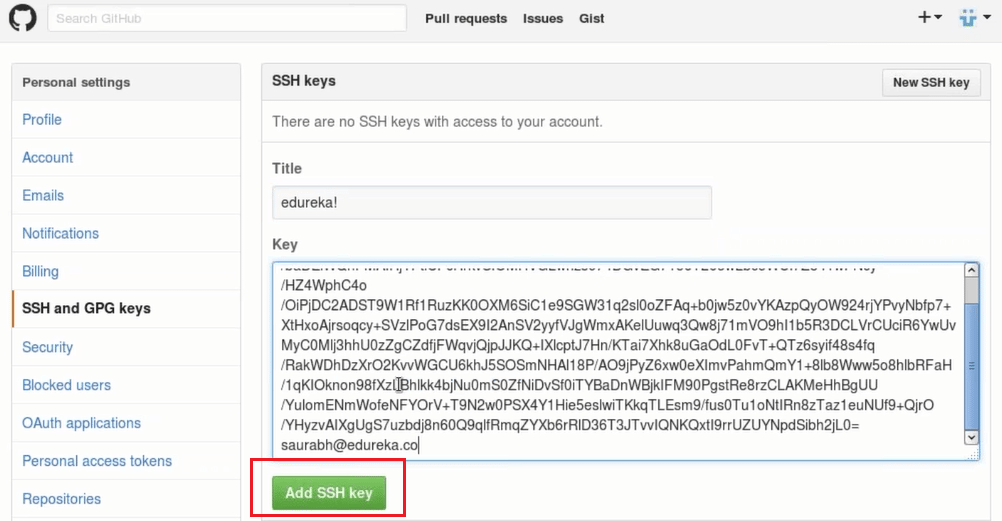
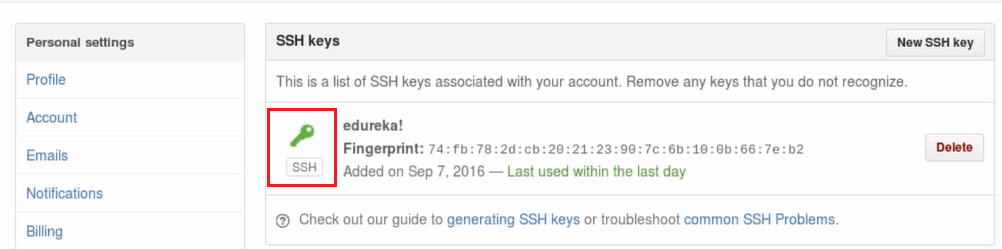
We will now click on New SSH key and add title to it and then paste the copied key in the space provided. Now we will click on add SSH key

Now use the below command to test the SSH key:
ssh -T git@github.com

Now we can see in the snapshot below, that the colour of the key is green. It means we have successfully tested the key.

This is how you install Git and connect to your central repository on Git.
Create GitHub Repositories
You have learnt to install Git in your system and now its time to make repositories on GitHub that will act as your remote repository.
Step 1:
Go to “www.github.com” and like a piece of cake, all you need to do to Sign Up is fill up the following form and click on Sign Up.
Step 2:
Choose if you want your repositories to be private or public.
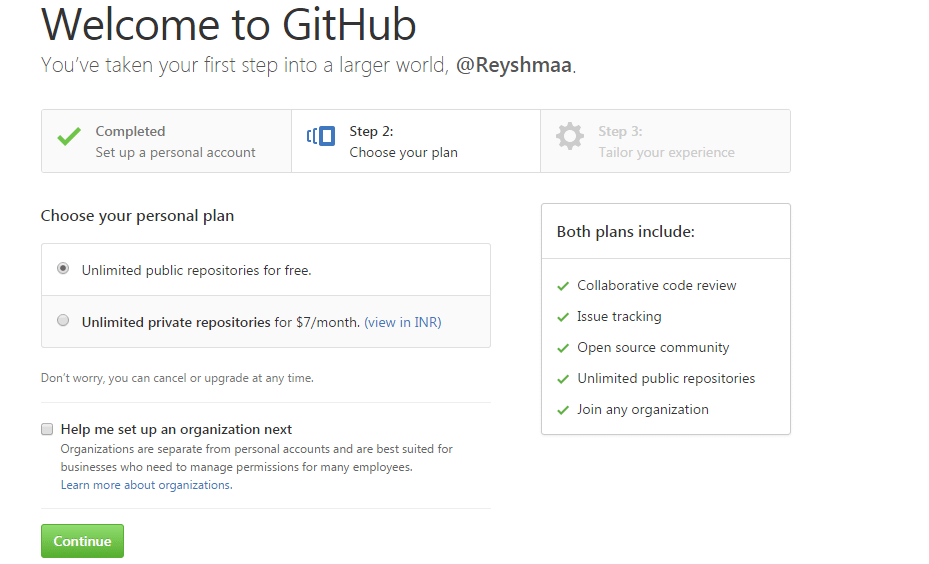

After choosing your plan, click on Continue
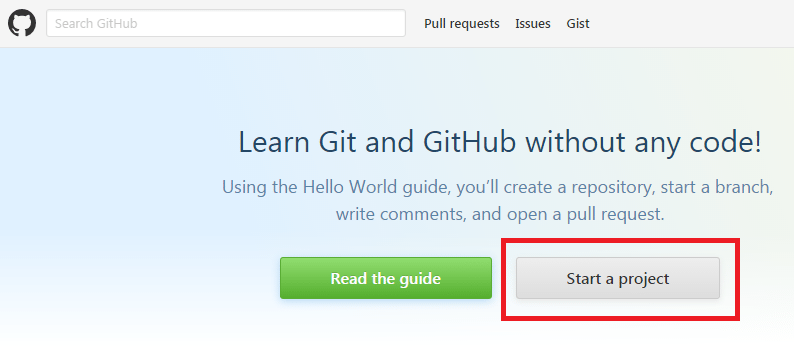
Step 3:
Confirm your email and then click on Start a project.

Step 4:
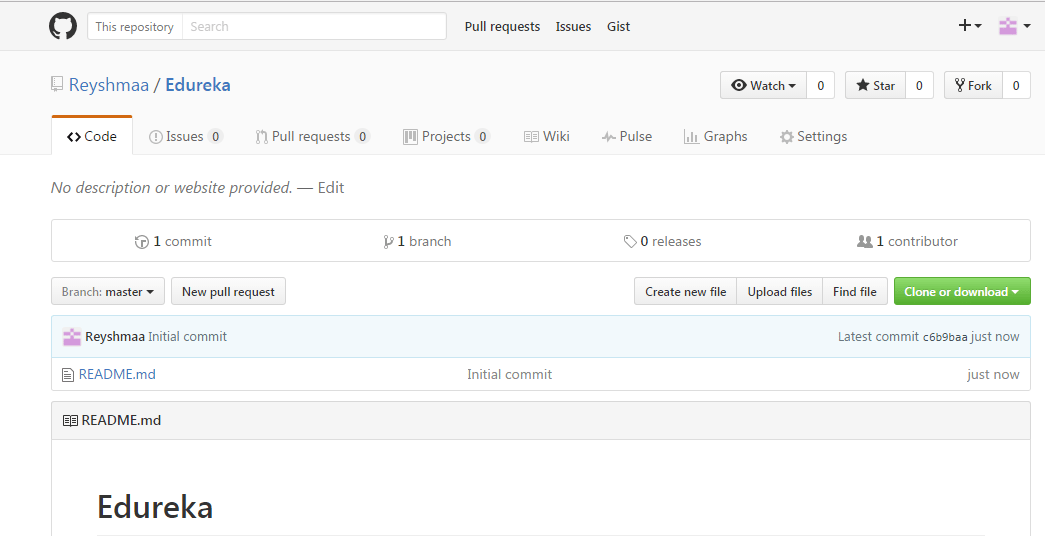
Name your repository and click on Create repository.
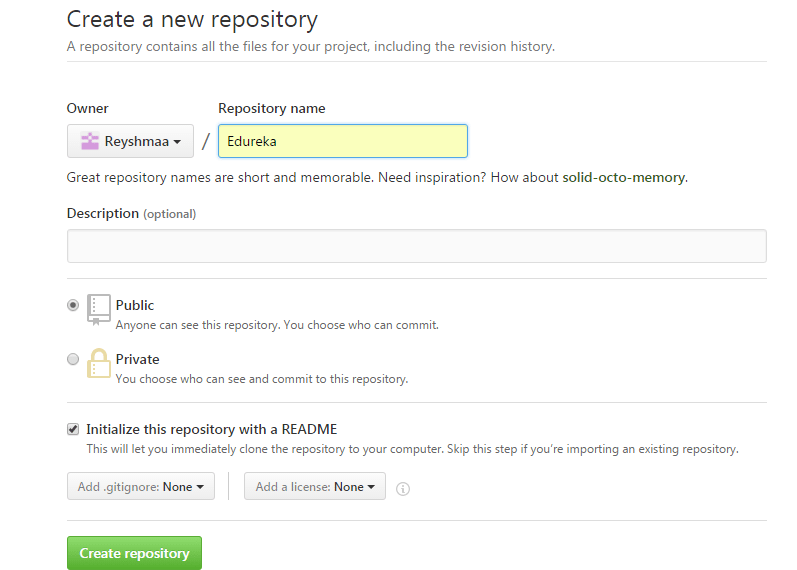

Your repository will look like this snapshot below:

Now, you are all ready to commit, pull, push and perform all other operations using Git. If you want to learn how to perform these operations and more, please checkout my Git Tutorial blog.
Popular Question:-
Do I need to install git to use GitHub?
You need to have Git installed if you want to work on your project on your local computer. GitHub will not work on your local computer if you don’t have Git installed. So, install Git for Windows, Mac, or Linux as needed.
How do I know if git is installed or not?
To check if git is installed or not, open the command prompt and execute the command git --version. If this returns a valid version number that means you have git installed in your system.