
Advanced DevOps Certification Training with G ...
- 22k Enrolled Learners
- Weekend
- Live Class
(7990)


 Copy Link!
This blog will guide you to install Ansible in your CentOS machine in two easy steps. Ansible installation is just a piece of cake ;)
You will also learn how to setup your node machines and I will show you an example of how to install Nginx in your node machine from your control machine.
If you are still a little doubtful about using Ansible to manage your servers go through the features and advantages of using Ansible in my previous blog on What is Ansible and then you would be sure that Ansible is one of the best tool in the marketplace for automation and orchestration purpose. ;)
Let’s begin with the installation now.
 Install Ansible on CentOS 6.8
Step 1: Set EPEL Repository
EPEL (Extra Packages for Enterprise Linux) is open source and free community based repository project from Fedora team which provides high quality add-on software packages for Linux distribution including RHEL (Red Hat Enterprise Linux), CentOS, and Scientific Linux.
Ansible package is not available in the default yum repositories, so we will enable EPEL repository for CentOS 6.8 using the command below:
sudo rpm -ivh http://dl.fedoraproject.org/pub/epel/6/i386/epel-release-6-8.noarch.rpm

This will download all the necessary packages which will be required to install Ansible.
Step 2: Install Ansible
Now that your EPEL repository has been added, all you have to do now is install Ansible using the command below:
yum install ansible -y

And its done. I told you Ansible is easy! :D
Now, if you want to check out your version of Ansible which you have installed, you can use the command below:
ansible –version

You can see in the above snapshot that Ansible version 2.2.0.0 has been installed in your system
After installing Ansible you need to add servers which you want to manage through Ansible. For that I have created another CentOS VM which will act as my node machine.
The first task is to setup password-less SSH authentication with nodes on my Control machine.
Step 1: Generate SSH key on the Ansible Control Machine. In order to do that, use the command below:
ssh-keygen
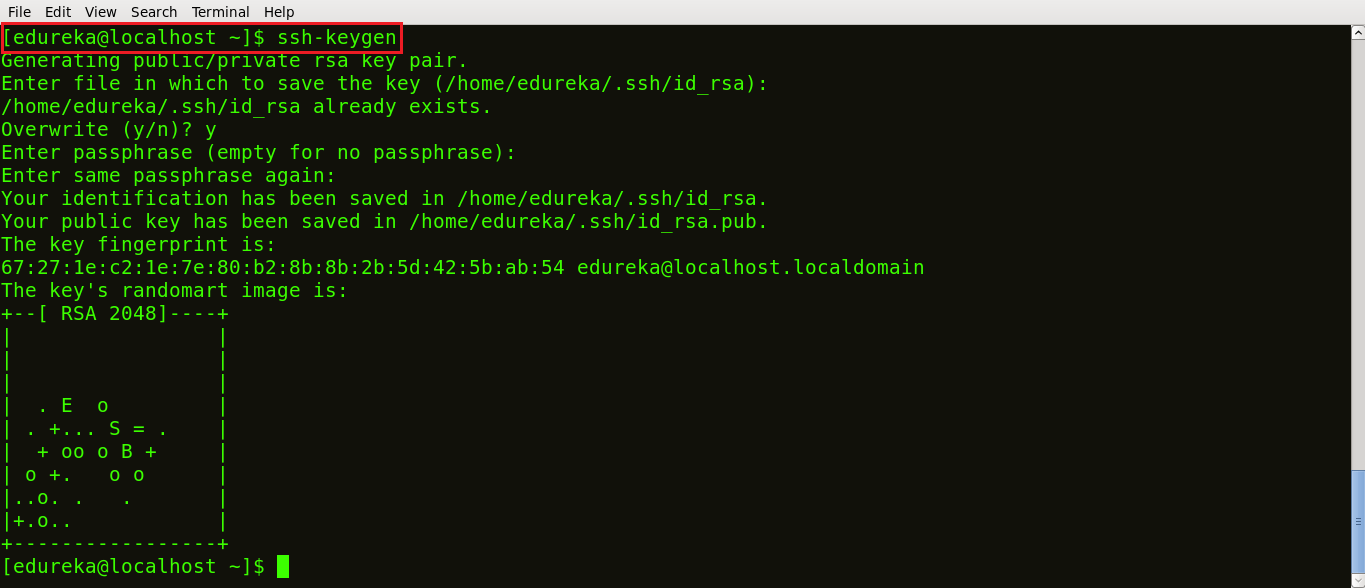
As you can see in the above snapshot a public SSH key has been generated.
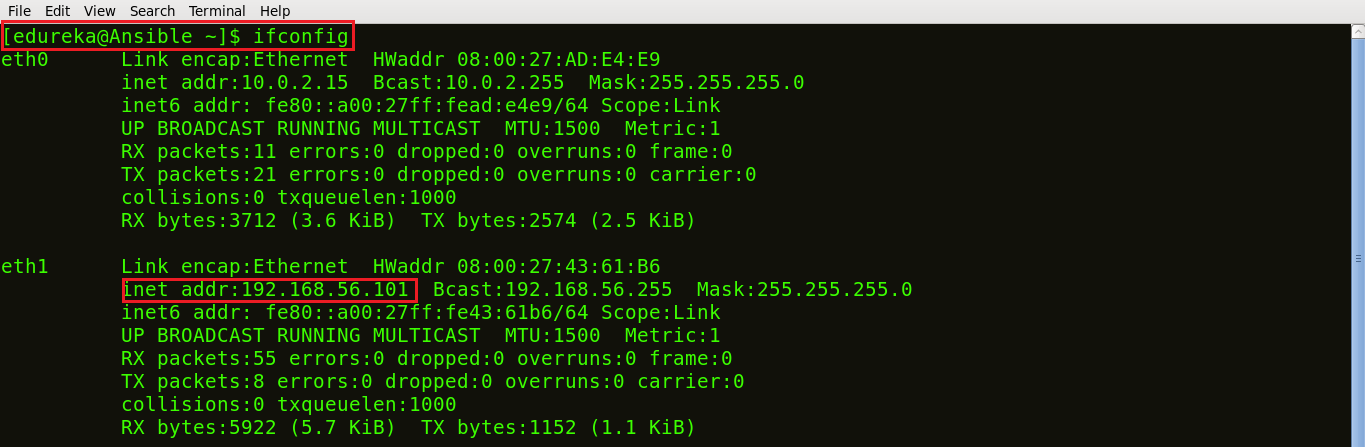
Step 2: Now, check the IP addresses of your nodes because you will need to specify it in the Ansible inventory later. To do that, type in the command ifconfig on your node terminal.
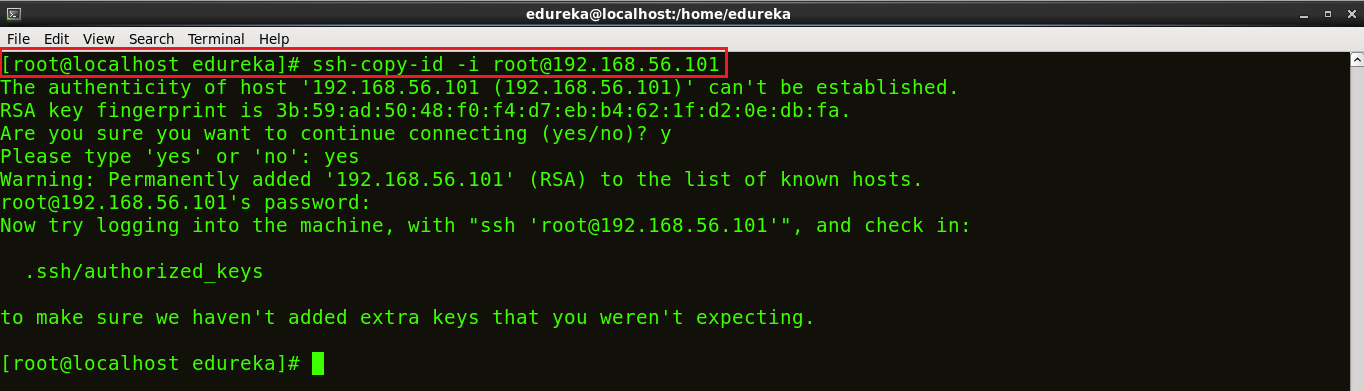
Step 3: After the key is generated, the next task is to copy public key of Ansible server to its nodes. Use the command below:
ssh-copy-id -i root@<ip address of your node machine>
Step 4: Now, you can use any editor to write your inventory or specify the IP addresses of your nodes grouped under ‘test-servers’ (or whatever you want your group name to be). I am using the vi editor.
use the following command:
vi /etc/ansible/hosts

This will open a vi editor like the snapshot below:

After you have added the IP address under ‘test-servers’, save the file and then exit.
Step 5: You might want to check if the IP address of your host has been added or not. To sample output of the host files using the following command:
cat /etc/ansible/hosts

You can see the IP address of my host being displayed in the snapshot above.
Step 6: Let us now perform a simple ping operation to test the connectivity using Ansible. To do that, just type the following command:
ansible -m ping ‘test-servers’

Now, that you have checked the connection with your host machines, you are ready to manage them with Ansible.
Let me show you few shell command examples using Ansible.
Uptime is a measure of the availability and working time of a computer. In order to check that use the following command:
ansible -m command -a “uptime” ‘test-servers’

It can be useful to know the version number of the kernel (i.e., the core of the operating system). Use the command below:
ansible -m command -a “uname -r” ‘test-servers’

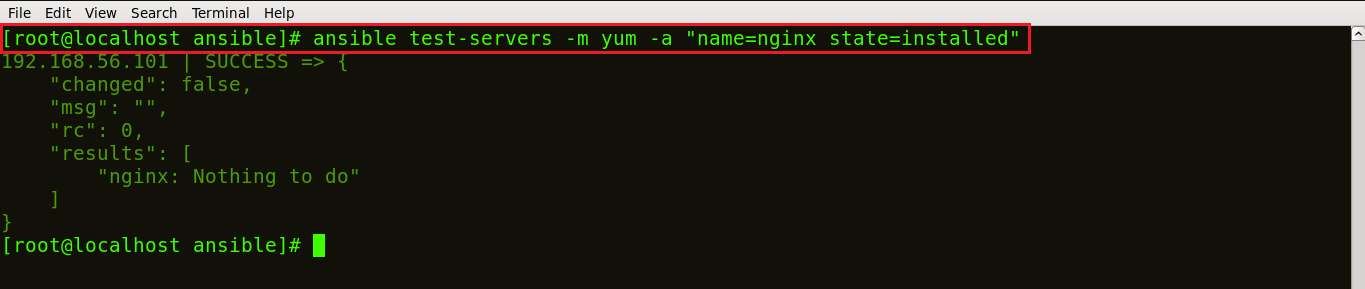
Now, let us install Nginx into my node machine from my control machine using Ansible.
Nginx is software to provide a web server. It can act as a reverse proxy server for TCP, UDP, HTTP, HTTPS, SMTP, POP3, and IMAP protocols, as well as a load balancer and an HTTP cache.
I am deploying Nginx using Ansible in just one node. You can deploy it in multiple nodes too using the same way. All you have to do is list out the IP addresses of the nodes under ‘test-servers’.
Use the following command in your control machine:
ansible test-servers -m yum -a “name=nginx state=installed”
Now to check if it is installed in your node machine, type the following command in your node:
ps waux | grep nginx

The above snapshot shows that few processes are running with the PID 16387 and 772 which indicates that Nginx has been installed and it is ready to get started.
I have used Ad hoc commands here to install Nginx on my nodes, but you can do the same using Ansible playbooks or using the pre-defined Ansible modules as well.
I hope you have enjoyed this ‘Install Ansible’ blog and Ansible is up and running in your machine by now. :)
If you want to learn how to manage your servers by using Ansible playbooks and Adhoc commands in my next blog on Ansible Tutorial.
If you found this “Install Ansible” relevant, check out the DevOps Certification Course by Edureka, a trusted online learning company with a network of more than 250,000 satisfied learners spread across the globe.


 Thank you for registering Join Edureka Meetup community for 100+ Free Webinars each month JOIN MEETUP GROUP
Thanks for your Ansible article. I’ve seen your Ansible playbooks video and it helps me to understand the basic things. Thanks a lot!.