


Informatica provides the market’s leading data integration platform. Tested on nearly 500,000 combinations of platforms and applications, the data integration platform interoperates with the broadest possible range of disparate standards, systems, and applications. This unbiased and universal view makes Informatica unique in today’s market as a leader in the data integration platform and Informatica Certification one of the most engrossed skills. In this blog, I will help you with Informatica installation and configuration of its services.
Let’s begin by setting up of Oracle database as our primary database on your system. In case you have already installed and configured the Oracle Database and SQL Developer, you can proceed directly to Informatica Installation.
Oracle Database Installation
To commence with the Oracle installation, begin by downloading the setup zip file from the link below.
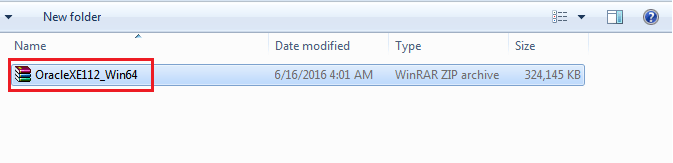
Step 1: Download Oracle Database Express Edition from the below link (I am installing on a Windows 64 bit OS, so I have selected windows x64):
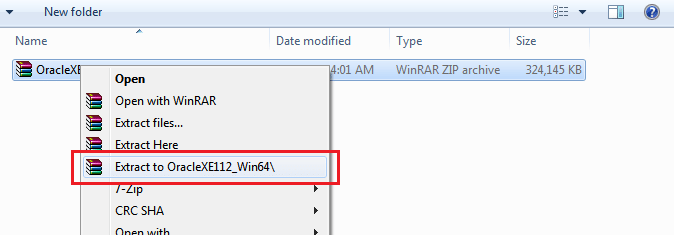
Step 2 : Once the file download is complete, extract the file:


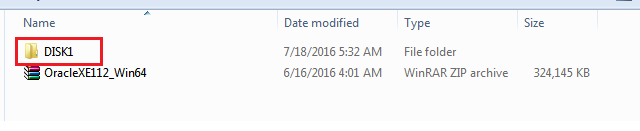
Step 3 : After extracting the file you will get DISK1 folder, Open the folder.

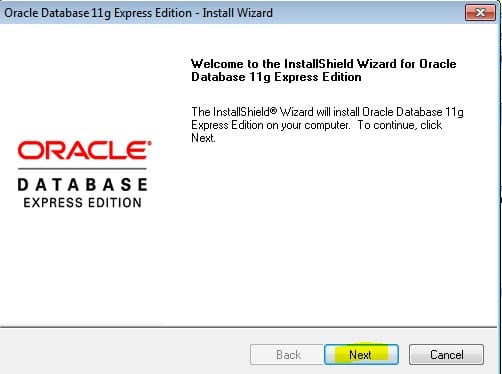
Step 4: Double click on setup to start installation:


Click on Next.

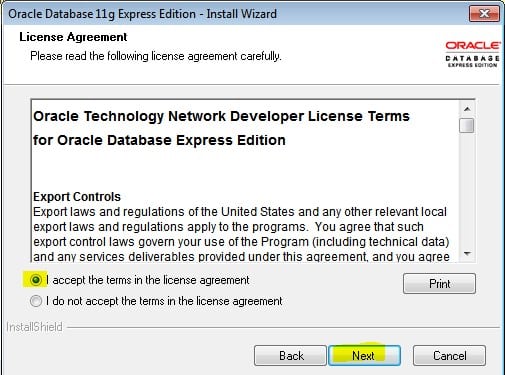
Step 5: Accept the terms and click on Next.

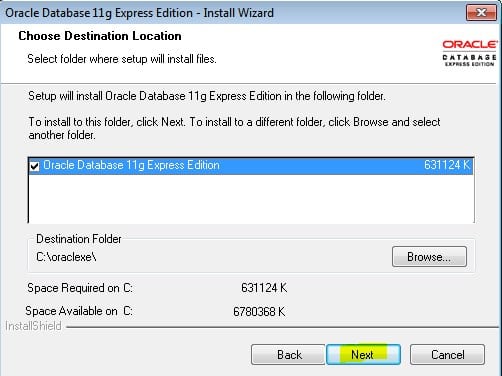
Click on Next.

Step 6: Specify the Database Password.
- Enter Password: oracle123
Note: If you are choosing your own password so please make a note, we will need this password again.
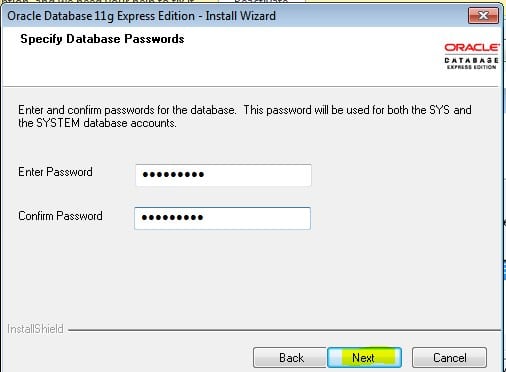

Note: The Default port in which Oracle listens is 1521.
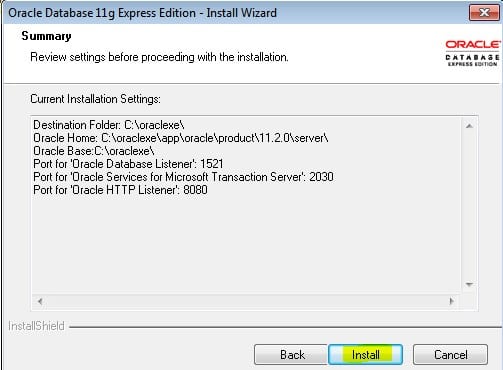
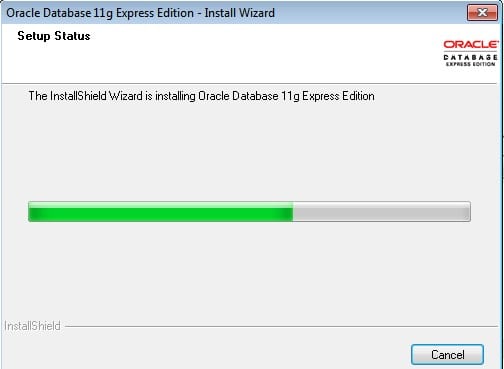
Click on Install.

This may take a while.

Step 7: Click on finish to complete the installation.


Configuration of Oracle SQL Developer
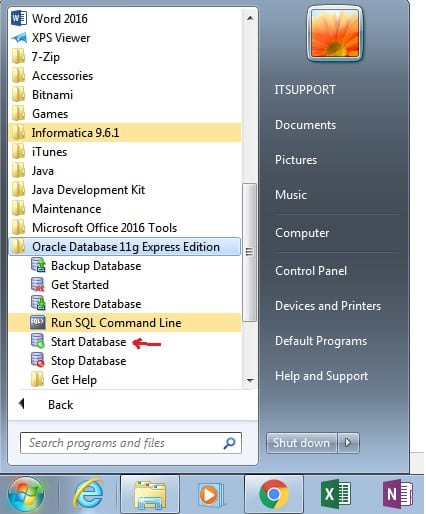
Before beginning the SQL developer installation, make sure you have started the database. If the database isn’t started, the connection between the SQL developer and database will fail.
To start the database: Go to Start -> Oracle Database 11g Express Edition -> Click on Start database.

Now we can begin the Configuration of Oracle SQL Developer:
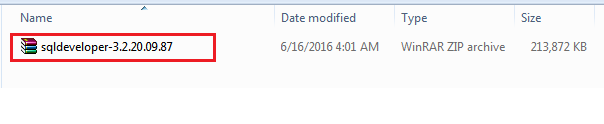
Step 1: Begin by downloading Oracle SQL Developer zip file. I recommend you use SQL Developer 3.2.20 as the later versions require you to install Java 1.8 and manually set the path. You can download the file from the link below:
Step 2: Once the download is complete, extract the downloaded file.

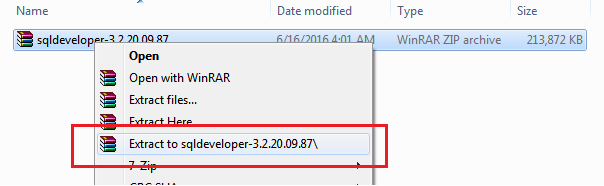

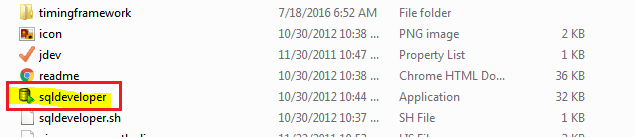
Step 3: After the extraction is complete, you will get sqldeveloper – 3.2.20.09.87 folder. Enter the sqldeveloper – 3.2.20.09.87 folder and double click on click on sqldeveloper to start configuration.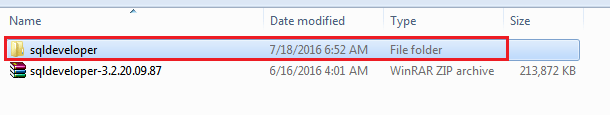


Note: If we go for the version 4.0 or higher of SQL Developer we need to install JDK 1.8 and we have to manually configure the complete path so we will recommend to go with version 3.2 itself.
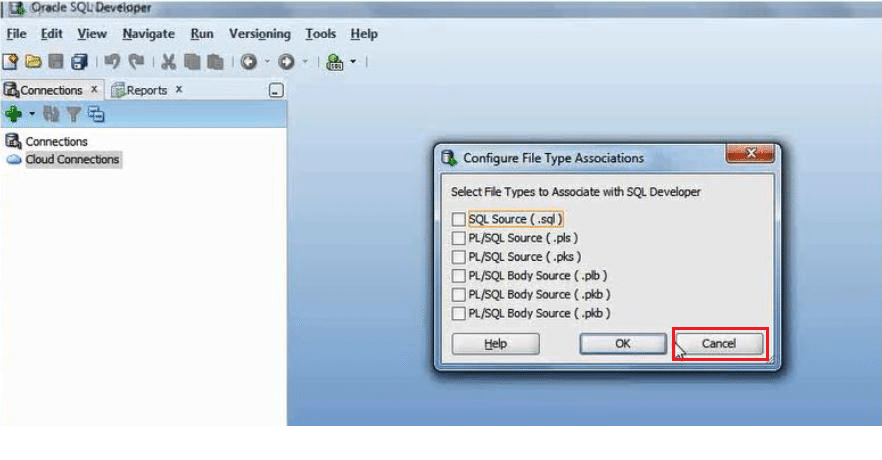
Step 4: Once the initialization is completed, you will get to the home screen below. Do not select any configure file type association, directly click on cancel.

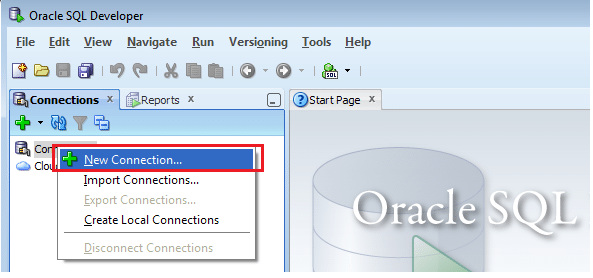
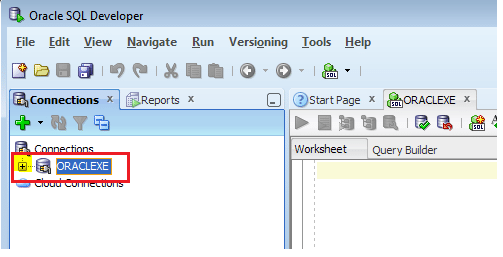
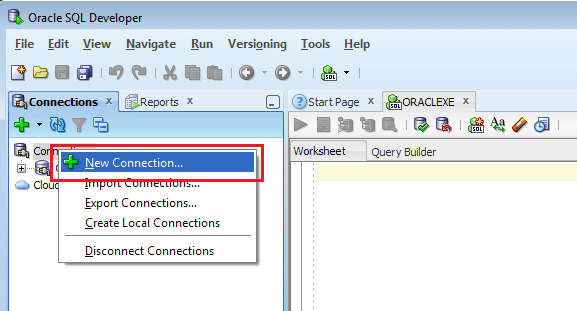
Step 5: To establish the connection, start by right clicking on connections and Click on New Connections.

Step 6: We will now connect to the Oracle Database. Enter the following details as below :
- Connection Name: ORACLEXE
- Username: sys
- Password: oracle123 (here we have to specify the same password that was set while database installation)
- Role: SYSDBA
Click on Save -> Test -> Connect


Once we will click on connect we can see the Connection is added in the list.

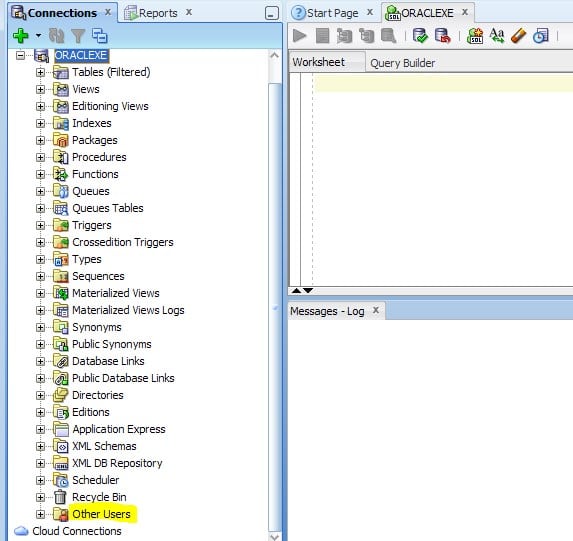
Step 7: Now click on the Plus icon next to ORACLEXE to get the screen below:

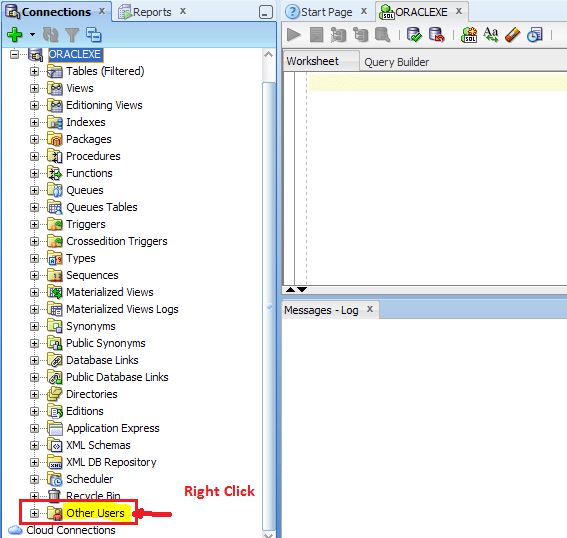
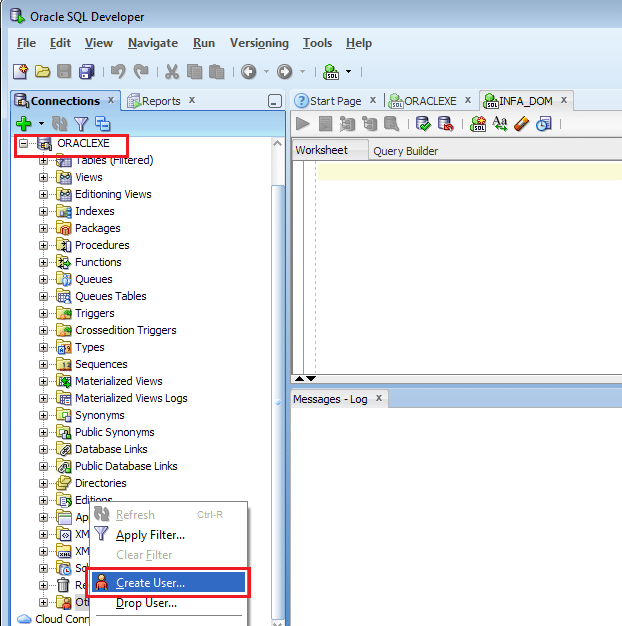
Step 8: Now we have to create 2 users.
- INFA_DOM (For Domain)
- INFA_REP (For Repository)
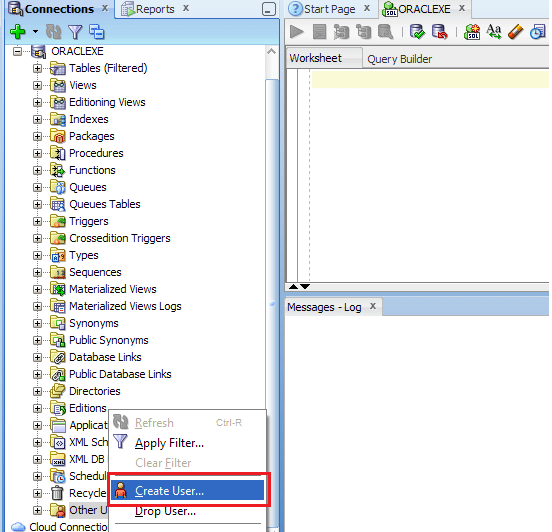
Right click on Other Users to create user.

Click on Create User.

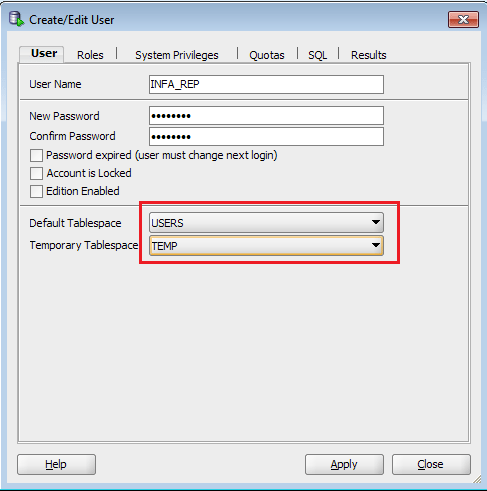
Step 9: We will now be creating the user for domain. Enter the following User details :
- User Name: INFA_DOM
- Password: INFA_DOM
- Default Tablespace: USERS
- Temporary Tablespace: TEMP
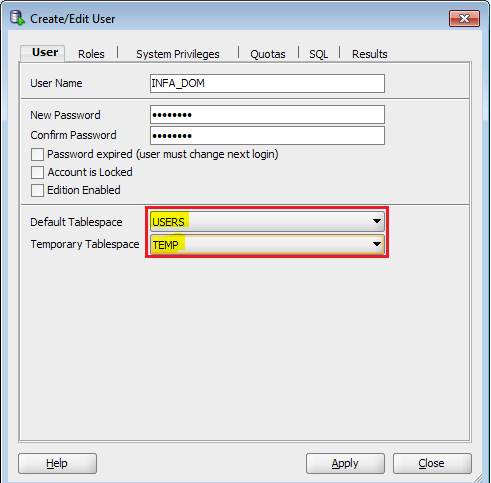

Note: After specifying all the details do not click on Apply
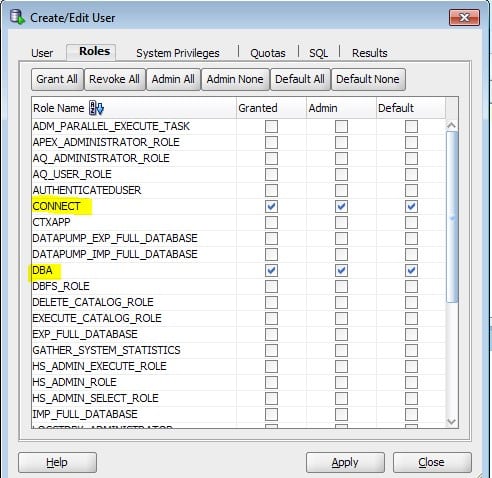
Step 10: Click on roles tab to define the roles of the user.
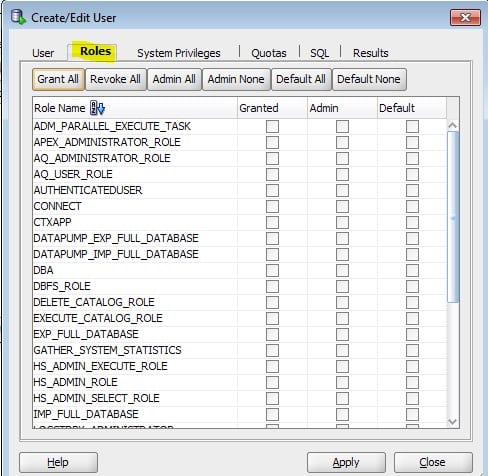

Step 11: We have to assign the Domain user complete permissions for :
- DBA
- CONNECT
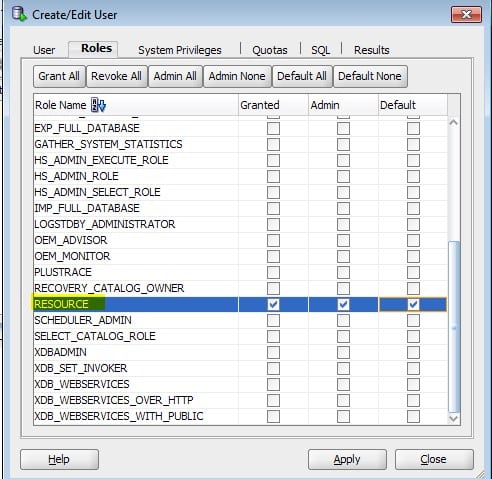
- RESOURCE

Scroll down for to find resources role :

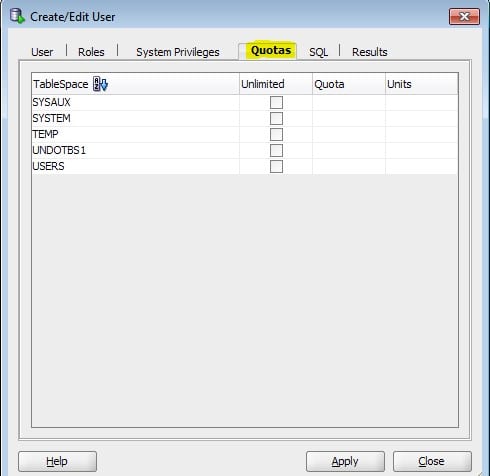
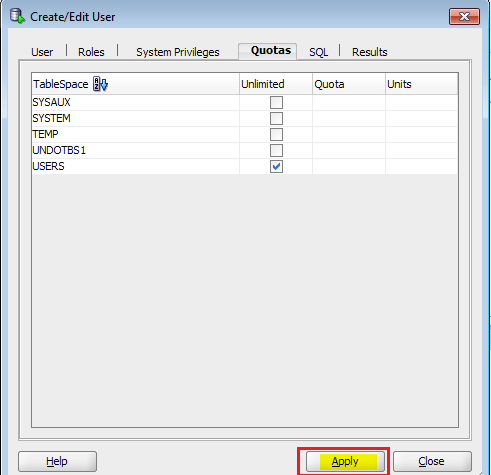
Step 12: Now Click on Quotas tab to assign tablespace area:

Step 13: Select USERS and assign the unlimited option. Click on Apply
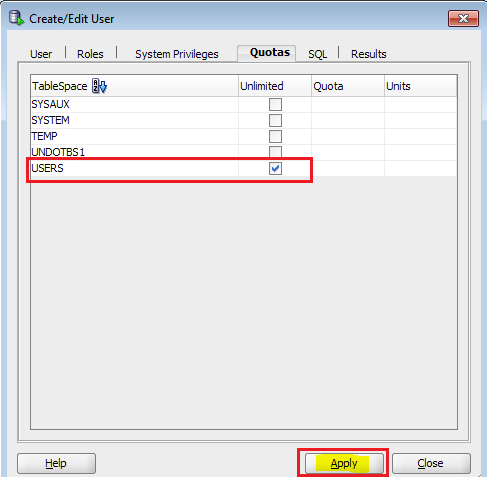

Click on Close.


User INFA_DOM has successfully been created.
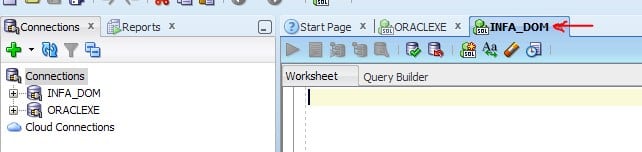
Step 14: Now we will click on Connection and New Connection to connect to Domain user.

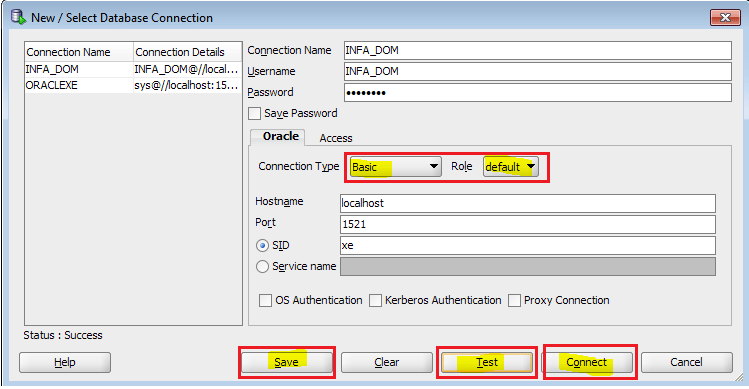
Step 15: Enter the following user details :
- Connection Name: INFA_DOM
- Username: INFA_DOM
- Password: INFA_DOM
- Connection Type: Basic
- Role: Default
Click on Save -> Test -> Connect

Once we will click on connect we can see the User is added in the list

Step 16: We will now add Repository user in the similar manner. Click on other user and add users under ORACLEXE.

Step 17: Enter the following details for Repository user:
Username: INFA_REP
Password: INFA_REP
Default Tablespace: USERS
Temporary Tablespace: TEMP

Step 18: As in Domain user, provide the Repository user with complete permission for following roles under Roles tab:
- DBA
- CONNECT
- RESOURCE
Step 19: Click on Quotas tab and select unlimited option for Users as seen below:

Click on Close.
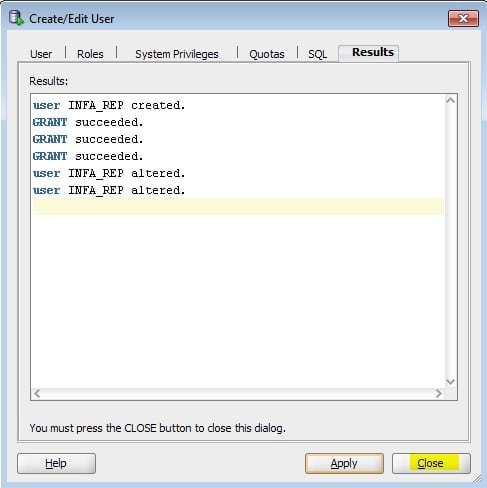
User INFA_REO has successfully been created.
Step 20: Now we will click on Connection and New Connection to connect to Repository user.
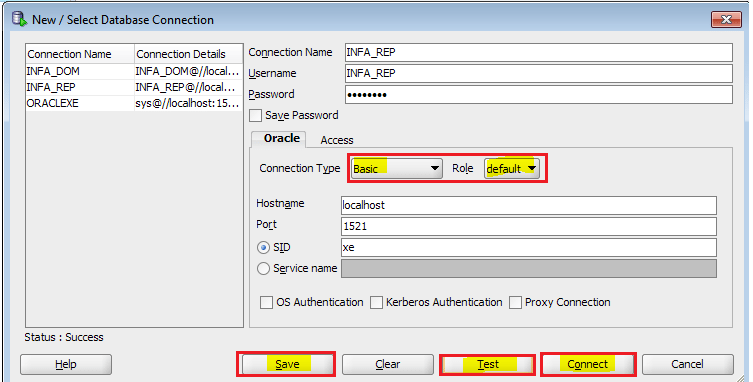
Step 21: Enter the following user details :
- Connection Name: INFA_REP
- Username: INFA_REP
- Password: INFA_REP
- Connection Type: Basic Role: Default
Click on Save -> Test -> Connect

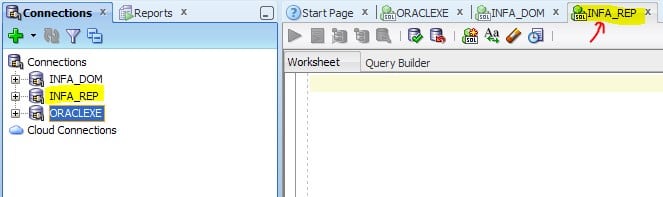
Now you can see New user INFA_REP is created and connected successfully.

Now we are done with the Installation of Oracle and SQL now we have to download the Informatica tool and install them.
Informatica Installation
The Informatica installation will follow the steps below:
- Downloading the Installation Packs.
- Unpacking the Installation Packages.
- Informatica PowerCenter Pre-Installation check.
- Installing Informatica PowerCenter.
- Domain Configure.
- Configure Repository Service.
- Configure Integration Service.
- Client Installation.
- PowerCenter Designer Configuration.
Lets begin the installation process now :
Step 1: Downloading Installation Packs
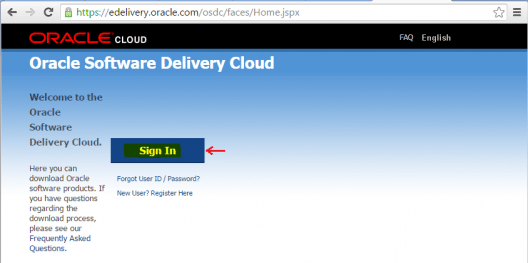
To begin with the Informatica installation, we start off by downloading the free version of the Informatica PoweCenter provided by oracle.
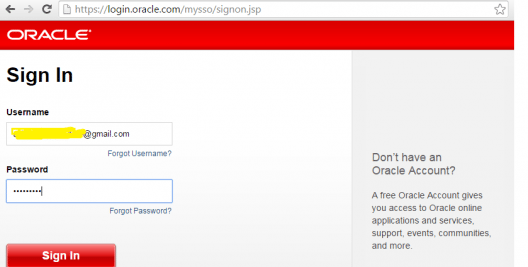
Step 1.1: Download Informatica 9.6.1 using below link
Step 1.2: Sign in to your account, If you do not have Oracle account use New User option to create account.


Step 1.3: In search Box type PowerCenter.
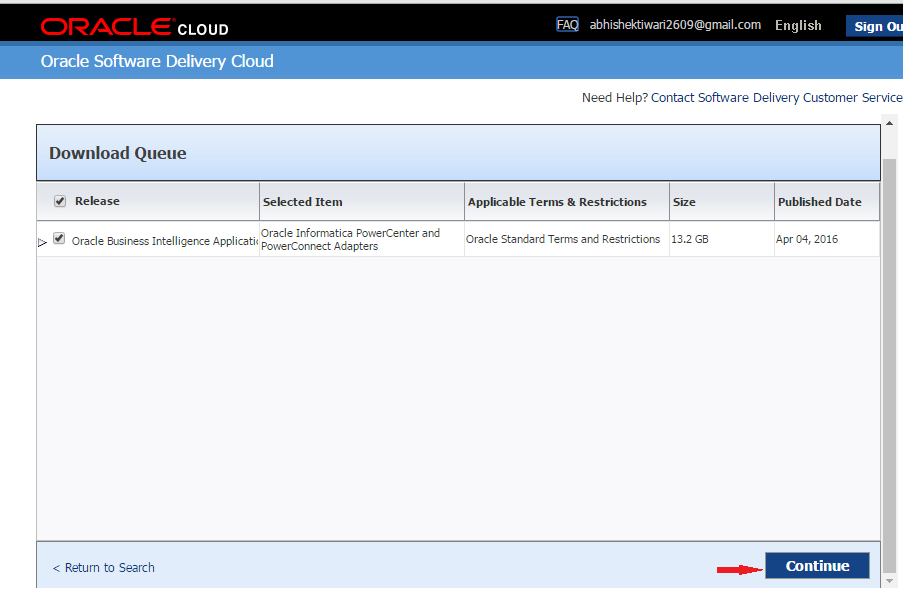
Step 1.4: Select Oracle Informatica PowerCenter and PowerConnect Adapters.
Step 1.5: Select Platform (I am installing on a Windows 64 bit OS, so I have selected windows 64 ).

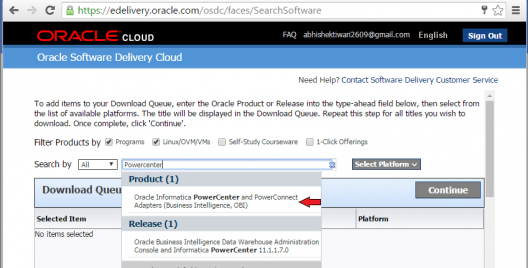
Step 1.6: Click on Continue.

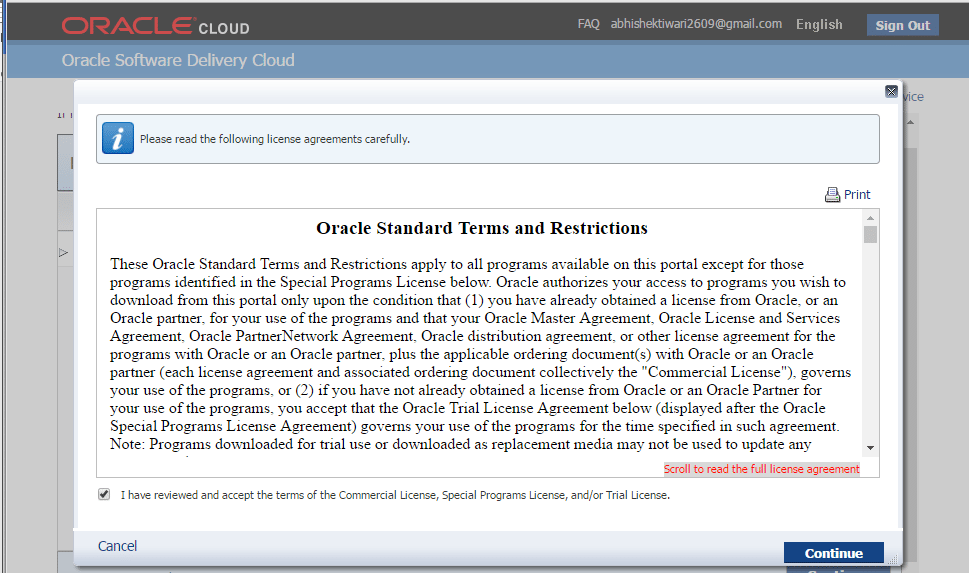
Step 1.7: Accept the Oracle license.

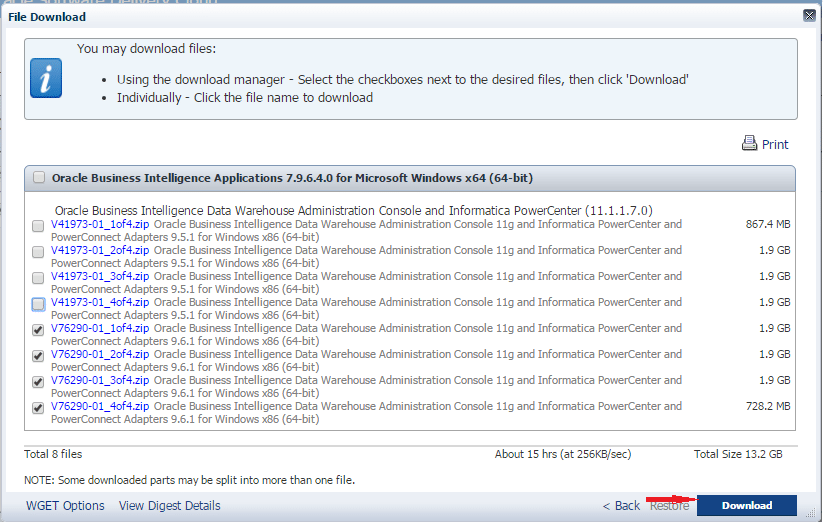
Step 1.8: Now as in below screenshot, you have to select last four files from the list.
Step 1.9: After selecting files click on Download.

Step 1.10: You will get a pop up asking you to download installer.
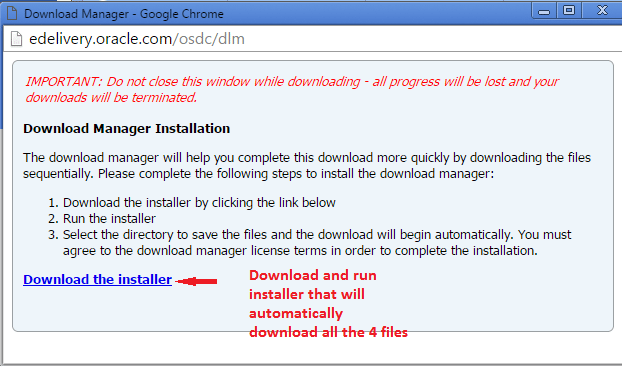
Step 1.11: Download the installer and install it in your system. Once installer is launched it will automatically download all the four files in specified directory.
Since the required files are now downloaded, we will proceed ahead with the Informatica installation by unpacking the downloaded files.
Step 2: Unpacking the Installation Packages
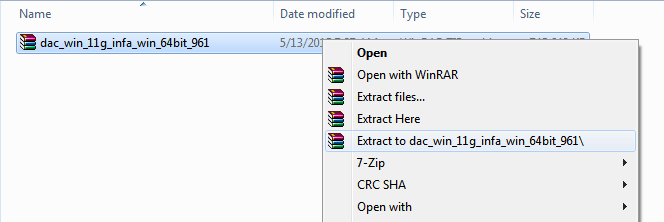
Note : Use WinRAR for extraction of the files as any other file explorer may cause an error while extracting the dac_win_11g_infa_win_64bit_961
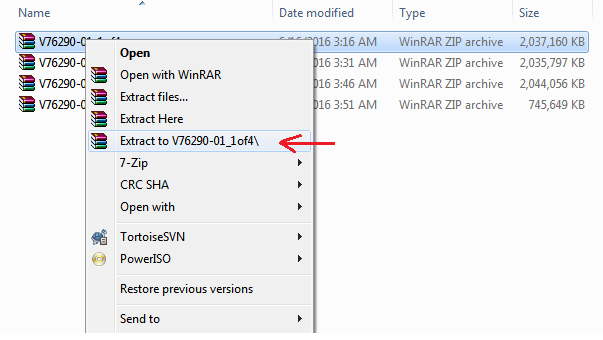
Step 2.1: Now extract all the four files one by one.
Step 2.2: Extract it in the same directory using option as suggested in below screenshot.


Step 2.3: After extracting, you will get four files :
- V76290-01_1of4.
- V76290-01_2of4.
- V76290-01_3of4.
- V76290-01_4of4.

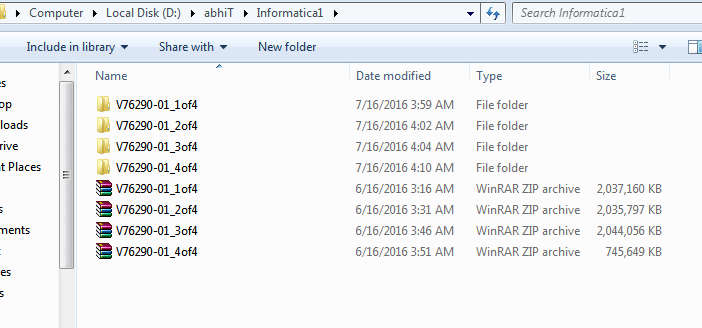
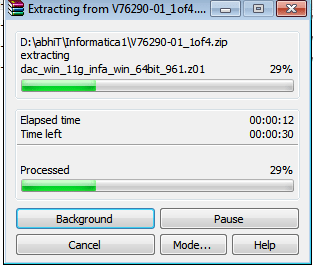
Step 2.4: Now enter into fourth file V76290-01_4of4, and extract the file named dac_win_11g_infa_win_64bit_961.

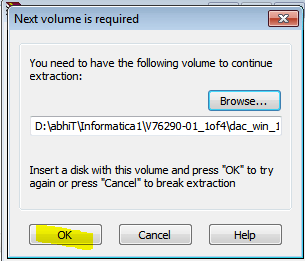
Step 2.5: While extracting this file, you have to enter the path of all the 4 extracted files one by one as suggested in below screenshot :
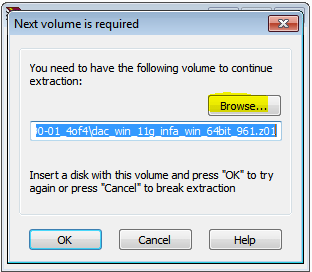

Step 2.6: When you get above window, browse to the location of first extracted file and click OK as suggested below :

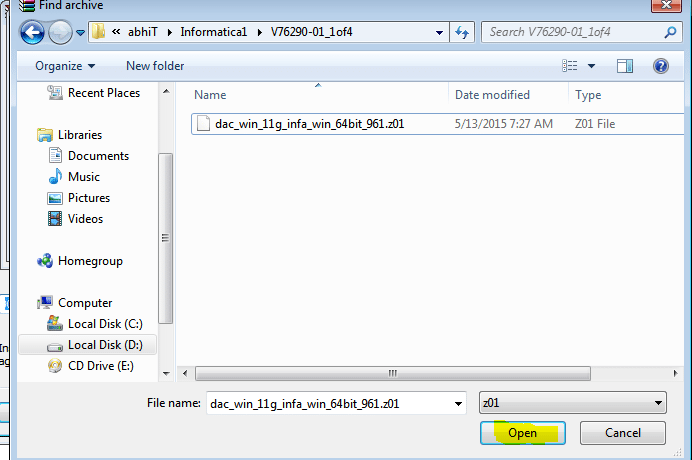
Step 2.7: In the same way browse and extract the second, third and fourth file.

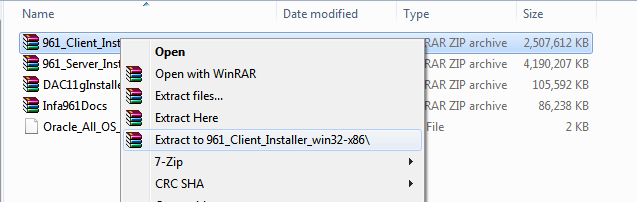
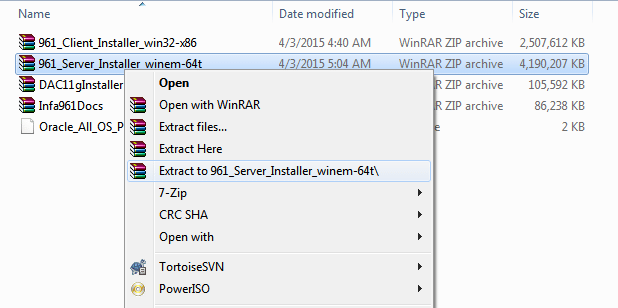
Step 2.8: Now enter into extracted file dac_win_11g_infa_win_64bit_961 and extract server and client installer using option as suggested in below screenshots.

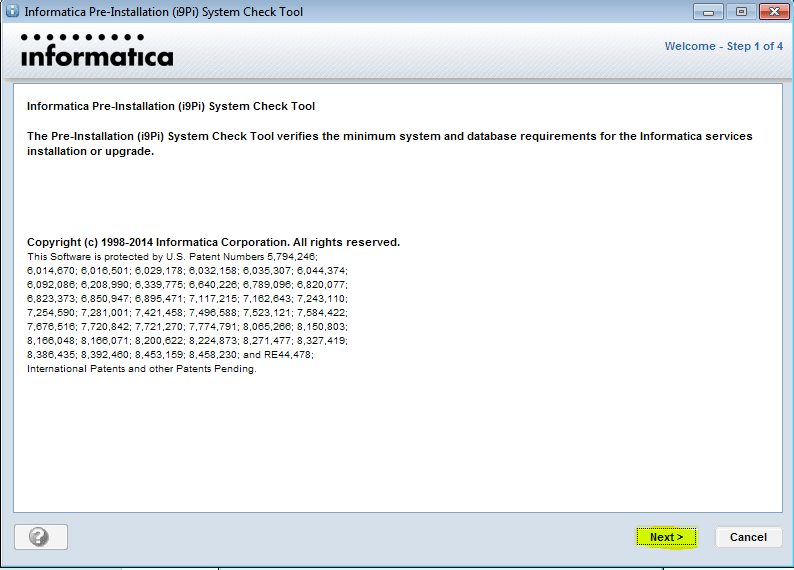
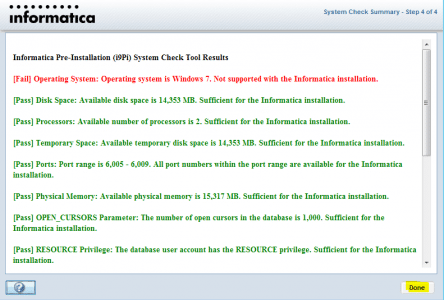
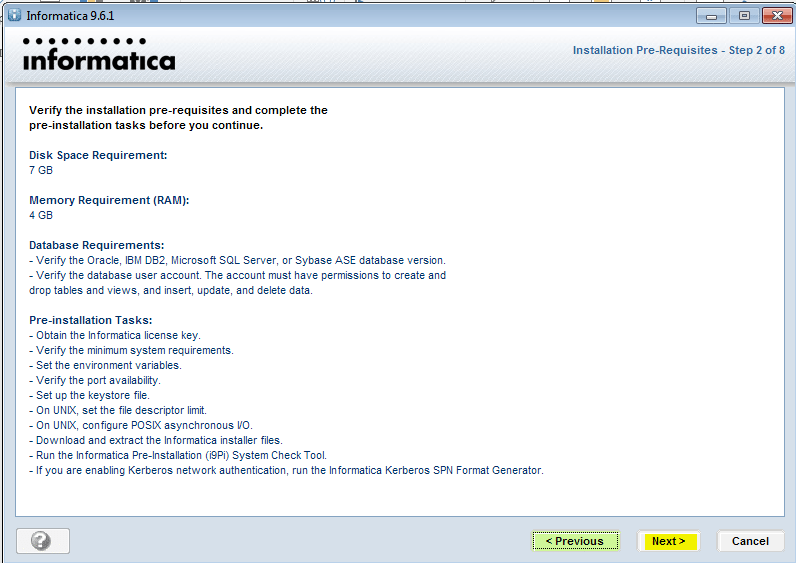
Step 3: Informatica PowerCenter Pre-Installation Check.
From this point onward the Informatica installation process begins, however before we go ahead with the actual process we need to check whether the current system meets with the minimum requirements for Informatica installation.
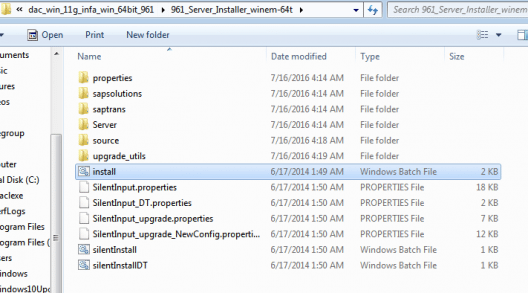
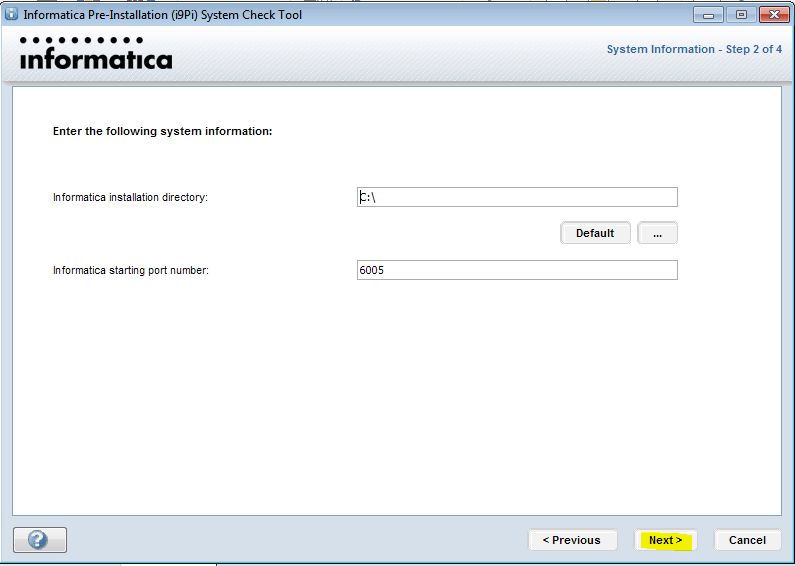
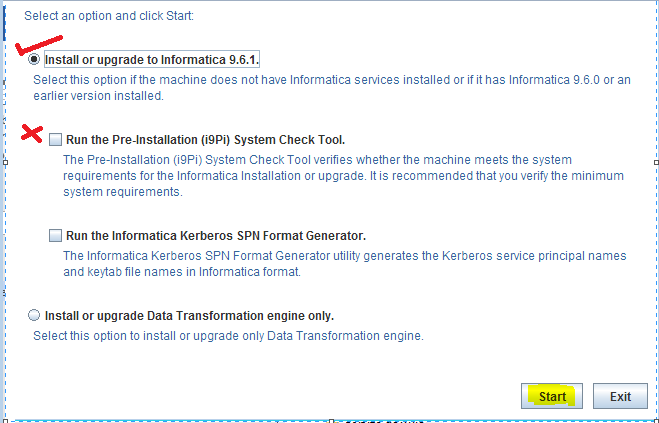
Step 3.1: Enter into directory 961_Server_Installer_winem-64t and double click on install.bat file to begin the installation.

Step 3.2: Follow below screenshot.

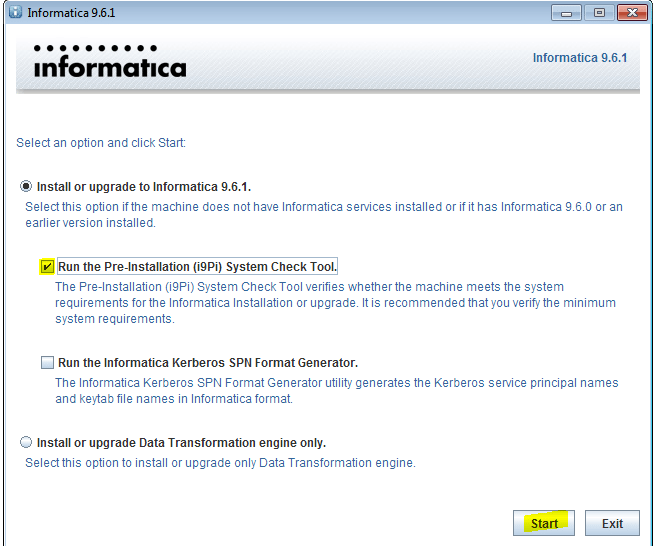

Click on Next.

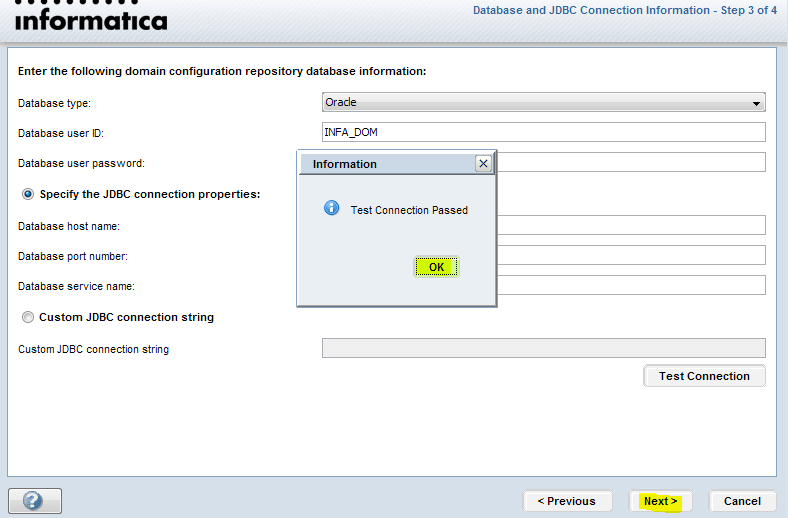
Step 3.3: Enter the domain configuration as below :
- Host name : EDUREKA23 (this is my machine’s hostname)
- Database Password : INFA_DOM
- Database User ID : INFA_DOM
- Database type : Oracle
To connect to a remote host, you would have to purchase the Licence from Informatica which costs a few thousand USD per year depending on certain parameter like Number of users, Operating System, Number of processors, etc.

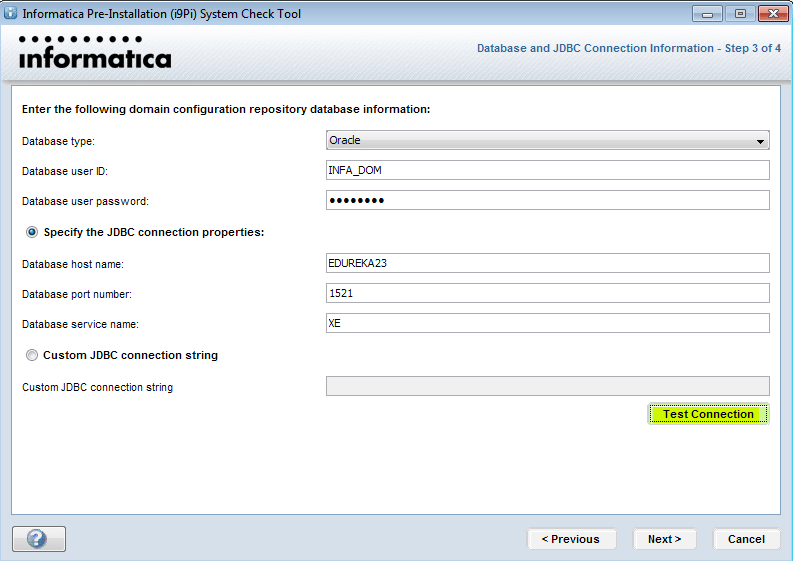
- To find the hostname of your machine, go to oracle installation directory and open tnsname.ora file, present in C:oraclexepporacleproduct .2.0server
etworkADMIN path

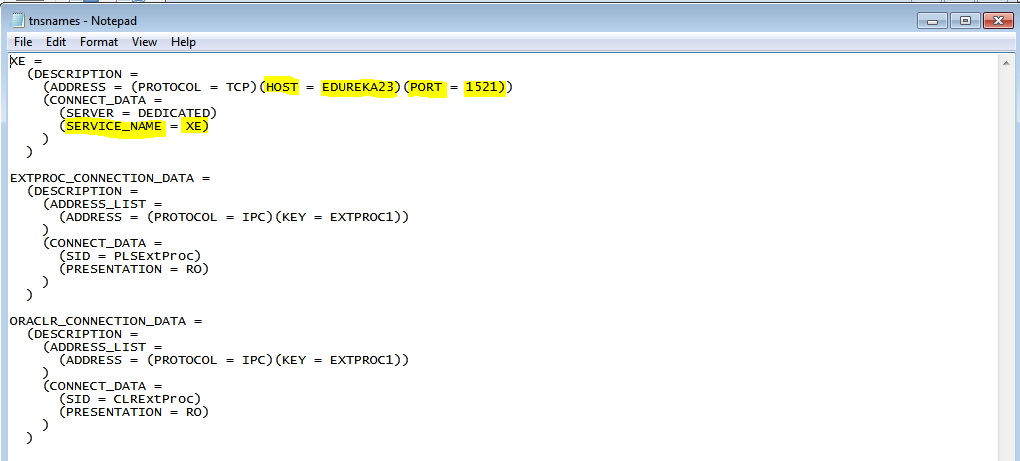
Step 3.4: Click on Test Connection and Next.

Step 3.5: Click on Done.

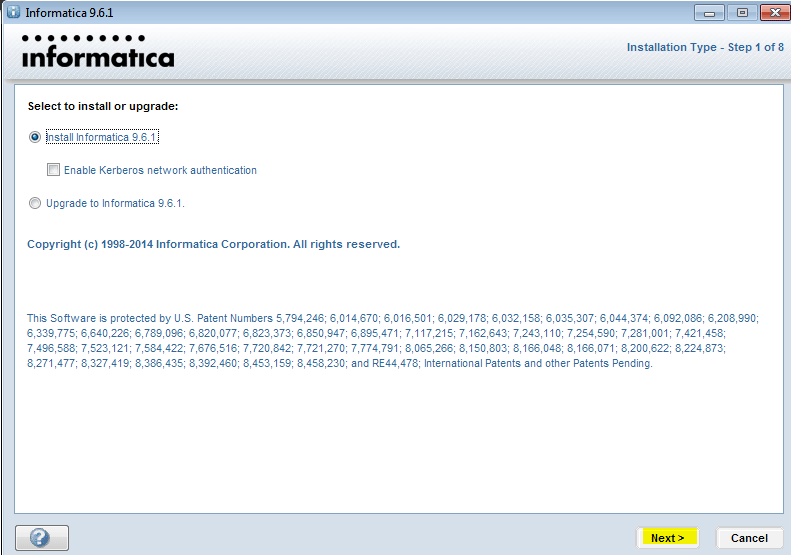
Step 4: Installing Informatica PowerCenter
Now that we have verified that the current system meets the minimum requirements, we will proceed with the actual Informatica installation.
Step 4.1: Now again go to the extracted directory 961_Server_Installer_winem-64t and double click on install.bat file.

Step 4.2: Follow below steps.

Click on Next.

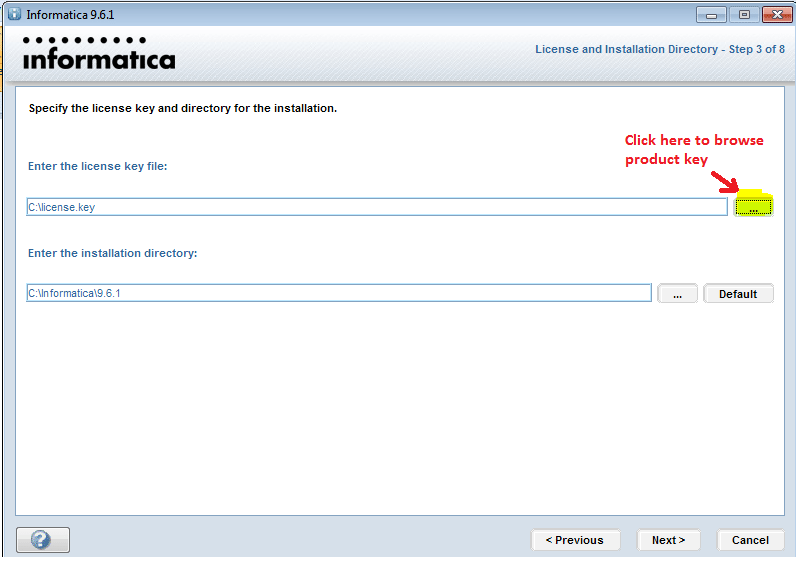
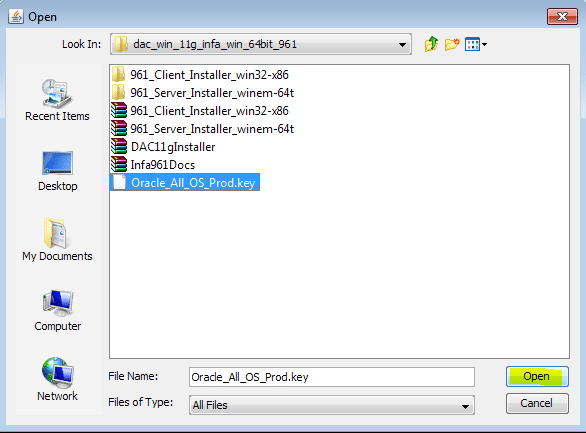
Step 4.3: Now in below window browse for product key Which is present under V76290-01_4of4dac_win_11g_infa_win_64bit_961.

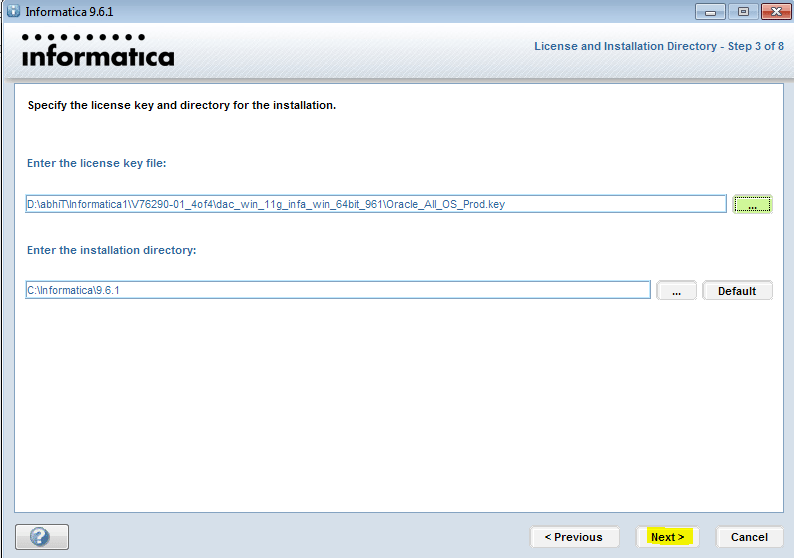

Click on Next.
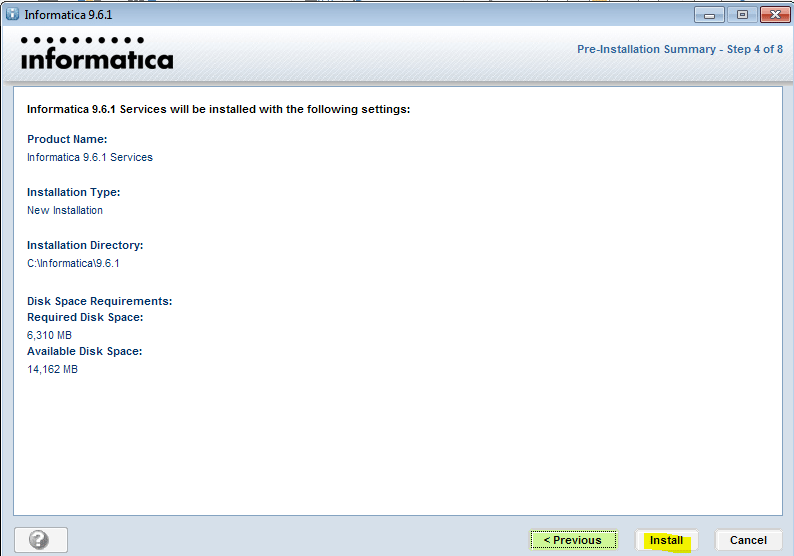

Click on Install.
- It will take a bit time to install the software.

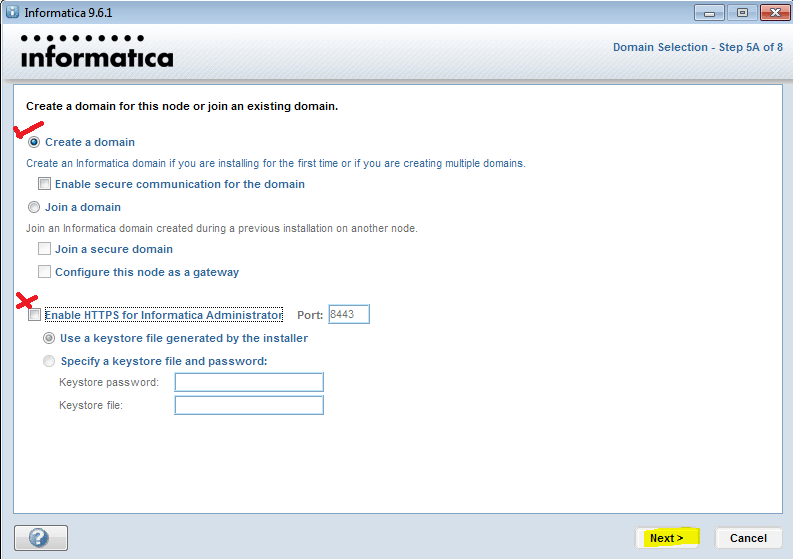
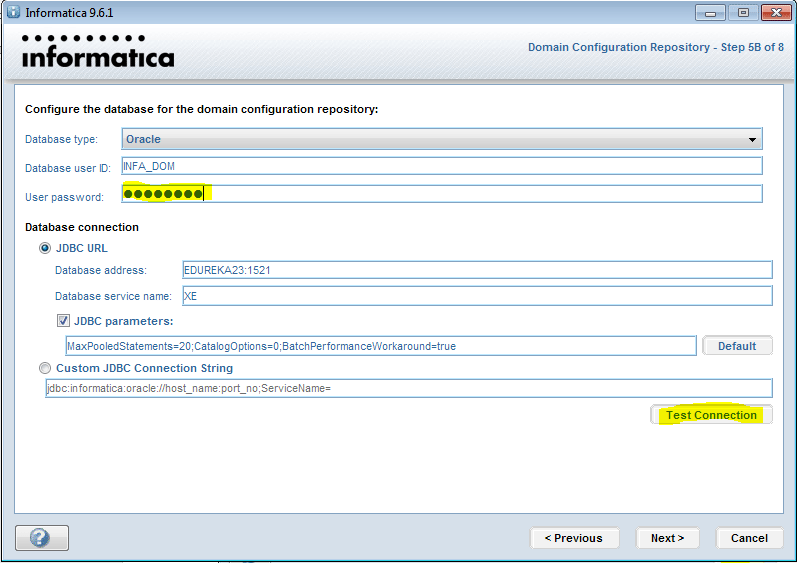
Step 5: Domain Configuration
Now that we have completed with the Informatica installation, we begin the process of configuration. The first component that needs to be configured is the operational domain.
Step 5.1: Uncheck “Enable HTTPS for Informatica Administrator” and click Next.
Step 5.2: Enter the domain configuration as below :
- Database type : Oracle
- Database User ID : INFA_DOM
- User Password : INFA_DOM
- Rest of the parameter are default.
Step 5.3: Click on Test connection and click Next.

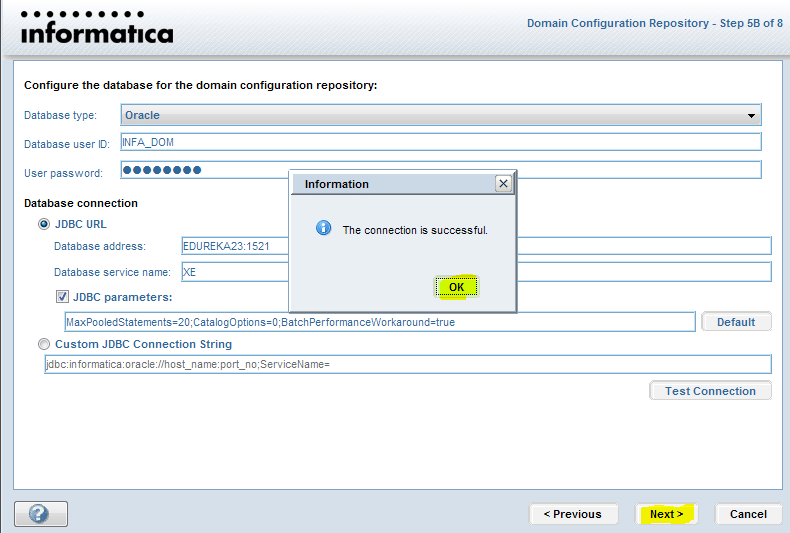
You have successfully tested the domain connection.
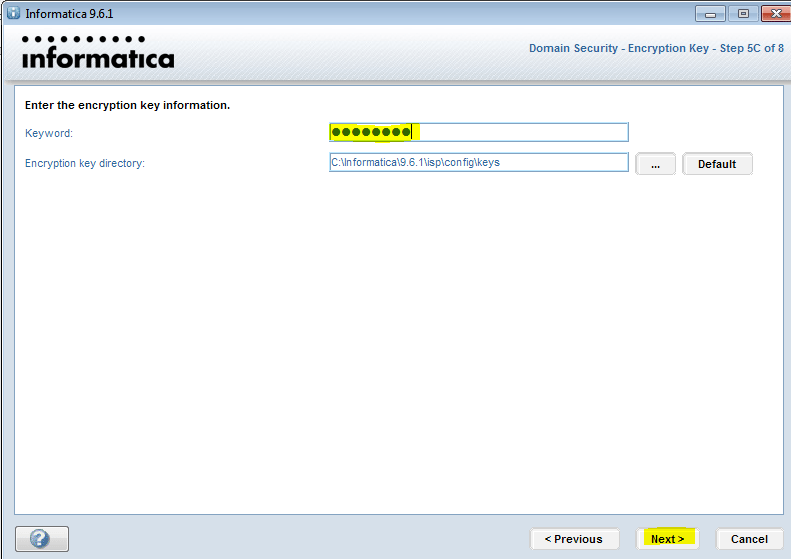
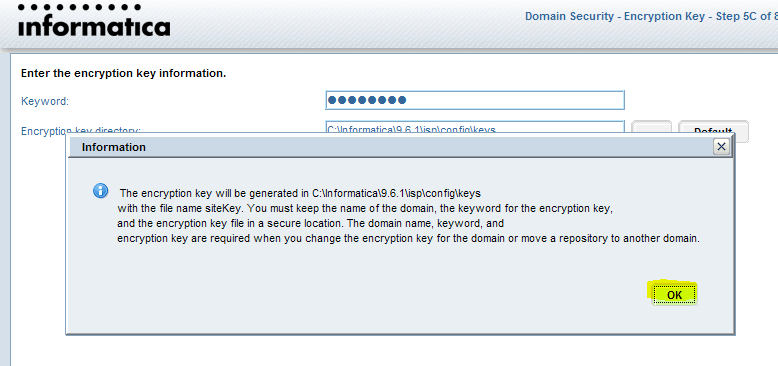
Step 5.4: Enter the Encryption key information( I am choosing Edu@1122, you can choose as like):
- Keyword : Edu@1122
Click on Next and OK.


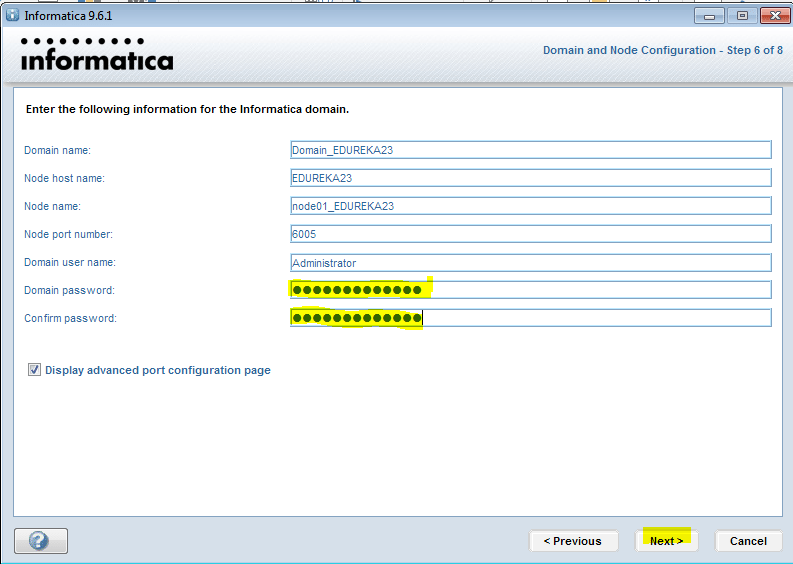
Step 5.5: Enter the following details as below regarding Informatica Domain :
- Domain User Name : Administrator
- Domain Password : Administrator
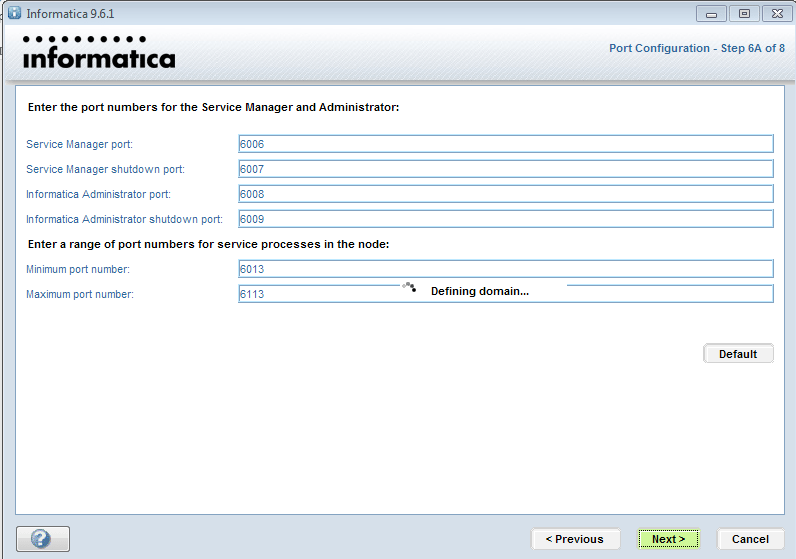
Mark check on Display advance port configuration page and click on Next.

Click on Next.

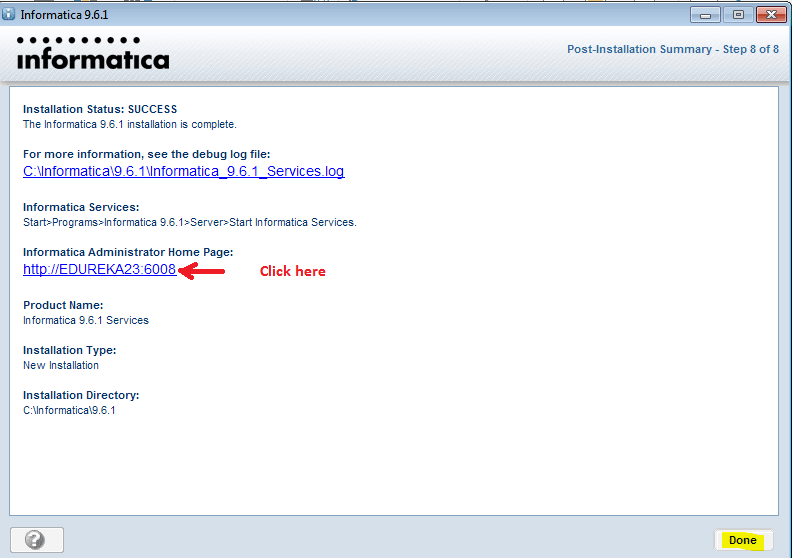
- It will take time to configure settings.
Step 5.6: Uncheck Run Informatica under a different user account and Click on Next.


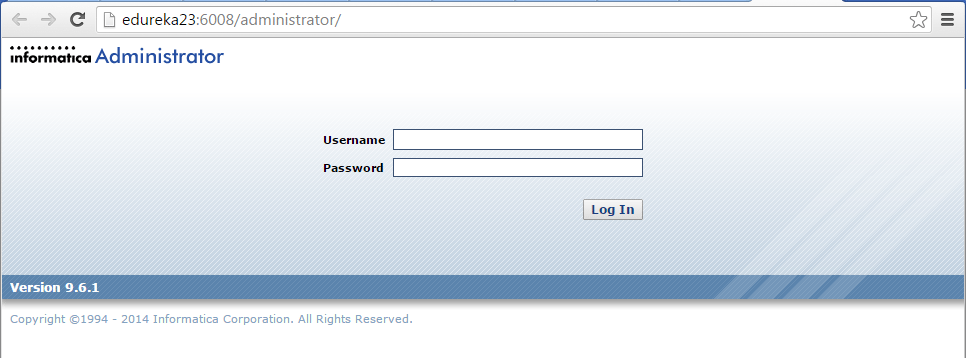
Step 5.7: Click on Informatica Administrator Home Page link.
Step 6: Configure Repository Service
Once the operational domain is configured, we need to configure the repository services which will connect to the repository from client applications.
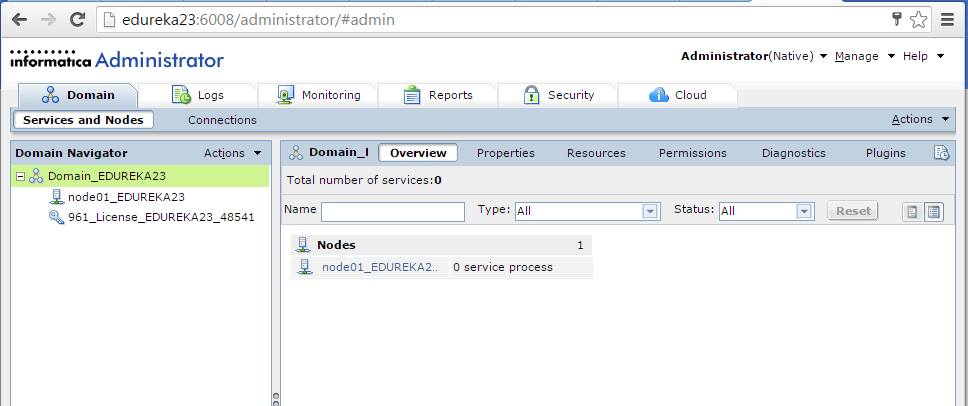
Step 6.1: After clicking on above link, Informatica Administrator console will be opened in browser.
- Username : Administrator
- Password : Administrator


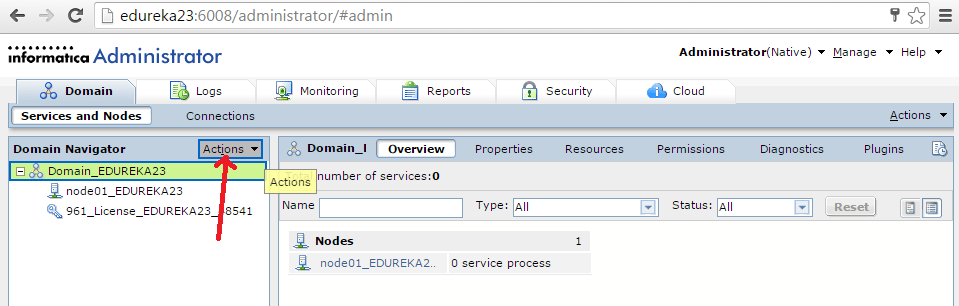
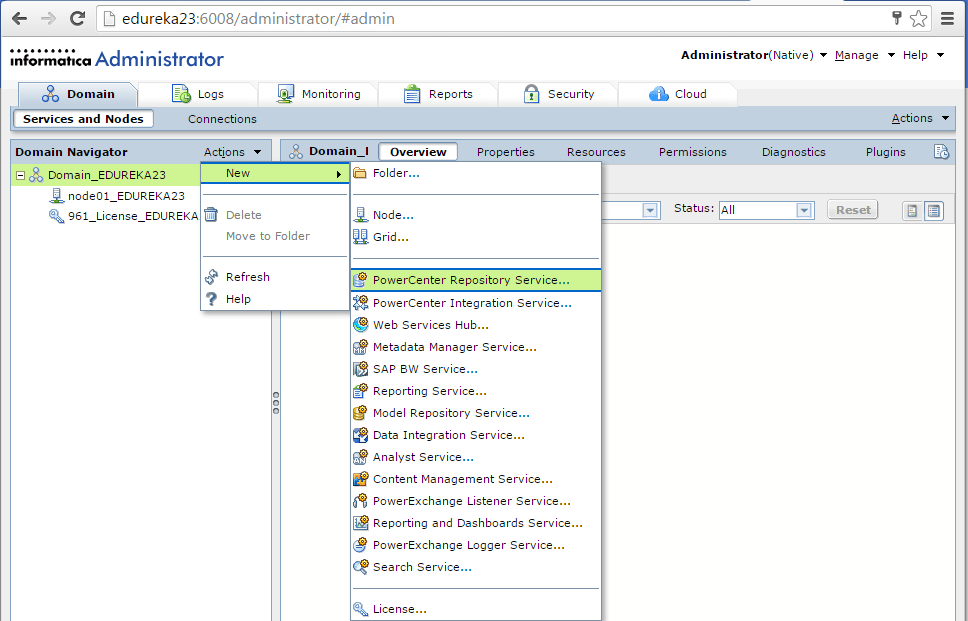
Step 6.2: Create Repository services :
- Click on Action -> New -> PowerCenter Repository Service.


Step 6.3: Enter the following Repository service details :
- Name : Repsvc_Edureka
- From drop down list select License and Node and Click on Next.

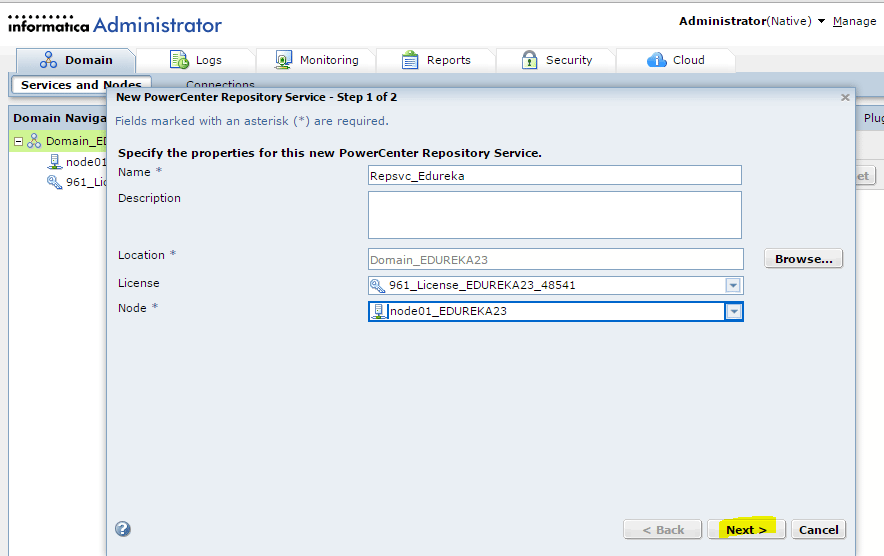
Click Next.
Step 6.4: Enter the following details as below for database properties :
- Database Type : Oracle
- Username : INFA_REP
- Password : INFA_REP
- Connection String : XE

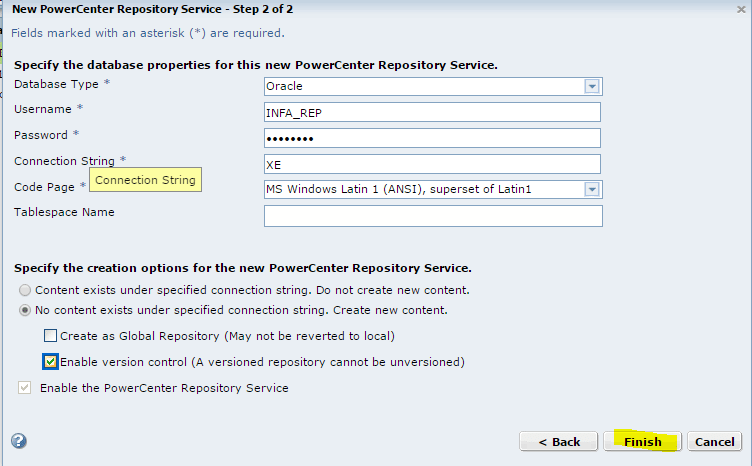
Click on Finish.
Step 6.5: Now change Operating Mode from Exclusive to Normal.


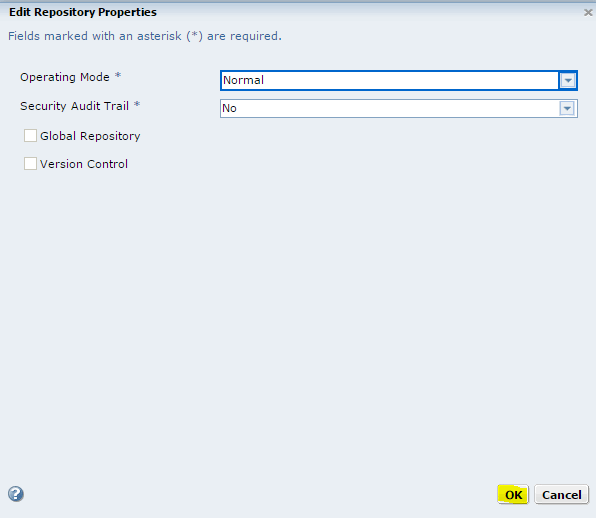


Now we have successfully made the Repository available for further operations.
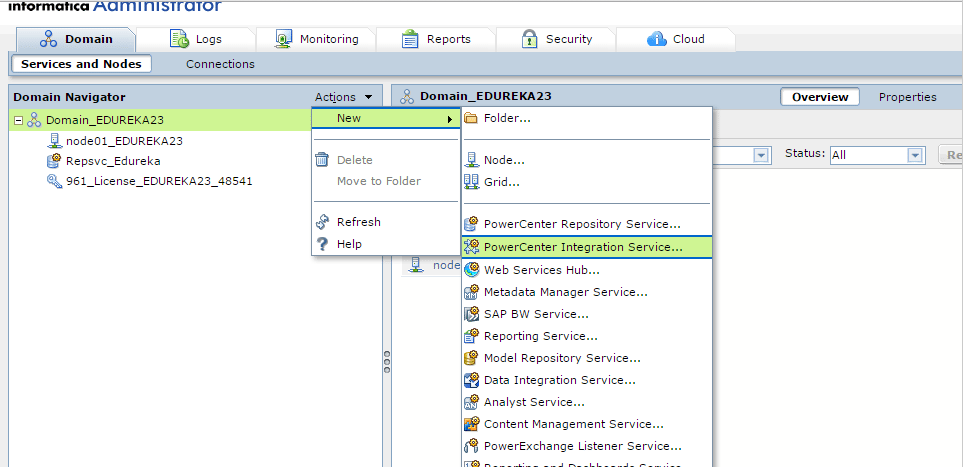
Step 7: Configure Integration Service
As part of configuration of the repository services, we need to configure the Integration services also which will load the workflows from the repositories and help combine data from different platforms and source types.
Step 7.1: Create Integration services
- Click on Action -> New -> PowerCenter Integration Service

Step 7.2: Enter the following Integration service details
- Name : Intsvc_Edureka
- From drop down list select License and Node and Click on Next

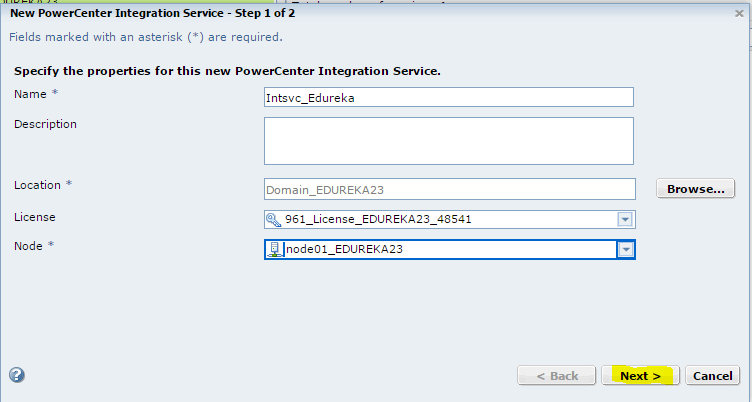
Click on Next
Step 7.3:Enter the following Repository service details
- PowerCenter Repository Service : Repsvc_Edureka
- Username : Administrator
- Password : Administrator
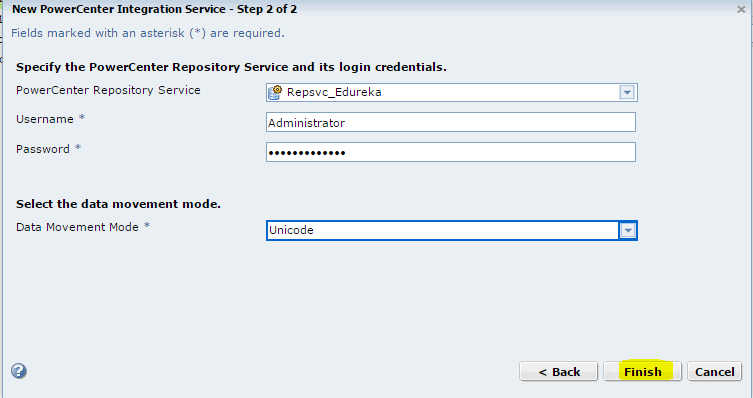


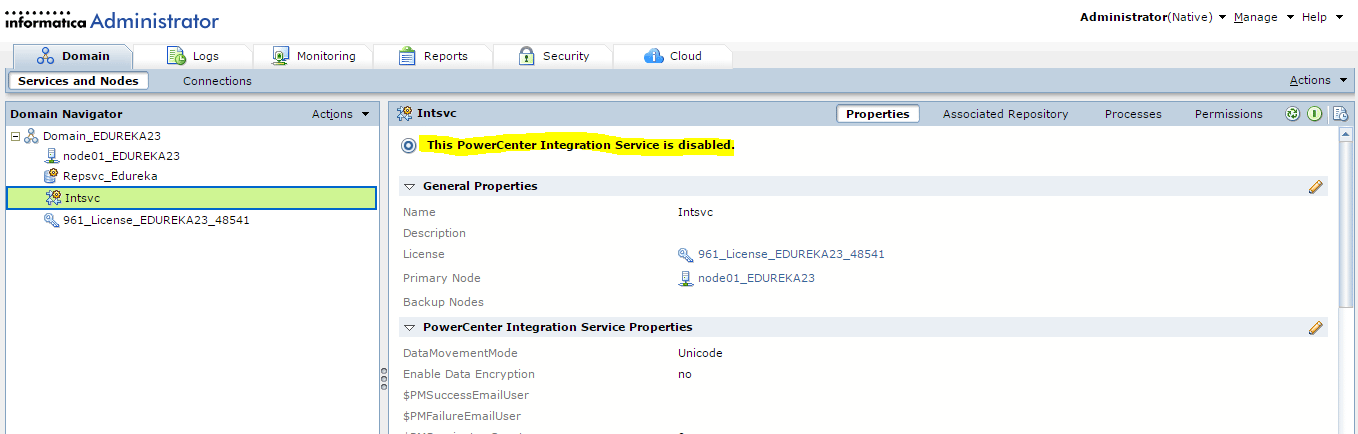
- Now Integration service is created but it is disabled, so we have to enable it.
Step 7.4: Follow the steps below to enable the integration service

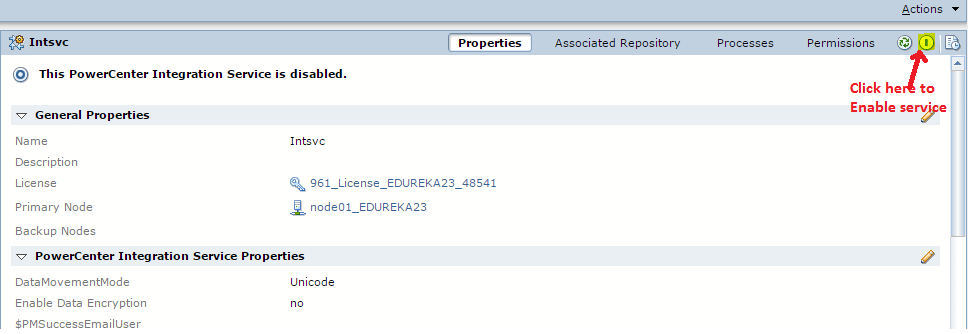


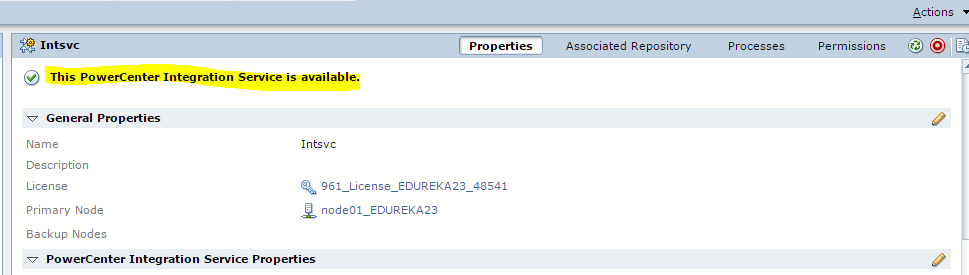
We have now successfully made the Integration Services available for further operations.
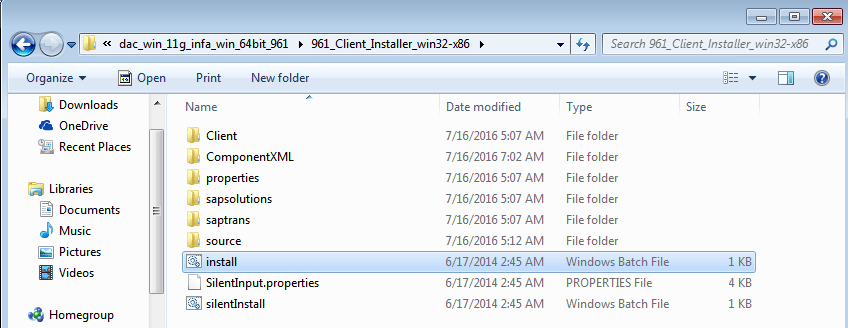
Step 8: Client Installation
To proceed ahead with the Informatica installation, we start with the client installation.
Step 8.1: Now Install PowerCenter Client
- Go to the directory 961_Client_Installer_win32-x86 and double click into install.bat .


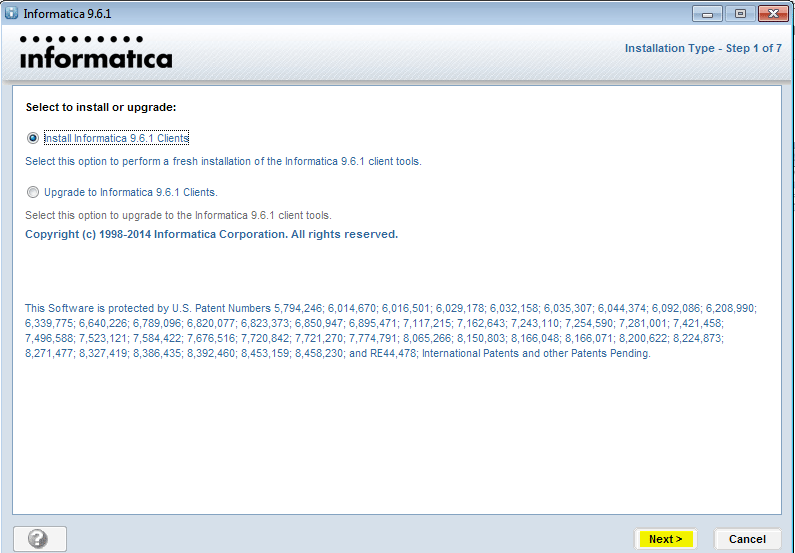
Click on Next.
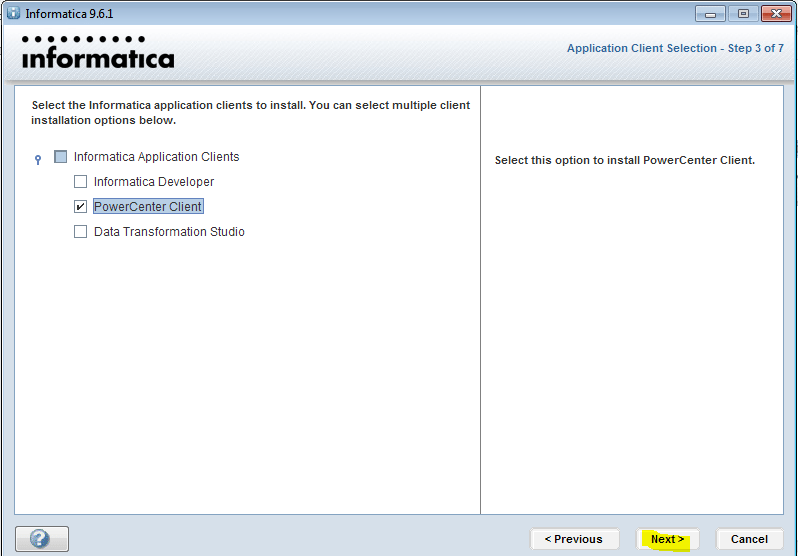
Step 8.2: Mark check on PowerCenter Client and click Next.
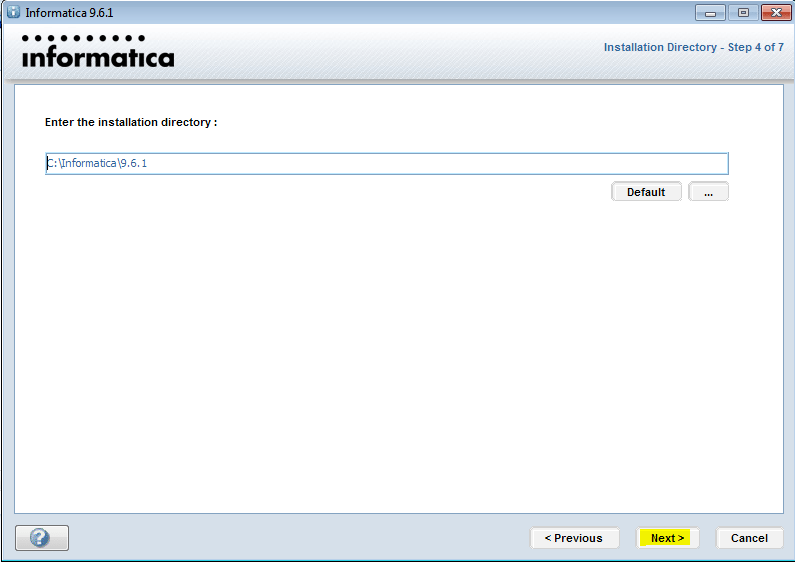
Step 8.3: Click Next and specify installation directory .
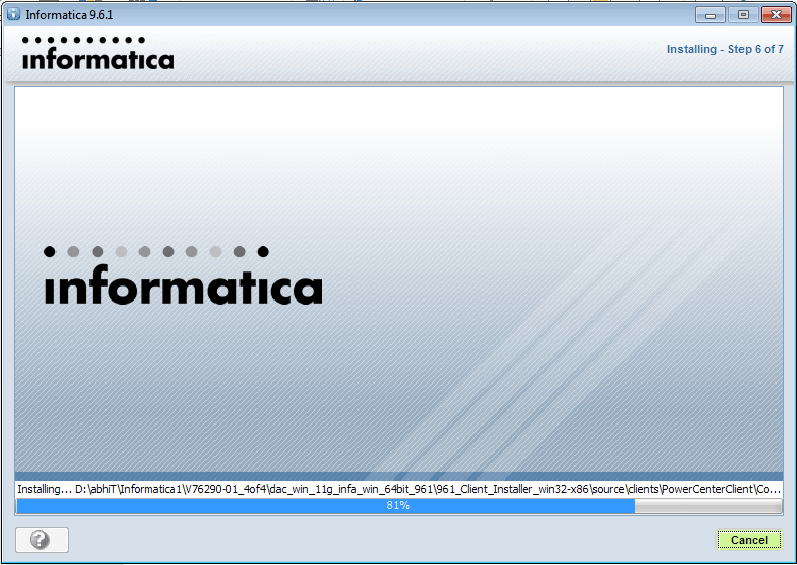
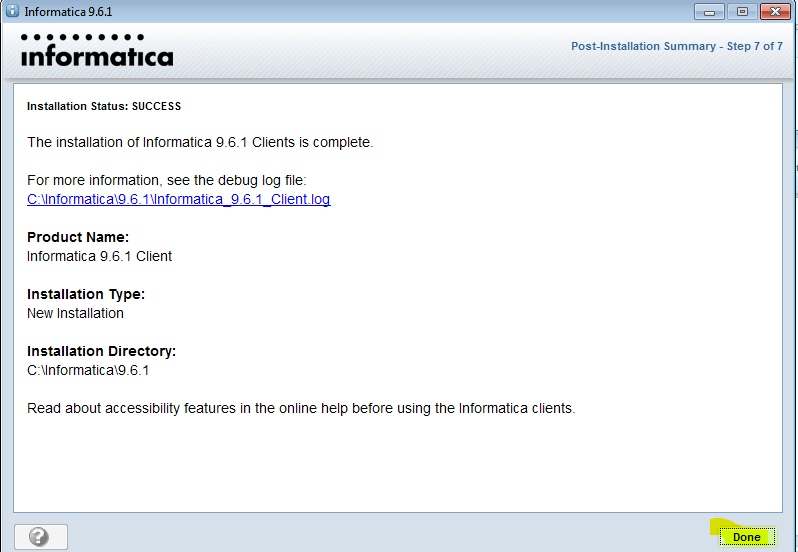
Step 8.4: Click Install.

Now this step will take some time to install the software.


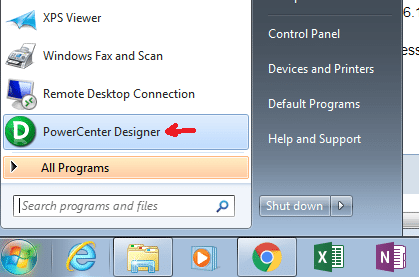
Step 9: Configure PowerCenter Designer
The final step of Informatica installation is the configuration of the PowerCenter Designer to connect to the domain and repositories to load the databases
Step 9.1: Now Click on Windows start button to start PowerCenter Designer.


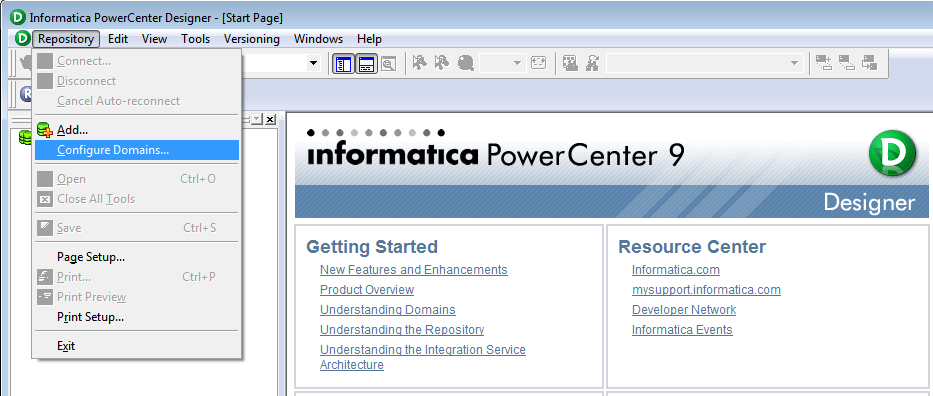
Step 9.2: Click on Repository -> Configure Domains.

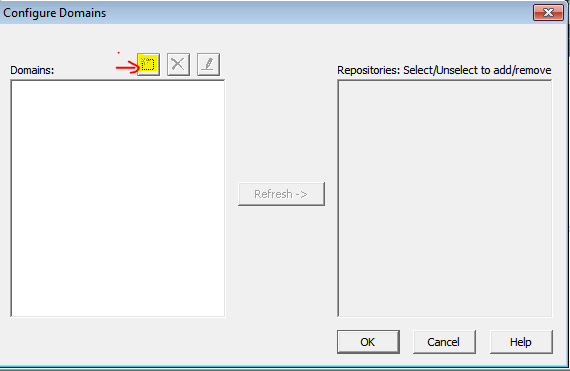
Step 9.3: Click to add domain.

Step 9.4: Enter the following details to add a domain :
- Domain Name : Domain_Edureka23 (here you should type Domain_Host Name Of Your Machine)
- Gateway Host : Edureka23 (your machine’s host name)
- Gateway Port : 6005

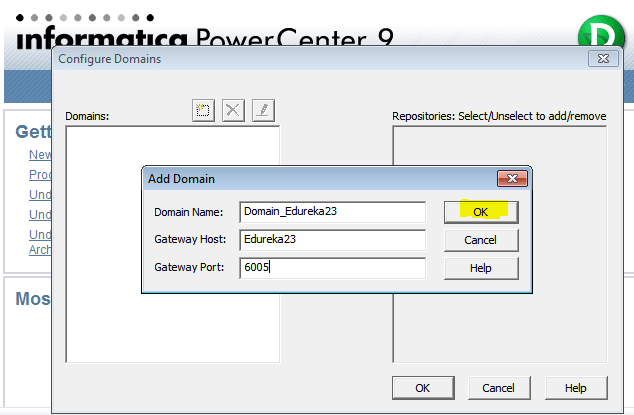
Click OK.
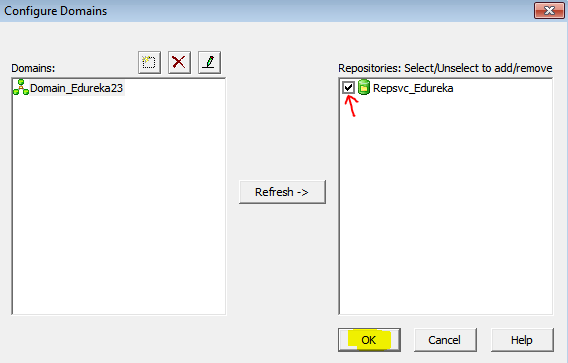
Step 9.5: Select Repsvc_Edureka and click OK.

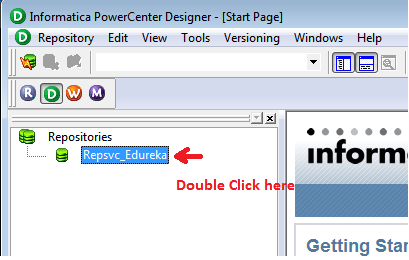
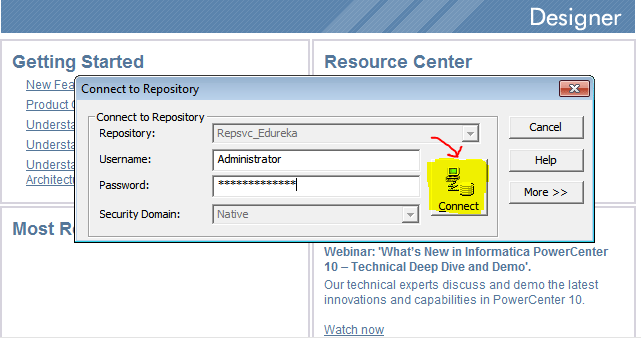
Step 9.6: Select Repsvc_Edureka and connect to the repository as shown below.

- In below screenshot, you can see that connection is successful.
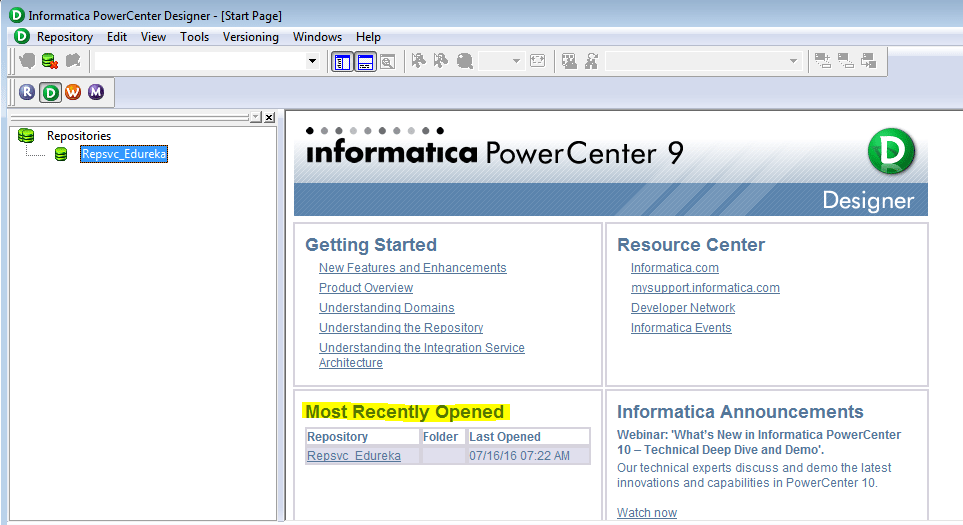

- You can verify the connection in repository service in Informatica administrative console.
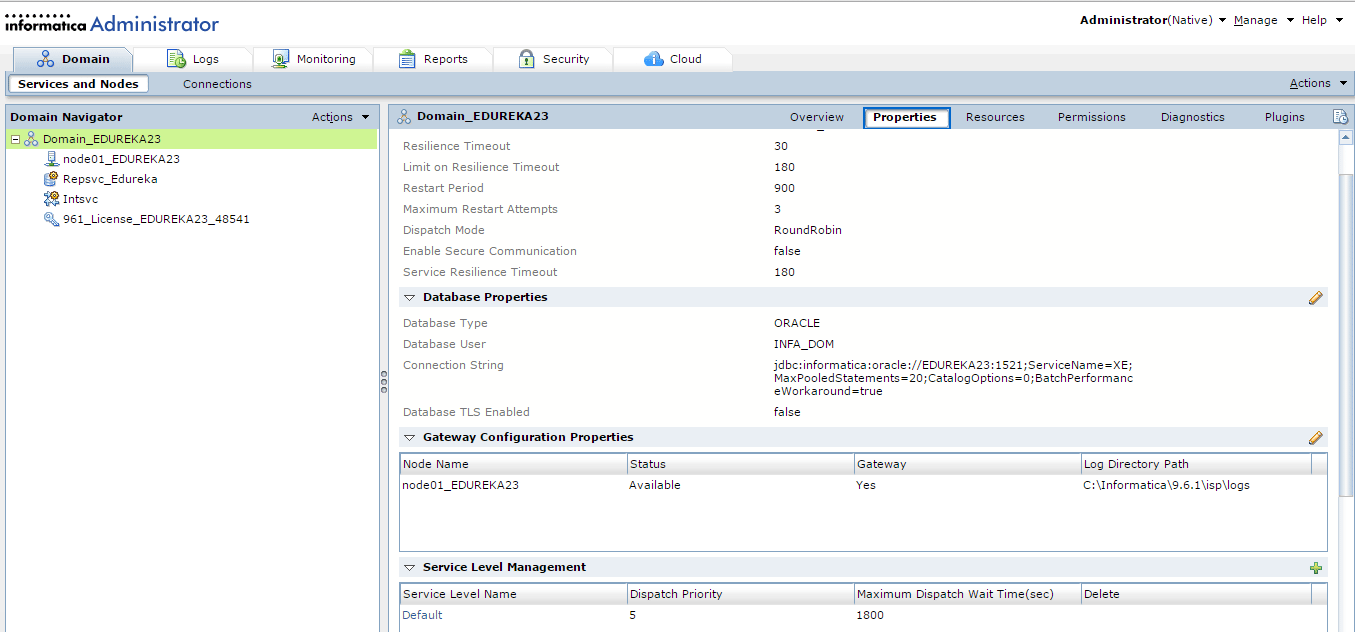
- You can see the table listed in Domain Properties.

This completes the Informatica installation, hope this blog has been useful in setting up Informatica PowerCenter in your system.
If you found this blog helpful, you can also check out our Informatica Tutorial blog series What is Informatica: A Beginner Tutorial of Informatica PowerCenter and Informatica Tutorial: Understanding Informatica ‘Inside Out’ . In case if you are looking for details on Informatica Certification, you can check our blog Informatica Certification: All there is to know.
Got a question for us? Please mention it in the comments section and we will get back to you.