


The purpose of Informatica ETL is to provide the users, not only a process of extracting data from source systems and bringing it into the data warehouse, but also provide the users with a common platform to integrate their data from various platforms and applications. This has led to an increase in the demand for certified Informatica professional. Before we talk about Informatica ETL, let us first understand why we need ETL.
Why Do We Need ETL?
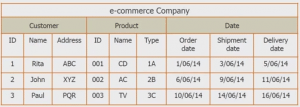
Every company these days have to process large sets of data from varied sources. This data needs to be processed to give insightful information for making business decisions. But, quite often such data have following challenges:
- Large companies generate lots of data and such huge chunk of data can be in any format. They would be available in multiple databases and many unstructured files.
- This data must be collated, combined, compared, and made to work as a seamless whole. But the different databases don’t communicate well!
- Many organisations have implemented interfaces between these databases, but they faced the following challenges:
- Every pair of databases requires a unique interface.
- If you change one database, many interfaces may have to be upgraded.
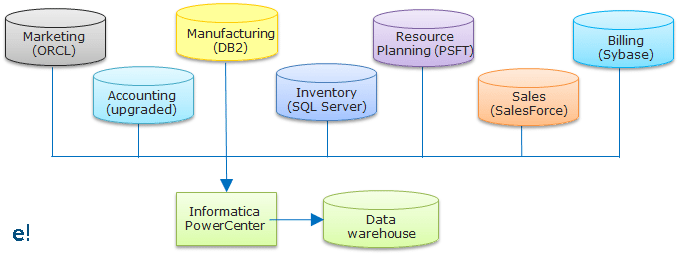
Below you can see the various databases of an organisation and their interactions:
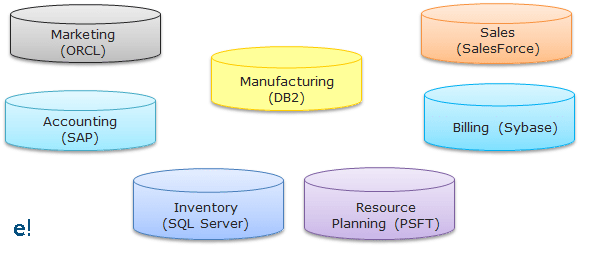
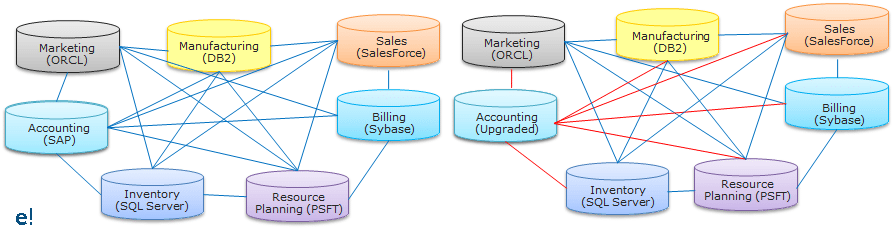
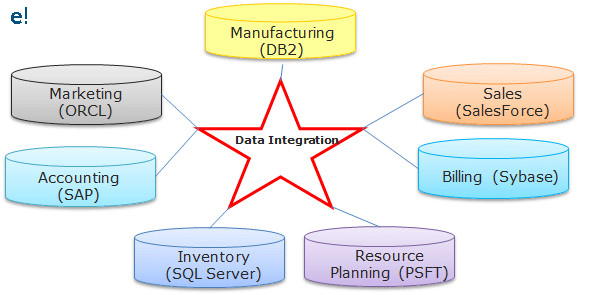
As seen above, an organisation may have various databases in its various departments and the interaction between them becomes hard to implement as various interaction interfaces have to be created for them. To overcome these challenges, the best possible solution is by using the concepts of Data Integration which would allow data from different databases and formats to communicate with each other. The below figure helps us to understand, how the Data Integration tool becomes a common interface for communication between the various databases.
But there are different processes available to perform Data Integration. Among these processes, ETL is the most optimal, efficient and reliable process. Through ETL, the user can not only bring in the data from various sources, but they can perform the various operations on the data before storing this data on to the end target.
Among the various available ETL tools available in the market, Informatica PowerCenter is the market’s leading data integration platform. Having tested on nearly 500,000 combinations of platforms and applications, Informatica PowerCenter inter operates with the broadest possible range of disparate standards, systems, and applications. Let us now understand the steps involved in the Informatica ETL process.
Informatica ETL | Informatica Architecture | Informatica PowerCenter Tutorial | Edureka
This Edureka Informatica tutorial helps you understand the fundamentals of ETL using Informatica Powercenter in detail.
Steps in Informatica ETL Process:
Before we move to the various steps involved in Informatica ETL, Let us have an overview of ETL. In ETL, Extraction is where data is extracted from homogeneous or heterogeneous data sources, Transformation where the data is transformed for storing in the proper format or structure for the purposes of querying and analysis and Loading where the data is loaded into the final target database, operational data store, data mart, or data warehouse. The below image will help you understand how the Informatica ETL process takes place.
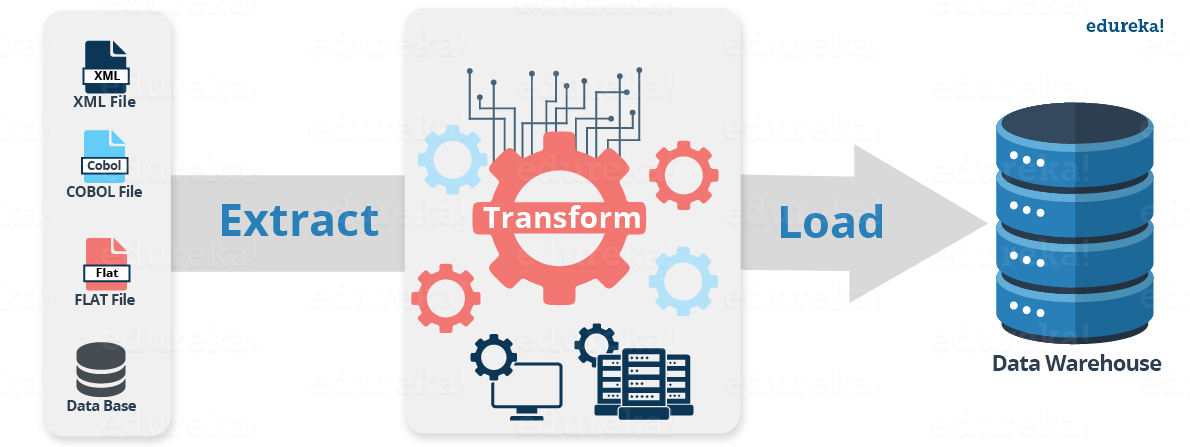
As seen above, Informatica PowerCenter can load data from various sources and store them into a single data warehouse. Now, let us look at the steps involved in the Informatica ETL process.
There are mainly 4 steps in the Informatica ETL process, let us now understand them in depth:
- Extract or Capture
- Scrub or Clean
- Transform
- Load and Index
1. Extract or Capture: As seen in the image below, the Capture or Extract is the first step of Informatica ETL process. It is the process of obtaining a snapshot of the chosen subset of data from the source, which has to be loaded into the data warehouse. A snapshot is a read-only static view of the data in the database. The Extract process can be of two types:
- Full extract: The data is extracted completely from the source system and there’s no need to keep track of changes to the data source since the last successful extraction.
- Incremental extract: This will only capture changes that have occurred since the last full extract.

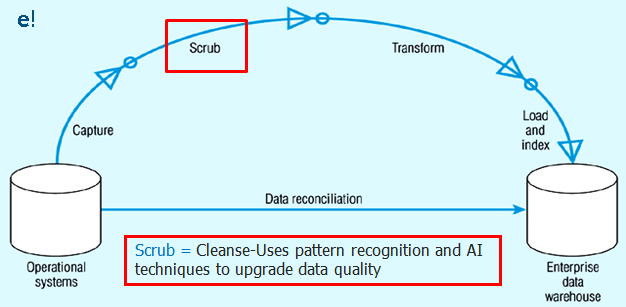
2. Scrub or Clean: This is the process of cleaning the data coming from the source by using various pattern recognition and AI techniques to upgrade the quality of data taken forward. Usually, the errors like misspellings, erroneous dates, incorrect field usage, mismatched addresses, missing data, duplicate data, inconsistencies are highlighted and then corrected or removed in this step. Also, operations like decoding, reformatting, time stamping, conversion, key generation, merging, error detection/logging, locating missing data are done in this step. As seen in the image below, this is the second step of Informatica ETL process.
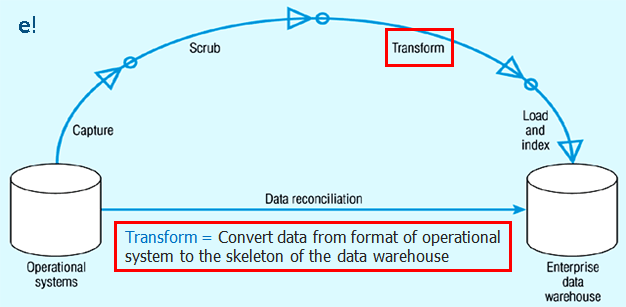
3. Transform: As seen in the image below, this is the third and most essential step of Informatica ETL process. Transformations is the operation of converting data from the format of the source system to the skeleton of Data Warehouse. A Transformation is basically used to represent a set of rules, which define the data flow and how the data is loaded into the targets. To know more about Transformation, check out Transformations in Informatica blog.
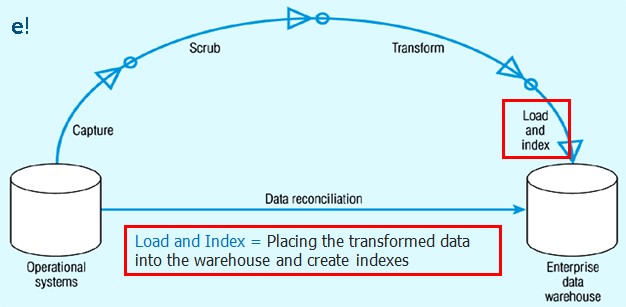
4. Load and Index: This is the final step of Informatica ETL process as seen in the image below. In this stage, we place the transformed data into the warehouse and create indexes for the data. There are two major types of data load available based on the load process.:
- Full Load or Bulk Load: The data loading process when we do it at very first time. The job extracts entire volume of data from a source table and loads into the target data warehouse after applying the required transformations. It will be a one time job run after then changes alone will be captured as part of an incremental extract.
- Incremental load or Refresh load: The modified data alone will be updated in target followed by full load. The changes will be captured by comparing created or modified date against the last run date of the job. The modified data alone extracted from the source and will be updated in the target without impacting the existing data.
If you have understood the Informatica ETL process, we are now in a better position to appreciate why Informatica is the best solution in such cases.
Features of Informatica ETL:
For all the Data integration and ETL operations, Informatica has provided us with Informatica PowerCenter. Let us now see some key features of Informatica ETL:
- Provides facility to specify a large number of transformation rules with a GUI.
- Generate programs to transform data.
- Handle multiple data sources.
- Supports data extraction, cleansing, aggregation, reorganisation, transformation, and load operations.
- Automatically generates programs for data extraction.
- High-speed loading of target data warehouses.
Below are some of the typical scenarios in which Informatica PowerCenter is being used:
- Data Migration:
A company has purchased a new Accounts Payable Application for its accounts department. PowerCenter can move the existing account data to the new application. The figure below will help you understand how you can use Informatica PowerCenter for Data migration. Informatica PowerCenter can easily preserve data lineage for tax, accounting, and other legally mandated purposes during the data migration process.

- Application Integration:
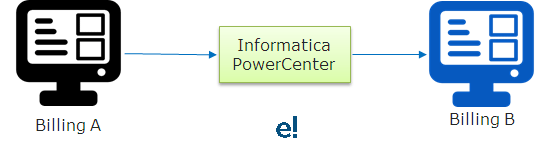
Let’s say Company-A purchases Company-B. So, to achieve the benefits of consolidation, the Company-B’s billing system must be integrated into the Company-A’s billing system which can be easily done using Informatica PowerCenter. The figure below will help you understand how you can use Informatica PowerCenter for the integration of applications between the companies.
- Data warehousing
Typical actions required in data warehouses are:
- Combining information from many sources together for analysis.
- Moving data from many databases to the Data warehouse.
All the above typical cases can be easily performed using Informatica PowerCenter. Below, you can see Informatica PowerCenter is being used to combine the data from various kinds of databases like Oracle, SalesForce, etc. and bringing it to a common data warehouse created by Informatica PowerCenter.
- Middleware
Let’s say a retail organisation is making use of SAP R3 for its Retail applications and SAP BW as its data warehouse. A direct communication between these two applications is not possible due to the lack of a communication interface. However, Informatica PowerCenter can be used as a Middleware between these two applications. In the image below you can see the architecture of how Informatica PowerCenter is being used as middleware between SAP R/3 and SAP BW. The Applications from SAP R/3 transfer their data to the ABAP framework which then transfers it to the SAP Point of Sale (POS) and SAP Bills of Services (BOS). Informatica PowerCenter helps the transfer of data from these services to the SAP Business Warehouse (BW).
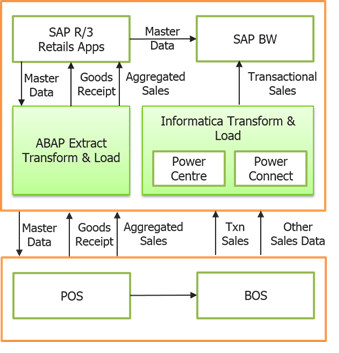
Informatica PowerCenter as Middleware in SAP Retail Architecture
While you have seen a few key features and typical scenarios of Informatica ETL, I hope you understand why Informatica PowerCenter is the best tool for ETL process. Let us now see a use case of Informatica ETL.
Use Case: Joining Two tables to obtain a Single detailed Table
Let’s say you wish to provide department wise transportation to your employees as the departments are located at various locations. To do this, first you need to know which Department each employee belongs to and location of the department. However, the details of employees are stored in different tables and you need to join the details of Department to an existing database with the details of all Employees. To do this, we will be first loading both the tables into Informatica PowerCenter, performing Source Qualifier Transformation on the data and finally loading the details to Target Database. Let us begin:
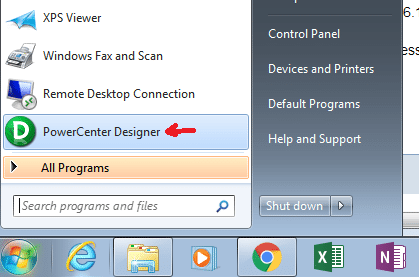
Step 1: Open PowerCenter Designer.
Below is the Home page of Informatica PowerCenter Designer.
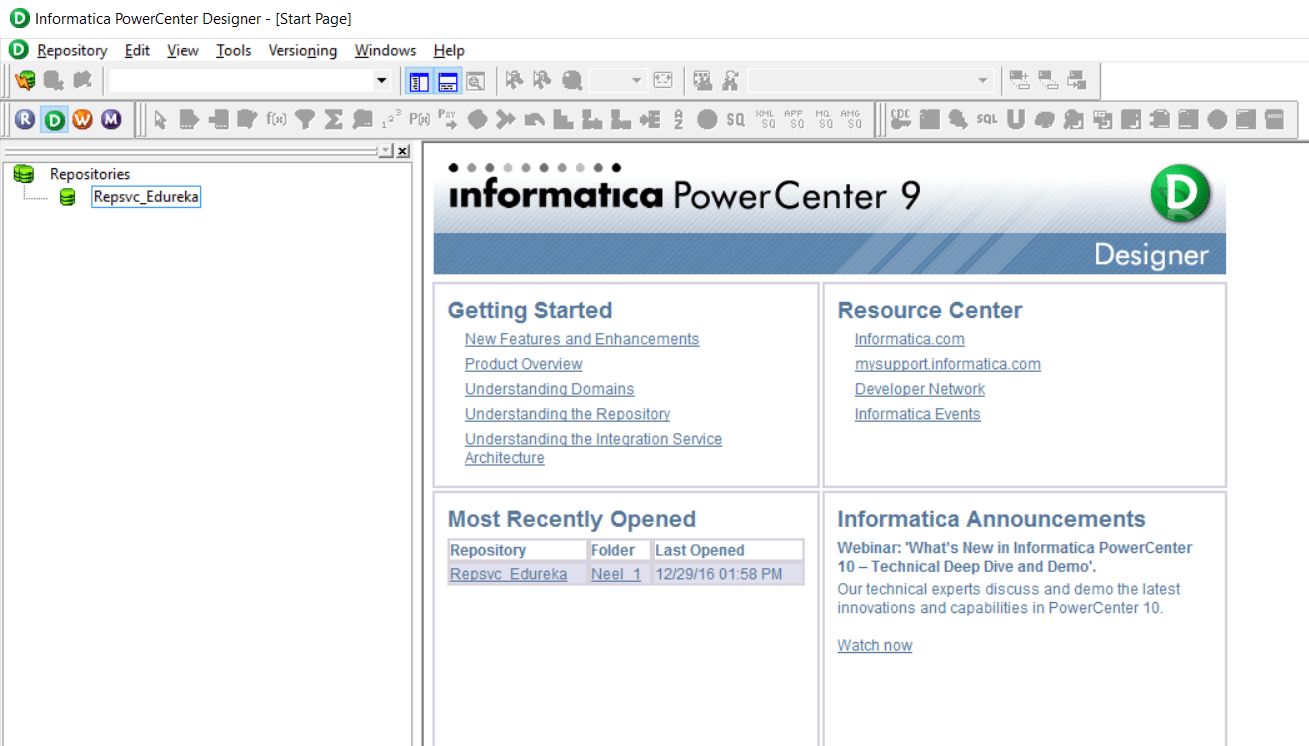
Let us now connect to the repository. In case you haven’t configured your repositories or are facing any issues you can check our Informatica Installation blog.
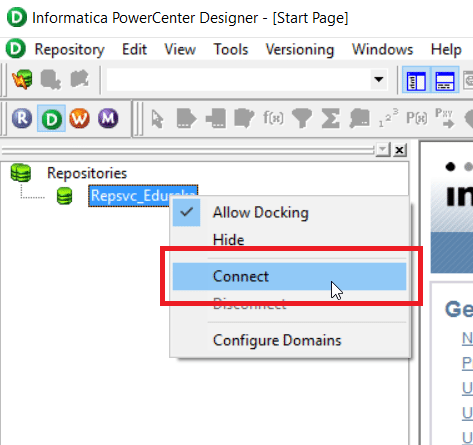
Step 2: Right click on your repository and select connect option.
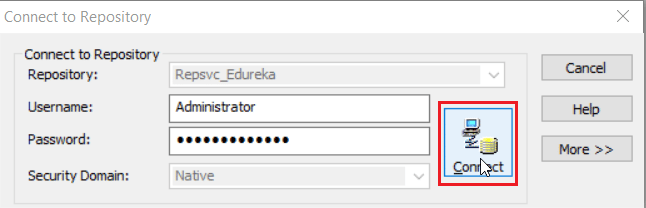
On clicking the connect option, you will be prompted with the below screen, asking for your repository username and password.
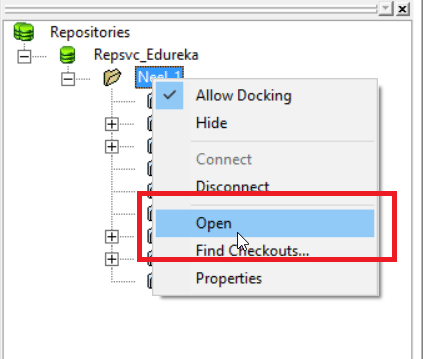
Once you have connected to your repository, you have to open your working folder as seen below:
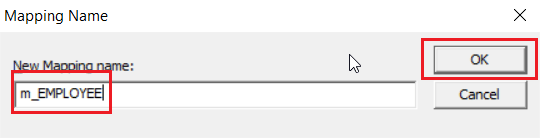
You will be prompted asking the name of your mapping. Specify the name of your mapping and click on OK (I have named it as m-EMPLOYEE).
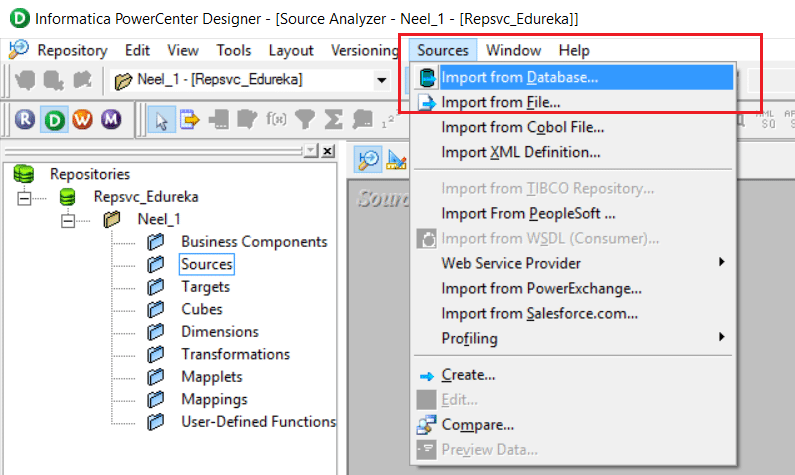
Step 3: Let us now load the Tables from the Database, Start by connecting to the Database. To do this, select Sources tab and Import from Database option as seen below:
On clicking Import from Database, you will be prompted the screen as below asking the details of your Database and its Username and Password for connection(I am using the oracle database and HR user).
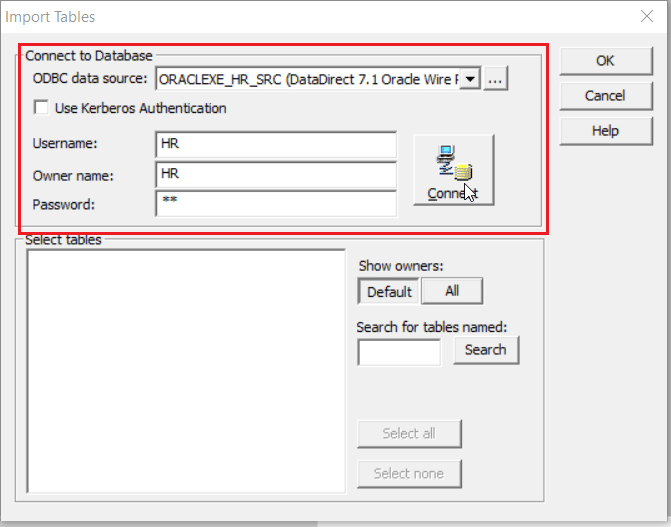
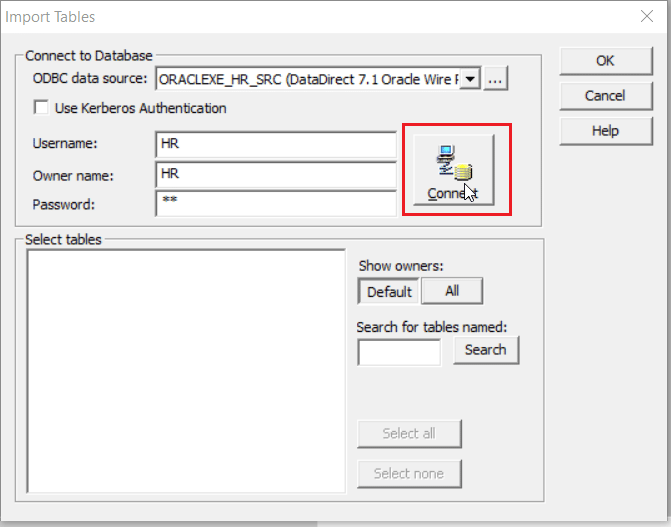
Click on Connect to connect to your database.
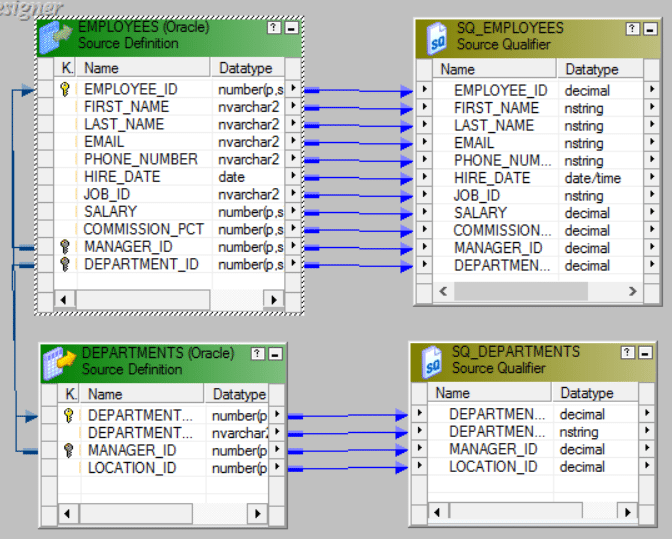
Step 4: As I wish to join the EMPLOYEES and DEPARTMENT tables, I will select them and click on OK.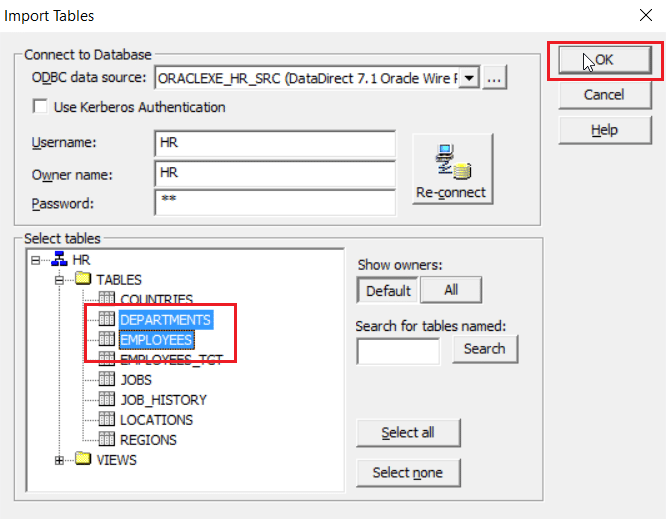 The sources will be visible on your mapping designer workspace as seen below.
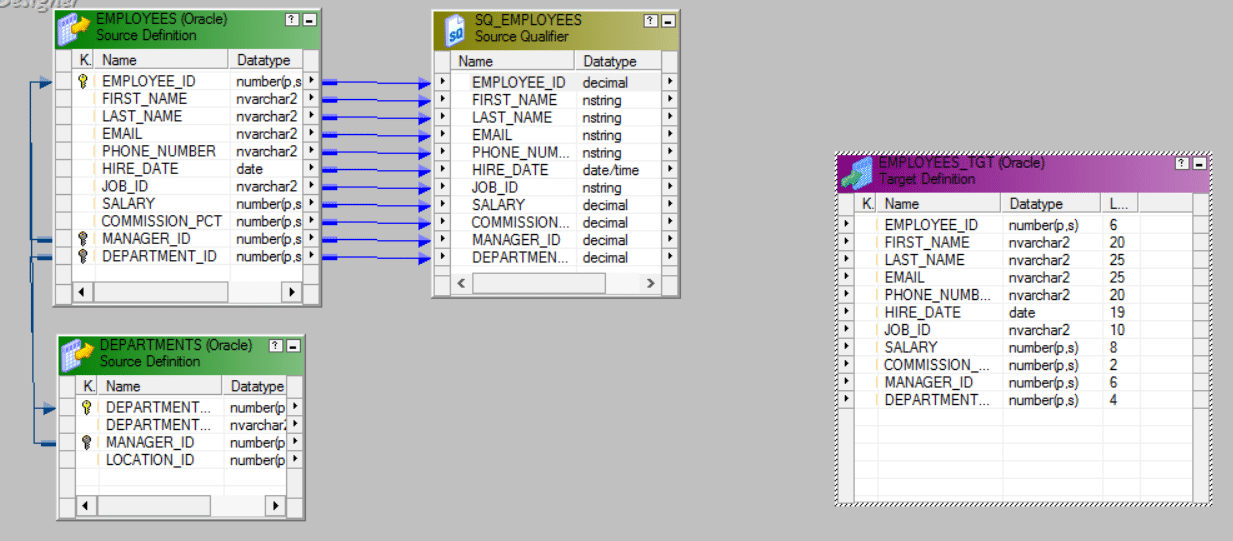
Step 5: Similarly Load the Target Table to the Mapping.
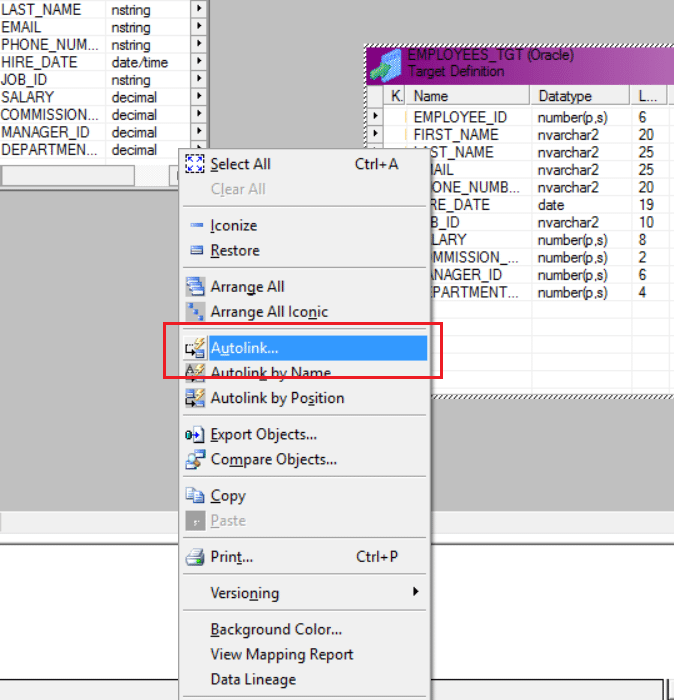
Step 6: Now let us link the Source qualifier and the target table. Right click on any blank spot of the workspace and select Autolink as seen below:
Below is the mapping linked by Autolink.

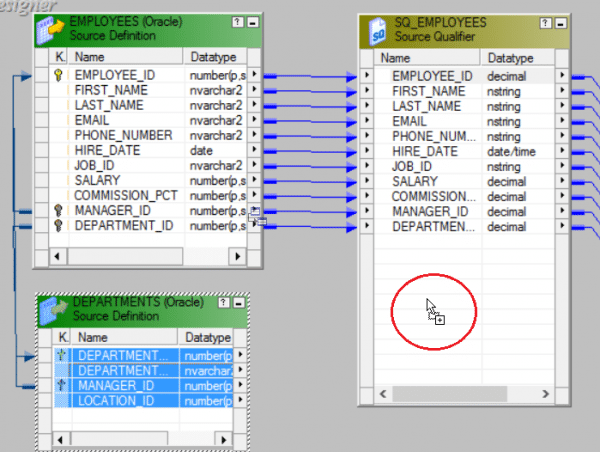
Step 7: As we need to link both the tables to the Source Qualifier, select the columns of the Department table and drop it in the Source Qualifier as seen below:
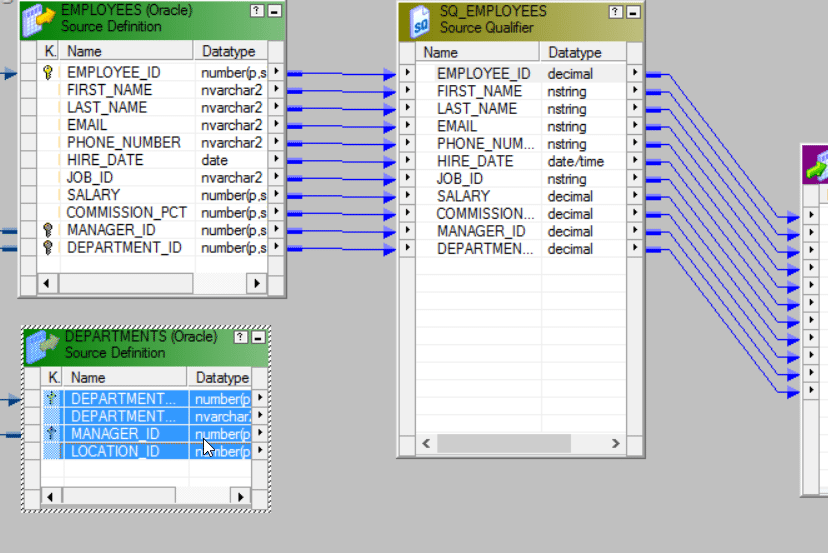
Drop the column values into the Source Qualifier SQ_EMPLOYEES.
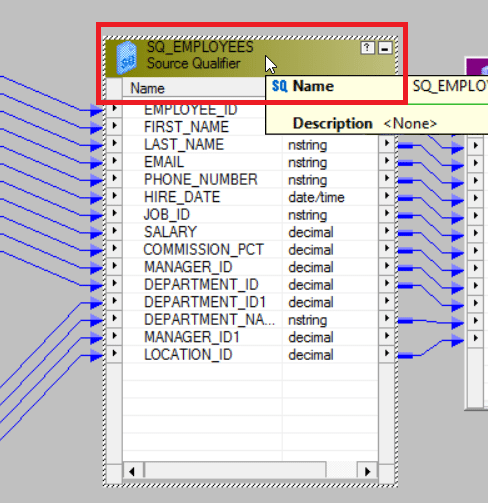
Below is the updated Source Qualifier.

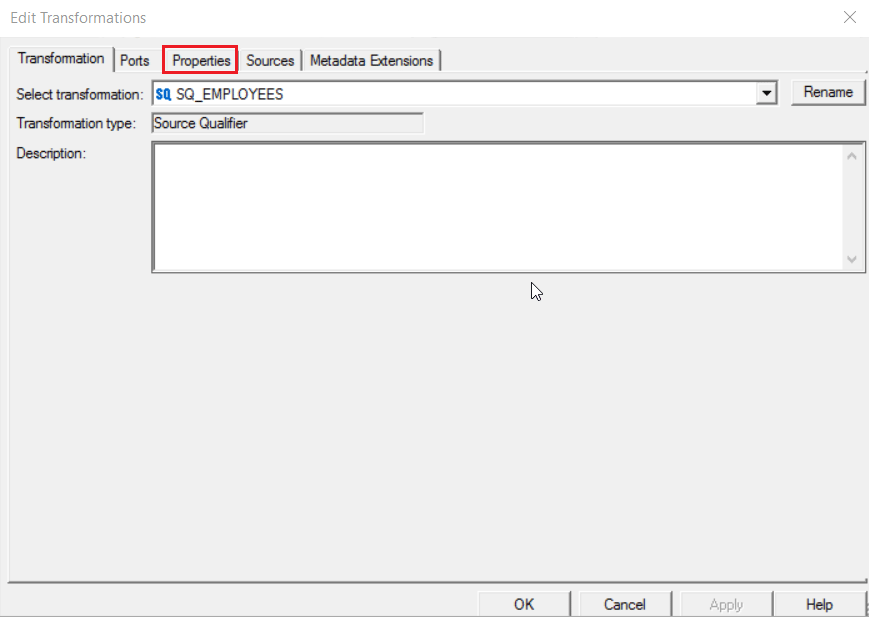
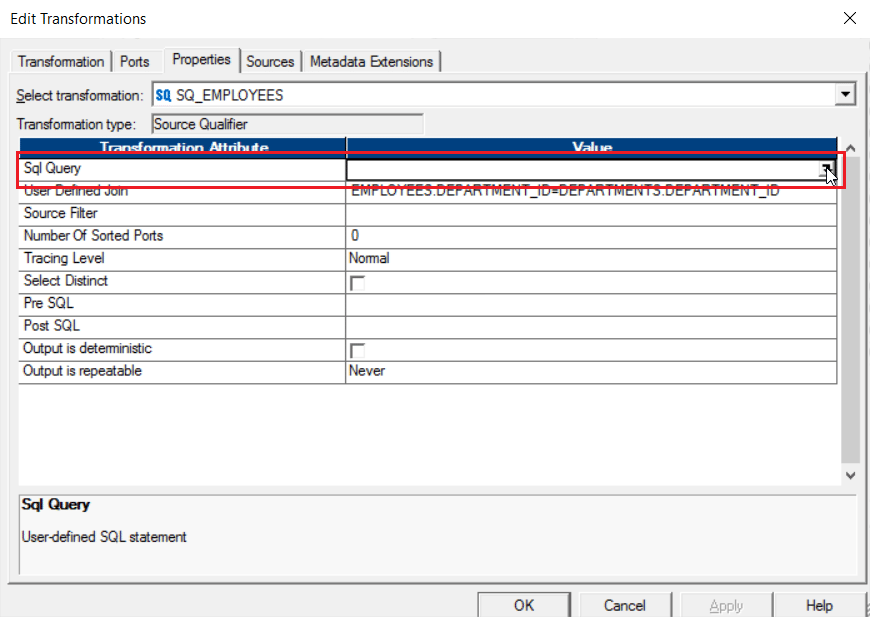
Step 8: Double click on Source Qualifier to edit the transformation.
You will get the Edit Transformation pop up as seen below. Click on Properties tab.
Step 9: Under the Properties tab, Click on Value field of UserDefined Join row.

You will get the following SQL Editor:
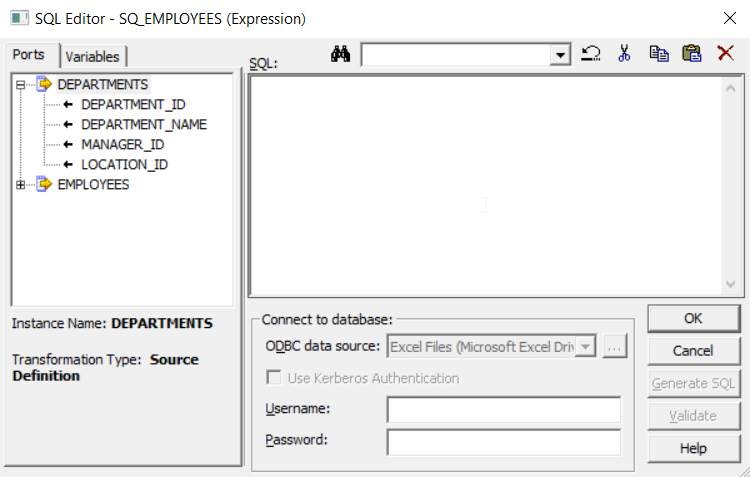
Step 10: Enter EMPLOYEES.DEPARTMENT_ID=DEPARTMENT.DEPARTMENT_ID as the condition to join both the tables in the SQL field and click on OK.

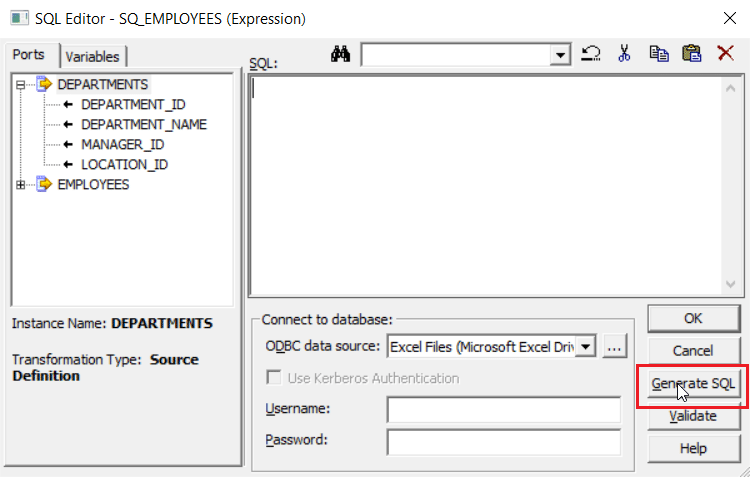
Step 11: Now click on the SQL Query row to generate the SQL for joining as seen below:
You will get the following SQL Editor, Click on Generate SQL option.
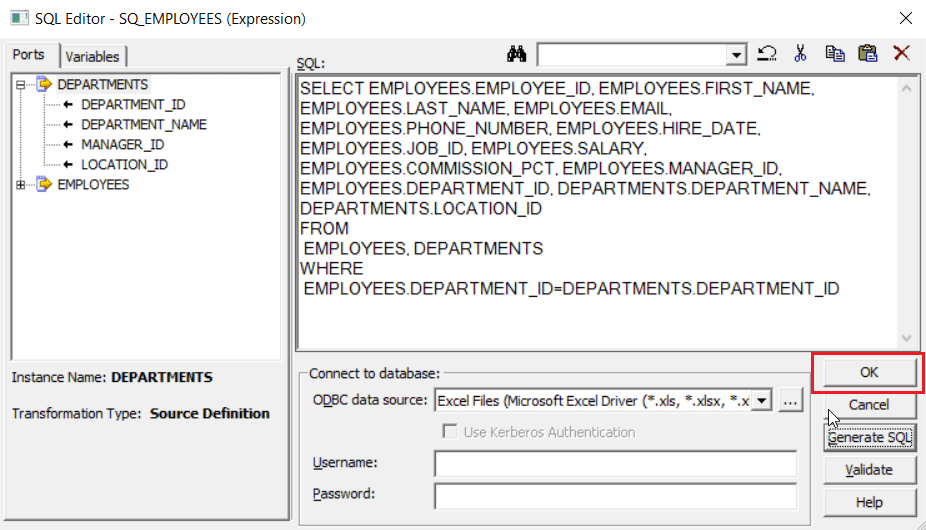
The following SQL will be generated for the condition we had specified in the previous step. Click on OK.
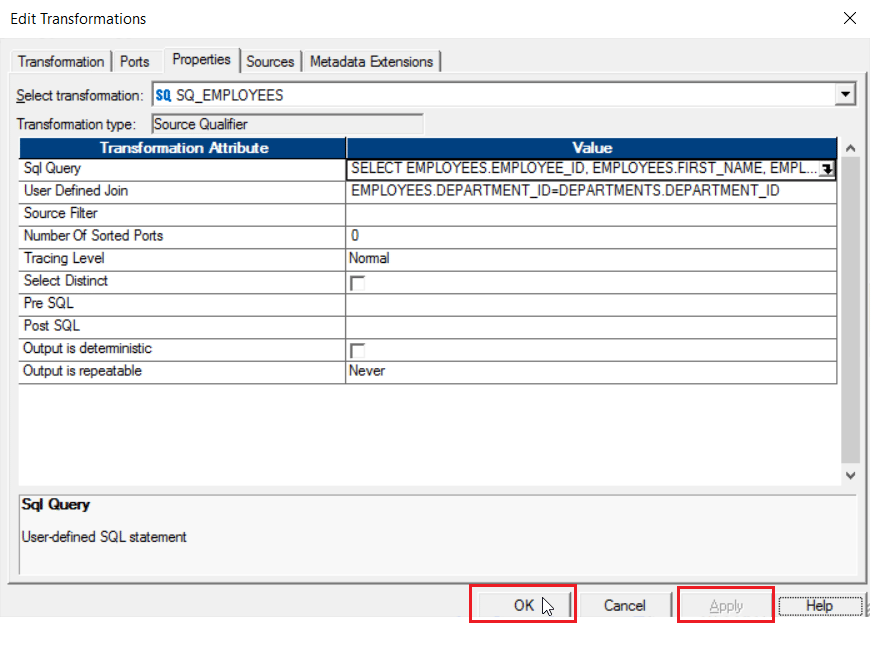
Step 12: Click on Apply and OK.
Below is the completed mapping.
We have completed the designing of the how the data has to be transferred from the source to target. However, the actual transfer of data is still yet to happen and for that we need to use the PowerCenter Workflow Design. The execution of the workflow will lead to the transfer of data from the source to the target. To know more about workflow, check our Informatica Tutorial: Workflow blog
Step 13: Let us now launch the Workflow Manager by Clicking the W icon as seen below:
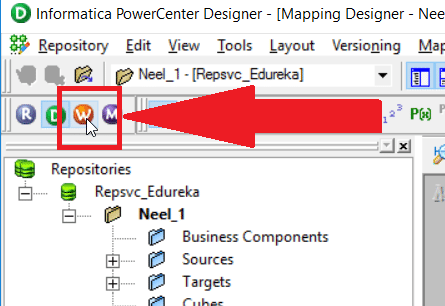
Below is the workflow designer home page.

Step 14: Let us now create a new Workflow for our mapping. Click on Workflow tab and select Create Option.
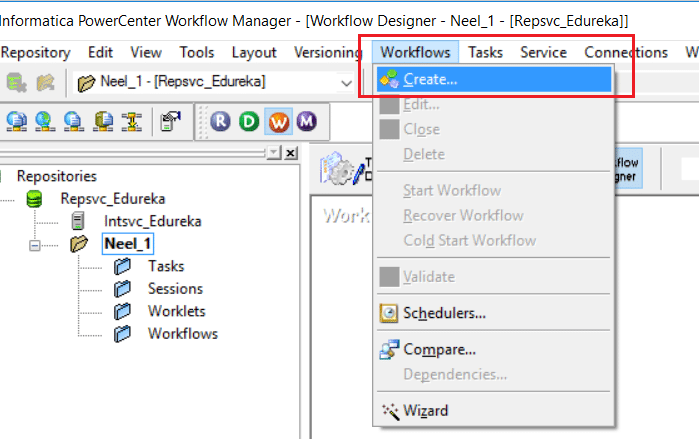
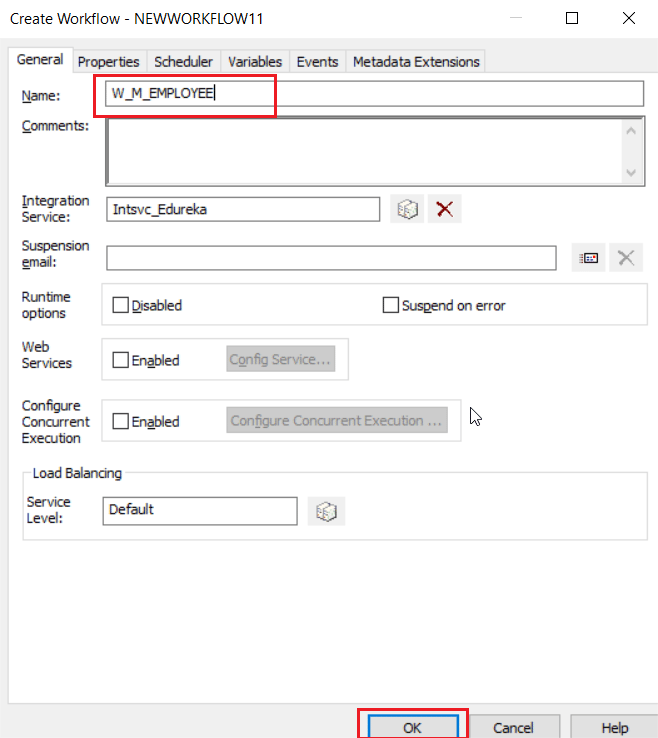
You will get the below pop-up. Specify the name of your workflow and click on OK.
Step 15: Once a workflow is created, we get the Start Icon in the Workflow Manager workspace.
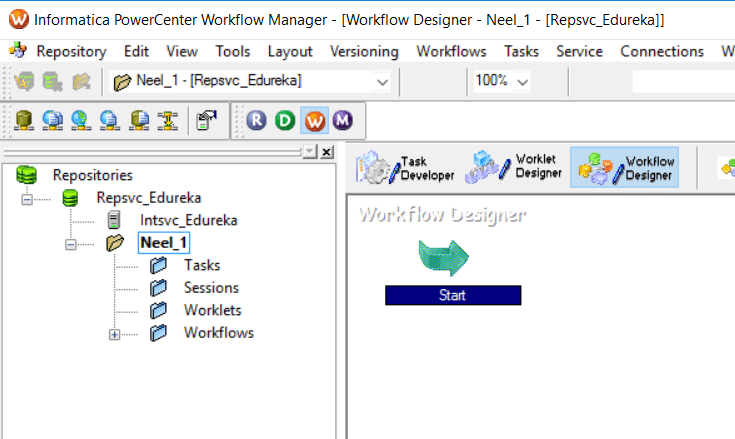
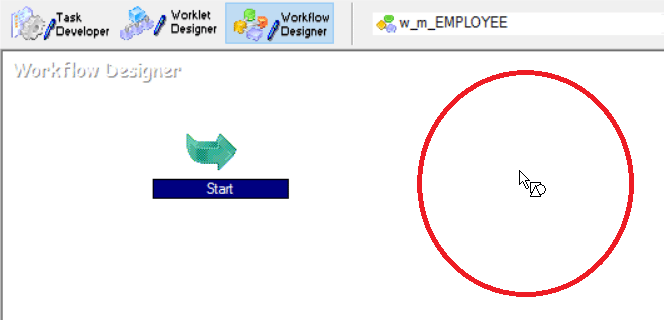
Let us now add a new Session to the workspace as seen below by clicking the session icon and clicking on the workspace:
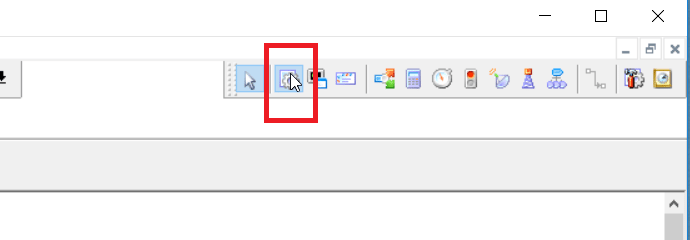
Click on the workspace to place the Session icon.
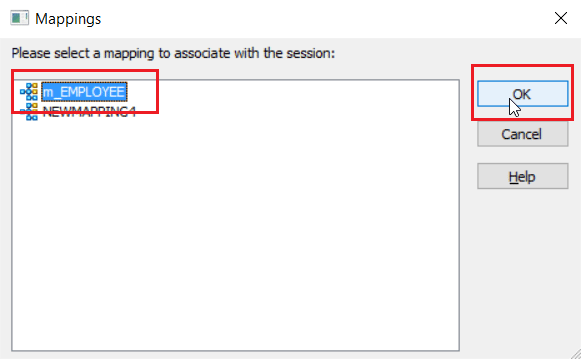
Step 16: While adding the session you have to select the Mapping you had created and saved in the above steps. (I had saved it as m-EMPLOYEE).
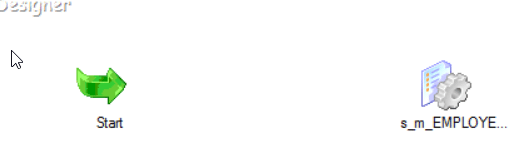
Below is the workspace after adding the session icon.
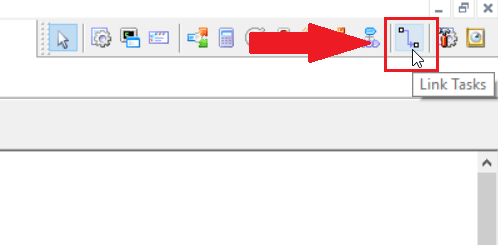
Step 17: Now that you have created a new Session, we need to link it to the start task. We can do it by clicking on Link Task icon as seen below:
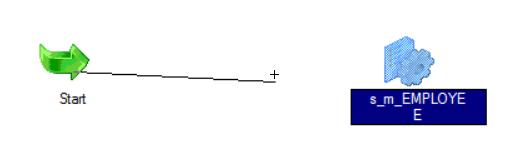
Click on the Start icon first and then on the Session icon to establish a link.
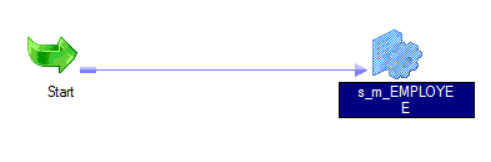
Below is a connected workflow.
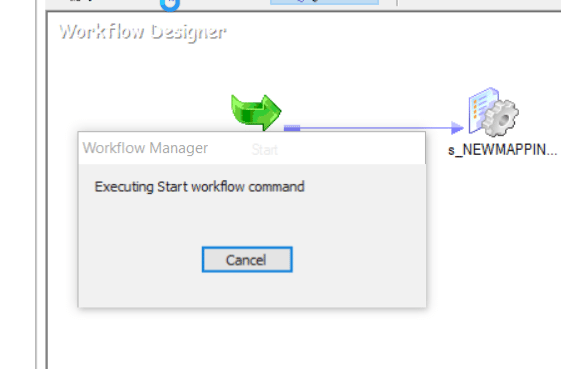
Step 18: Now that we have completed the design, let us start the workflow. Click on Workflow tab and select Start Workflow option.

Workflow manager starting Workflow Monitor.
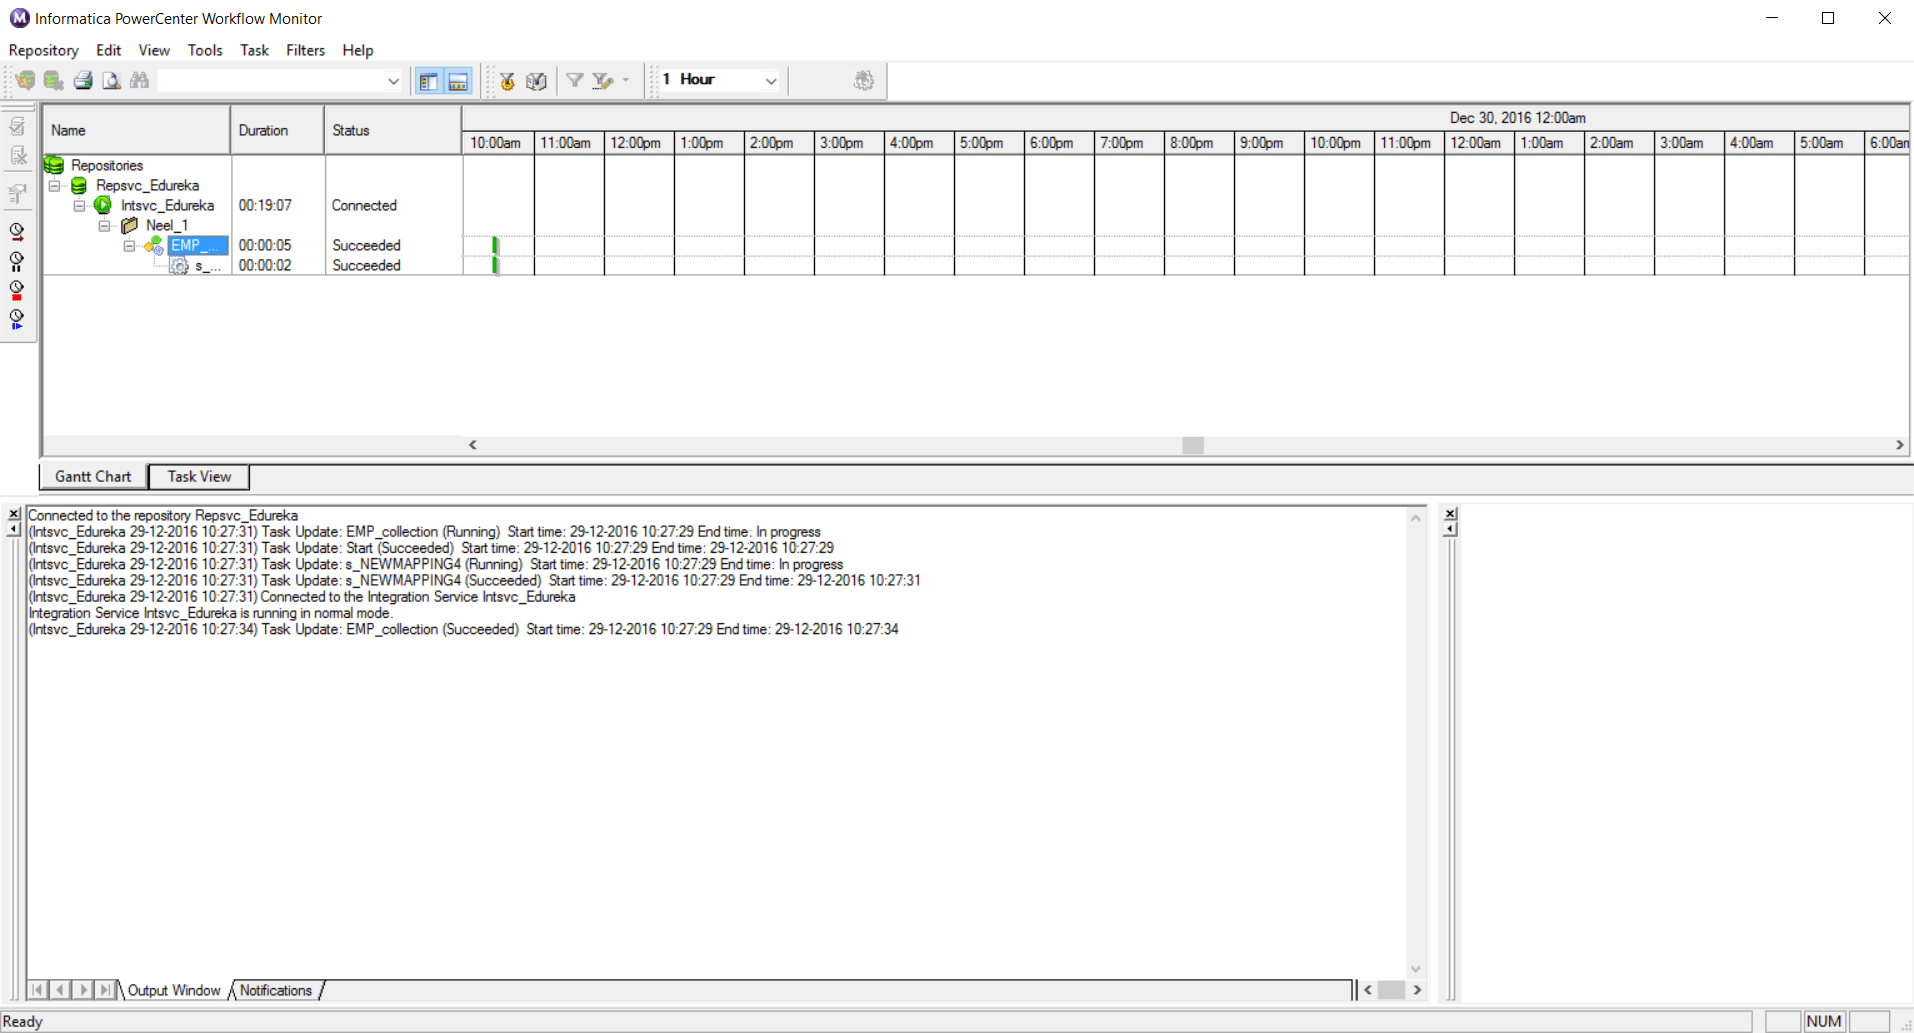
Step 19: Once we start the workflow, the Workflow Manager automatically launches and allows you to monitor the execution of your workflow. Below you can see the Workflow Monitor shows the status of your workflow.
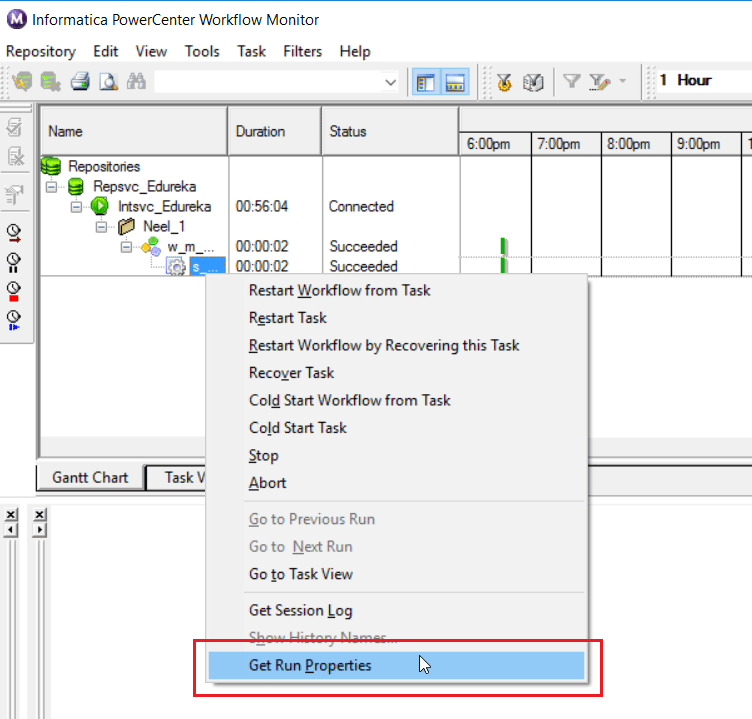
Step 20: To check the status of the workflow, right click on the workflow and select Get Run Properties as seen below:
Select the Source/Target Statistics tab.

Below you can see the number of rows that have been transferred between the source and target after transformation.

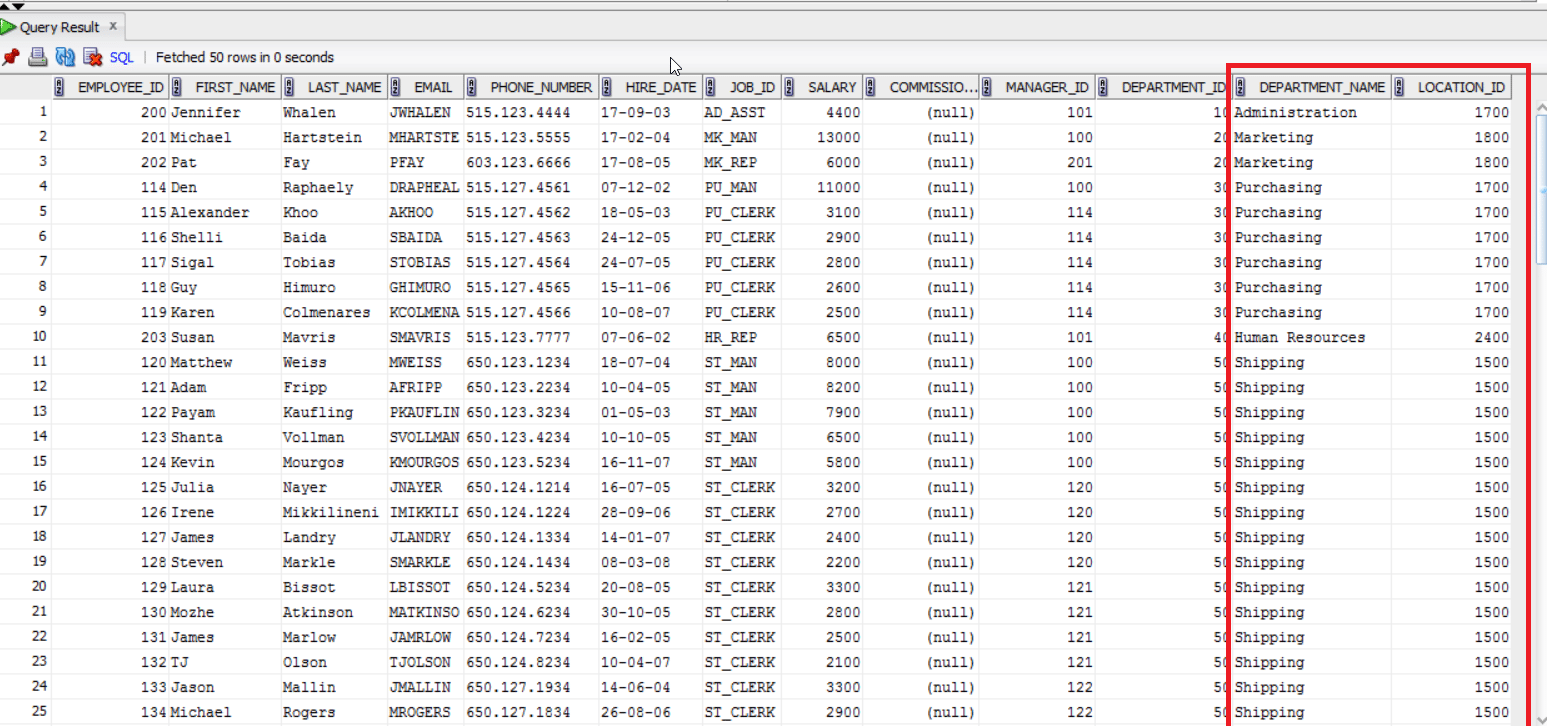
You can also verify your result checking your target table as seen below.
I hope this Informatica ETL blog was helpful to build your understanding on the concepts of ETL using Informatica and has created enough interest for you to learn more about Informatica.
If you found this blog helpful, you can also check out our Informatica Tutorial blog series What is Informatica: A Beginner Tutorial of Informatica PowerCenter, Informatica Tutorial: Understanding Informatica ‘Inside Out’ and Informatica Transformations: The Heart and Soul of Informatica PowerCenter. In case if you are looking for details on Informatica Certification, you can check our blog Informatica Certification: All there is to know.
If you have already decided to take up Informatica as a career, I would recommend you to have a look at our Informatica Training course page. The Informatica Certification training at Edureka will make you an expert in Informatica through live instructor-led sessions and hands-on training using real life use cases.


The latest study demonstrates that approximately 75% people are engrossed into web browsing jobs. Web worldwide is simply becoming bigger and better and generating a great number of make money online opportunities. Home based on line tasks are becoming poplar and improving people’s daily lives. Why it is actually in demand? This is because it enables you to work from anywhere and anytime. You get much more time to invest with your loved ones and can plan out journeys for holidays. People are making wonderful income of $19000 per week by utilizing the effective and smart methods. Doing right work in a right direction will always lead us towards success. You can begin to earn from the 1st day once you look at our web site.
Hi Neel, I am new to ETL and I found this article very useful. I appreciate your time and effort on this document. Thanks you for your great documentation.