


AWS is one of the leading cloud providers, accounting for 47.8% of the 2018 IaaS public cloud services market share, according to Gartner’s analysis. The AWS Command Line Interface (CLI) is a unified tool for managing AWS Services. Multiple AWS Services can be managed through CLI, which provides the opportunity for automation through scripts. In this article, let’s check out how to use the AWS CLI.
Prerequisites to Use AWS CLI
The hands-on activity in this blog requires the following pre-requisite to be installed on the system.
- Create an AWS Account: You need an AWS account to configure AWS CLI. Please register here for an AWS account. The new account includes 12 months of free tier access.
- Install AWS CLI: AWS CLI is available for Windows, MAC and Linus distribution of OS.
- Windows installer: 64 bit and 32-bit.
- MAC and Linux: Please follow these steps
- Install Python 2.6.5 or higher
- pip (Package installer for Python) should be installed. Installation steps to be followed.
- Run the following command from terminal/command prompt
'pip install awscli'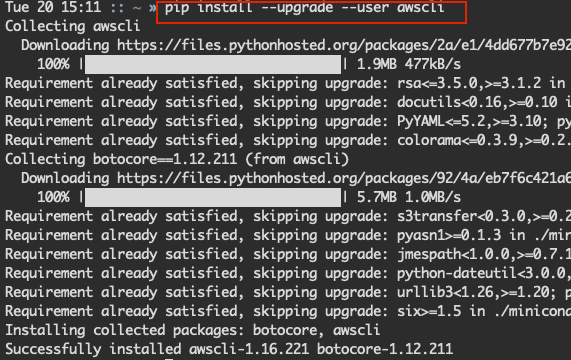

Learn how to Install AWS CLI for Windows & Linux in detail here.
Set up the AWS Command Line Interface (AWS CLI)
AWS CLI Tutorial | Introduction To AWS Command Line Interface | AWS Training | Edureka

This “AWS Command Line Interface” video by Edureka will help you understand how to access and manage AWS Services using AWS CLI. The below topics have been covered in this session:
1. New user creation
Step1: To being with, log in to the AWS management console. In this case, either use an existing AWS account or a newly created account as part of the pre-requisite step.
Step2: After logging in, we are going to land on the AWS Management Console Dashboard.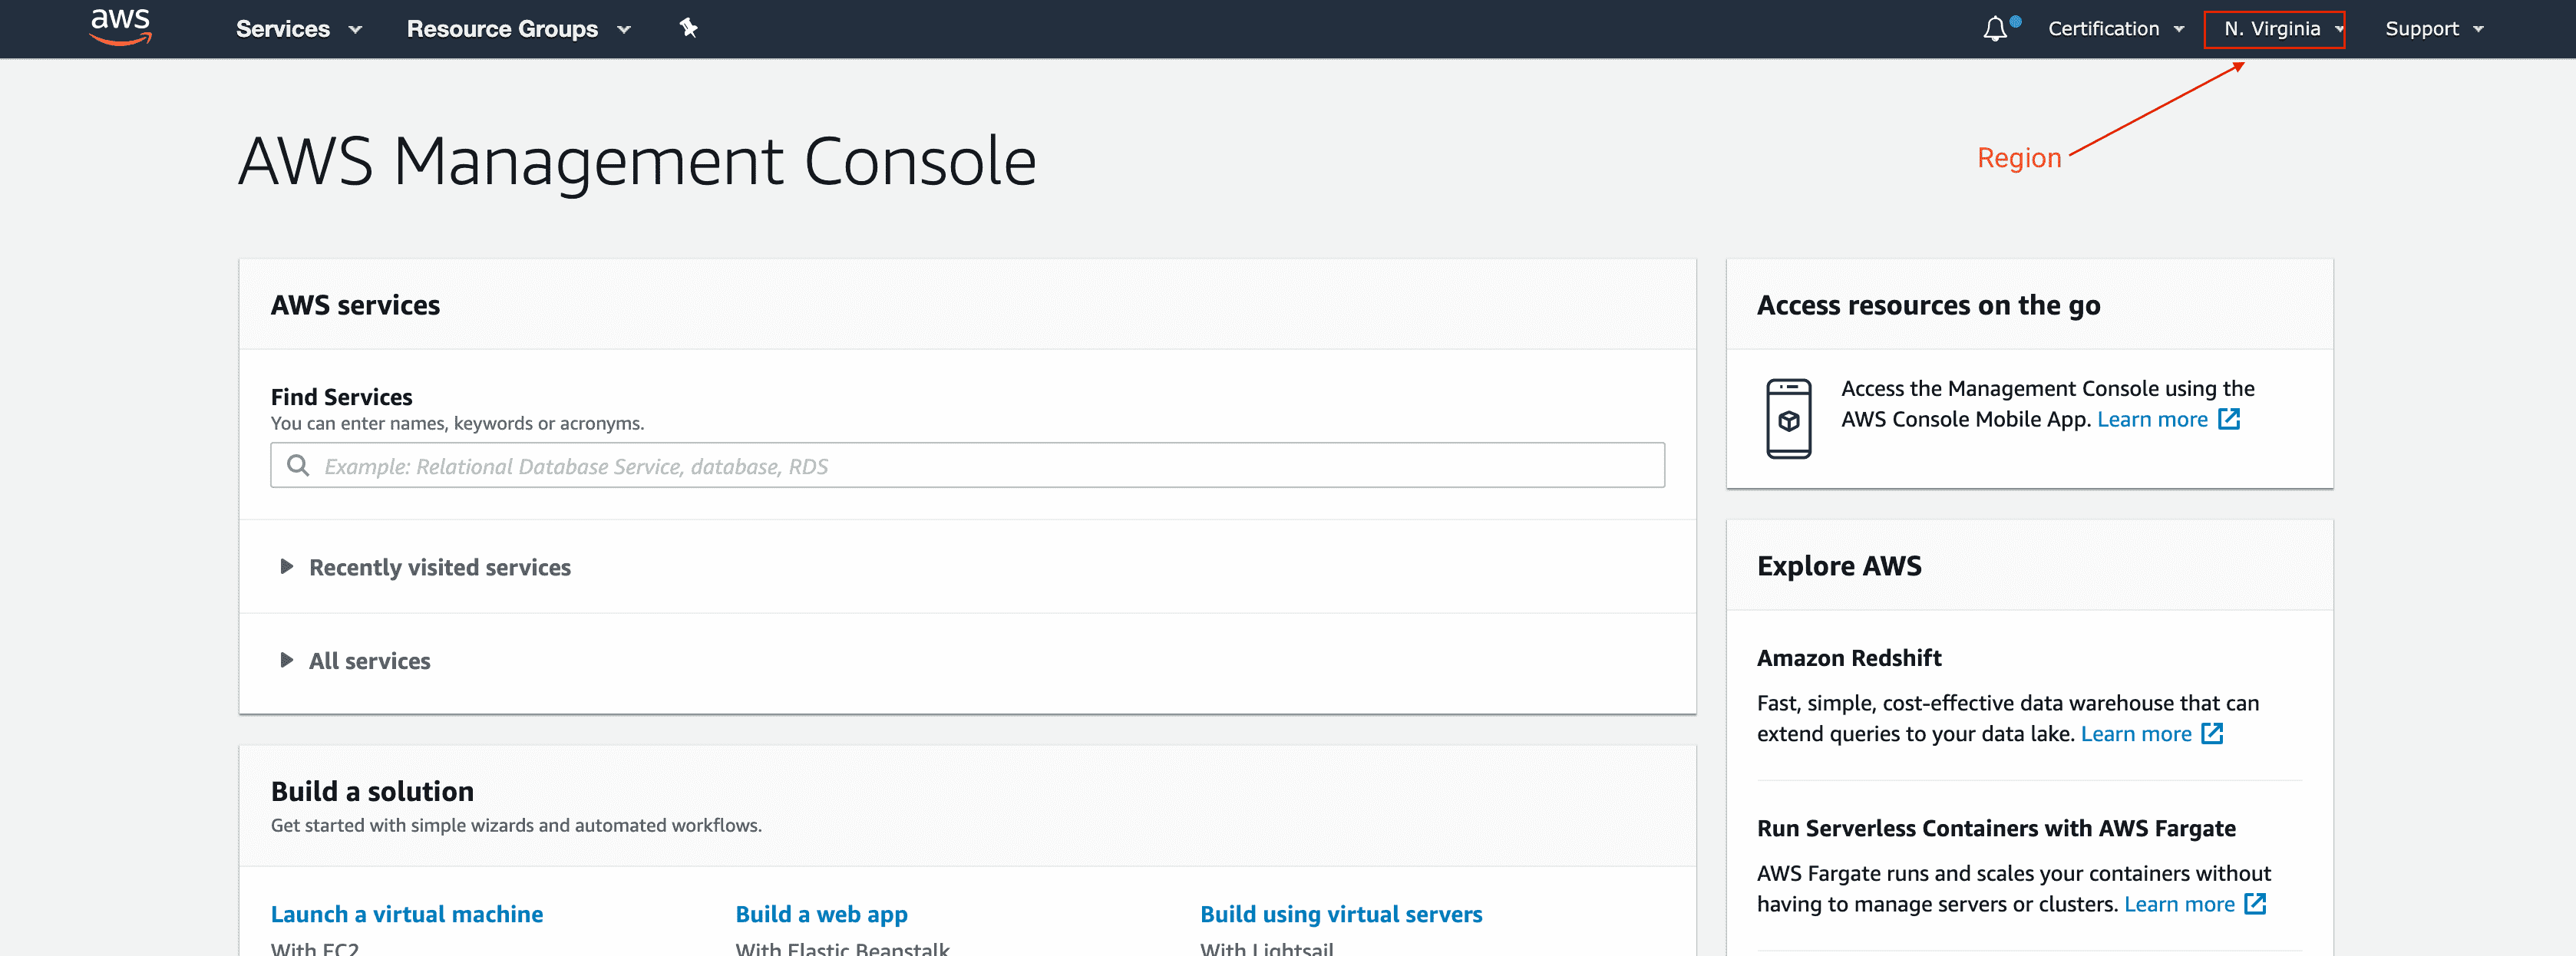

Step3: Under find services, we are going to enter “IAM” in the text box.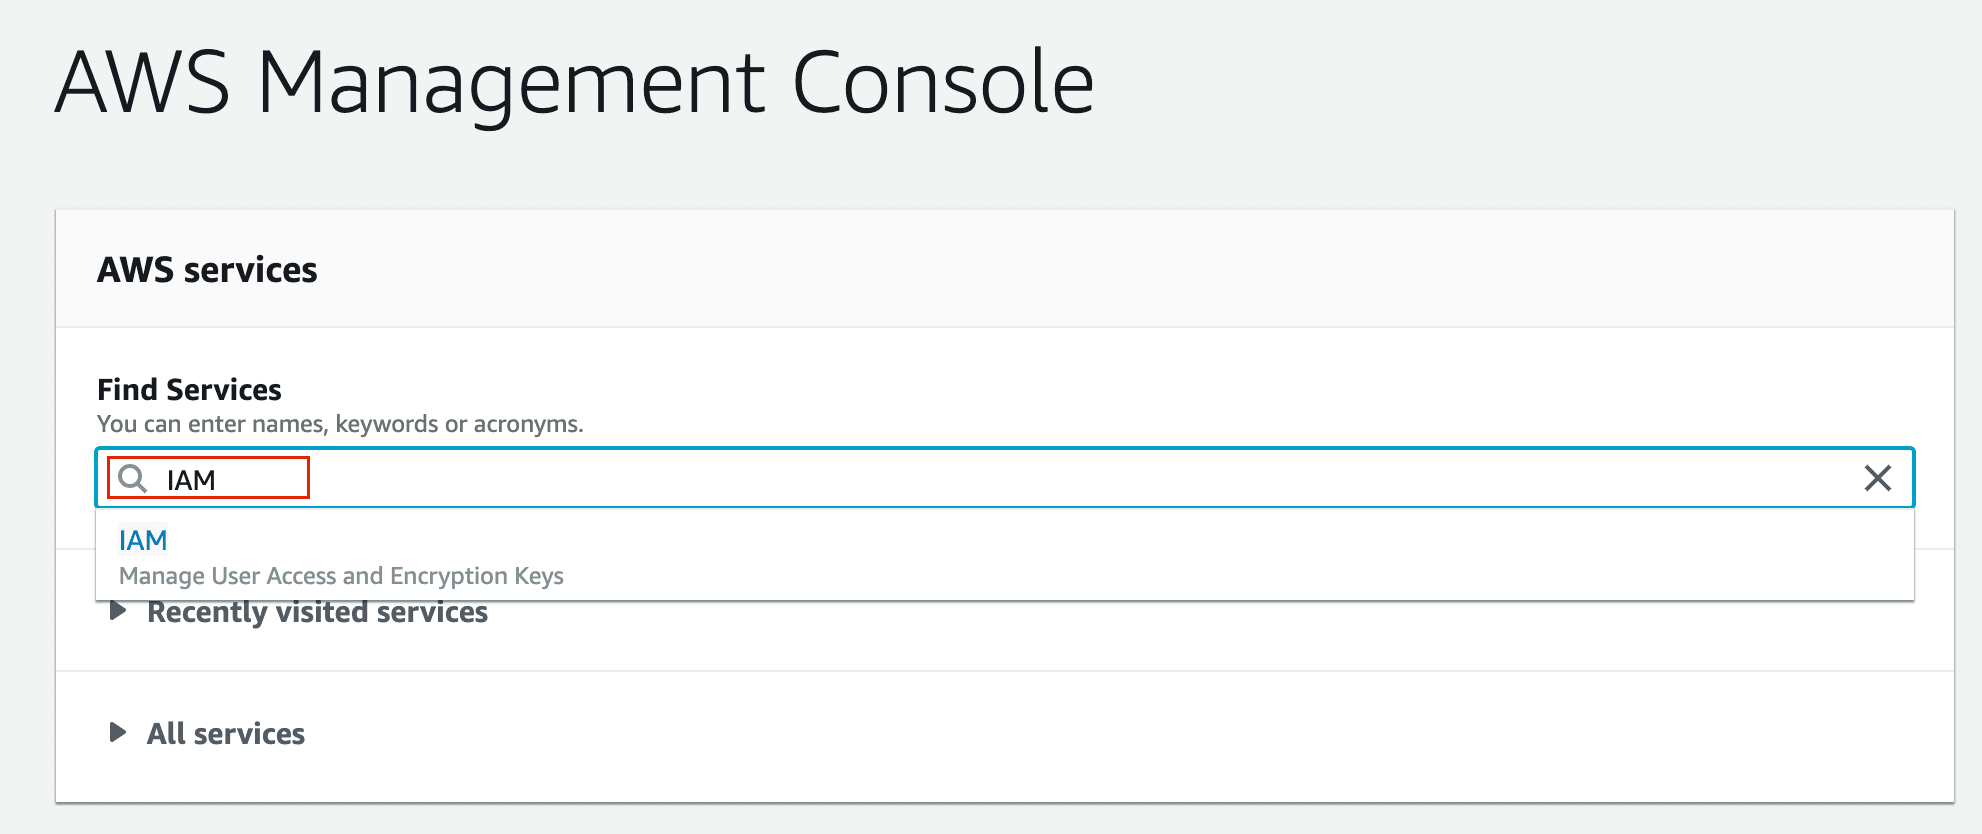

Step4: Now we are in the IAM (Identity and Access Management Console) for AWS. IAM console is the central hub providing the following functionality.
- AWS resources and services access management.
- User creation and permission management.
Group creation and management.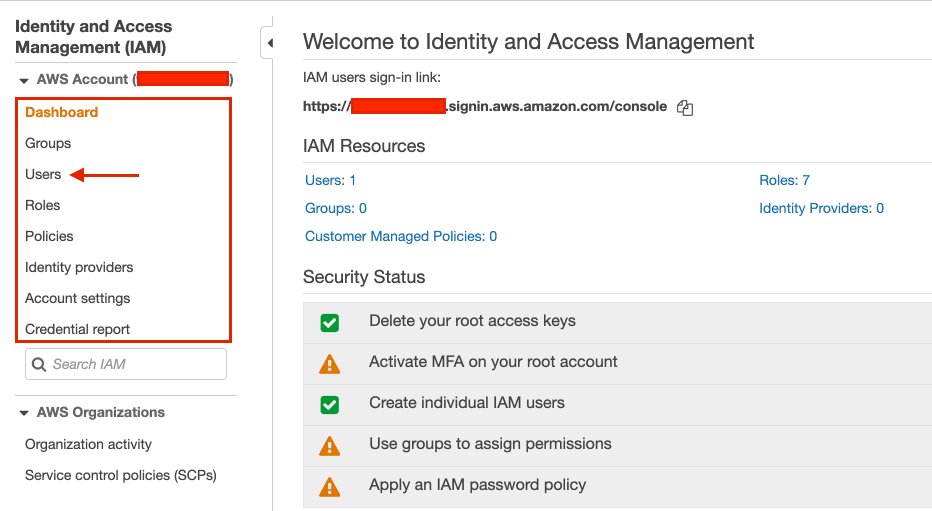

2. User Permissions
Step1: To begin with, we are going to click Add User in the AWS IAM Dashboard.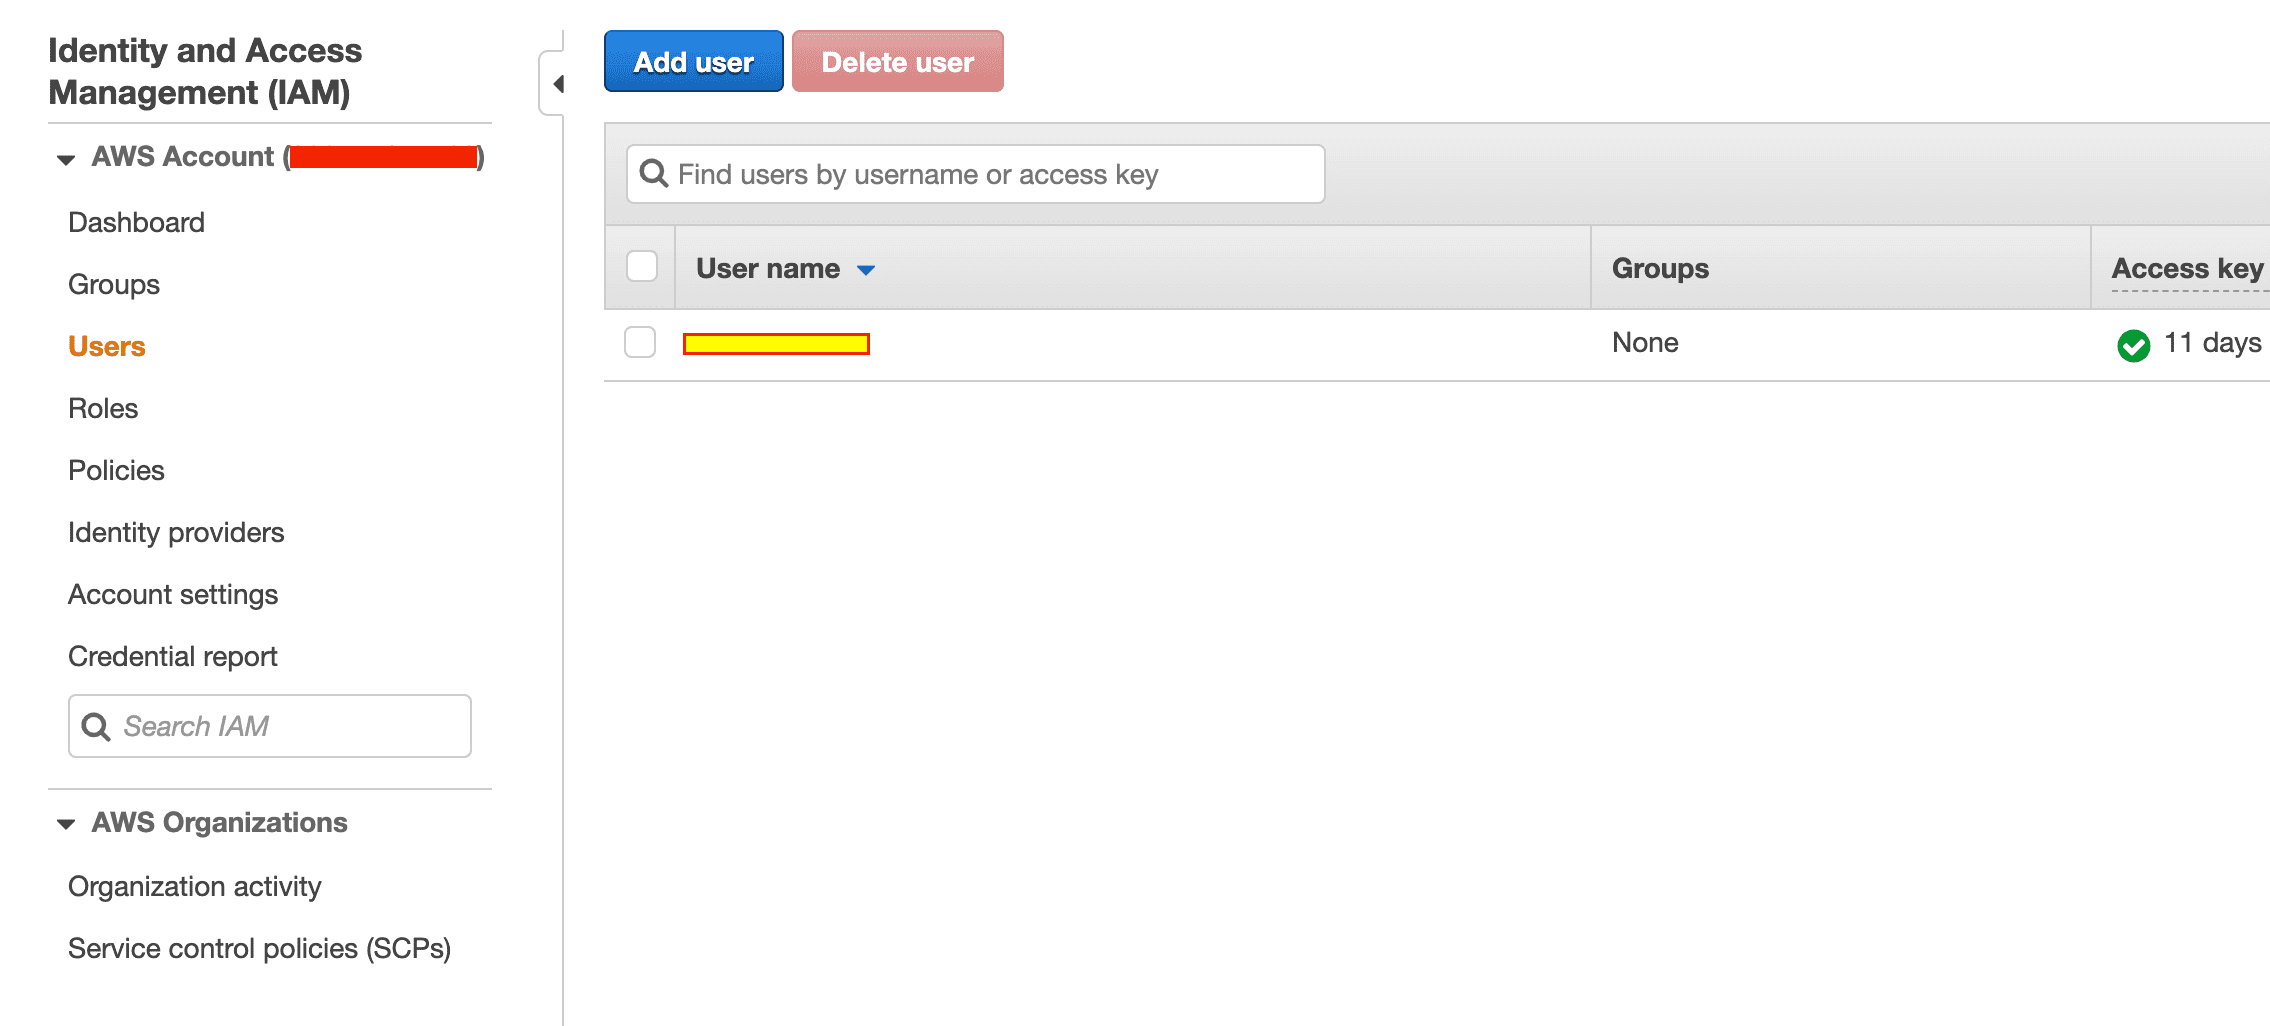

Step2: In this case, the users only require access to the API, AWS CLI. The user does not need to access the AWS Management Console. Hence, we are going to select the Programmatic access option.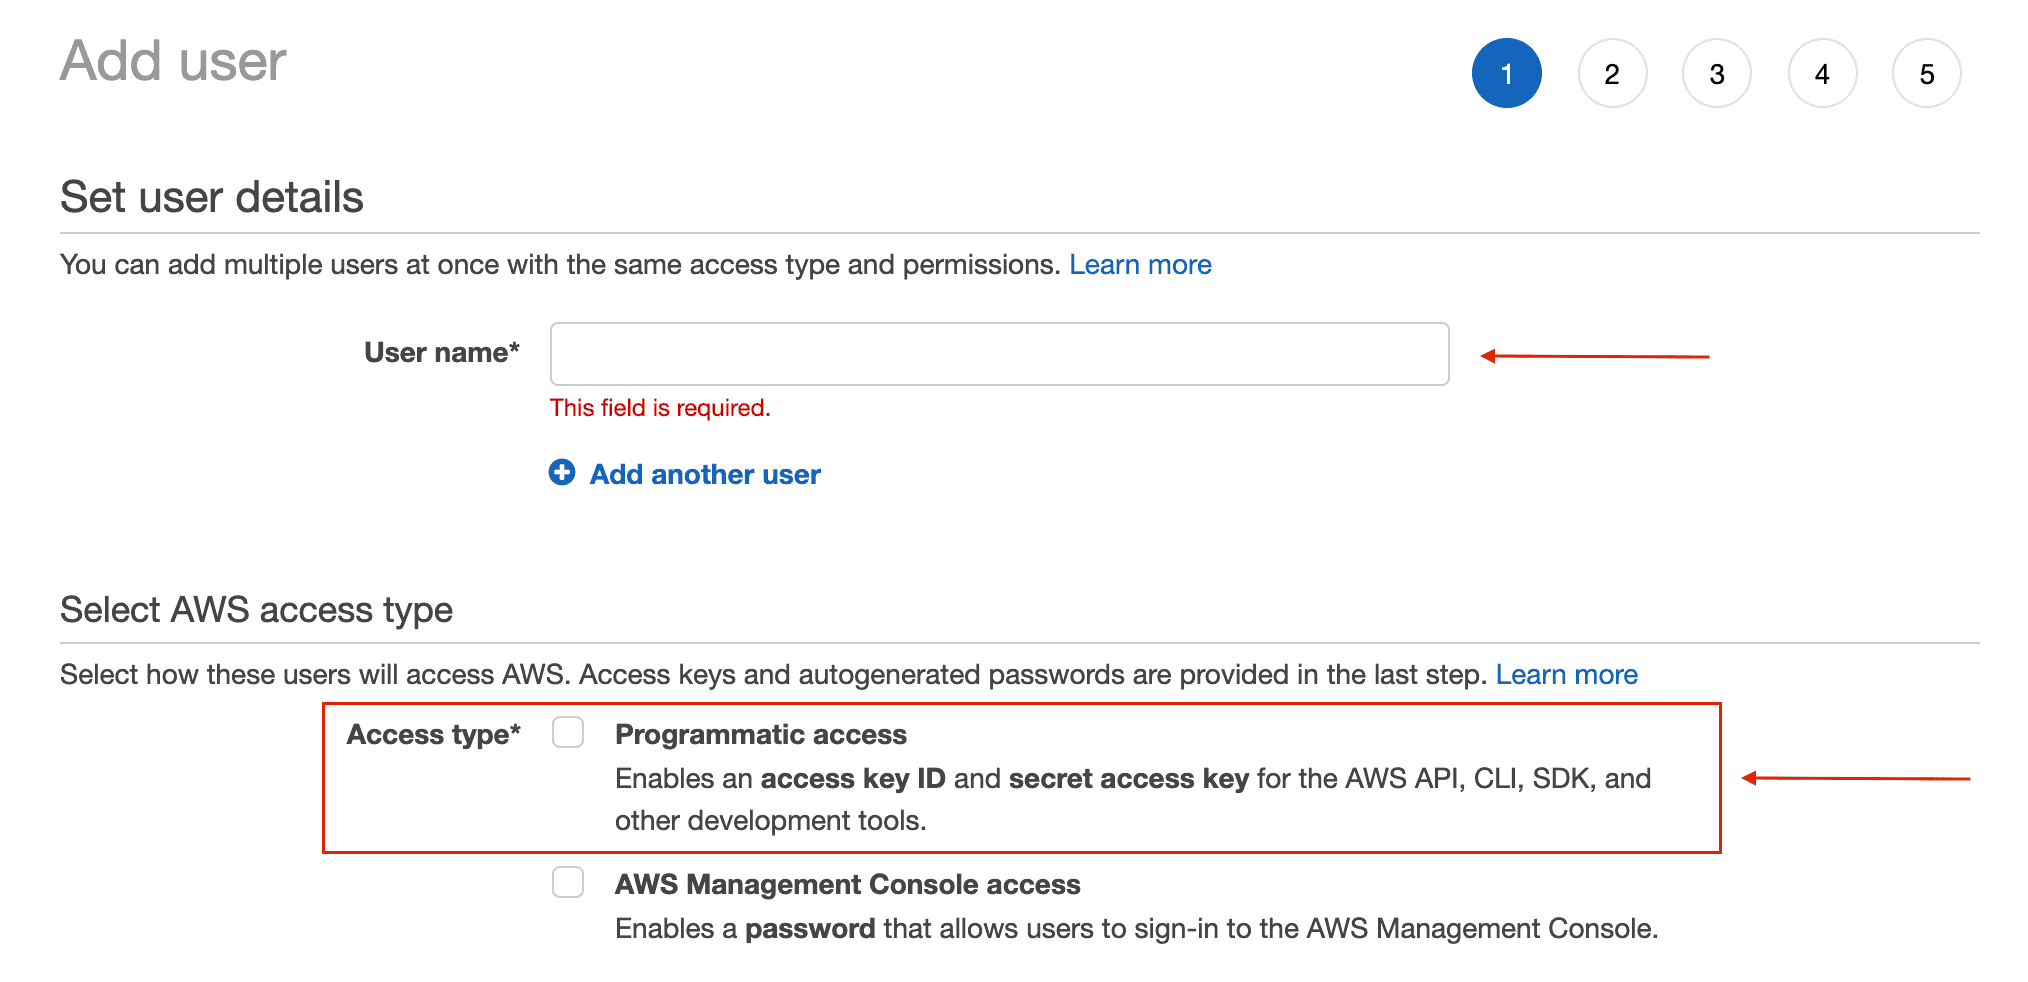

Step3: Next, we are going to provide the user name and select access type as Programmatic access.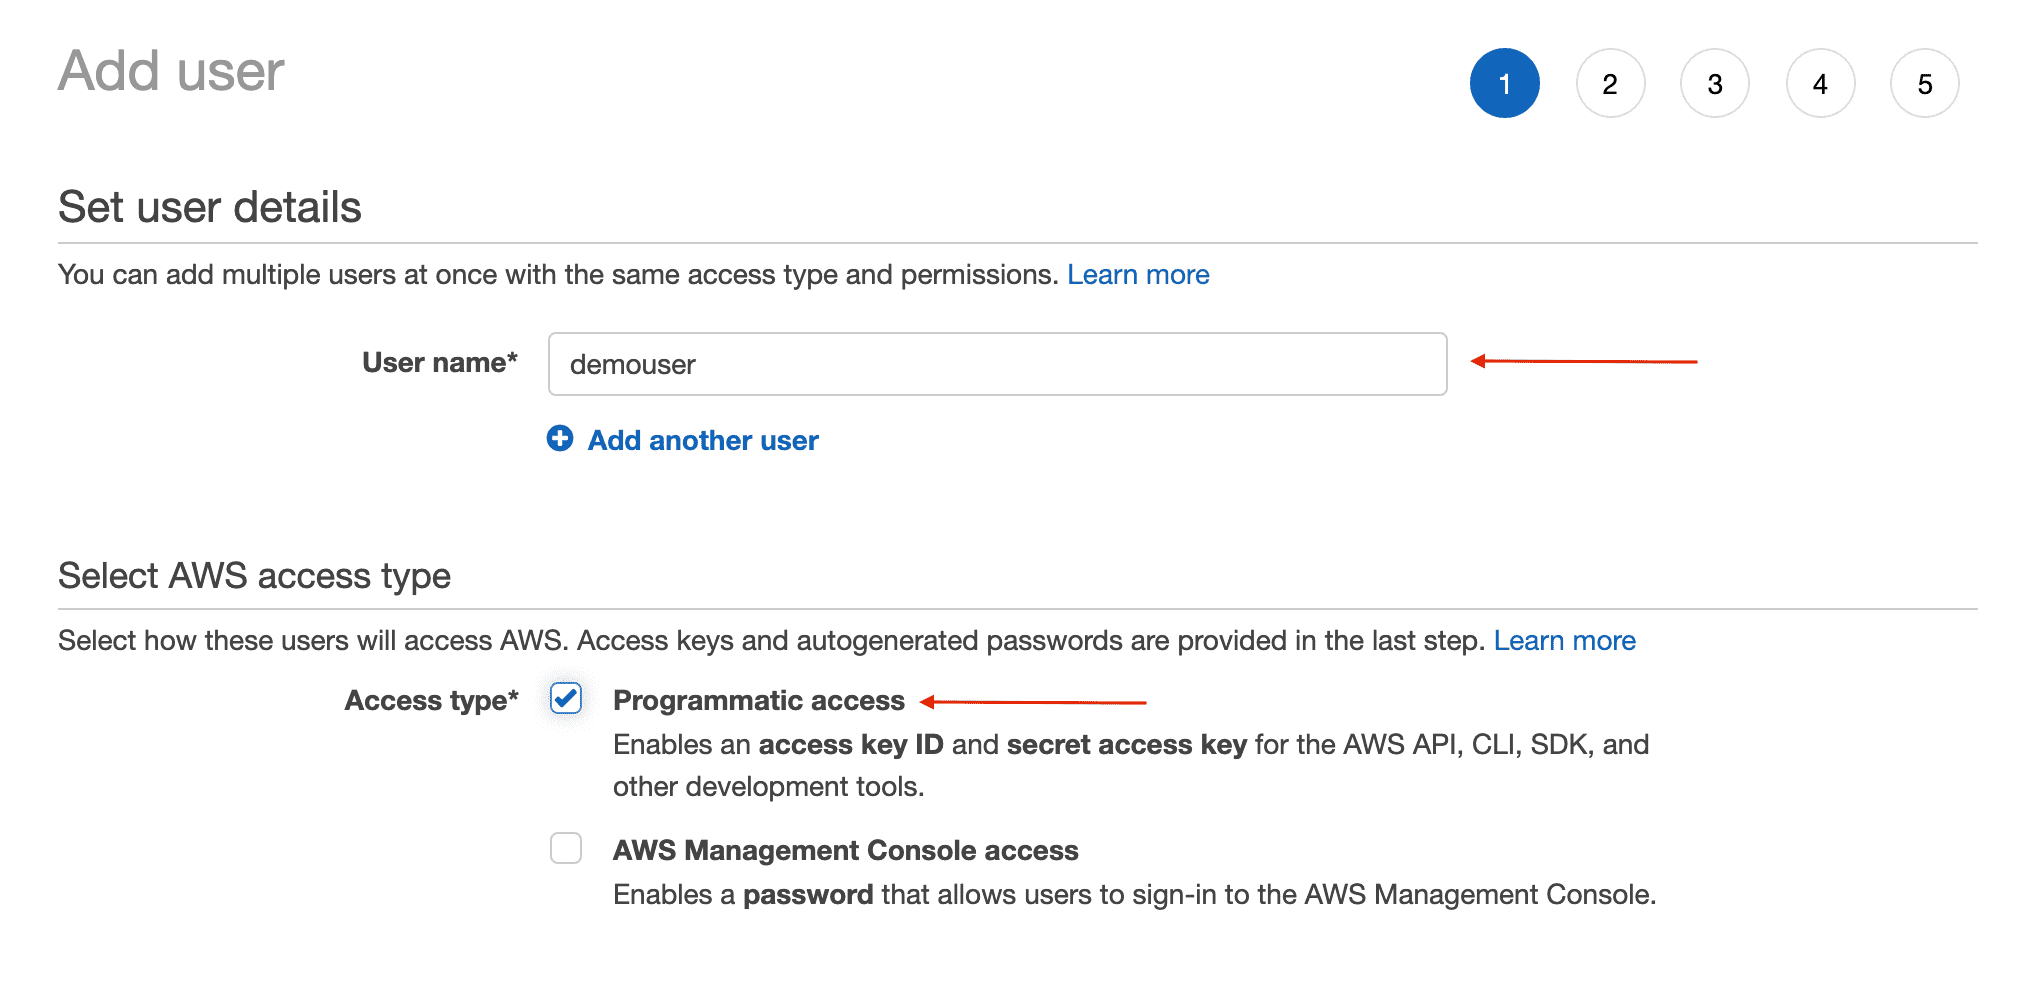

Step4: Click on next, after access type is selected.
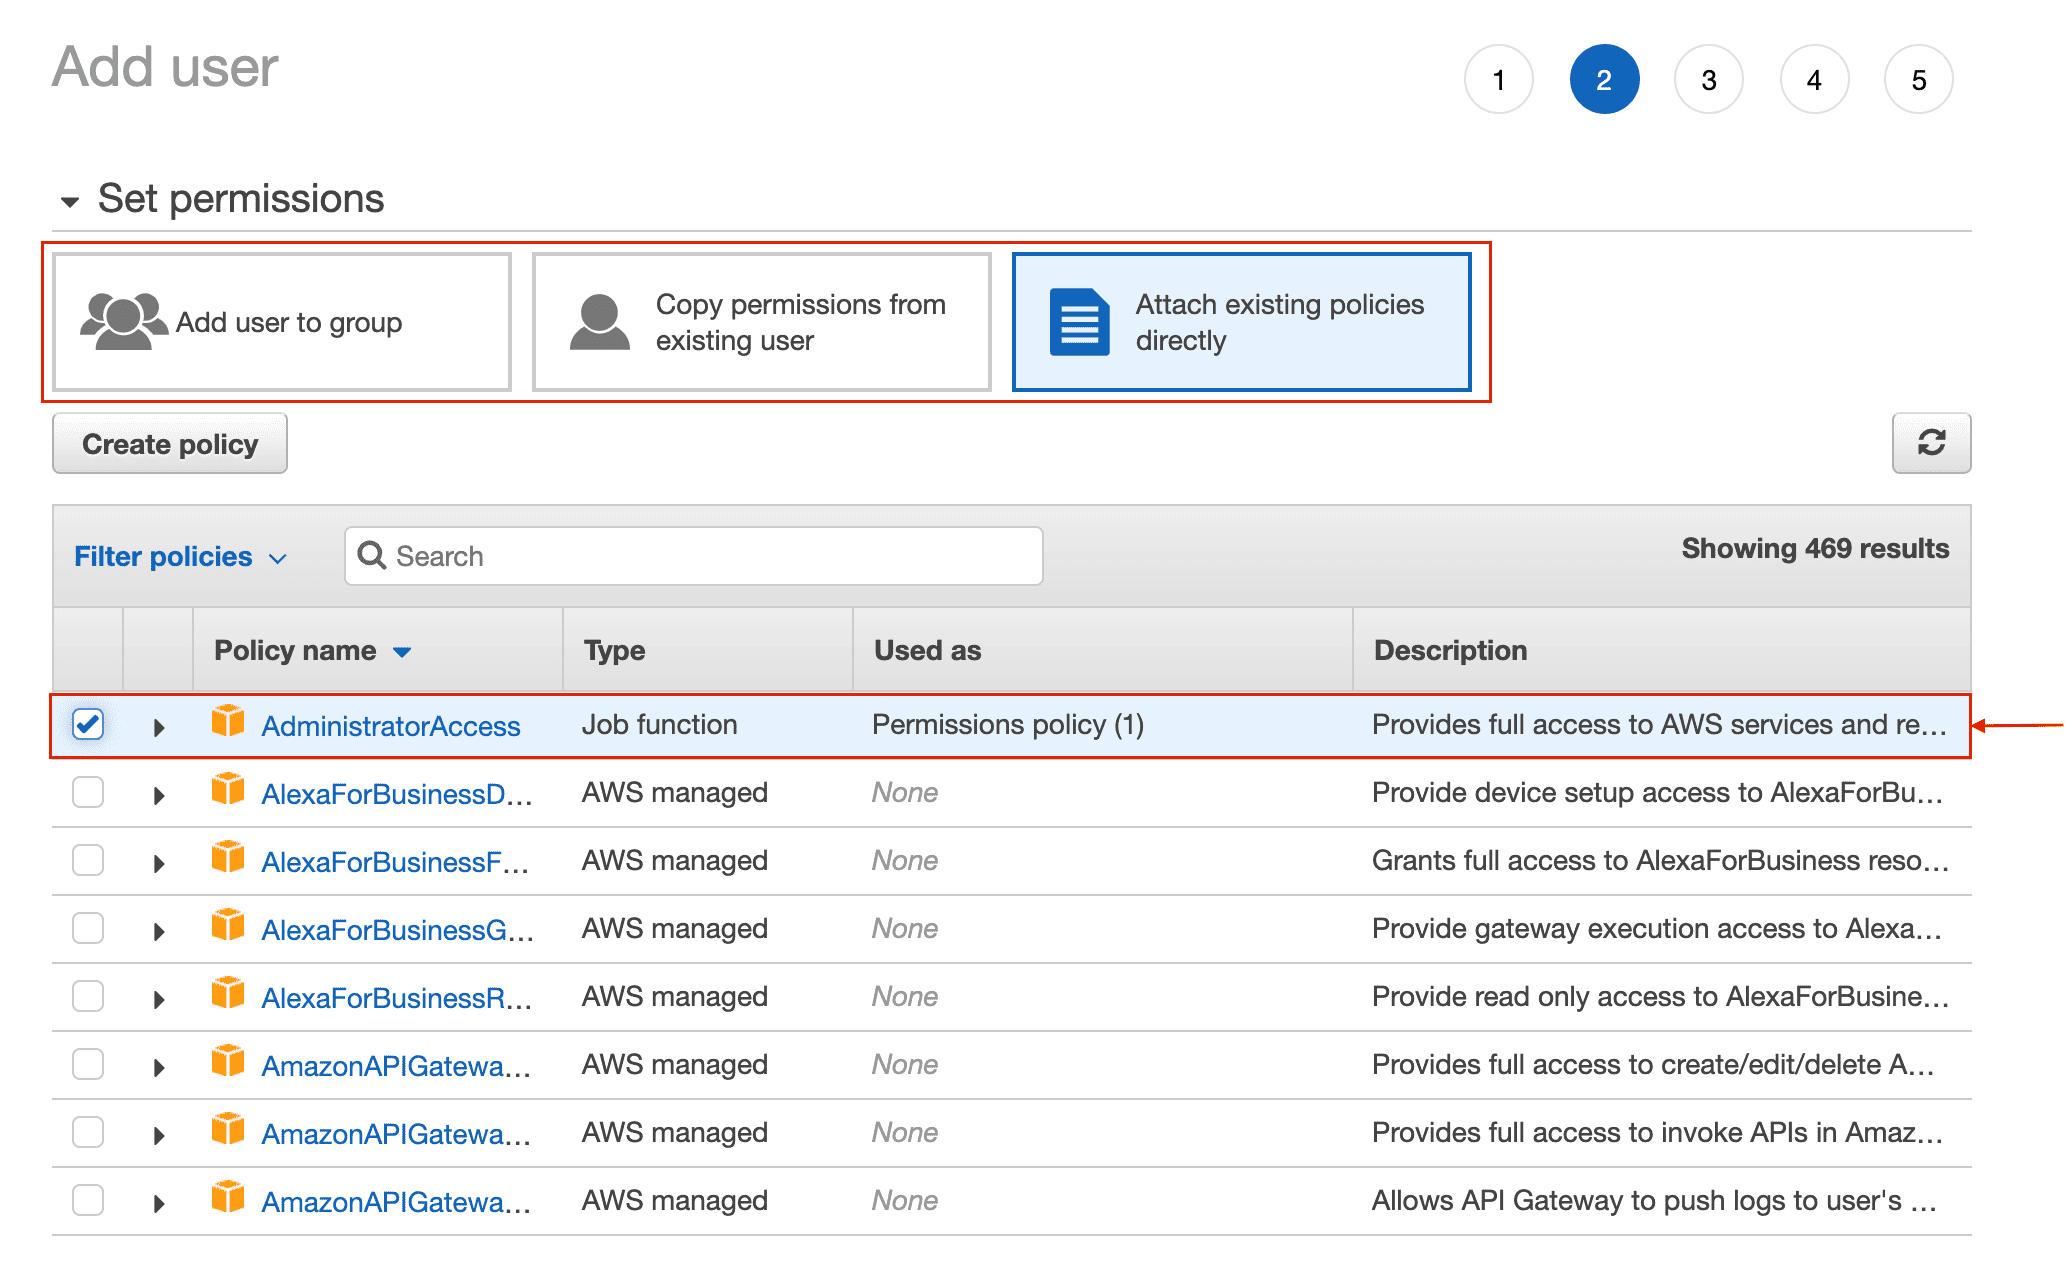
Step5: Next, permissions need to be assigned to the new user. Following options are available
- Add user to an existing group
- Copy permission from an existing user
- Attach existing policy directly to the user
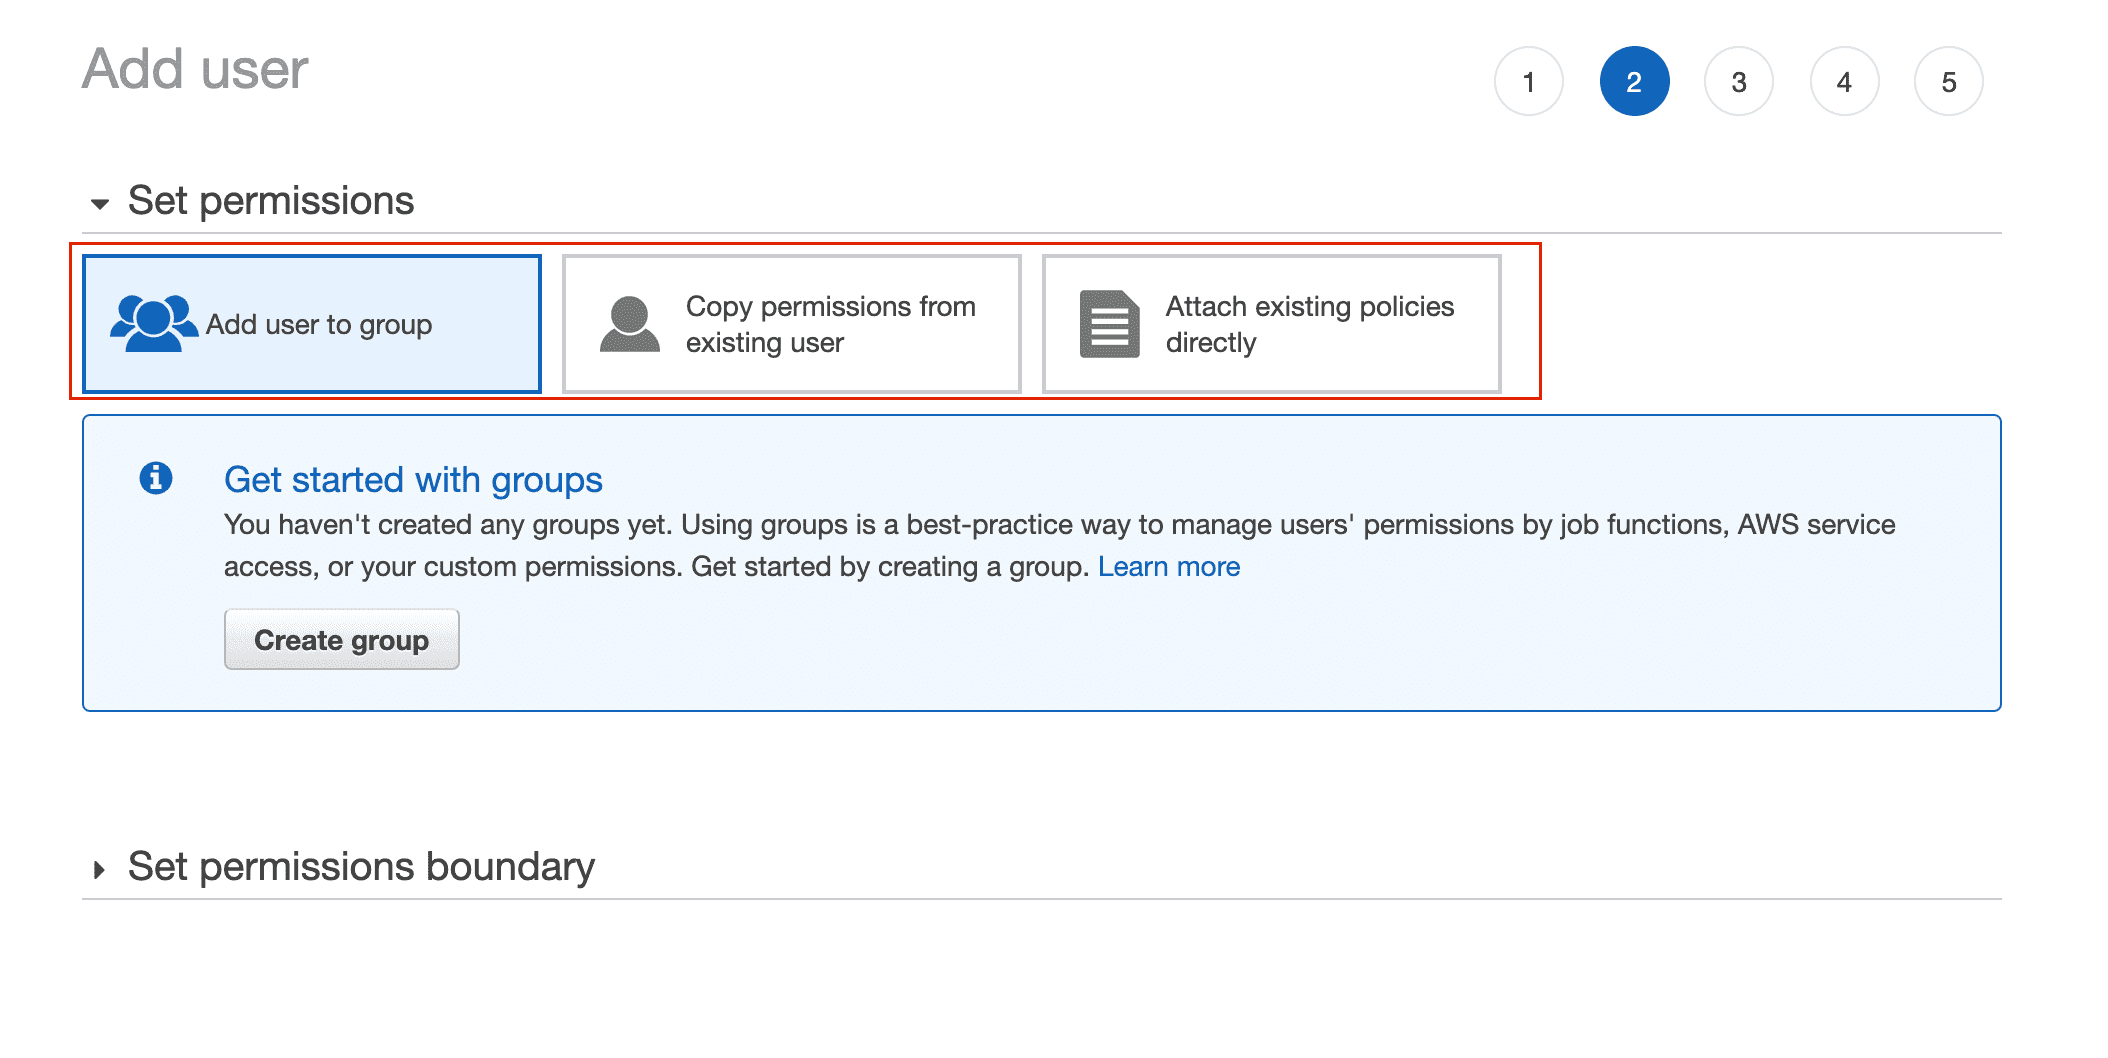

Step6: For the existing task, we are going to attach existing policies directly, in this we are going to select the “Administrator Access” policy.
IAM Policy is a complete topic in itself. Therefore, we are not going to discuss this here but will be a topic for another blog. In brief, what is an IAM Policy
- IAM Policy defines permissions.
- Therefore, when policies are associated with an AWS Resource, AWS Resource inherits the permissions defined in the policy.
- In short, policies are templates for providing permissions.

Step7: After adding the exiting policy, tags can be associated with the resource.
- In brief, tag is a label assigned to a resource.
- Each tag consists of a key and an optional value.
- Using tags, AWS resources can be categorized.


Step8: Click next, and we will end up on the review screen. This is the summary screen for the selection which we have made.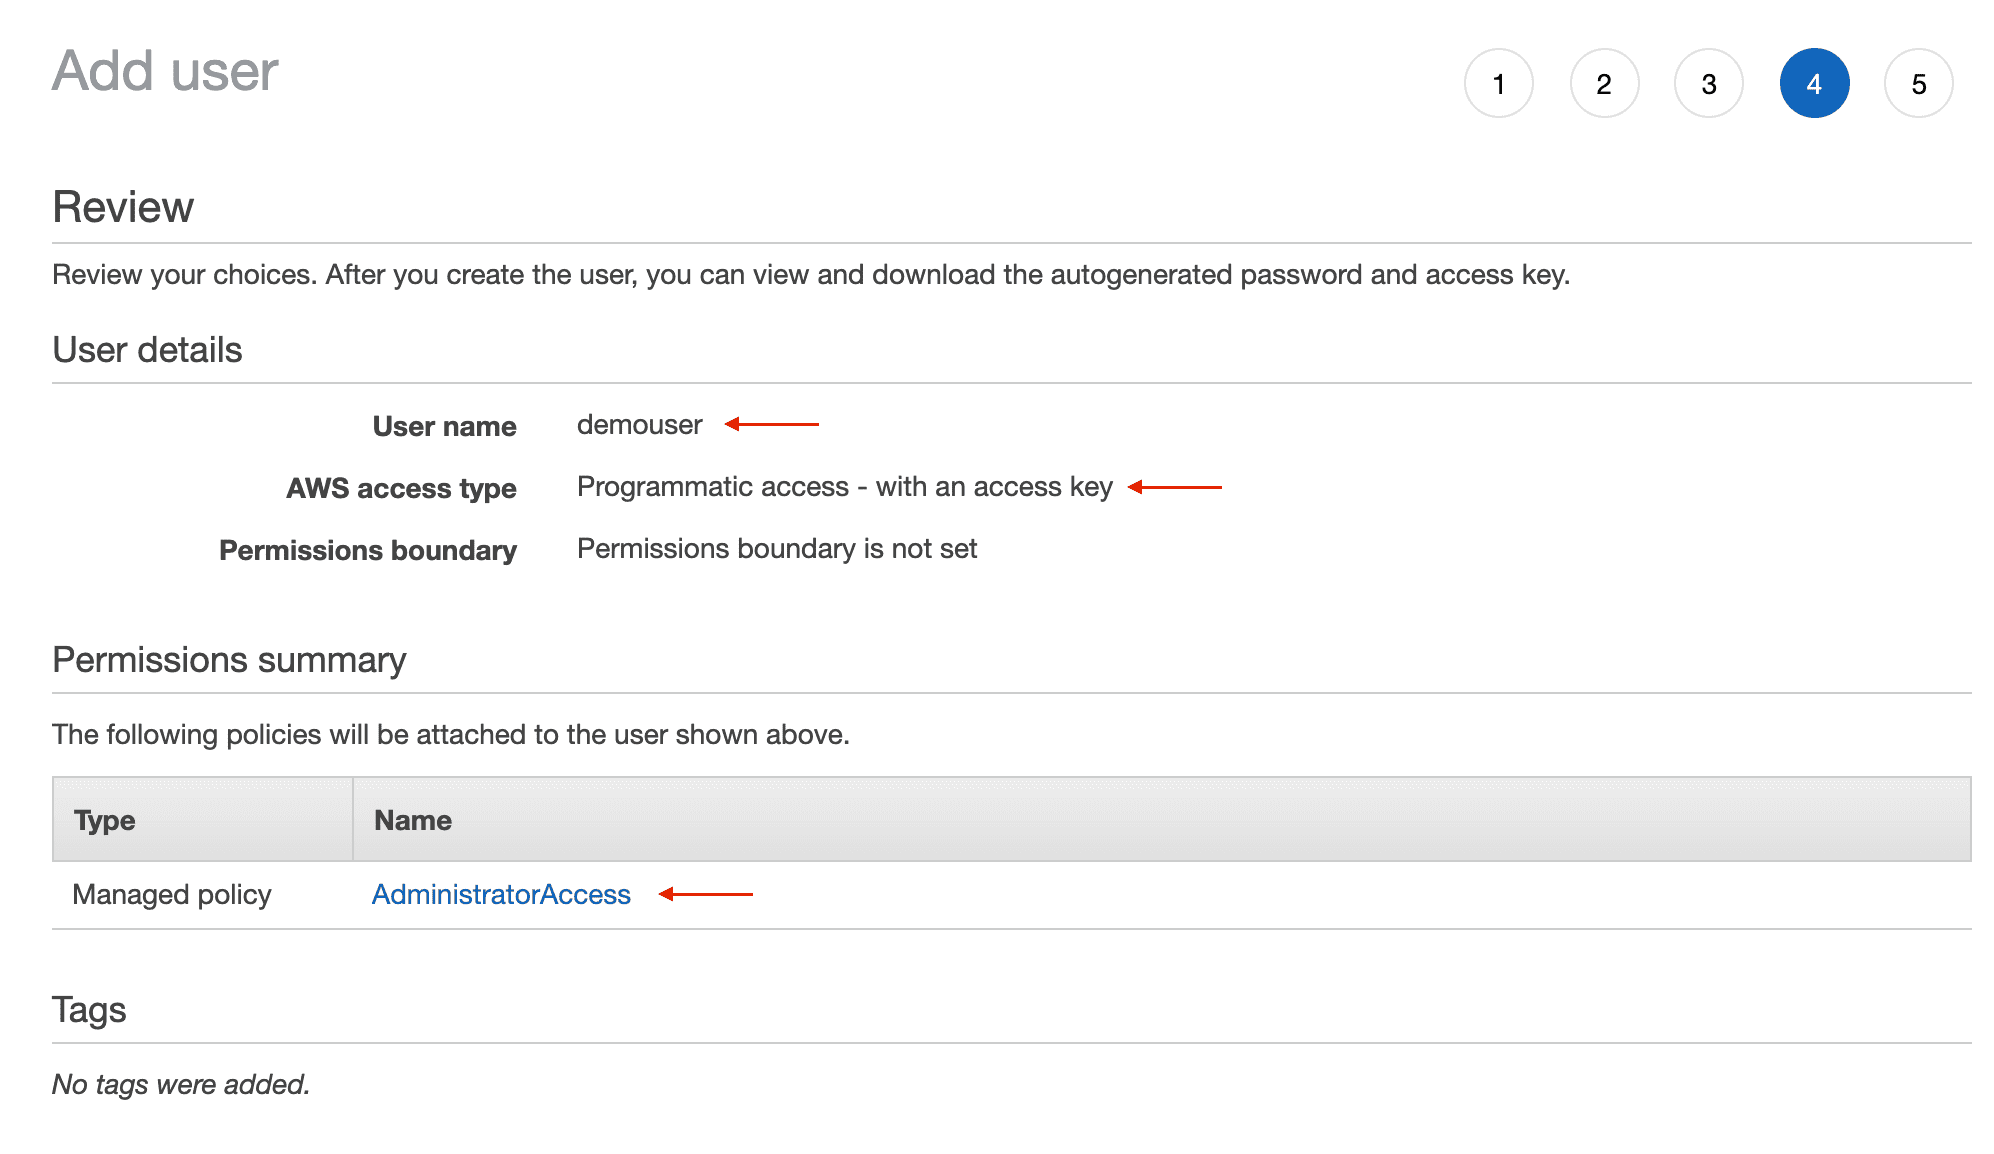

Step9: After all the steps are done, we are going to click on create. As a result, a new user will be created with the username “demouser”.

3. User Creation Response
- On the user creation success screen, two important pieces of information are provided.
- Access Key ID
- Secret access key
- We are going to store this information securely and will not share this information.
- Alternatively, CSV file download file option is available, CSV file contains the details.
- Safely store the key or downloaded “CSV” file, as we will not be able to retrieved Secret Access Key again.
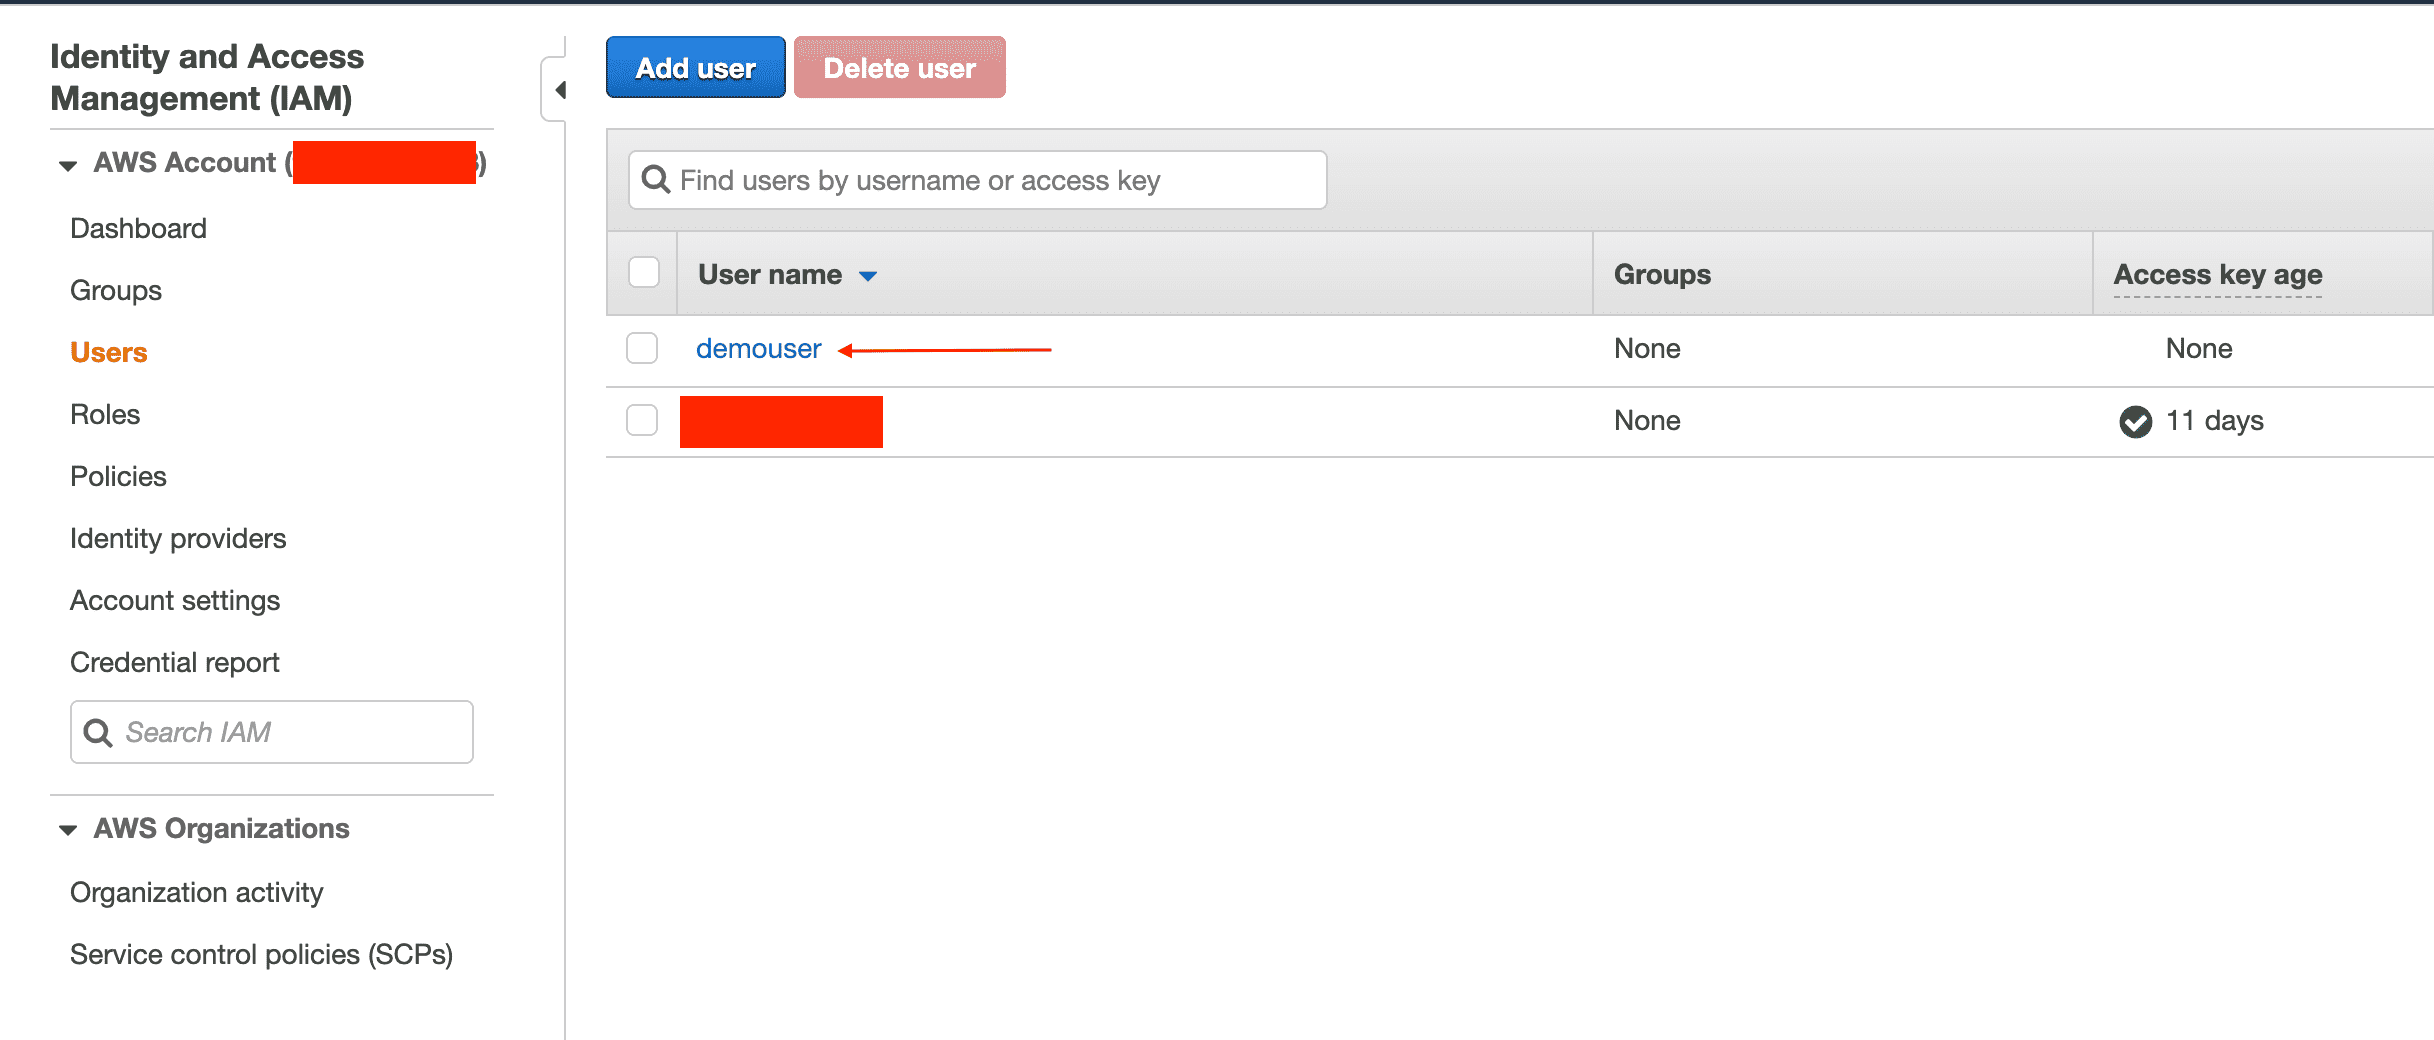
- Click on close and you will end up on the user dashboard. The newly created user is available now.
Enhance your productivity with the Salesforce CLI commands.
How to Use AWS CLI?
1. AWS CLI – Configuration
Step1: Click on the demo user, the pertinent details corresponding to use will be shown.
- Permissions
- Groups
- Tags
- Security Credentials
- Access Advisor

Step2: For this blog, we want to use a Security Credentials object, click on the Security Credentials tab.

Step3: Here we see seeing Access Key ID, which was recently created with status marked as “Active”
Step4: In this case, the Access Key status provides an important security feature to the administrators.
Step5: Now we have the user, therefore allowing us access to AWS resources programmatically.
Related Course: Planning to do the AWS Masters? Enroll Today!
2. Configuring Terminal/Command Prompt
- Log in to the terminal window (“mac”/ Linux”) or command prompt (“Windows”).
- Before we can access the AWS resources using CLI (command-line interface), we will need to configure the CLI.
- Accordingly, we will run the following command to configure AWS CLI
“aws configure –profile <profile name>”
Field Value AWS Access Key ID Created as part of new security credentials AWS Secret Access Key Corresponding to the “AWS Access Key” selected. Default Region name AWS regions, we are using us-east-1 Default Output format JSON 
- Now we are all set with the profile.


Stay Ahead in the Cloud Era with Top-Notch AWS SysOps Administrator Training!
3. AWS CLI Test Run
Step1: In this case, we will be using AWS S3 (Simple Storage Service) as an example.
Step2: In brief, AWS S3 is an object storage service.
- Scalability
- Data availability
- Security
- Performance.
Step3: Next, we are going to run “aws s3 ls --profile mydemouser”![]()

Step4: After listing out the content of the existing bucket, let us try to create a new s3 bucket using AWS CLI“aws s3 mb s3://mydemouserbucket --profile mydemouser”![]()

Step5: As a result of the command execution, the bucket should be created.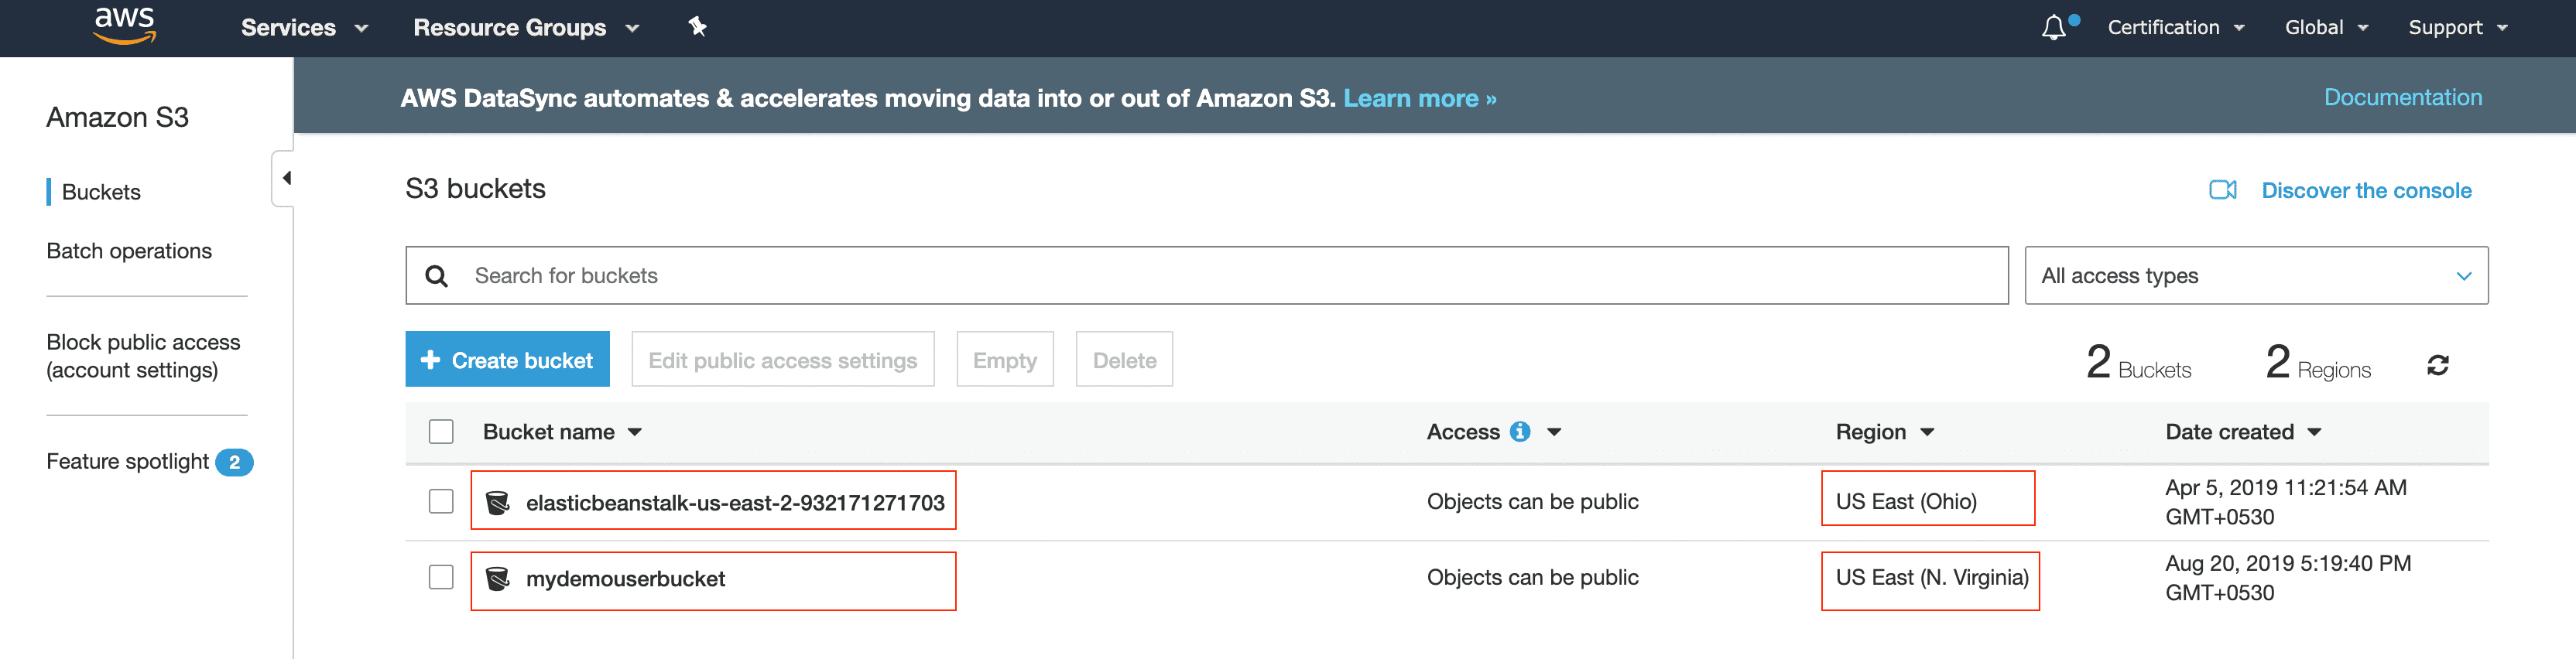

Step6: Furthermore, let us try to create a bucket in a region other than the default region for the CLI profile, in our case the default region is ‘us-east-1’![]()

Step7: After the command has been executed, let us check, if the bucket has been created and what is the region of the bucket.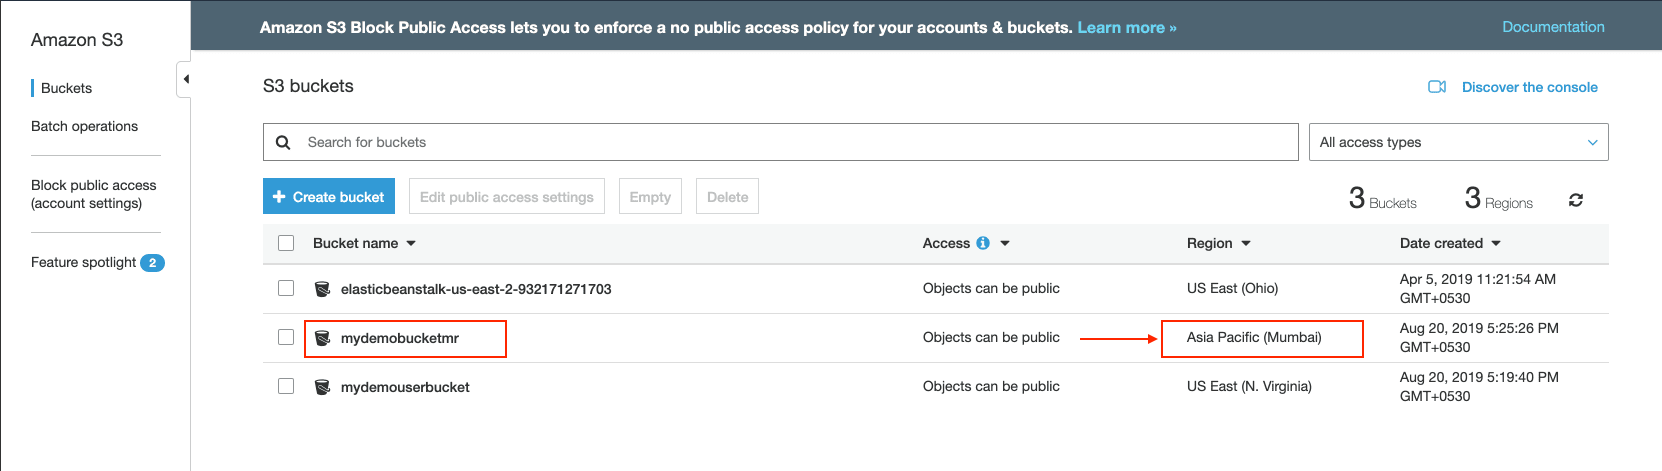

Conclusion
AWS CLI is an excellent tool not only from the standpoint of administration of AWS resources, but CLI also provides a key insight into how AWS can be accessed programmatically. Key concepts have been introduced, user set up done in IAM, configured the CLI to access the AWS resources. But AWS CLI can do much more. In this blog, we just touched upon accessing them through the console. In the next blog, the focus will be on AWS S3. Stay tuned for more.
One of the best ways to gain in-depth knowledge is through the AWS Certified Solutions Architect Associate Training
Got a question for us? Please mention it in the comments section of “How to Use AWS CLI?” and we will get back to you.