
Advanced DevOps Certification Training with G ...
- 22k Enrolled Learners
- Weekend
- Live Class
(7990)


 Copy Link!
This is the second post in the series of Hacking Git and GitHub. In this post, we will drill down into the GitHub markdown for creating README files, adding a .gitignore file, and learn about the most important feature of Git: Branching.
Here is a quick recap of the topics we covered in the first post in the series:
In this post we are going to cover the following topics:
It is always a good idea to add a README file to your repository so that other team members can easily identify the contents in their respective repositories. GitHub provides the option of adding a README file when a new repository is created. You can put plain text in the README file or write a GitHub markdown in order to create a beautiful README file with images, lists, tables etc.
So what happens if you don’t add a README file? Well, you will have to guess what your repository contains. In short, good repositories are always well documented!
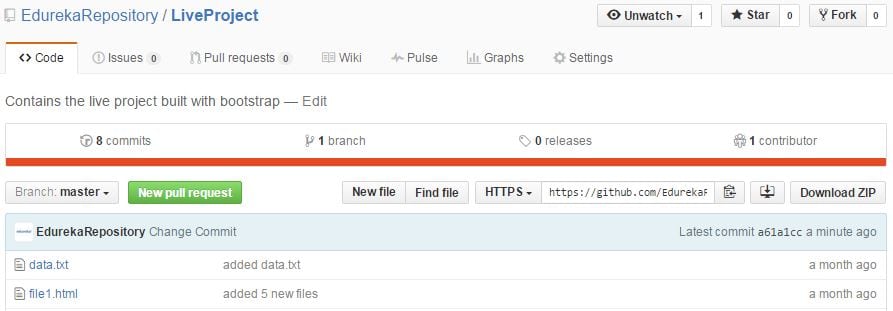
Let’s now add a README file to our LiveProject repository
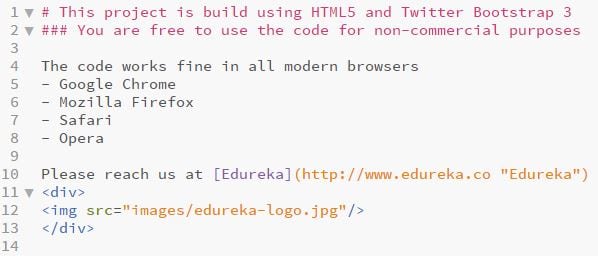
Here is a simple README file. We need to make sure it ends with the <b>.md</b> extension.
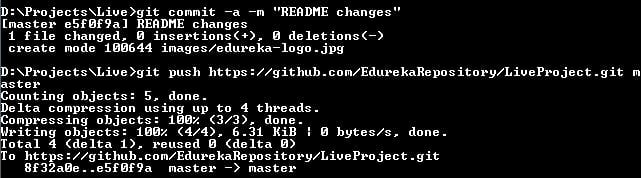
Next, commit the README changes to our remote GitHub repository:
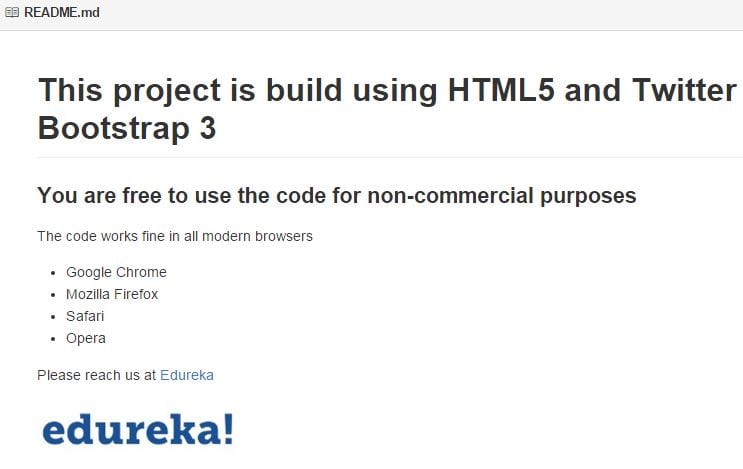
This is what your repository will look like, once you push the README file changes to the remote repository.
Here is a quick cheat sheet for a GitHub markdown:
<pre># for H1 header
## for H2 header
…
###### for H6 header
** This text will be bold **
* This text will be italic *
– or * for unordered list
1. 2. 3. for ordered list
For links wrap, link the text in brackets [ ], and provide the link in parentheses ()</pre>
Next, we are going to learn about the .gitignore file, why we need them and how to use them.
What is .gitignore file and why we need it
While developing real world projects, your project will almost certainly include third party libraries as dependencies, or configuration files which might include confidential information. You will definitely not want these files to be available on the remote GitHub repository. To prevent certain files/folders from being pushed to remote GitHub repositories, we use the .gitignore file.
Creating a .gitignore file
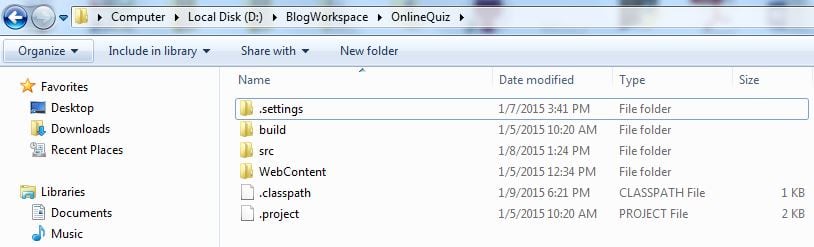
Here is a snapshot of a Quiz application written in Java. Here, we don’t want anything under build and .settings folder to be pushed to the remote GitHub repository. To achieve that, we will mention these both the folder names in our .gitignore file.
To create a .gitignore file from the Git shell, you can use the touch command as shown here:

We just added two lines for ignoring everything that is under build and .settings folder in our project directory.
<pre> .settings/*
build/*</pre>
Let’s now add and commit the changes, and push it to the GitHub repository:
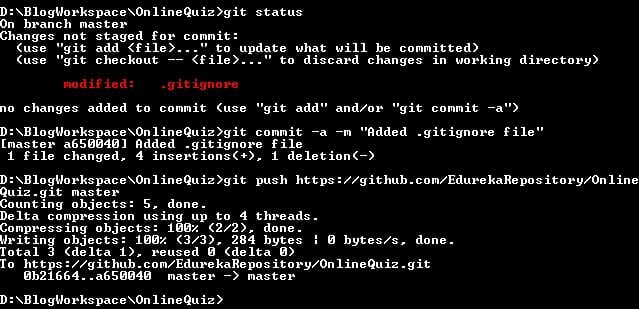
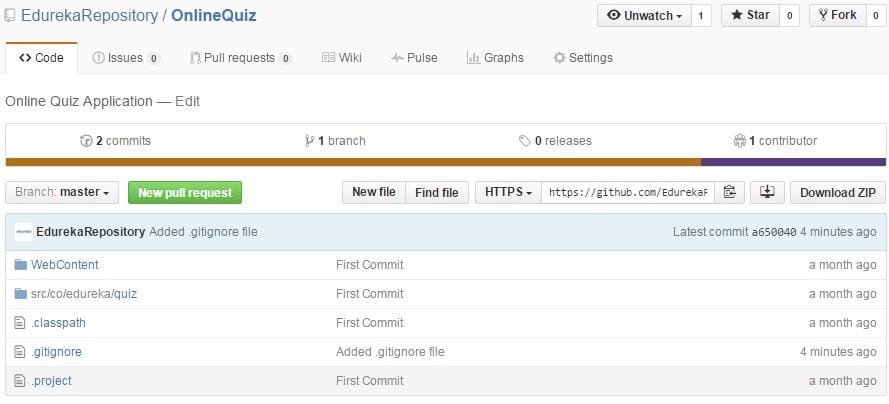
No files under build and .settings folder will be pushed to remote repository, as shown below:
Next, we are going to learn more about one of the most important feature of Git: Branching.
Why Branching?
Problem:
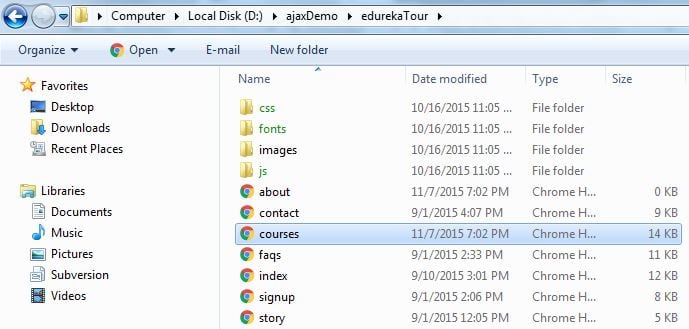
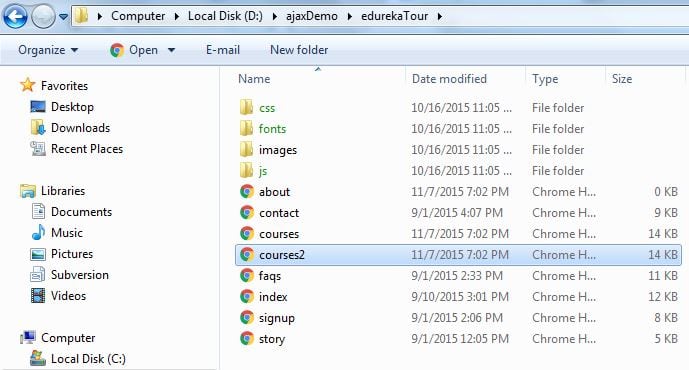
Suppose you want to add/update courses.html file to add new features but you don’t want to mess the original courses.html file. What will you do?
Old School Approach:
Most probably you will copy courses.html file and rename it to something else (in this case courses2.html). Once you are satisfied with your changes in courses2.html, you can delete the courses.html file and rename courses2.html to courses.html. This tedious workflow can easily be solved by Git:
Git solves this problem very elegantly using its branching feature. So let’s now see how to achieve that.
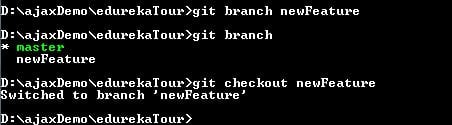
Note that Git by default creates master branch when we initialize any directory as Git repository. You can see that using git branch command as shown below:

Next we are going to create a new branch (newFeature) to make the new changes and once we are done with the changes we will merge the newFeature branch to the master branch. This way we can easily try out code experiments without breaking the working code.
Creating a new branch : So let’s create the newFeature branch

Even though we have created the new branch (newFeature), git does not change the working branch automatically on branch creation. To change the working branch to newFeature we use the git checkout command.
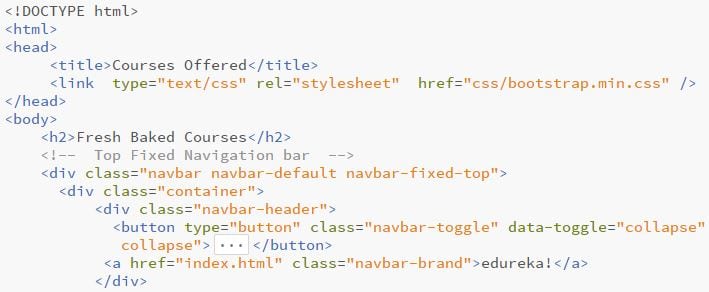
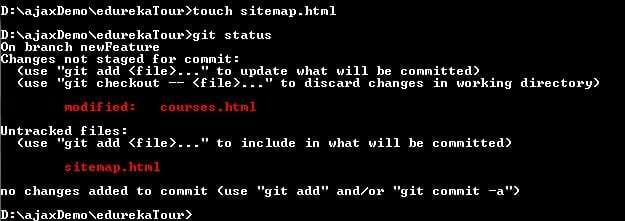
For the demo we have just added the h2 header in our courses.html file
Let’s check the status:
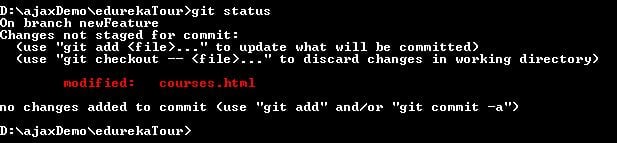
As shown above we have modified courses.html on branch newFeature. Let’s now add a new file as we are on newFeature branch.
Now we are ready to commit the changes.

Note: If we switch to the master branch, you will see that courses.html will be as before and sitemap.html will be absent. As we made the changes in the newFeature branch and not the master branch.

Let’s now merge the changes to master branch. To do that, switch to master branch and use the git merge command as shown below:

After the merge operation, you will be able to view the changes made in the newFeature branch reflected in the master branch.

That’s all there is to know about Git’s branching feature. In the next post, we will talk about Git Gists and how to add GitHub Gists to the web pages.
Got a question for us? Please mention it in the comments section and we will get back to you.
If you found this blog interesting and relevant, check out the DevOps Certification course by Edureka


 Thank you for registering Join Edureka Meetup community for 100+ Free Webinars each month JOIN MEETUP GROUP