
Advanced DevOps Certification Training with G ...
- 23k Enrolled Learners
- Weekend
- Live Class
(7990)


 Copy Link!
Remember the days you had to share codes via email? I really wish Git and GitHub were around during my college days when we collaborated over email or pen drives, by sharing code.
I’ve created a series of blogs on Git and GitHub, aimed to take you through the various functions and capabilities of Git and GitHub. In the first blog of the series, let’s understand the basics.
What is Git?
Git is a free and open source version control system which makes it easy to track files and collaboratively build code.
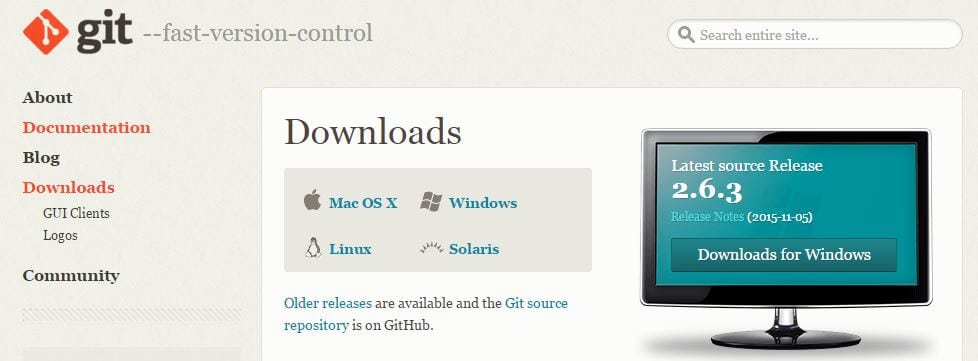
To get started, you have to download Git for your machine from https://git-scm.com/downloads
Getting started:
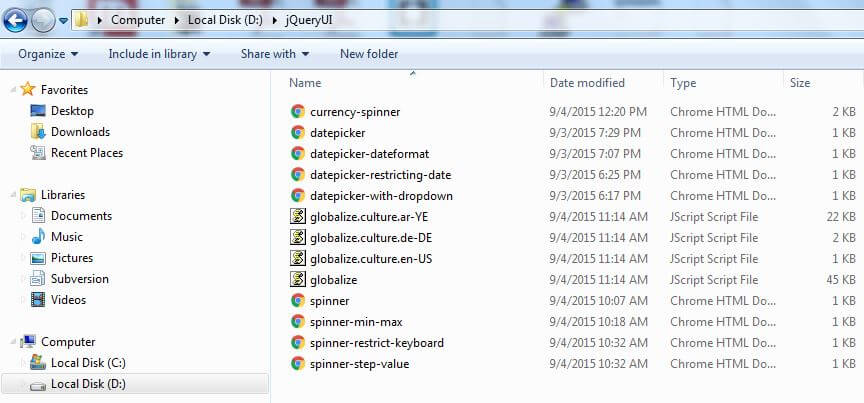
Great. You have installed Git on your machine. In order to track files/directories with Git, you create a repository and put the files/directories into it. I have my jQuery work in jQueryUI directory, and in order to put all the files/directories under Git version control, I need to initialize the directory as a Git repository.
Initializing Git Repository :

We have now initialized our jQueryUI directory as a Git repository with git init.
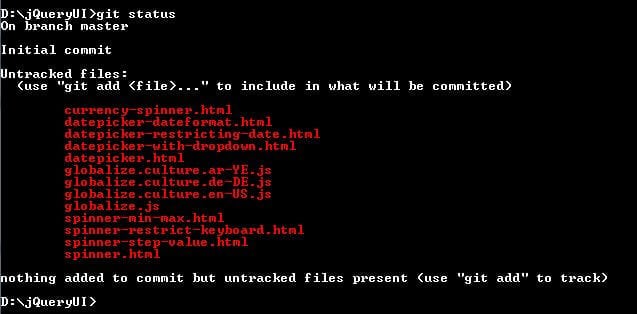
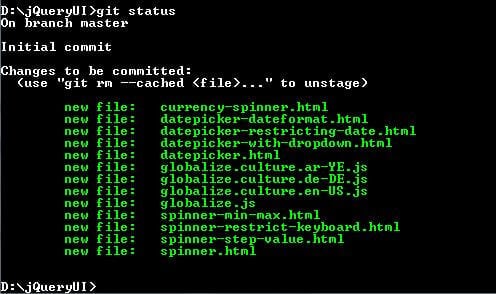
Checking Status:
You can see that the files under jQueryUI directory are still not tracked by Git. You need to use git status to check the status of this operation.
Staging Files:
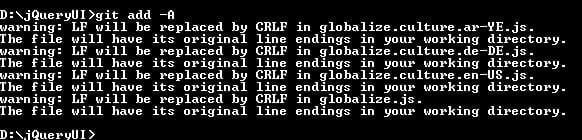
Now we are going to put all the untracked files under Git’s version control by using git add command. Since there are 13 untracked files we will use the option -A with git add command to put all the untracked files under Git version control in one command.
Above we have added all the files under Git version control, we can check it with git status command.
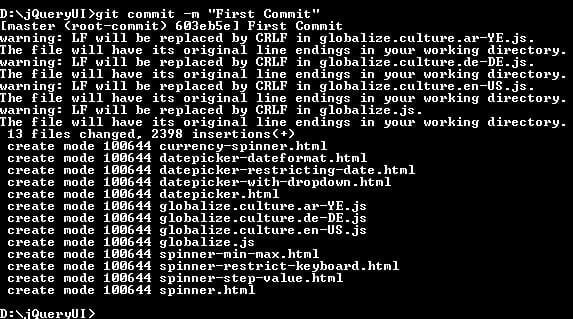
Committing Files:
Next we are going to commit the changes with git commit command, while committing the changes you should provide a meaningful commit message after -m option. Note that it is mandatory to provide the commit message while committing the changes.
Creating a GitHub repository :
Once we have committed our changes we are ready to push the code to a remote GitHub repository. To create a GitHub repository, we need to create an account at https://github.com/.
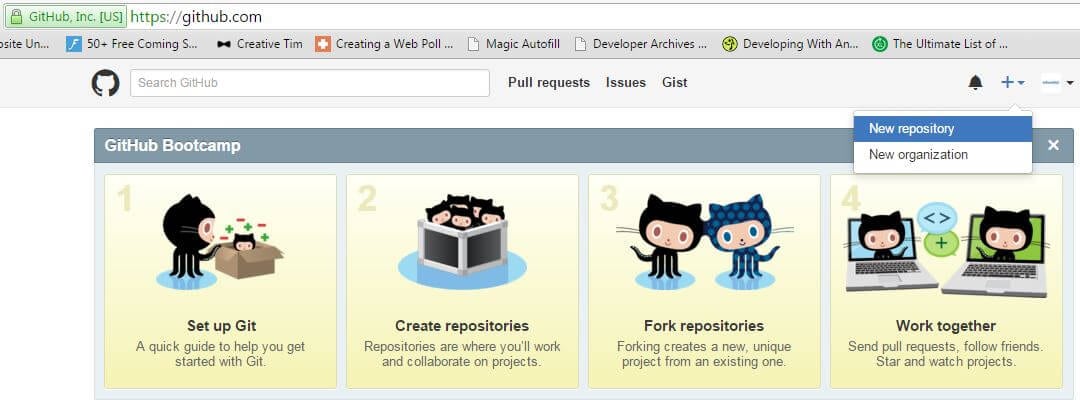
After creating the GitHub account, log into GitHub and click on the New Repository menu as shown below:
Below we have named our GitHub repository to jQueryProject and provided a small description.
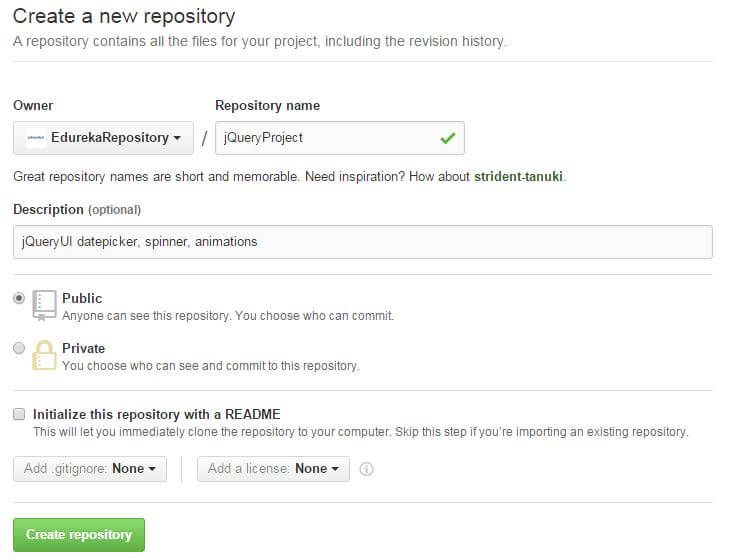
Public Vs. Private Repository:
By default a GitHub repository is public which means that anyone can see the contents of the repository. Private repositories is a paid option in GitHub. Public repositories are best suited for open source projects. If you don’t want anyone to see the contents of your repository, you can check the GitHub pricing for private repositories here: https://github.com/pricing
Pushing changes to GitHub repository:
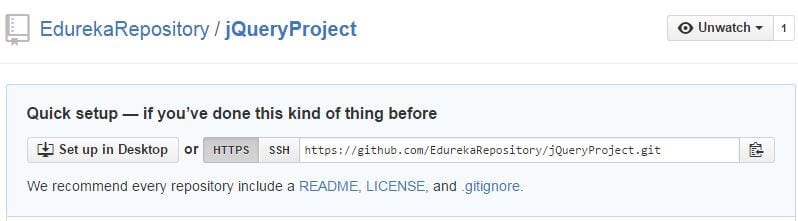
To push changes to GitHub repository, copy the address of the GitHub repository and push the changes using the git push command. In our case, the address to the remote GitHub repository is https://github.com/EdurekaRepository/jQueryProject.git
Note that by default every GitHub repository have a master branch. So we will push our code to master branch of repository.
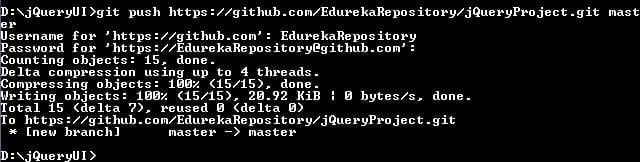
Here, we have pushed the code to remote GitHub repository jQueryProject
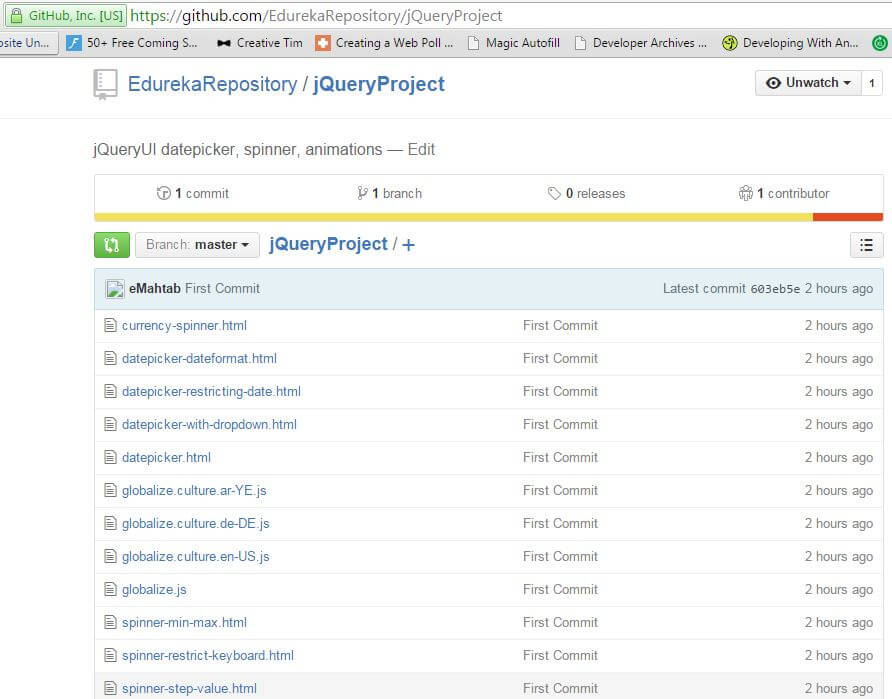
Accessing GitHub Repository:
After pushing the code or any other files to GitHub repository, you can access all the pushed data from the GitHub repository as shown below.
Editing Files, Staging, Committing and Pushing:
We have made our first commit. Now let’s edit the code and commit the latest code to GitHub.
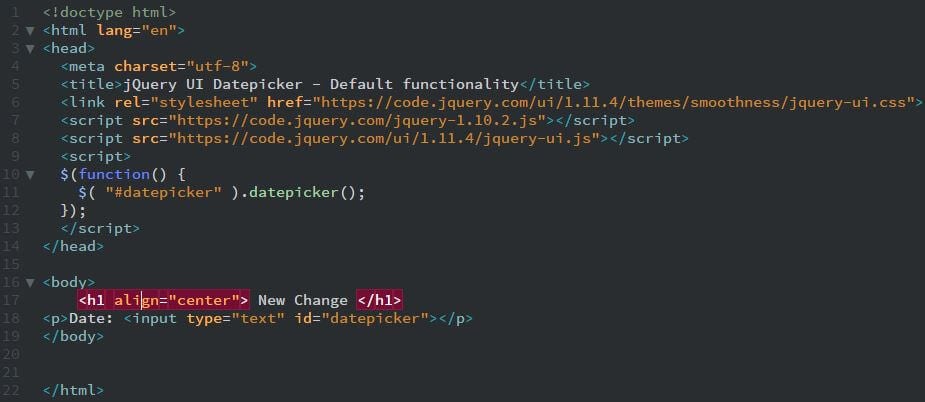
Here, we have edited the datepicker.html file (added an h1 header). Let’s now check the status with the git status command.
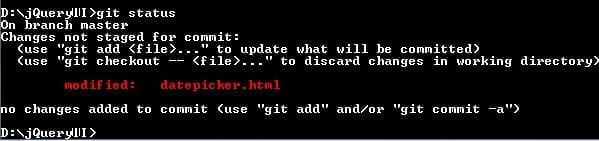
git status command shows that we have one modified file — datepicker.html– and new changes are not committed. To commit the new changes we have to first add the changed file and then commit it. Rather than typing two separate git commands, first to add and then to commit, we can commit the new changes with just one command.
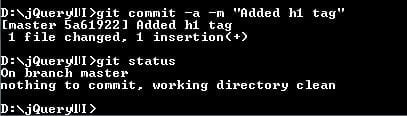
Here, we have used -a option with git commit to add all the changed files.
Once we have committed the changes, we are ready to push the changes to GitHub repository. This time while pushing the code to GitHub repository, we are going to create a short handle for our repository. This makes it easy to refer to our GitHub repository.
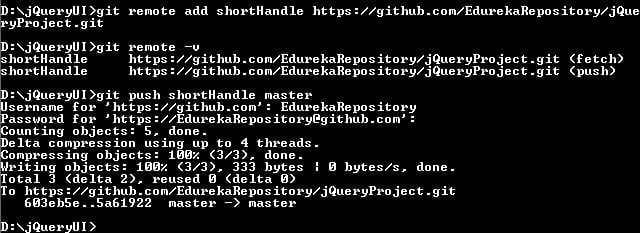
Here, we have created a handle (shortHandle) for our GitHub repository, and used shortHandle to push the changes to GitHub repository.
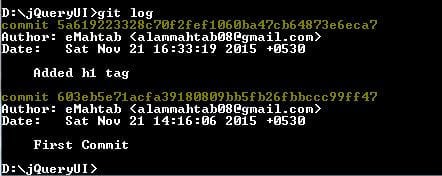
Commit History:
We can see the history of commits with git log command as shown below. Latest commit will be shown on the top.
That’s it for now. Lot of things that can be done with Git and GitHub. In the next post, let’s learn how to clone a repository, fork a repository, git branches, github markdown, README and gitignore file, github gist and some cool tips to work with Git. Bye for now. For more about DevOps, don’t forget to join our DevOps Online Training program.
Do you have a question for us? Please mention it in the comments section, and we will respond to you.
Related Posts:


 Thank you for registering Join Edureka Meetup community for 100+ Free Webinars each month JOIN MEETUP GROUP