


The main reason for Blockchain Technology to get its place among the Top Technologies is because of its Decentralized nature. While the main purpose of Blockchain was to maintain transaction records without a Central Authority, to automate this, Smart Contracts were introduced. But what after writing a Smart Contract? In this Ethereum Smart Contract tutorial, we will see how to use Truffle Ethereum and Ethereum Private Network to execute a Smart Contract.
Interested in Ethereum Development? Check out this Live Ethereum Developer Training.
We will look at the following topics in this Ethereum Smart Contract tutorial:
- Use Case: Smart Contracts in Insurance Process
- Benefits of Smart Contracts
- Installing Pre-Requisites
- Configuring Genesis Block
- Running the Ethereum Private Network
- Creating Ethereum Account
- Creating Ethereum Smart Contract
- Executing Ethereum Smart Contract
Use Case: Smart Contracts in Insurance Process
“No Central Authority” is what Blockchain follows and that’s the reason Smart Contracts were introduced. But have you ever wondered how can a Smart Contract be used? Well, in this section of Ethereum Smart Contract, I will explain a use case of Smart Contract in Insurance process.
Let’s consider an example of a Flight Delay insurance. Suppose you want to take a Flight from source A to destination C but you don’t have a direct Flight. So, you decide to take a connecting flight(through B). Now, your route will be from A to B and then from B to C, where B is the airport you will be changing the flights. Unfortunately, you don’t have much time gap between the flights from A to B and from B to C. So, if by any chance, the flight from A to B is delayed then you will miss the flight from B to C. You realize this and just to save yourself from heavy loss, you take a Flight Delay Insurance.
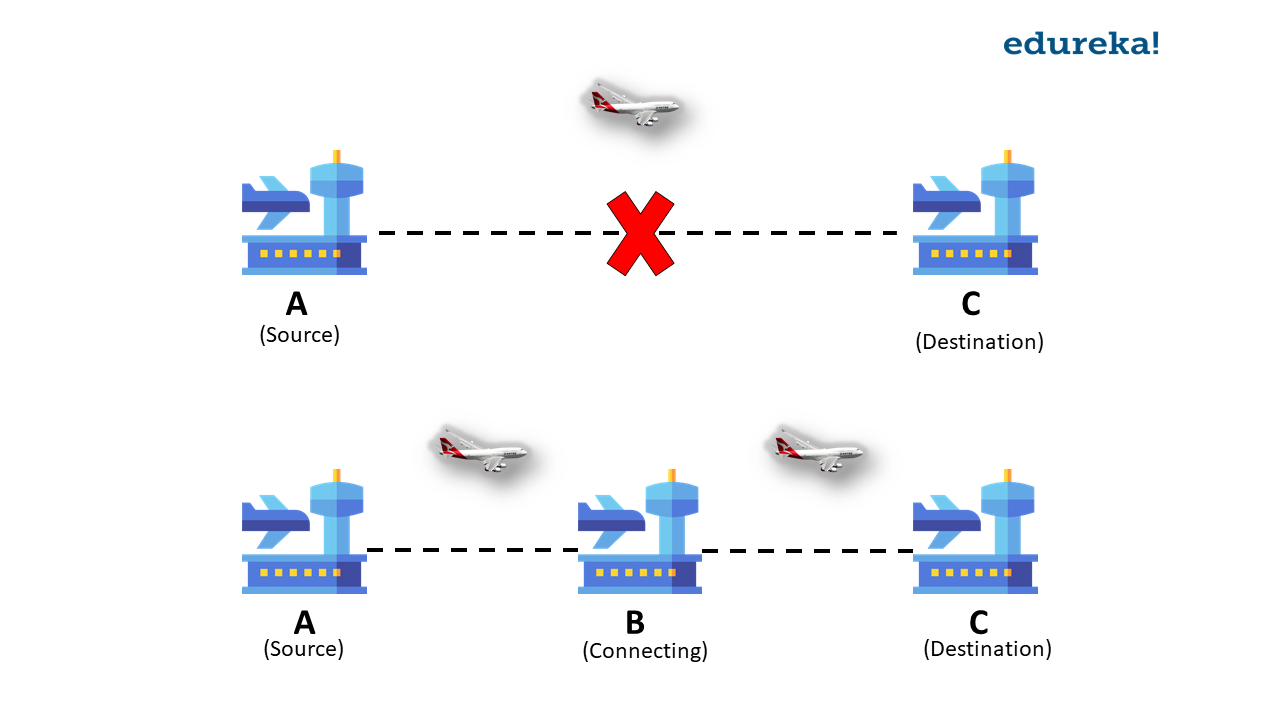
Now, if your flight from A to B is delayed (which will make you miss the flight from B to C), you will be paid the insurance amount. The normal way this works is, if your flight is delayed, you claim the insurance. Then, some person there will verify and approve the insurance and finally, you will get your insurance amount. But this is quite a lengthy process.
How can you use Smart Contracts to improve the Insurance process?
When it comes to financial transactions, and especially when you are getting money, “the faster, the better”, isn’t it? So, let’s see how Smart Contracts can fasten the insurance process. Smart Contracts are digital contracts which are automatically executed when certain conditions are met. A Smart Contract can be written to pay out the insurance amount to people who have opted for Flight Delay Insurance if the flight is delayed. So, when the flight is delayed and this delay is recorded by the system, insurance is paid out immediately.

Hola! insurance amount paid in few seconds. This is how simple and fast Smart Contracts make a process happen.
Benefits of Smart Contracts
You have seen in the above example how Smart Contract can fasten financial processes. Apart from fast transactions, Smart Contracts have some more benefits. Here, I am listing out some other benefits of using a Smart Contract:
- Automatic: All the steps in process happens automatically with Smart Contracts
- No intermediates: When you use Smart Contracts, you don’t need an intermediate to get the job done as everything will be handled by Smart Contracts
- Cost Effective: Using Smart Contracts will save you money on transaction fees charged by banks and the service fees charges by intermediates (if any)
Now, that we know how Smart Contracts can be used to make the world a faster place, let’s get to the hands-on part on this Ethereum Smart Contract tutorial.
Installing Pre-Requisites
For this Ethereum Smart Contract tutorial, we will require 5 important applications:
- NodeJS
- NPM
- Ethereum
- Truffle
- Solidity Compiler
Installing NodeJS
NodeJS is a JavaScript Framework that is used to build server applications. As we are using a private network, NodeJS will make it easy to build the network application.
To install Nodejs, run the following command in your terminal:
$ sudo apt-get install nodejsInstalling NPM
NPM stands for Node Package Manager and is used to run Nodejs applications.
To install NPM, run the following command in your terminal:
$ sudo apt-get install npmInstalling Ethereum
Ethereum is an open-source & public blockchain based, distributed computing platform for building decentralized applications.
To install Ethereum, run the following command in your terminal:
$ sudo apt-get install software-properties-common
$ sudo add-apt-repository -y ppa:ethereum/ethereum
$ sudo apt-get update
$ sudo apt-get install ethereum
Installing Truffle
Truffle is a Development Environment, Testing Framework and Asset pipeline for Ethereum Blokchains.
To install Truffle, run the following command in your terminal:
$ npm install -g truffleInstalling Solidity Compiler
Solidity is a programming language used to write Smart Contracts. To run smart contracts on our system, we have to install Solidity Compiler.
To install Solidity Compiler, run the following command in your terminal:
$ sudo npm install -g solc
Configuring Genesis Block
A Genesis Block is the start-point of a Blockchain and we need a genesis file to start the Blockchain. In this section of Ethereum Smart Contract, we will write a Genesis file and configure it to allow us to run Smart Contracts.
Let’s first create a new directory and then in that directory we shall create the genesis file
$ mkdir ethereum-network
$ cd ethereum-network
$ nano genesis.json
Now, enter the following lines in the genesis.json file:
{
"config": {
"chainId": 2019,
"homesteadBlock": 0,
"eip155Block": 0,
"eip158Block": 0
},
"alloc": {},
"difficulty" : "200"
"gasLimit" : "99999999999999"
}
Save this and exit.
Running the Ethereum Private Network
In this Etheruem Smart Contract tutorial, we will deploy an Ethereum Smart Contract on a private network. So, to start this network we will use the following command:
$ geth --datadir ./dataDir init ./genesis.json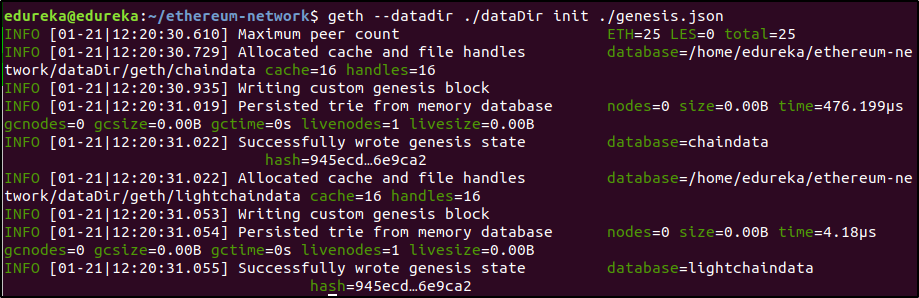
$ geth --port 4321 --networkid 1234 --datadir=./dataDir --rpc --rpcport 8543 --rpcaddr 127.0.0.1 --rpcapi "eth,net,web3,personal,miner"
Before moving further, let me explain some important flags used in the above command:
datadir: The directory where the data related to the Blockchain is stored.
rpc: Enables HTTP-RPC server.
rpcport and rpcaddr are used to set the port and address of the network respectively.
rpcapi: Allows us to interact with the Ethereum network using different APIs.
Connecting Geth to Ethereum Private Blockchain
Geth console is the console from where we can interact with the Ethereum Private Blockchain. To connect Geth to the Ethereum Private Blockchain, open a new terminal and run the below command:
$ geth attach http://127.0.0.1:8543
Now, we are in the Geth console where we can run commands to interact with the Blockchain.
Creating Ethereum Account
To make any transaction, we need an account. In this section of Ethereum Smart Contract tutorial, we will see how to create new Ethereum account from the Geth console.
Following the steps so far, we are already in the Geth console. To create a new account, run the following command in the Geth console:
> personal.newAccount('seedphrase')Replace the “seedphrase” with the password you want to set for this account.
We have created a new account, but this account has no ethers. We need ethers to make any transaction and to get ethers to our account, we will start mining ethers. To start mining, we need to first unlock the account. Let’s unlock the account and start mining.
> personal.unlockAccount(web3.eth.coinbase, "seedphrase")
> miner.start()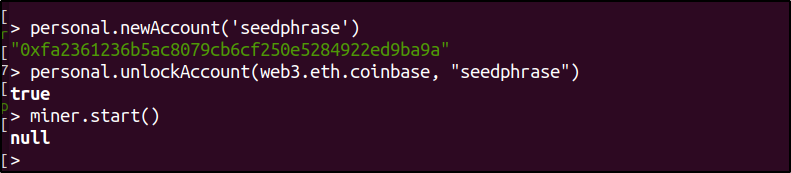
As mining keeps happening, some ethers will be deposited to this account.
Note: These ethers are dummy ethers and have no real-world value.
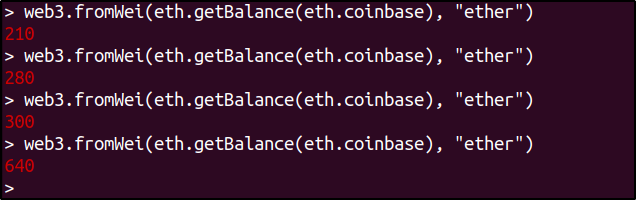
To check the balance ethers in the account we will run the following command:
> web3.fromWei(eth.getBalance(eth.coinbase), "ether")When you run this command at regular intervals, you will see that the ethers are getting increased due to mining.
To stop mining, run the following command:
> miner.stop()Creating Ethereum Smart Contract
Creating Truffle Project
Now that we have our private Blockchain all ready, we will see how to create an Ethereum Smart Contract using Truffle. For this tutorial, we will create a simple “Hello World” Ethereum Smart Contract.
To start with this, let us first create a new directory to store the Truffle project. And then in that directory, we will create a new Truffle project. Open a new terminal and run the below commands:
$ mkdir truffle
$ cd truffle
$ truffle init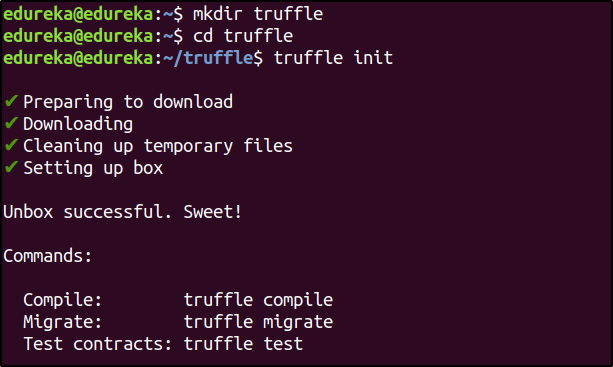
The truffle init command will create all the necessary files required for a truffle project.
Now that we have everything to deploy an Ethereum Smart Contract ready, let’s get to writing a “Hello World” Smart Contract.
Writing a “Hello World” Smart Contract
All the contracts should be written in the “contracts” directory. We will switch to this directory and create a contract with the name “HelloWorld.sol” and add the following lines in this file:
pragma solidity ^0.4.15;
contract HelloWorld {
    string public message;
    function Hello() public{
    message = "Hello World!";
    }
}
This is it! But this Smart Contract cannot be executed by itself. We will have to make some configurations for it.
Configuring Truffle Migration
To migrate our Smart Contract, we will have to add a file in the “migrations” directory in the “truffle” directory. In this directory we will add a file named “2_deploy_contracts.js” with the following contents in it:
var HelloWorld = artifacts.require("./HelloWorld.sol");
module.exports = function(deployer) {
   deployer.deploy(HelloWorld);
};
Save and exit.
To run truffle on our network, we need to edit the “truffle.js” file in the “truffle” directory. Open this file and make the following entries:
module.exports = {
rpc: {
host:"localhost",
port:8543
},
networks: {
development: {
host: "localhost",
port: 8543,
network_id: "*",
from: "0xfa2361236b5ac8079cb6cf250e5284922ed9ba9a",
gas: 20000000
}
}
};
Note: Replace the “from” address with the address of the account you created in the previous step.
Executing Ethereum Smart Contract
In this last section of Ethereum Smart Contract tutorial, we will see how to deploy our “Hello World” Smart Contract on our Ethereum Private Network.
Compiling and Deploying Smart Contract
Before we can execute our Smart Contract, we have to first compile and deploy it to our Ethereum Private Network. We will do this using the following commands:
$ truffle compile
Now, we have to unlock our account and start mining. Go back to the terminal with the Geth console and run the following command:
> personal.unlockAccount(web3.eth.coinbase)
> miner.start()
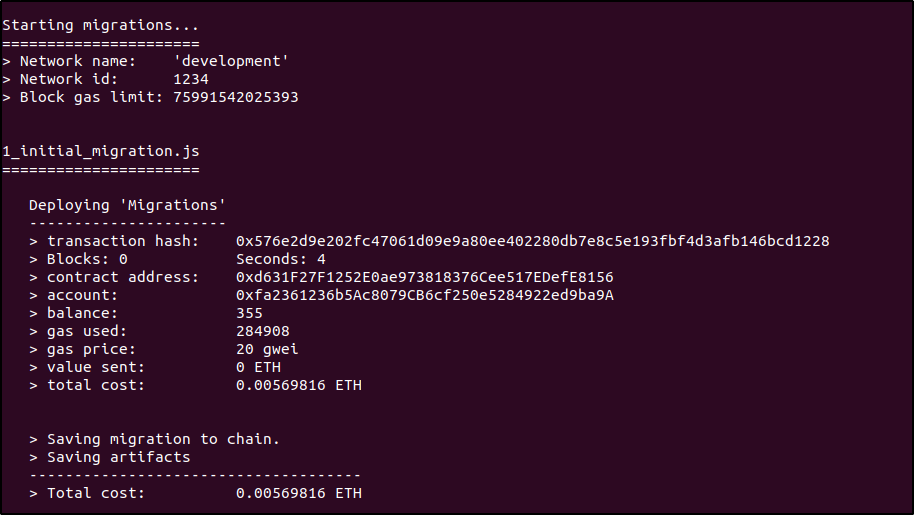
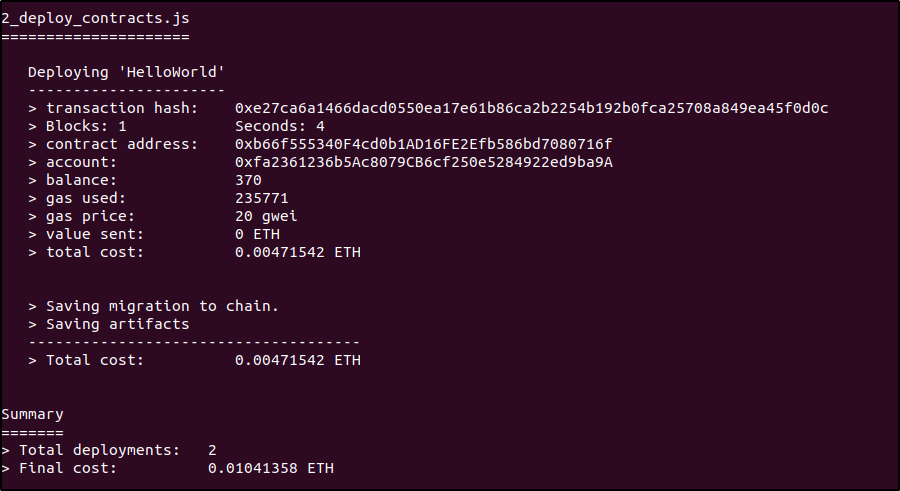
and then, go back to the terminal which has “truffle” as the present working directory and run the following command:
$ truffle migrateWait for the deployment to be completed.
Executing Smart Contract on Private Ethereum Blockchain
To execute the “Hello World” Smart Contract, we will have to enter into the truffle console. Run the following command to do this:
$ truffle consoleYou will now be in the truffle console. To execute the Smart Contract, run the following command:
> var first_contract
> HelloWorld.deployed().then(function(instance) { first_contract = instance; })
> dApp.message.call()
Congratulations! You have created your first Ethereum Smart Contract and executed it. I hope this Ethereum Smart Contract tutorial was informative and helped you understand about how to execute an Ethereum Smart Contract. Now, go ahead and try writing other Smart Contracts and executing it.
Got a question for us? Please post it on Edureka Community and we will get back to you.
If you wish to learn Blockchain and build a career in Blockchain Technologies, then check out our Blockchain Certification which comes with instructor-led live training and real-life project experience. This training will help you understand what is Blockchain in an exhaustive manner and help you achieve mastery over the subject.


Really amazing article. We get brief explanation about how smart contract works. Surely I will share this article.
If anyone having an idea to launch ethereum token, get in touch with ICOCLONE.