UiPath is one of the most popular RPA tools used for Windows desktop automation. It is used to automate repetitive tasks without human intervention, the tool offers drag and drop functionality of activities that you must have learned in the previous blogs. In this blog on Error Handling in UiPath, I will cover all the basics of how you can handle errors in projects.
Error Handling in UiPath mainly consists of two topics that you need to understand:
Once you go through the above two topics, we will discuss few tips & tricks which will make you aware of some common errors, and how to avoid them.
Debugging
Debugging in simple terms is the process of identifying and removing errors from the project. Now, to debug errors, you need to go to the Execute tab. The Execute tab has 3 sections, Launch section, Debug section & the Logs section, as you can see in the below image:
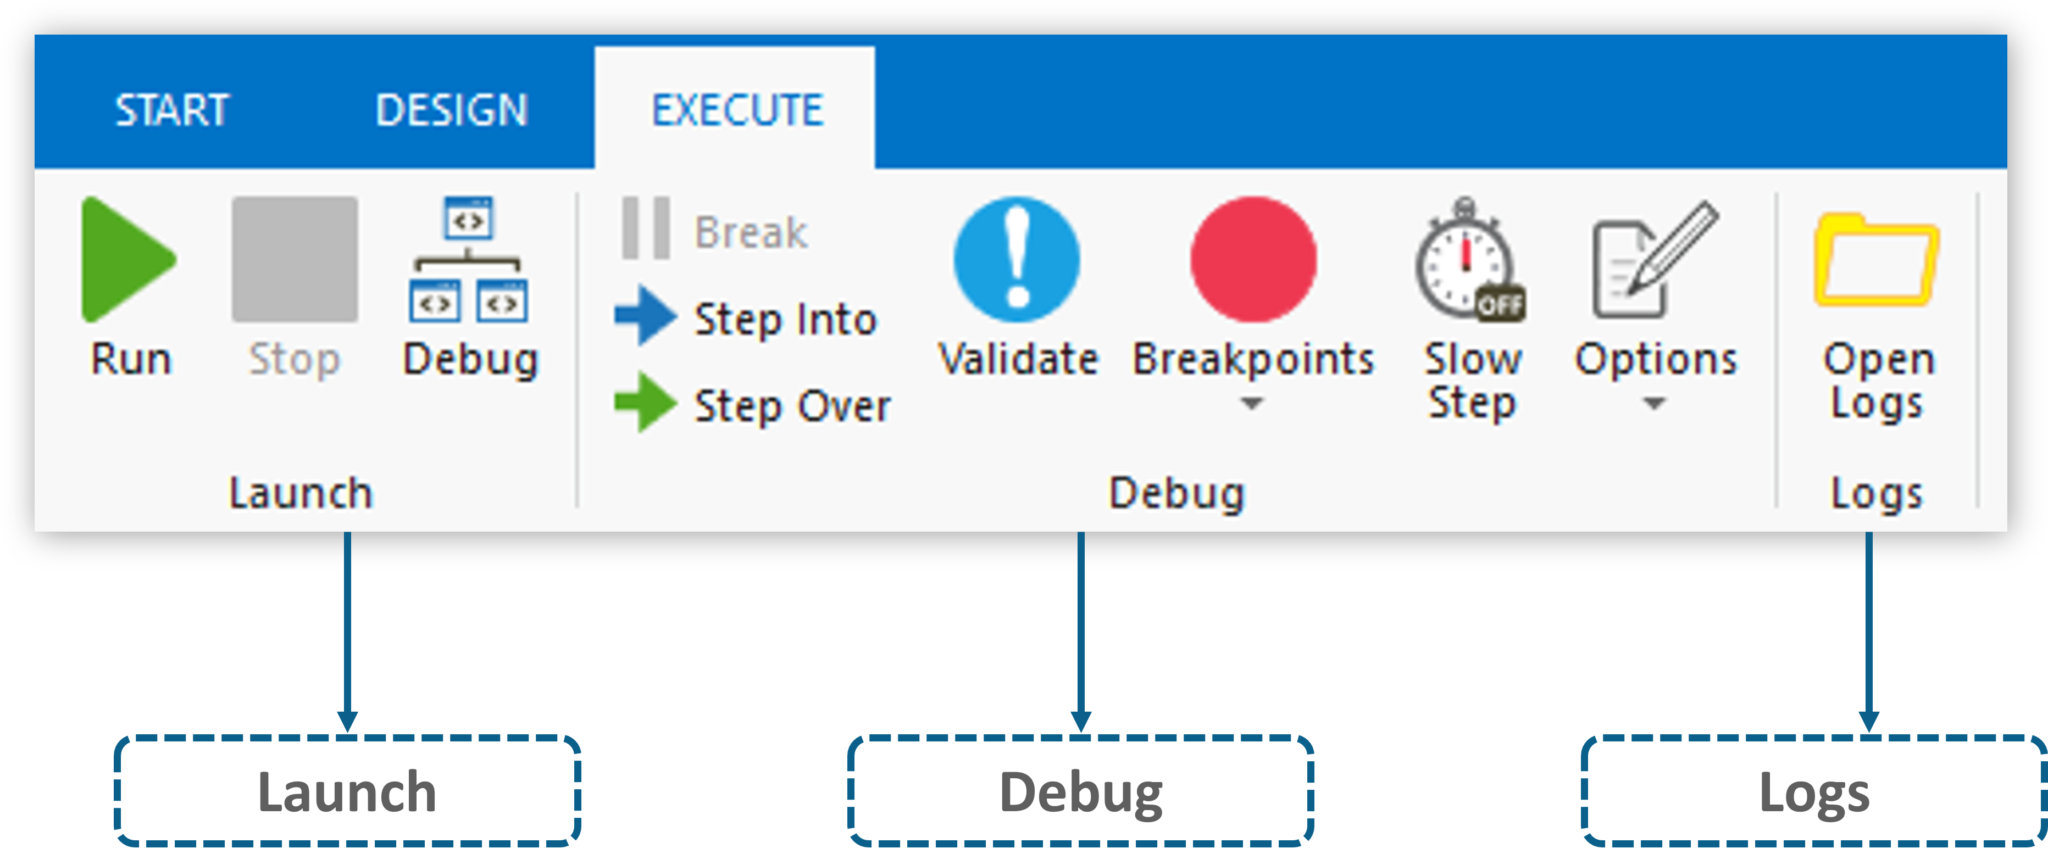
Fig 1: Execute Tab in UiPath – Error Handling in UiPath
Let me explain, the functionalities of each section one by one.
Launch Section:
The launch section has 3 options:

Fig 2: Launch Section Options – Error Handling in UiPath
As you can see in the above image, the Run option is used when you simply want to execute your project. So, with this option, you would not see the step by step execution, but would directly see the output, if it successfully executes. The Stop button is used to use stop the execution of your project in the middle and Debug is used to Debug the errors step by step.
Debug Section:
The Debug section has 5 options:

Fig 3: Debug Section Options – Error Handling in UiPath
- Steps are used to execute your project step by step. So, when you click on Step Into, it executes the next step and then it waits.
- Validate button is used to validate your project and check if you have any errors or not. So, when you choose this option, UiPath will check if your automation has any errors and if it has any errors it will return you the error.
- Breakpoints are the points at which you want to stop the execution and start debugging step by step. The breakpoints button offers two options:
- Toggle Breakpoints
- Remove All Breakpoints
- Slow Step slows down your execution so that, you get a track of what is happening.
- Options provide various highlighting options to highlight the activities. So, you can use this when you want to highlight any activity while you are debugging your project.
Logs Section:
The log section has only one option, which is Open Logs.

The Open Logs button lets you debug the program with the help of the logs. You can check where your values went wrong from the logs.
So, that was about Debugging folks. Let us move to our next topic which is Exception Handling.
Exception Handling
Exception Handling mainly deals with handling errors with respect to various activities in UiPath. The Error Handling activity offers four options: Rethrow, Terminate Workflow, Throw, Try Catch.
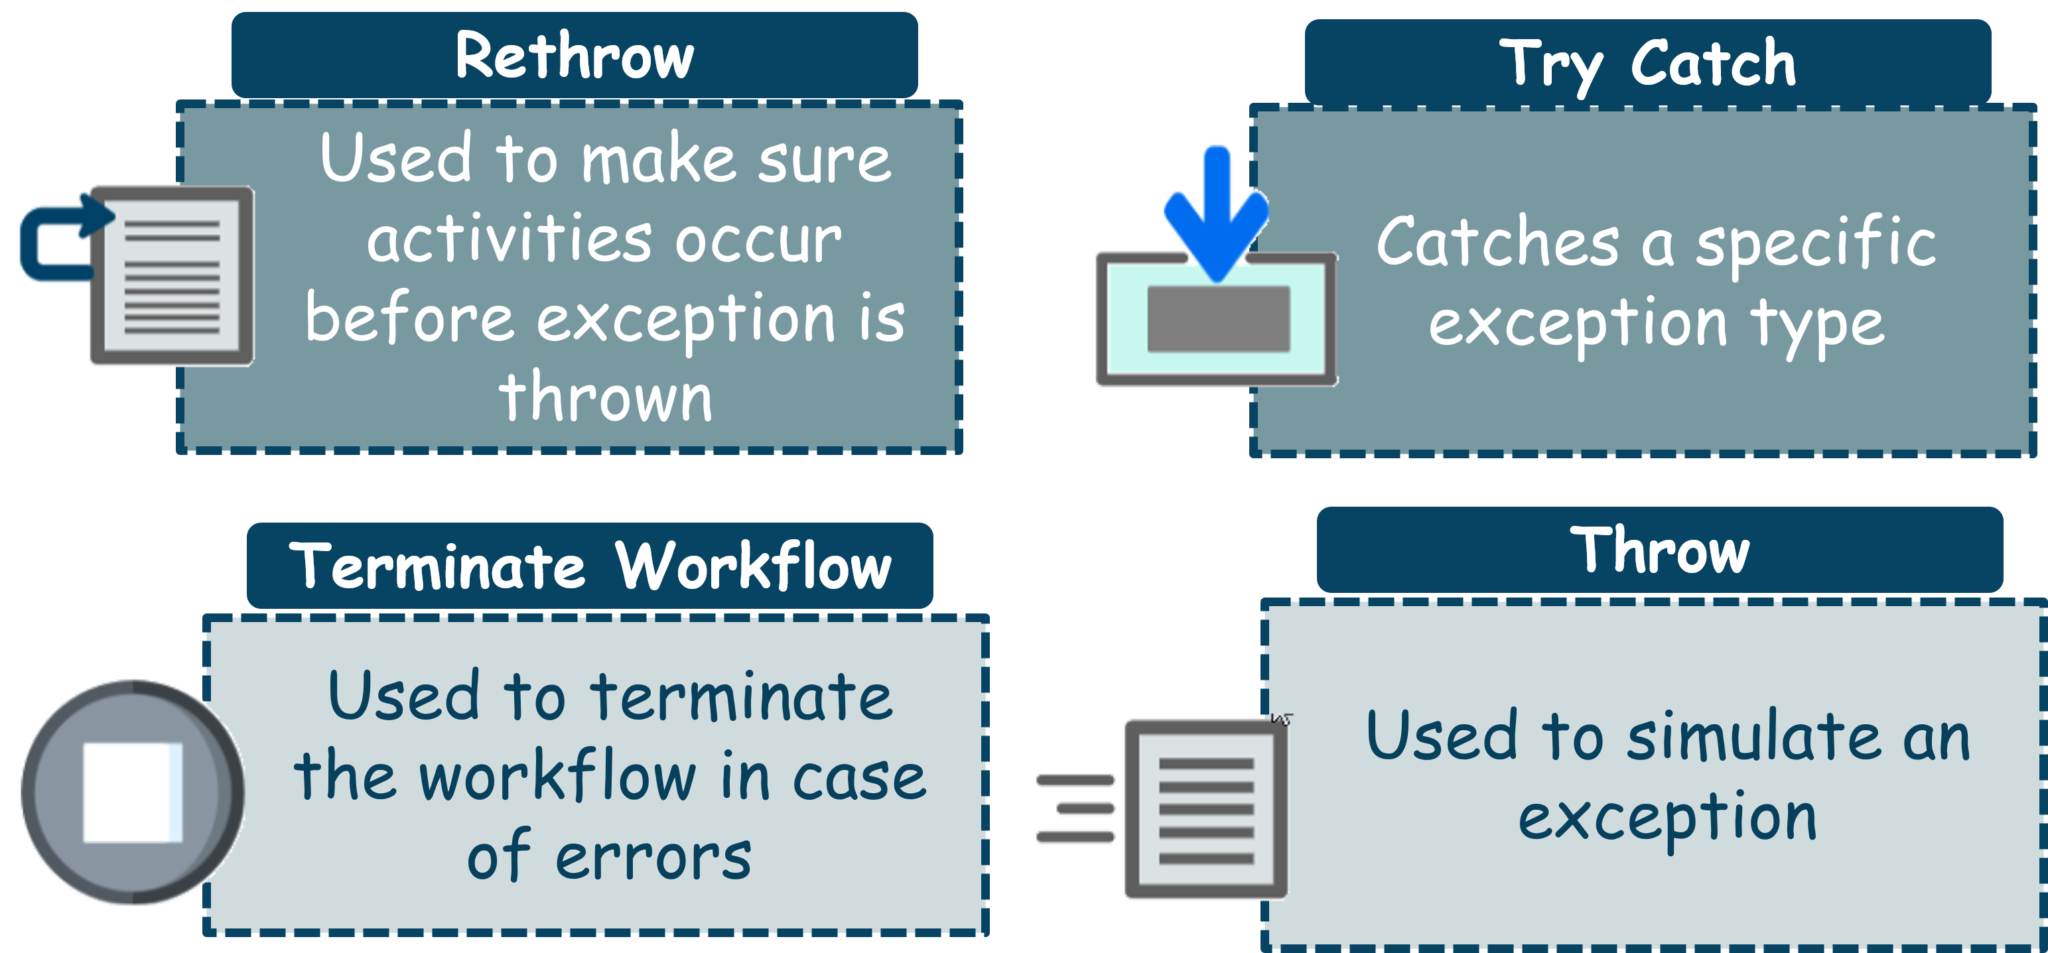
- Rethrow is used when you want activities to occur before the exception is thrown.
- Terminate workflow is used to terminate the workflow the moment the task encounters an error.
- Throw activity is used when you want to throw error before the execution of the step.
- Try Catch activity is used when you want to test something and handle the exception accordingly. So, whatever you want to test you can put it under the try section, and then if any error occurs, then it can be handled using the catch section, based on your input to the catch section. Apart from the try-catch, we also have a Finally section which is used to mention those activities which have to be performed after the try and catch blocks are executed.
Now, that you folks know the various options that UiPath offers for handling errors. It is a good time that you know the common mistakes that people do and learn how to resolve them.
Find out our RPA with UiPath Certification Course in Top Cities
Error Handling in UiPath: Tips & Tricks
 Error: When you do not name the activities.
It is often observed that all of us who work on UiPath, just drag and drop the activities, but nobody actually makes an effort to name the activities. Due to this, nobody understands the source of the errors like the below image.

Solution:
Now, to resolve such kind of errors, the simplest solution is to use name of the activities.
Once you name the activity, you will not get an error that Main has thrown an exception, but you would see that XXXX(name of activity) has thrown an exception.
Error: When some other application is open in front of the main application.
It may happen sometimes that you are working on “n” number of application on your system. But, when you execute the project you forget to make sure that the main application in which the automation has to be done is open, and no other window/application is open in front of that.
For example, if I want to scrape data from a website and if I have Notepad++ open in front of that, then UiPath will not be able to perform the automation.
Solution:
To avoid such kind of errors, you have the following 3 options.
- Make the main window/application visible, and close all other windows.
- If you have any click actions, then change the Input Method, and choose to Simulate Click.
- You can make sure that the right selector values are present, so that UiPath is directed to the right window and performs the automation.
 Error: When you have timing and synchronization issues.
It may happen sometimes that you are dependent on some other application to perform some task, and that application may take time to load. In such situations, if you do not mention the time to wait, then UiPath assumes that the application is not working/opening and throws an exception.
 Solution:
To handle such errors, mention the time to wait in the Timeout MS parameter. By default, the value would be 30.
Apart from that if you want to handle synchronization issues, then you have the following 3 options:
- Element Exists Activity – This activity returns TRUE/FALSE based on the existence of a specific element. So, you can use this if you just want to make sure whether an element is present or not.
- Find Element Activity – This activity will stop the automation until an element is found
- Wait Element Vanish Activity – This activity waits for an element to disappear before continuing.
Unlike the other two, the element exists activity does not affect the running of the workflow.
Error: When your browser crashes
Sometimes, when you work with the browser, it may happen that browser crashes. In such situations, UiPath will not understand the dependency and will throw an Exception that it cannot load/open.
Solution: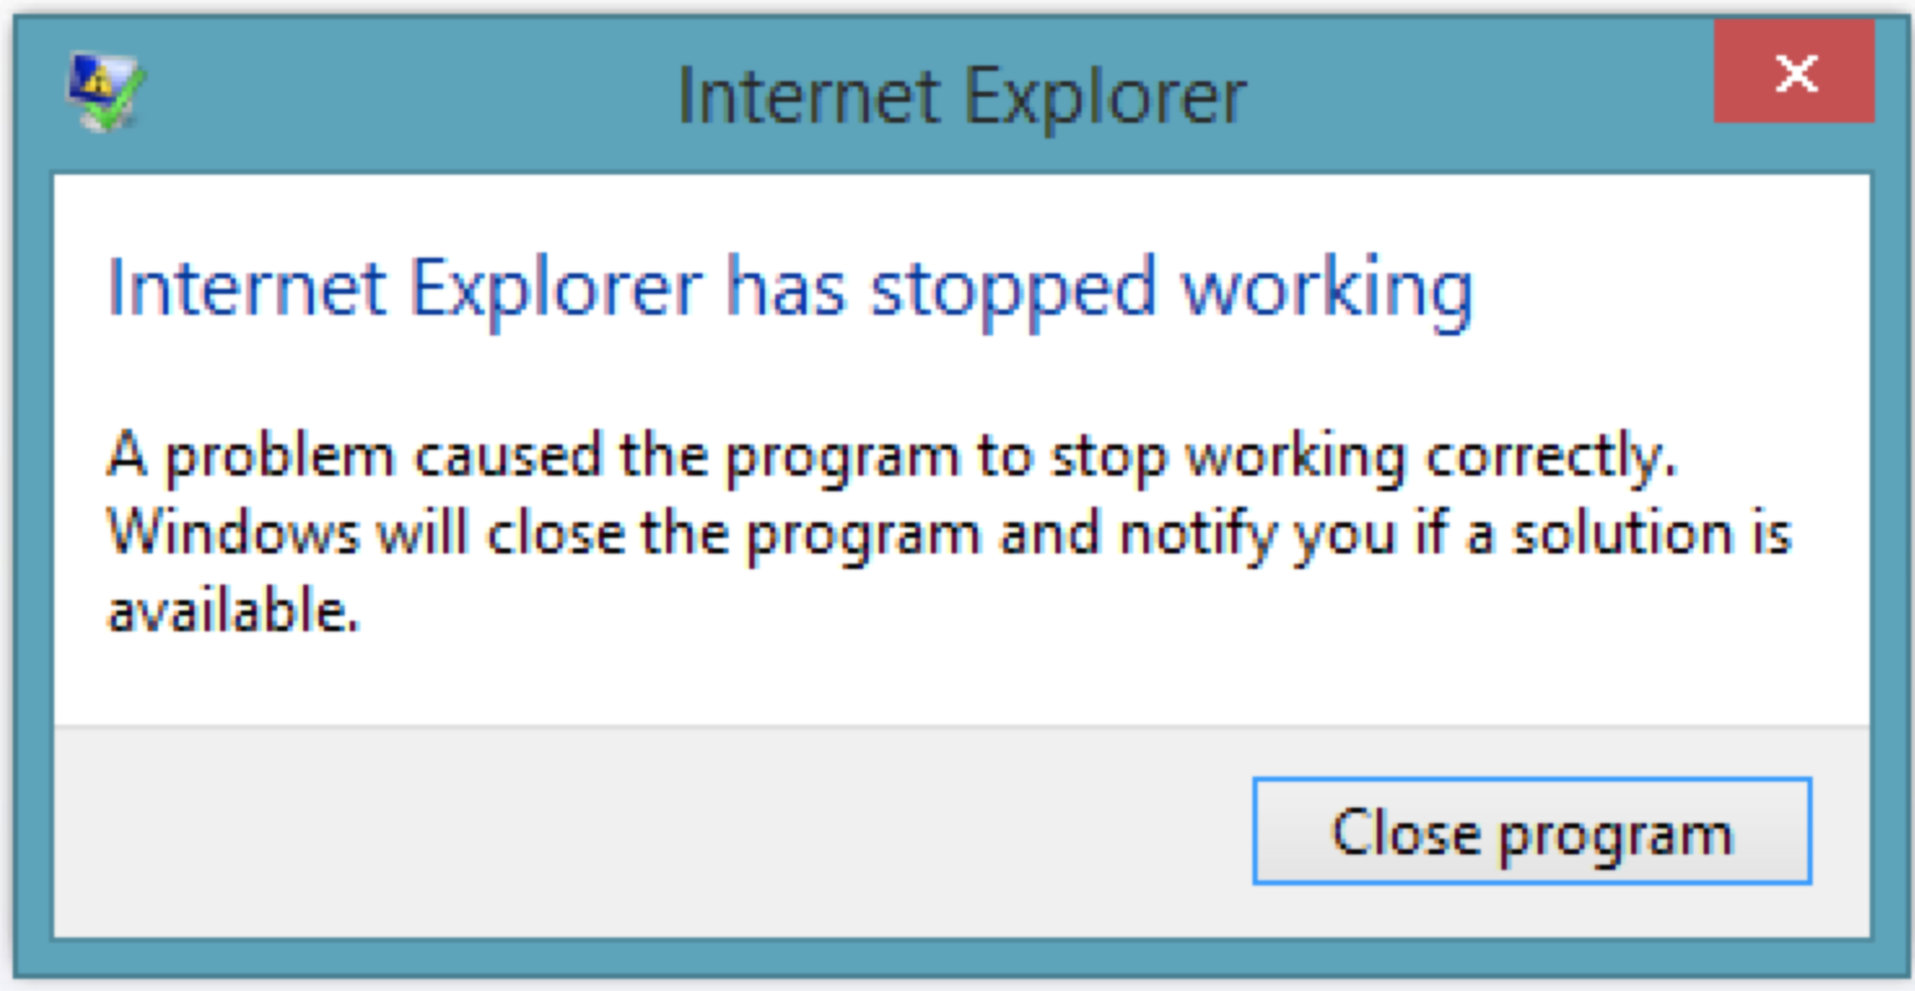
To solve such kind of errors, you can use a Try-Catch block. So, you can put the browser part in the Try section, and then either put a Message box or any other activity in the catch section. After this is done, you can mention the necessary activities, in the Finally block. So these activities would be executed after the Try-Catch block.
 Error: When you do not choose the right activity
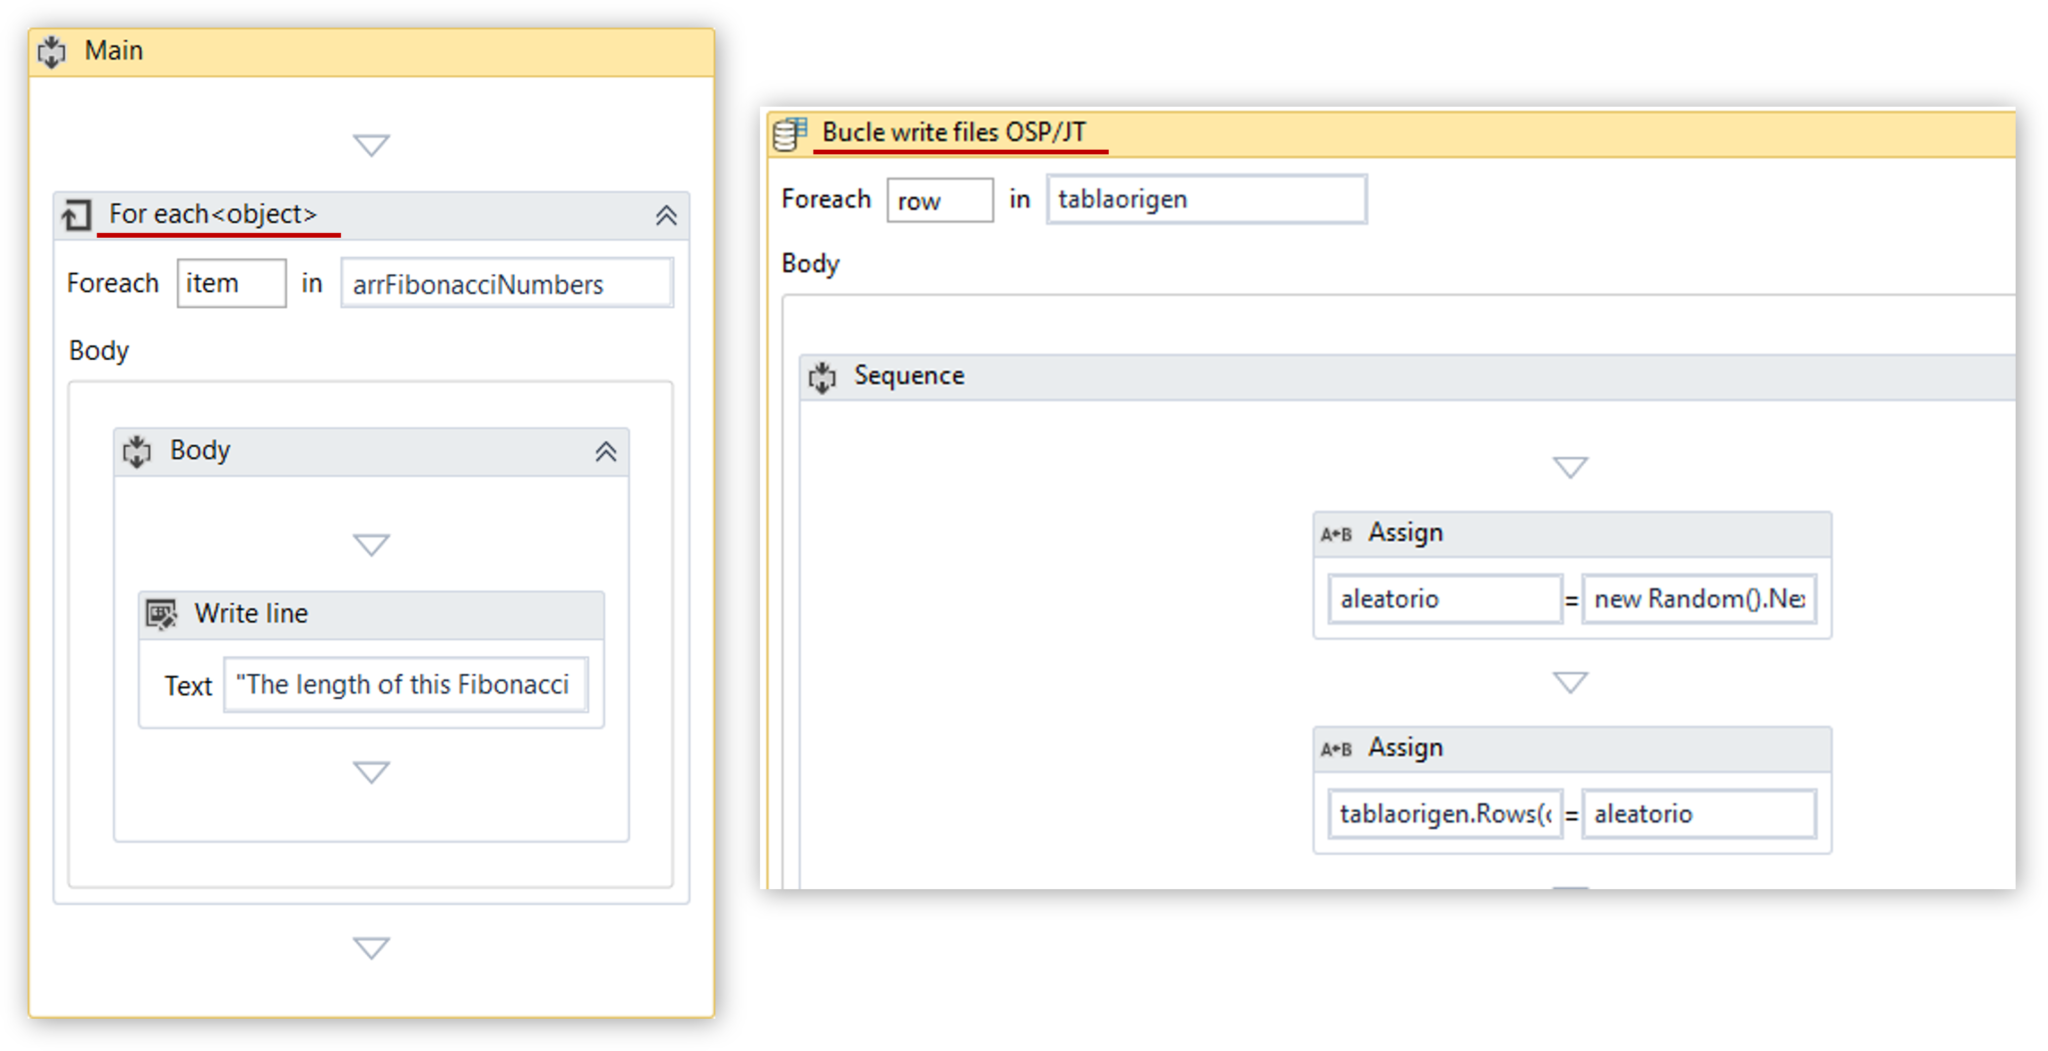
Sometimes it may happen that you may choose the wrong activity. For example, if you search for the “For each” activity, then you will see that there are three for each activity that can be chosen.
 Solution:
The solution is to just choose the right activity, according to your needs. To do that, you need to understand the functionality of each and every activity. For example, if you have to perform some action for each row in the data table, then choose the For-Each Row activity. Else, if you want to perform some action for each item, then choose the For-Each activity.
Error Handling In UiPath | Debugging & Exception Handling In UiPath
This video will cover all the concepts related to Debugging errors in your UiPath projects.
If you are further interested in learning about Robotic Process Automation, this blog series will be updated frequently, please subscribe. We at Edureka! also, offer RPA Course. If you are interested in shifting your career to RPA, you can enroll and get started.
Got a question for us? Please mention it in the comments section of ” Error Handling in UiPath” and I will get back to you.