
Advanced Certification in Agentic AI Engineer ...
- 66k Enrolled Learners
- Weekend
- Live Class
(45931)


 Copy Link!
Deep Learning is one of the Hottest topics of 2018-19 and for a good reason. There have been so many advancements in the Industry wherein the time has come when machines or Computer Programs are actually replacing Humans. This Deep Learning with Python article will help you understand what exactly is Deep Learning and How this transition has been made possible.
🐍 Ready to Unleash the Power of Python? Sign Up for Edureka’s Comprehensive Online Python Programming Course With Certificate with access to hundreds of Python learning Modules and 24/7 technical support.
Deep Learning with Tensorflow certification helps you master a complete application part of AI. You can learn it from the link: (https://www.edureka.co/ai-deep-learning-with-tensorflow)
I’ll be covering the following topics in this article:
Well, Data Science is something that has been there for ages. Data science is the extraction of knowledge from data by using different techniques and algorithms.
Artificial Intelligence is a technique which enables machines to mimic human behavior. The idea behind AI is fairly simple yet fascinating, which is to make intelligent machines that can take decisions on its own. For years, it was thought that computers would never match the power of the human brain.

Well, back then we did not have enough data and computation power, but now with Big Data coming into existence and with the advent of GPUs, Artificial Intelligence is possible.
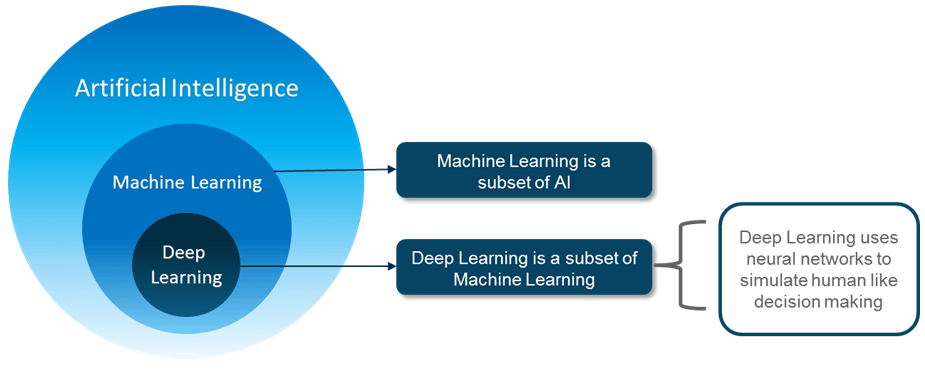
Machine Learning is a subset of AI technique which uses statistical methods to enable machines to improve with experience.
Deep learning is a subset of ML which make the computation of multi-layer neural network feasible. It uses Neural networks to simulate human-like decision making.
A Step Towards Artificial Intelligence is Machine Learning. Machine Learning is a subset of AI and is based on the idea that machines should be given access to data, and should be left to learn and explore for themselves. It deals with the extraction of patterns from large data sets. Handling large data sets was not a problem.
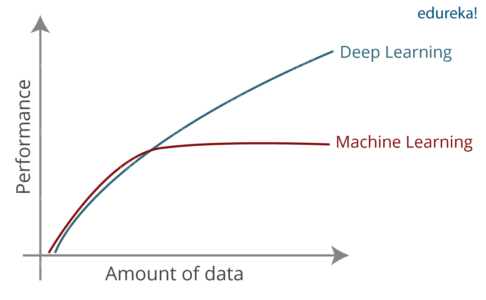
Now, this is where Deep Learning came to the rescue. Deep learning is capable of handling the high dimensional data and is also efficient in focusing on the right features on its own.
Deep Learning is a subset of Machine Learning where similar Machine Learning Algorithms are used to train Deep Neural Networks so as to achieve better accuracy in those cases where the former was not performing up to the mark. Basically, Deep learning mimics the way our brain functions i.e. it learns from experience.

As you know, our brain is made up of billions of neurons that allows us to do amazing things. Even the brain of a small kid is capable of solving complex problems which are very difficult to solve even using Super-Computers. So, How can we achieve the same functionality in a program? Now, this is where we understand Artificial Neuron (Perceptron) and Artificial Neural Network.
Deep Learning studies the basic unit of a brain called a brain cell or a neuron. Now, let us understand the functionality of biological neurons and how we mimic this functionality in the perception or an artificial neuron.

An Artificial Neuron or a Perceptron is a linear model used for binary classification. It models a neuron which has a set of inputs, each of which is given a specific weight. The neuron computes some function on these weighted inputs and gives the output.

It receives n inputs ( corresponding to each feature ). It then sums those inputs, applies a transformation and produces an output. It has two functions:
The weight shows the effectiveness of a particular input. More the weight of input, more it will have an impact on the neural network. On the other hand, Bias is an additional parameter in the Perceptron which is used to adjust the output along with the weighted sum of the inputs to the neuron which helps the model in a way that it can fit best for the given data.
Activation Functions translates the inputs into outputs. It uses a threshold to produce an output. There are many functions that are used as Activation Functions, like:
Well. if you think Perceptron solves the problem, then you are wrong. There were two major problems:
Consider the example here and the complexity with the parameters involved to take a Decision by the marketing team.

One Neuron, cannot take in so many inputs and that is why more than one neuron would be used to solve this problem. Neural Network is really just a composition of Perceptrons, connected in different ways and operating on different activation functions.

Now that you have an idea of how a perceptron behaves, the different parameters involved and the different layers of a Neural Network, Let’s continue this Deep Learning with Python Blog and see some cool applications of Deep Learning.
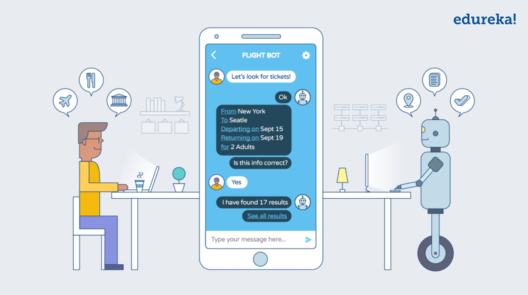
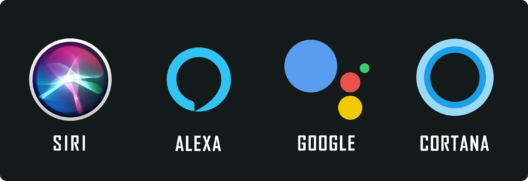
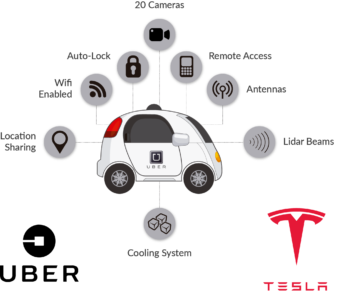
There are various applications of Deep Learning in the Industry, here are a few of the important ones that are present in our Day to Day tasks.


Now enough of theory, Let’s see how we can start Deep Learning with Python with a small yet exciting example.
Now I’m sure you guys must be familiar with the working of the “OR” gate. The output is 1 if any of the inputs is also 1.

Therefore, a Perceptron can be used as a separator or a decision line that divides the input set of OR Gate, into two classes:
Class 1: Inputs having output as 0 that lies below the decision line.
Class 2: Inputs having output as 1 that lies above the decision line or separator.
Till now, we understood that a linear perceptron can be used to classify the input data set into two classes. But, how does it actually classify the data?

Mathematically a perceptron can be thought of like an equation of Weights, Inputs, and Bias.
Here I’m going to import only one library, ie. TensorFlow
import tensorflow as tf
Next, we need to create variables for storing the input, output, and bias for the Perceptron.
train_in = [
[0,0,1],
[0,1,1],
[1,0,1],
[1,1,1]]


train_out = [
[0],
[1],
[1],
[1]]
Here we will define the tensor variable of shape 3×1 for our weights and assign some random values to it initially.
w = tf.Variable(tf.random_normal([3, 1], seed=15))
We need to define placeholders so that they can accept external inputs on the run.
x = tf.placeholder(tf.float32,[None,3])
y = tf.placeholder(tf.float32,[None,1])
As discussed earlier, the input received by a perceptron is first multiplied by the respective weights and then, all these weighted inputs are summed together. This summed value is then fed to activation for obtaining the final result.

output = tf.nn.relu(tf.matmul(x, w))
Note: In this case, I have used relu as my activation function. You are free to use any of the activation functions according to your need.
We need to calculate the Cost = Mean Squared Error which is nothing but the square of the difference of perceptron output and desired output.
loss = tf.reduce_sum(tf.square(output - y))
The goal of a perceptron is to minimize the Loss or Cost or Error. So here we are going to use the Gradient Descent Optimizer.
optimizer = tf.train.GradientDescentOptimizer(0.01)
train = optimizer.minimize(loss)
Variables are only defined with tf.Variable. So, we need to initialize the variables defined.
init = tf.global_variables_initializer()
sess = tf.Session()
sess.run(init)
We need to train our perceptron i.e. update values of weights and bias in the successive iteration to minimize the error or loss. Here, I will train our perceptron in 100 epochs.
for i in range(100):
sess.run(train, {x:train_in,y:train_out})
cost = sess.run(loss,feed_dict={x:train_in,y:train_out})
print('Epoch--',i,'--loss--',cost)

……
……

As you can see here, the loss started at 2.07 and ended at 0.27
.
Now that we have successfully created a perceptron and trained it for an OR gate. Let’s continue this article and see how can create our own Neural Network from Scratch, where we will create an Input Layer, Hidden Layers and Output Layer.
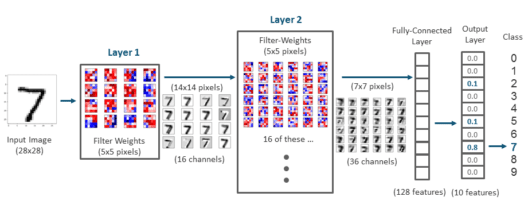
We are going to use the MNIST data-set. The MNIST data-set consists of 60,000 training samples and 10,000 testing samples of handwritten digit images. The images are of size 28×28 pixels and the output can lie between 0-9.
The task here is to train a model which can accurately identify the digit present on the image
Firstly, we are going use the below import to bring the print function from Python 3 into Python 2.6+. __future__ statements need to be near the top of the file because they change fundamental things about the language, and so the compiler needs to know about them from the beginning
from __future__ import print_function
Following is the code with comments at every step
# Import MNIST data
from tensorflow.examples.tutorials.mnist import input_data
mnist = input_data.read_data_sets("/tmp/data/", one_hot=True)

import tensorflow as tf
import matplotlib.pyplot as plt

# Parameters
learning_rate = 0.001
training_epochs = 15
batch_size = 100
display_step = 1

# Network Parameters
n_hidden_1 = 256 # 1st layer number of features
n_hidden_2 = 256 # 2nd layer number of features
n_input = 784 # MNIST data input (img shape: 28*28)
n_classes = 10 # MNIST total classes (0-9 digits)

# tf Graph input
x = tf.placeholder("float", [None, n_input])
y = tf.placeholder("float", [None, n_classes])

# Create model
def multilayer_perceptron(x, weights, biases):
    # Hidden layer with RELU activation
    layer_1 = tf.add(tf.matmul(x, weights['h1']), biases['b1'])
    layer_1 = tf.nn.relu(layer_1)
    # Hidden layer with RELU activation
    layer_2 = tf.add(tf.matmul(layer_1, weights['h2']), biases['b2'])
    layer_2 = tf.nn.relu(layer_2)
    # Output layer with linear activation
    out_layer = tf.matmul(layer_2, weights['out']) + biases['out']
    return out_layer

# Store layers weight & bias
weights = {
    'h1': tf.Variable(tf.random_normal([n_input, n_hidden_1])),
    'h2': tf.Variable(tf.random_normal([n_hidden_1, n_hidden_2])),
    'out': tf.Variable(tf.random_normal([n_hidden_2, n_classes]))
}

biases = {
    'b1': tf.Variable(tf.random_normal([n_hidden_1])),
    'b2': tf.Variable(tf.random_normal([n_hidden_2])),
    'out': tf.Variable(tf.random_normal([n_classes]))
}

# Construct model
pred = multilayer_perceptron(x, weights, biases)

# Define loss and optimizer
cost = tf.reduce_mean(tf.nn.softmax_cross_entropy_with_logits(logits=pred, labels=y))
optimizer = tf.train.AdamOptimizer(learning_rate=learning_rate).minimize(cost)

# Initializing the variables
init = tf.global_variables_initializer()

#create an empty list to store the cost history and accuracy history
cost_history = []
accuracy_history = []

# Launch the graph
with tf.Session() as sess:
    sess.run(init)

    # Training cycle
    for epoch in range(training_epochs):
        avg_cost = 0.
        total_batch = int(mnist.train.num_examples/batch_size)
        # Loop over all batches
        for i in range(total_batch):
            batch_x, batch_y = mnist.train.next_batch(batch_size)

            # Run optimization op (backprop) and cost op (to get loss value)
            _, c = sess.run([optimizer, cost], feed_dict={x: batch_x,y: batch_y})
            # Compute average loss
            avg_cost += c / total_batch
        # Display logs per epoch step
        if epoch % display_step == 0:

            correct_prediction = tf.equal(tf.argmax(pred, 1), tf.argmax(y, 1))
            # Calculate accuracy
            accuracy = tf.reduce_mean(tf.cast(correct_prediction, "float"))
            acu_temp = accuracy.eval({x: mnist.test.images, y: mnist.test.labels})
            #append the accuracy to the list
            accuracy_history.append(acu_temp)
            #append the cost history
            cost_history.append(avg_cost)
            print("Epoch:", '%04d' % (epoch + 1), "- cost=", "{:.9f}".format(avg_cost), "- Accuracy=",acu_temp)


    print("Optimization Finished!")
    #plot the cost history
    plt.plot(cost_history)
    plt.show()
    #plot the accuracy history
    plt.plot(accuracy_history)
    plt.show()

    # Test model
    correct_prediction = tf.equal(tf.argmax(pred, 1), tf.argmax(y, 1))
    # Calculate accuracy
    accuracy = tf.reduce_mean(tf.cast(correct_prediction, "float"))
    print("Accuracy:", accuracy.eval({x: mnist.test.images, y: mnist.test.labels}))
Output:


Now with this, we come to the end of this Deep Learning with Python article. I Hope you got an understanding of the various components of Deep Learning, How it all began and How using Python we can create a simple perceptron and a Deep Neural Network.
Discover your full abilities in becoming an AI and ML professional through our Artificial Intelligence Course. Learn about various AI-related technologies like Machine Learning, Deep Learning, Computer Vision, Natural Language Processing, Speech Recognition, and Reinforcement learning.
Got a question for us? Please mention it in the comments section of “Deep Learning with Python” and we will get back to you. Alternatively, check out the Deep Learning Training in Charlotte!


 Thank you for registering Join Edureka Meetup community for 100+ Free Webinars each month JOIN MEETUP GROUP