Advanced DevOps Certification Training with G ...
- 25k Enrolled Learners
- Weekend
- Live Class
(7990)


 Copy Link!
Continuous Delivery is a process, where code changes are automatically built, tested, and prepared for a release to production. I hope you have enjoyed my previous blogs on Jenkins. Here, I will talk about the following topics::
Let us quickly understand how Continuous Delivery works.
It is a process where you build software in such a way that it can be released to production at any time. Consider the diagram below:
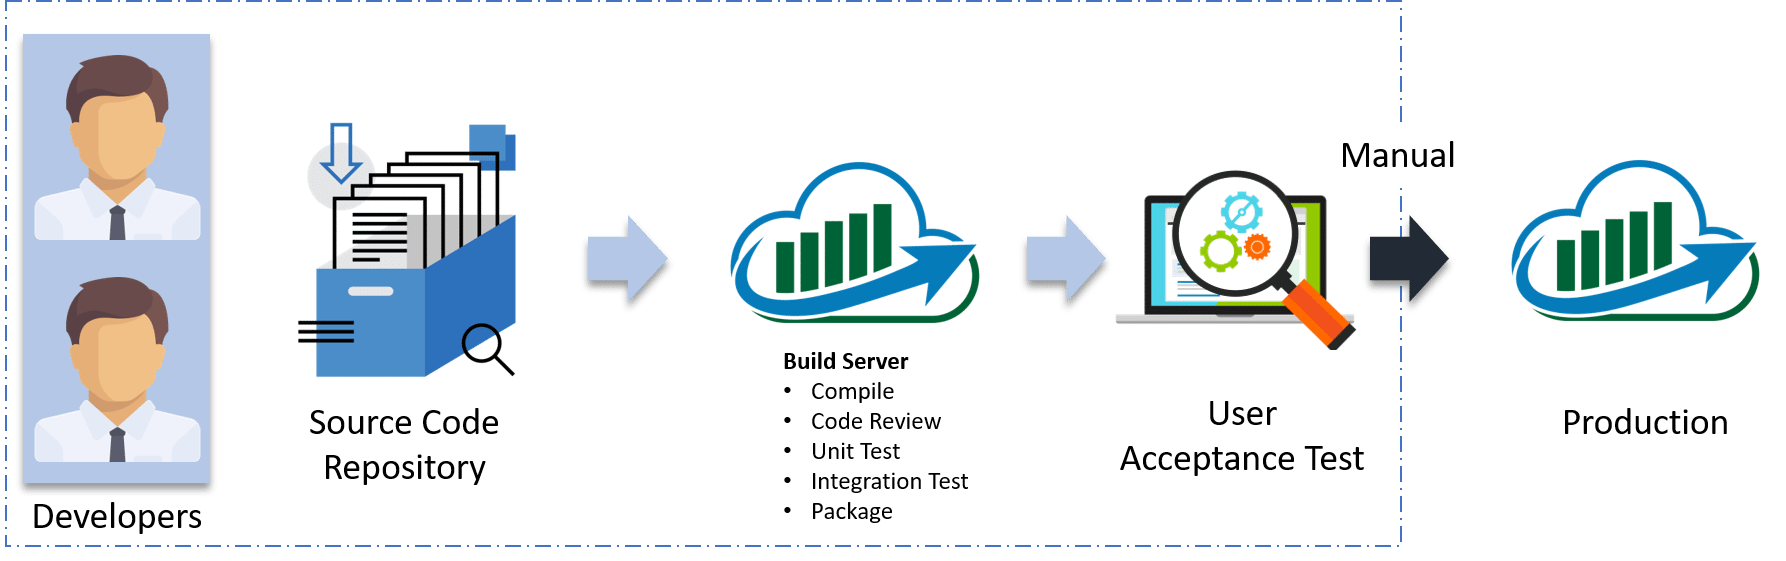
Let me explain the above diagram:
Before I proceed, it will only be fair I explain to you the different types of testing.
Broadly speaking there are two types of testing:
There are two types of testing, that falls under this category.
There are multiple tests that fall under this category. I will focus on a few, which are important for you to know, in order to understand this blog:
Now is the correct time for me to explain the difference between Continuous Integration, Delivery and Deployment.
Visual content reaches an individual’s brain in a faster and more understandable way than textual information. So I am going to start with a diagram which clearly explains the difference:
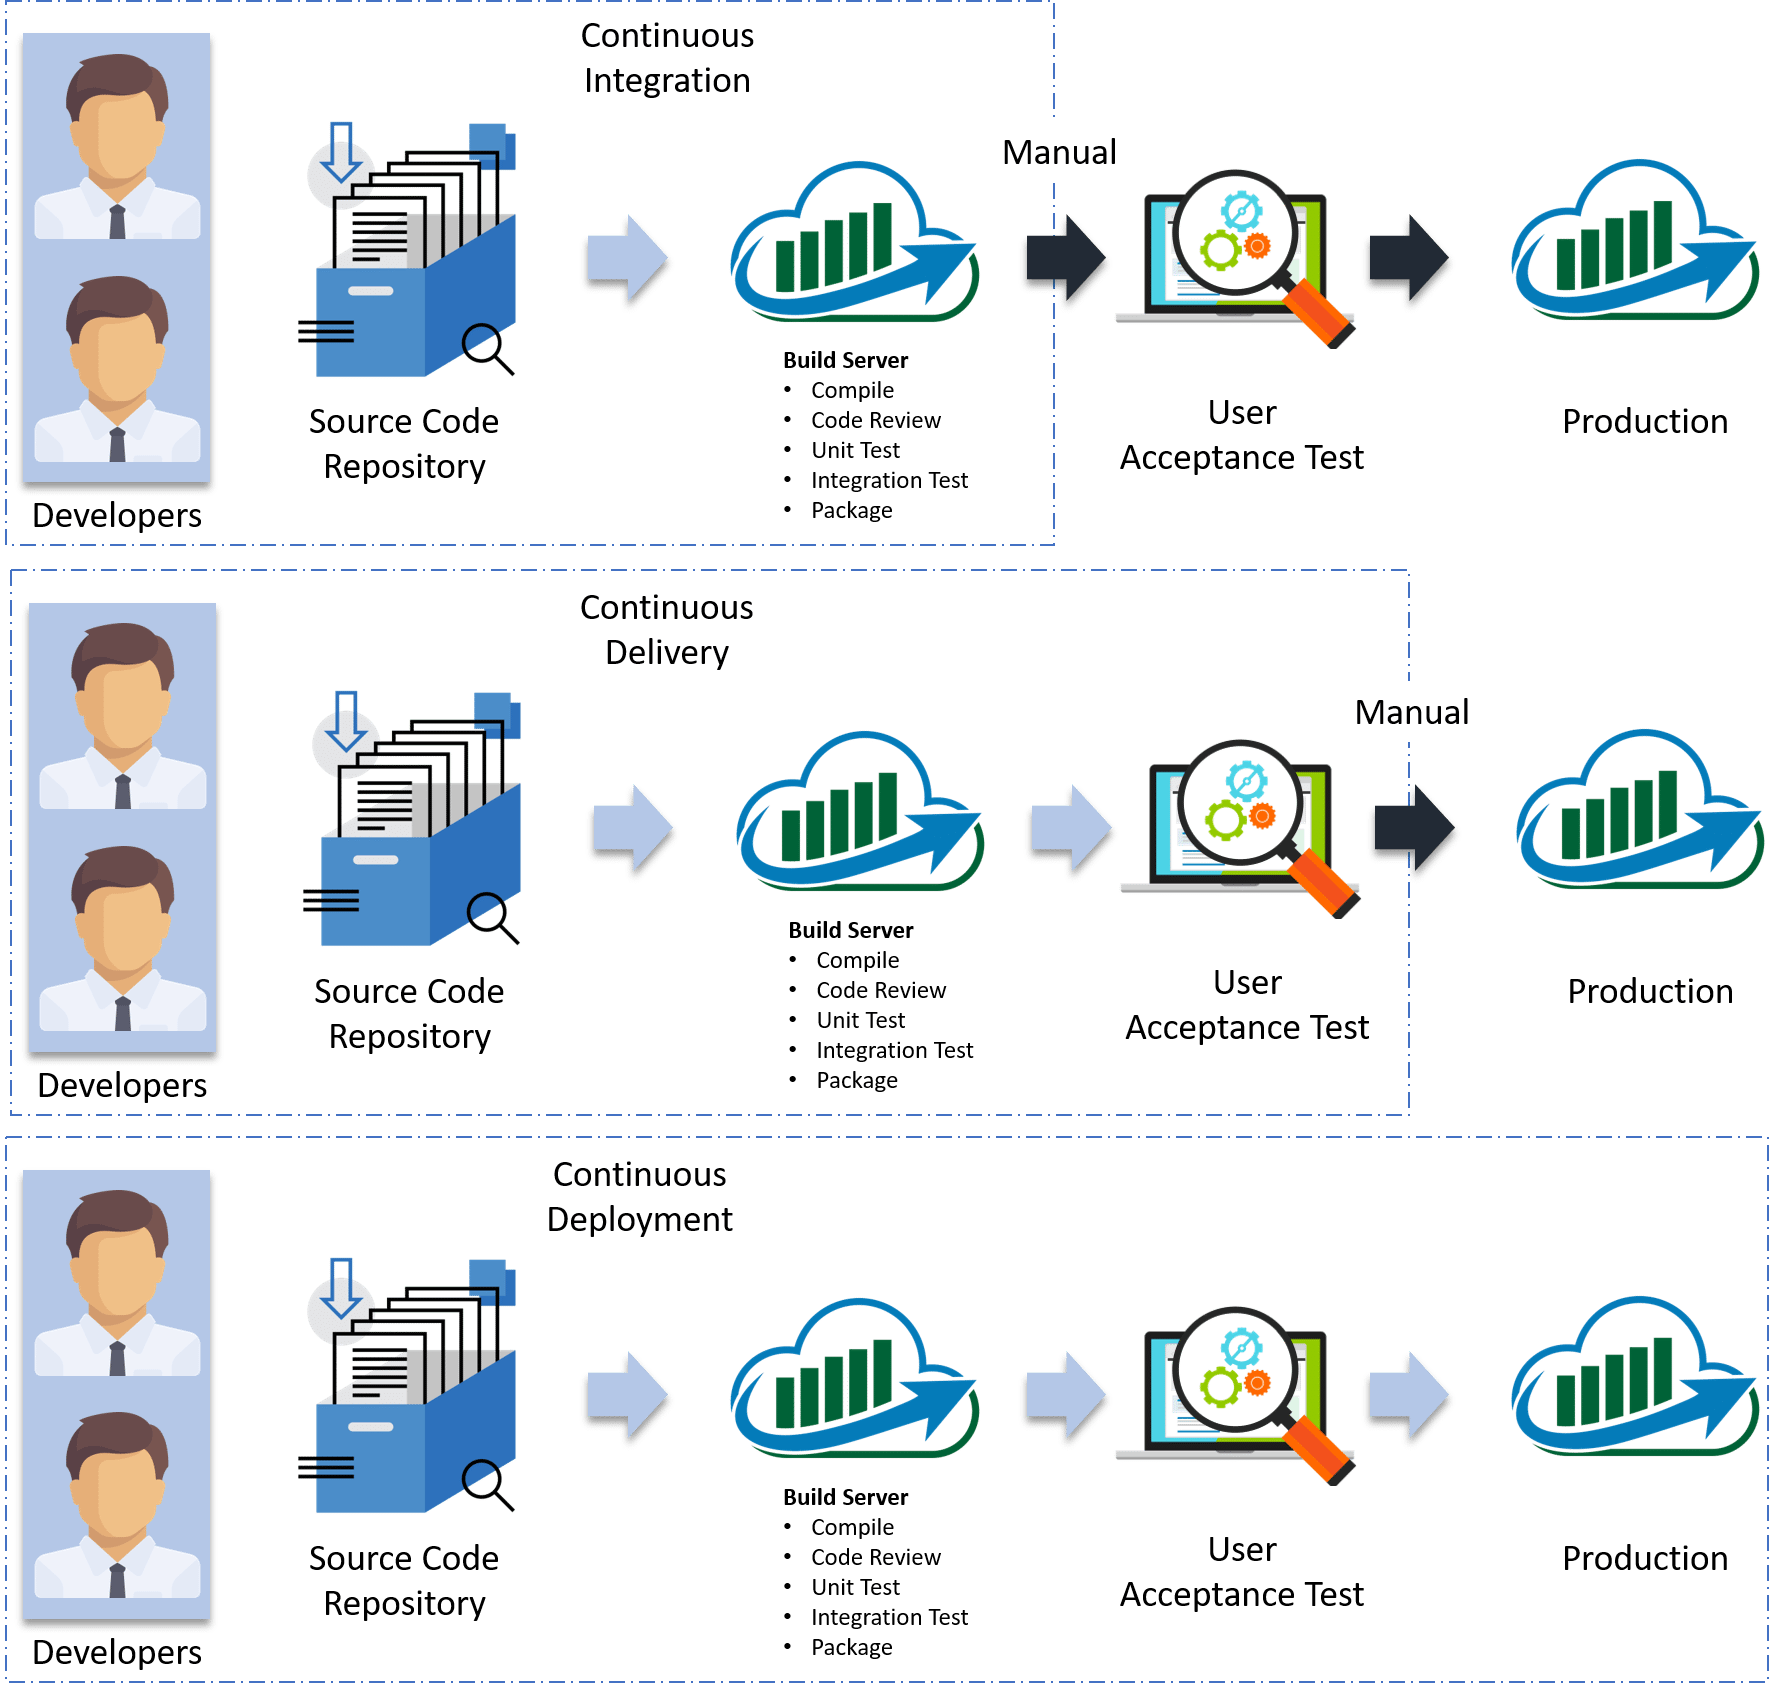
In Continuous Integration, every code commit is build and tested, but, is not in a condition to be released. I mean the build application is not automatically deployed on the test servers in order to validate it using different types of Blackbox testing like – User Acceptance Testing (UAT).
In Continuous Delivery, the application is continuously deployed on the test servers for UAT. Or, you can say the application is ready to be released to production anytime. So, obviously Continuous Integration is necessary for Continuous Delivery.
Continuous Deployment is the next step past Continuous Delivery, where you are not just creating a deployable package, but you are actually deploying it in an automated fashion.
Let me summarize the differences using a table:
| Continuous Integration | Continuous Delivery | Continuous Deployment |
| Automated build for every, commit | Automated build and UAT for every, commit | Automated build, UAT and release to production for every, commit |
| Independent of Continuous Delivery and Continuous Deployment | It is the next step after Continuous Integration | it is one step further Continuous Delivery |
| By the end, the application is not in a condition to be released to production | By the end, the application is in a condition to be released to the production. | The application is continuously deployed |
| Includes Whitebox testing | Includes Blackbox and Whitebox testing | It includes the entire process required to deploy the application |
In simple terms, Continuous Integration is a part of both Continuous Delivery and Continuous Deployment. And Continuous Deployment is like Continuous Delivery, except that releases happen automatically.
But the question is, whether Continuous Integration is enough.
Let us understand this with an example.
Imagine there are 80 developers working on a large project. They are using Continuous Integration pipelines in order to facilitate automated builds. We know build includes Unit Testing as well. One day they decided to deploy the latest build that had passed the unit tests into a test environment.
This must be a lengthy but controlled approach to deployment that their environment specialists carried out. However, the system didn’t seem to work.
Well, the first reason that most of the people will think is that there is some problem with the configuration. Like most of the people even they thought so. They spent a lot of time trying to find what was wrong with the configuration of the environment, but they couldn’t find the problem.

Then one of the senior Developer tried the application on his development machine. It didn’t work there either.
He stepped back through earlier and earlier versions until he found that the system had stopped working three weeks earlier. A tiny, obscure bug had prevented the system from starting correctly. Although, the project had good unit test coverage. Despite this, 80 developers, who usually only ran the tests rather than the application itself, did not see the problem for three weeks.
Without running Acceptance Tests in a production-like environment, they know nothing about whether the application meets the customer’s specifications, nor whether it can be deployed and survive in the real world. If they want timely feedback on these topics, they must extend the range of their continuous integration process.
Let me summarize the lessons learned by looking at the above problems:
They took Continuous Integration (Continuous Delivery) to the next step and introduced a couple of simple, automated Acceptance Tests that proved that the application ran and could perform its most fundamental function. The majority of the tests running during the Acceptance Test stage are Functional Acceptance Tests.
Basically, they built a Continuous Delivery pipeline, in order to make sure that the application is seamlessly deployed on the production environment, by making sure that the application works fine when deployed on the test server which is a replica of the production server.
Enough of the theory, I will now show you how to create a Continuous Delivery pipeline using Jenkins.
Here I will be using Jenkins to create a Continuous Delivery Pipeline, which will include the following tasks:

Pre-requisites:
Let’s begin by first creating a Freestyle project in Jenkins. Consider the below screenshot:

Give a name to your project and select Freestyle Project:

When you scroll down you will find an option to add source code repository, select git and add the repository URL, in that repository there is a pom.xml fine which we will use to build our project. Consider the below screenshot:

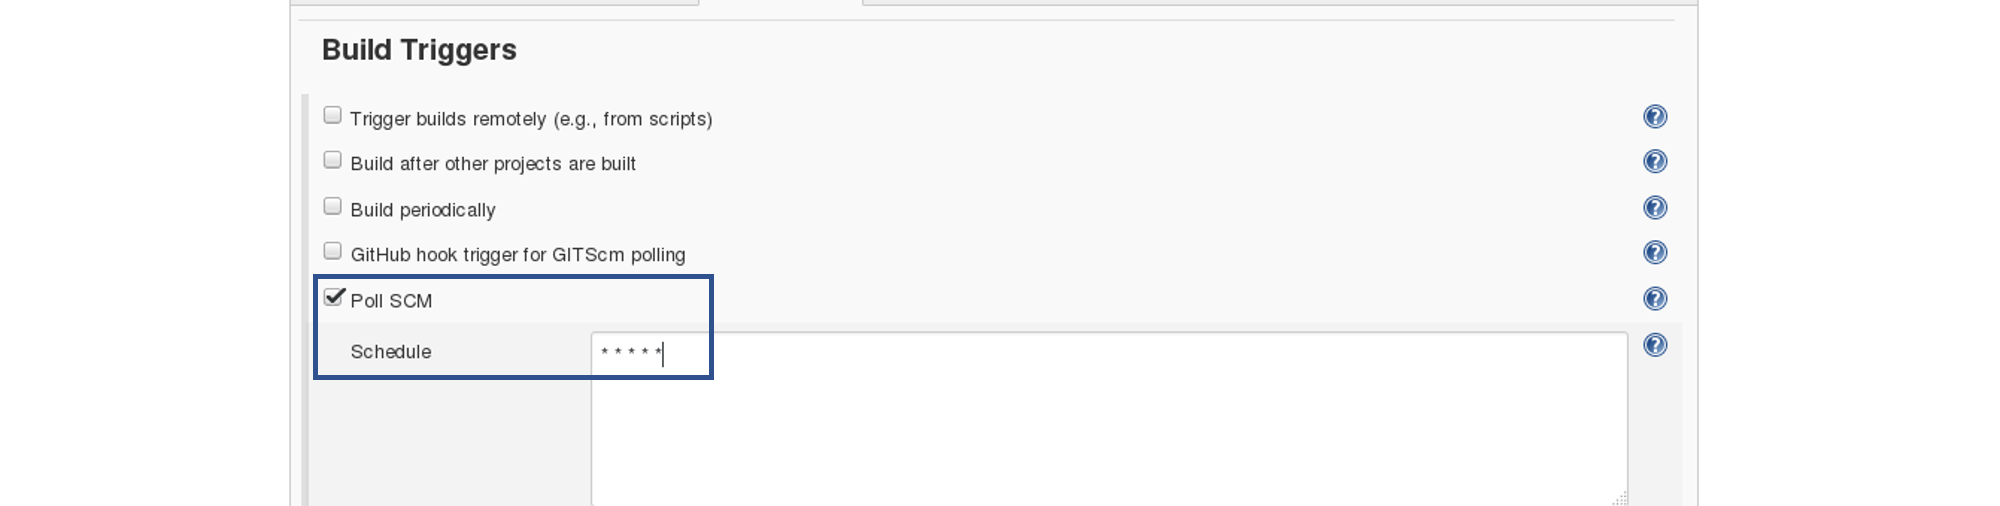
Now we will add a Build Trigger. Pick the poll SCM option, basically, we will configure Jenkins to poll the GitHub repository after every 5 minutes for changes in the code. Consider the below screenshot:
Before I proceed, let me give you a small introduction to the Maven Build Cycle.
Each of the build lifecycles is defined by a different list of build phases, wherein a build phase represents a stage in the lifecycle.
Following is the list of build phases:
I can run the below command, for compiling the source code, unit testing and even packaging the application in a war file:
mvn clean package
You can also break down your build job into a number of build steps. This makes it easier to organize builds in clean, separate stages.
So we will begin by compiling the source code. In the build tab, click on invoke top level maven targets and type the below command:
compile
Consider the below screenshot:
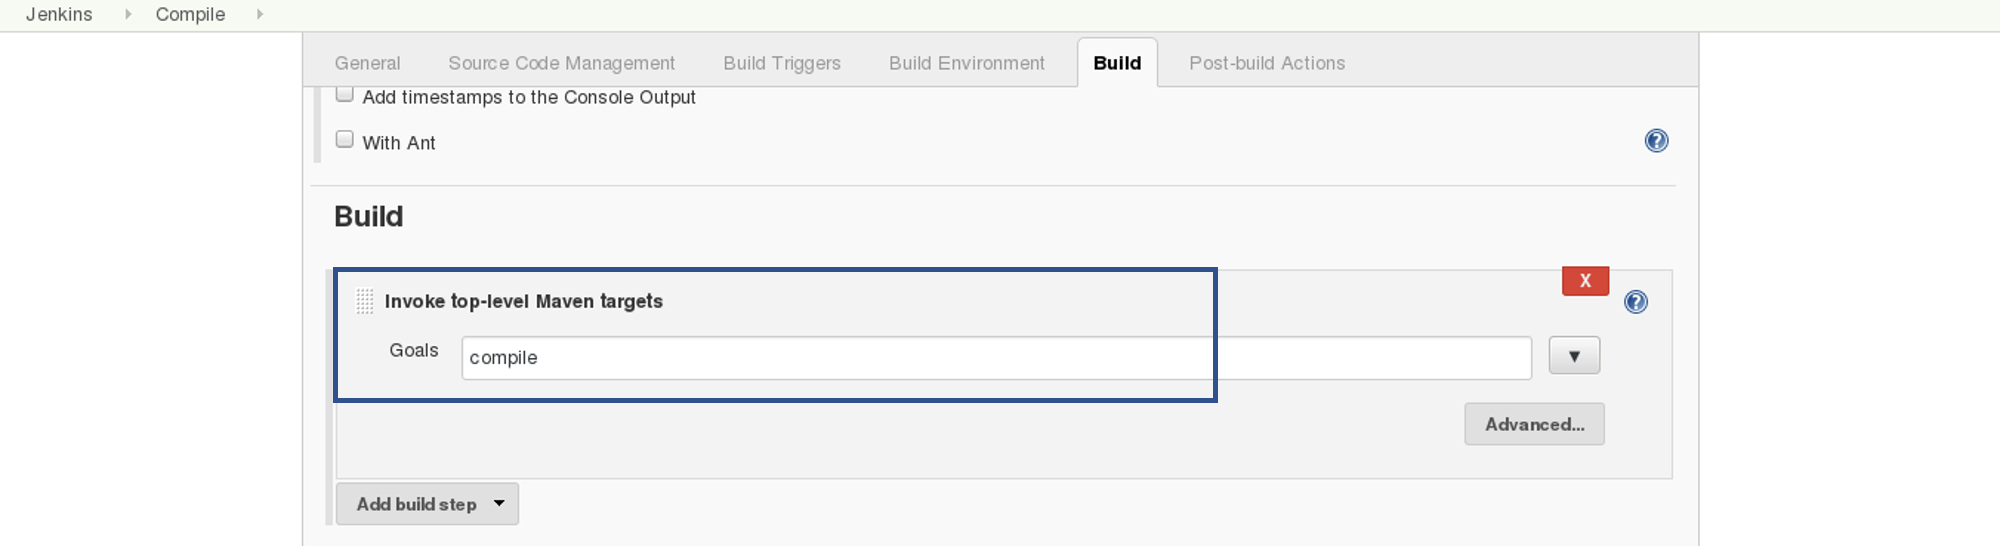
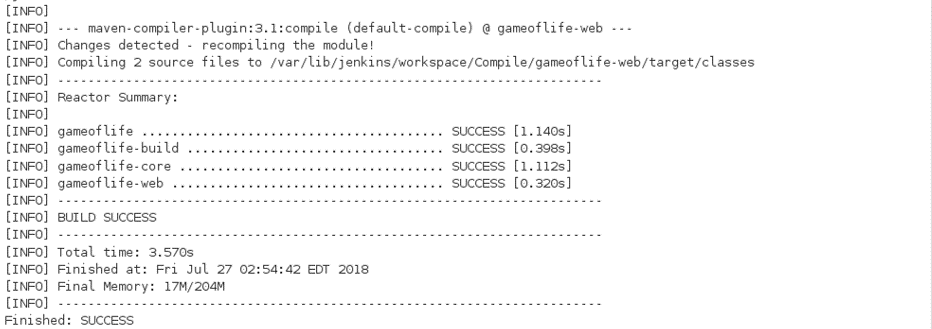
This will pull the source code from the GitHub repository and will also compile it (Maven Compile Phase).
Click on Save and run the project.
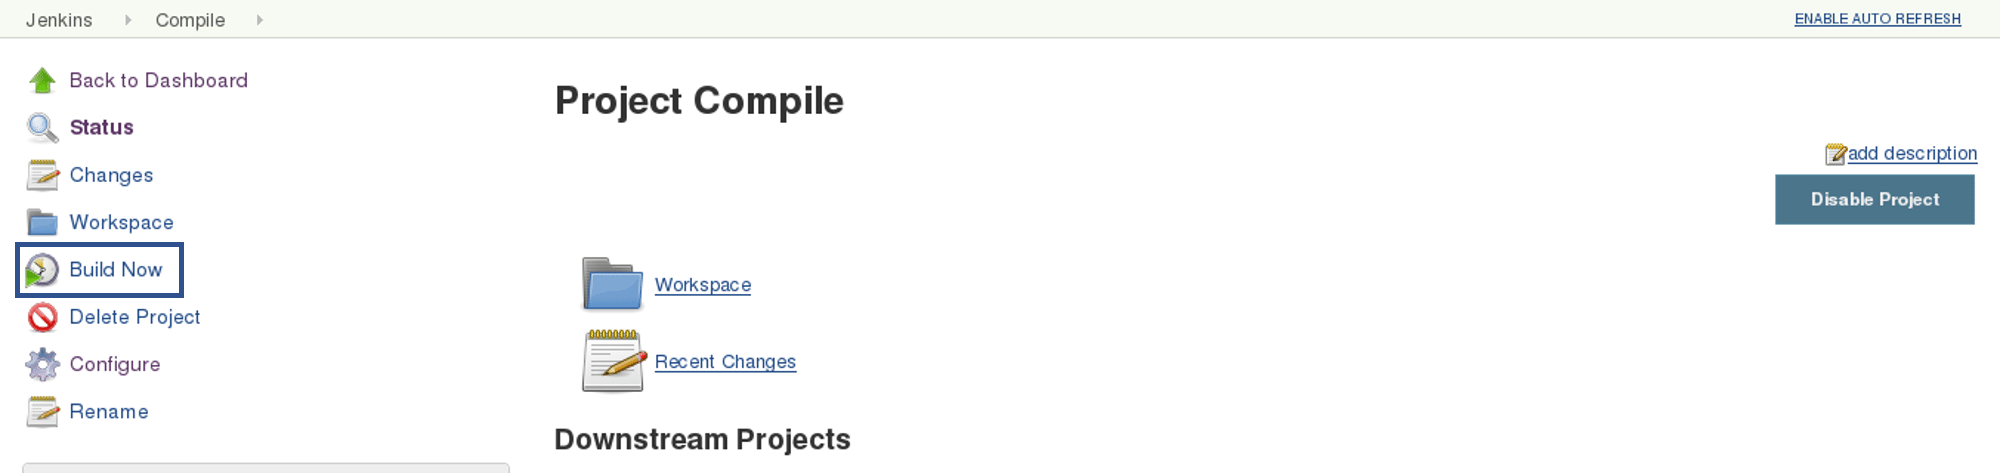
Now, click on the console output to see the result.
Now we will create one more Freestyle Project for unit testing.
Add the same repository URL in the source code management tab, like we did in the previous job.
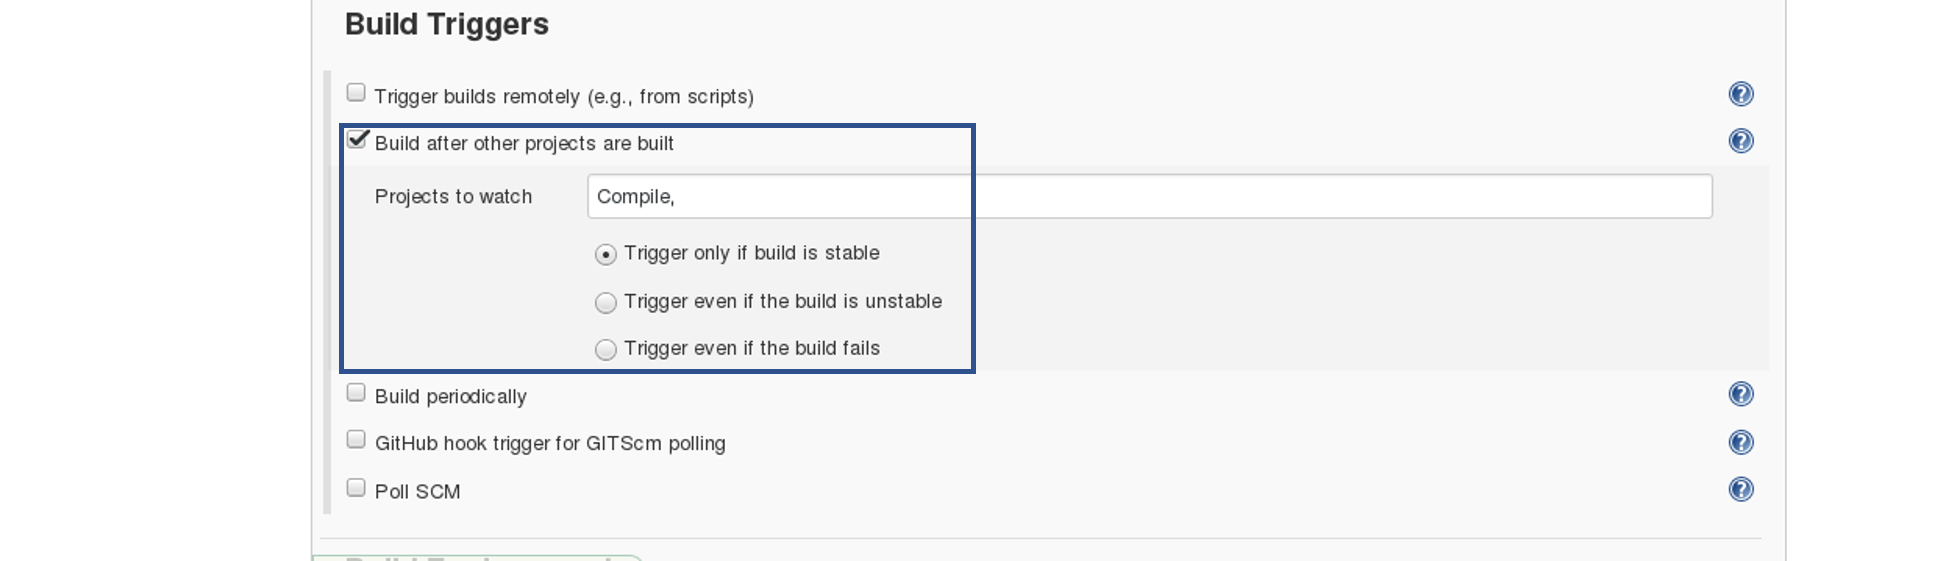
Now, in the “Buid Trigger” tab click on the “build after other projects are built”. There type the name of the previous project where we are compiling the source code, and you can select any of the below options:
I think the above options are pretty self-explanatory so, select any one. Consider the below screenshot:
 In the Build tab, click on invoke top level maven targets and use the below command:
test
Jenkins also does a great job of helping you display your test results and test result trends.
The de facto standard for test reporting in the Java world is an XML format used by JUnit. This format is also used by many other Java testing tools, such as TestNG, Spock, and Easyb. Jenkins understands this format, so if your build produces JUnit XML test results, Jenkins can generate nice graphical test reports and statistics on test results over time, and also let you view the details of any test failures. Jenkins also keeps track of how long your tests take to run, both globally, and per test—this can come in handy if you need to track down performance issues.
So the next thing we need to do is to get Jenkins to keep tabs on our unit tests.
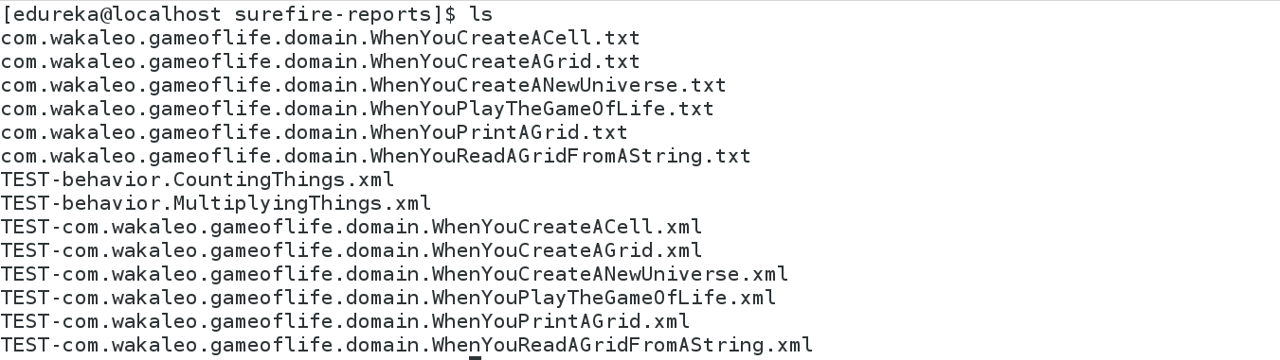
Go to the Post-build Actions section and tick “Publish JUnit test result report” checkbox. When Maven runs unit tests in a project, it automatically generates the XML test reports in a directory called surefire-reports. So enter “**/target/surefire-reports/*.xml” in the “Test report XMLs” field. The two asterisks at the start of the path (“**”) are a best practice to make the configuration a bit more robust: they allow Jenkins to find the target directory no matter how we have configured Jenkins to check out the source code.
**/target/surefire-reports/*.xml

Again save it and click on Build Now.
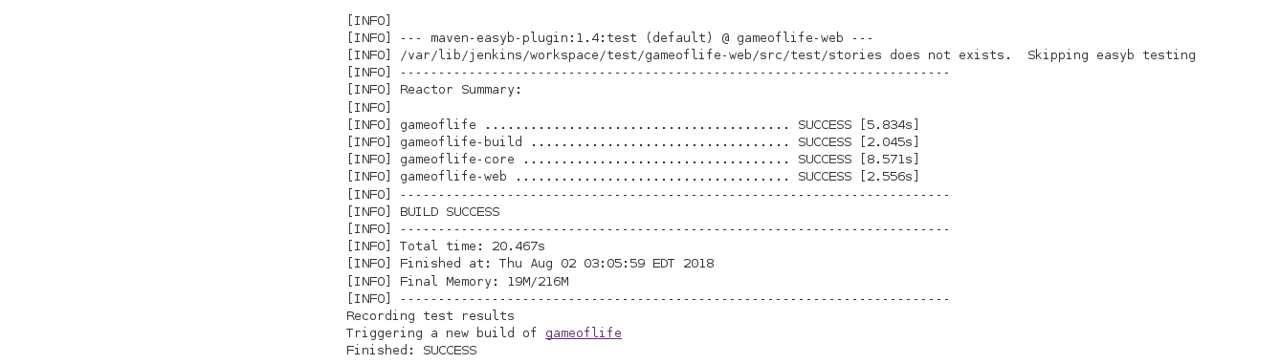
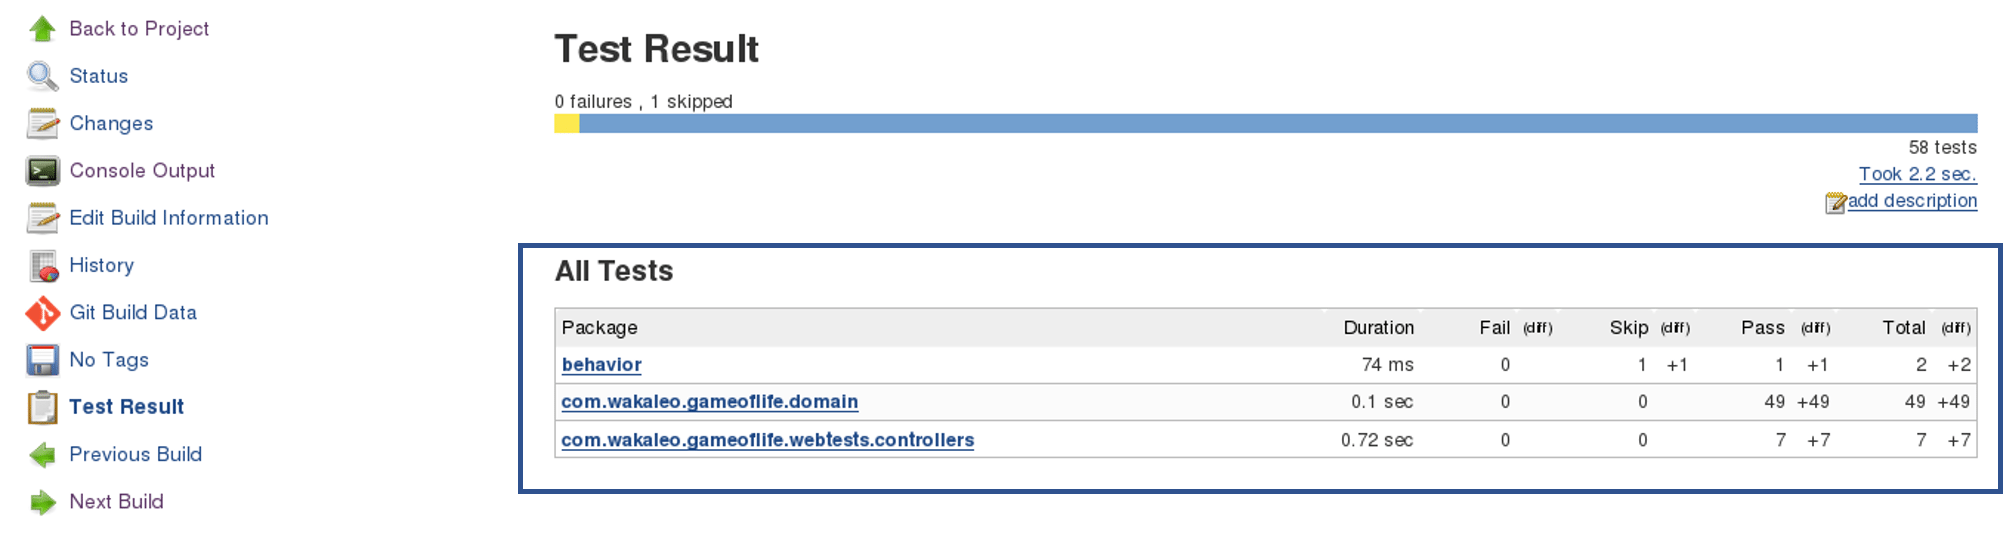
Now, the JUnit report is written to /var/lib/jenkins/workspace/test/gameoflife-core/target/surefire-reports/TEST-behavior.
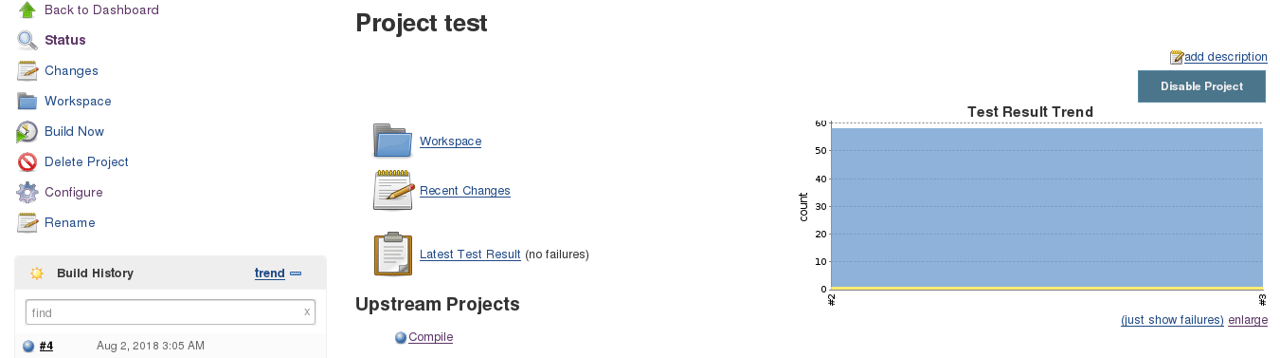
In the Jenkins dashboard you can also notice the test results:
Now, the next step is to package our application in a WAR file and deploy that on the Tomcat server for User Acceptance test.
Create one more freestyle project and add the source code repository URL.
Then in the build trigger tab, select build when other projects are built, consider the below screenshot:
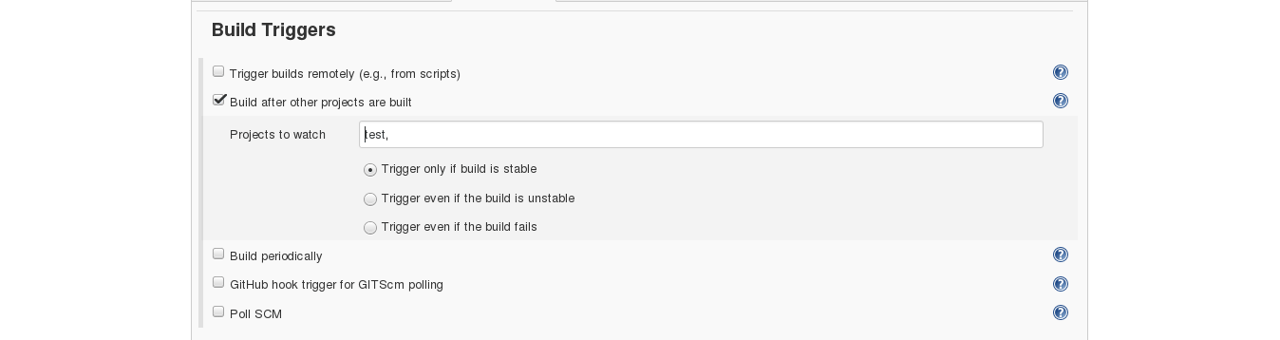
Basically, after the test job, the deployment phase will start automatically.
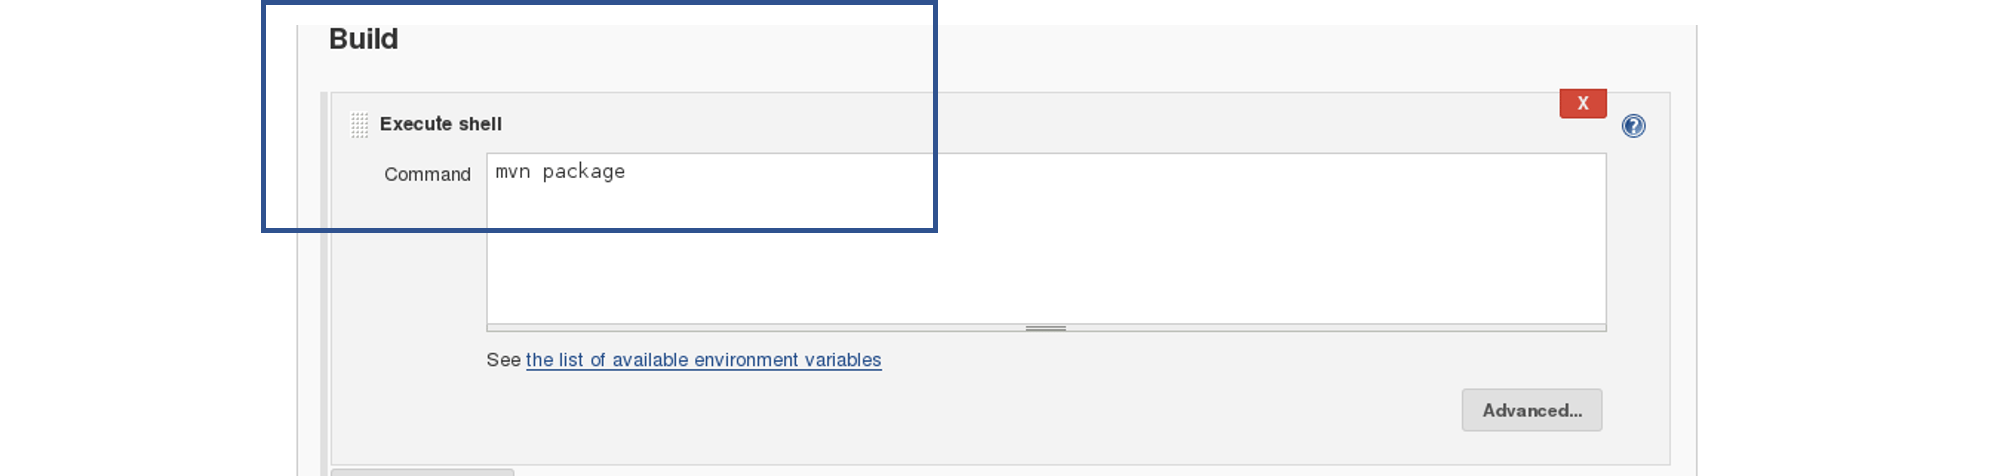
In the build tab, select shell script. Type the below command to package the application in a WAR file:
mvn package
Next step is to deploy this WAR file to the Tomcat server. In the “Post-Build Actions” tab select deploy war/ear to a container. Here, give the path to the war file and give the context path. Consider the below screenshot:

Select the Tomcat credentials and, notice the above screenshot. Also, you need to give the URL of your Tomcat server.
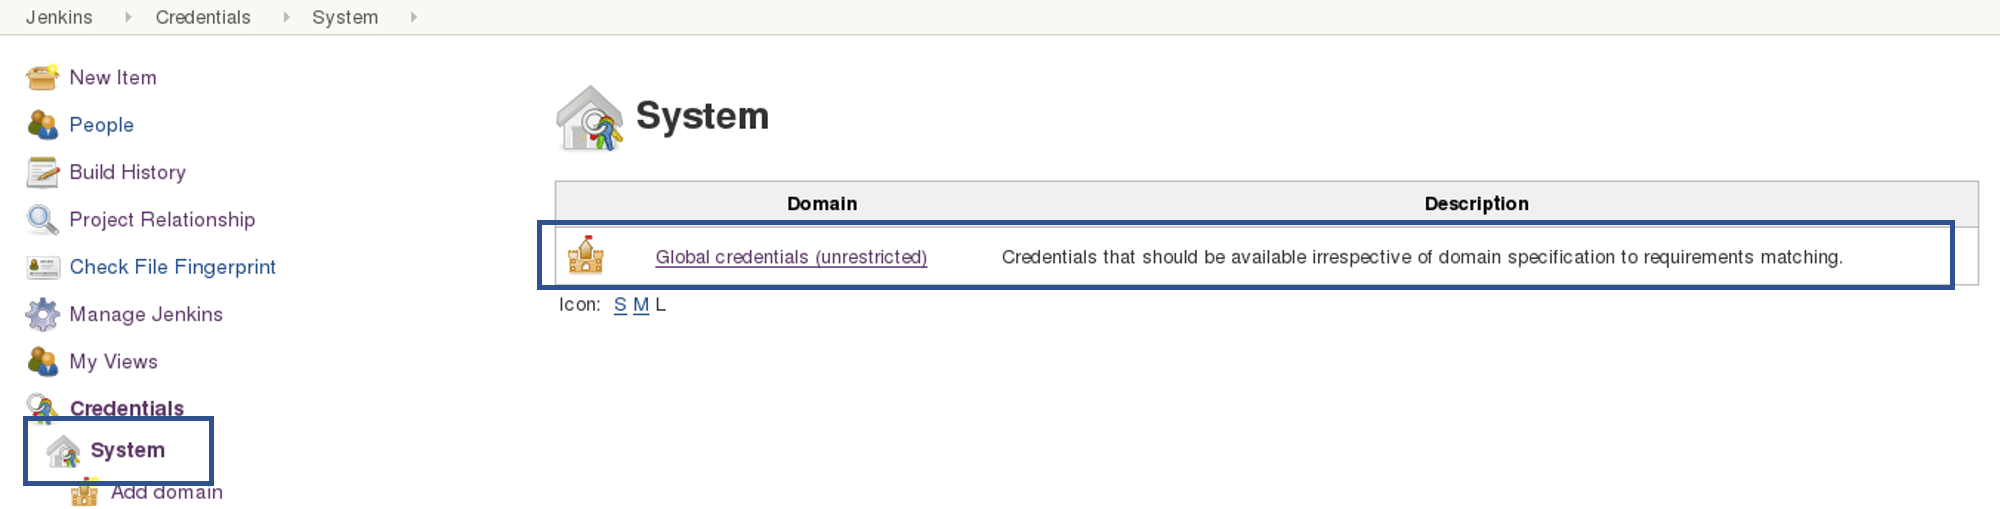
In order to add credentials in Jenkins, click on credentials option on the Jenkins dashboard.
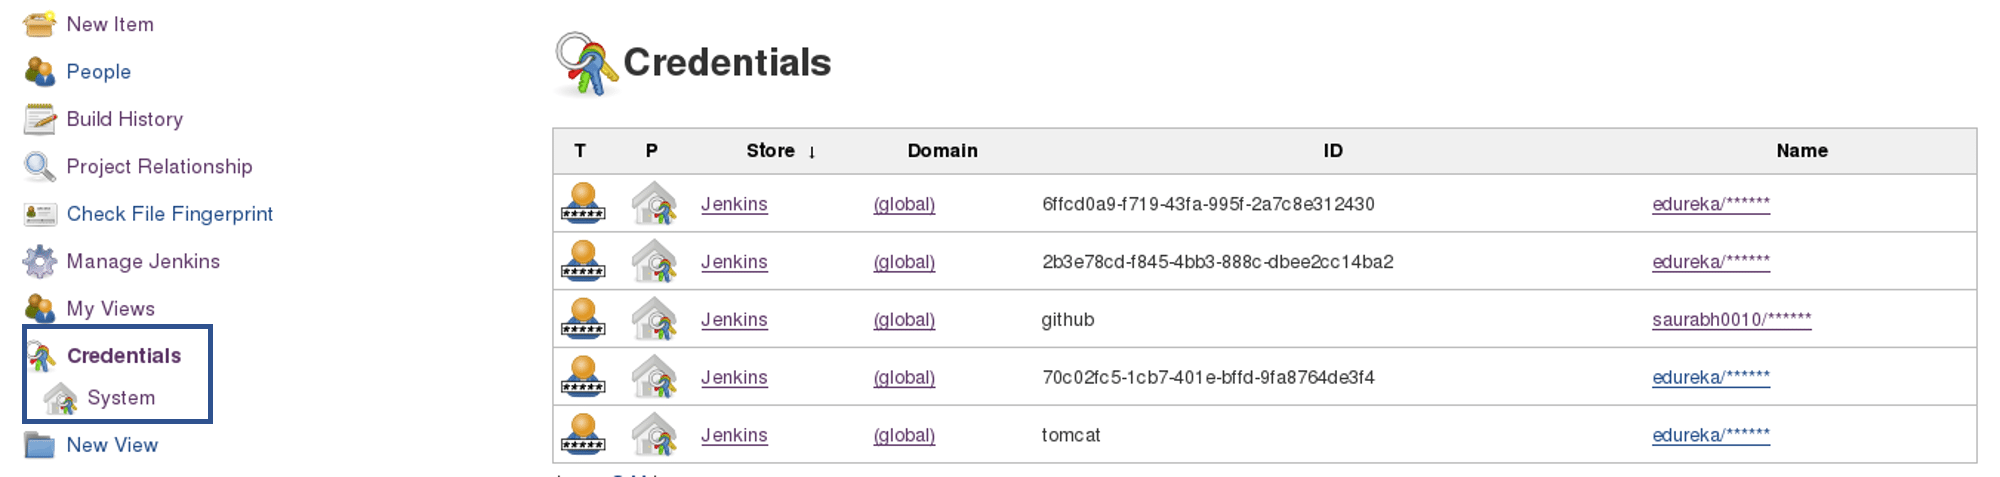
Click on System and select global credentials.
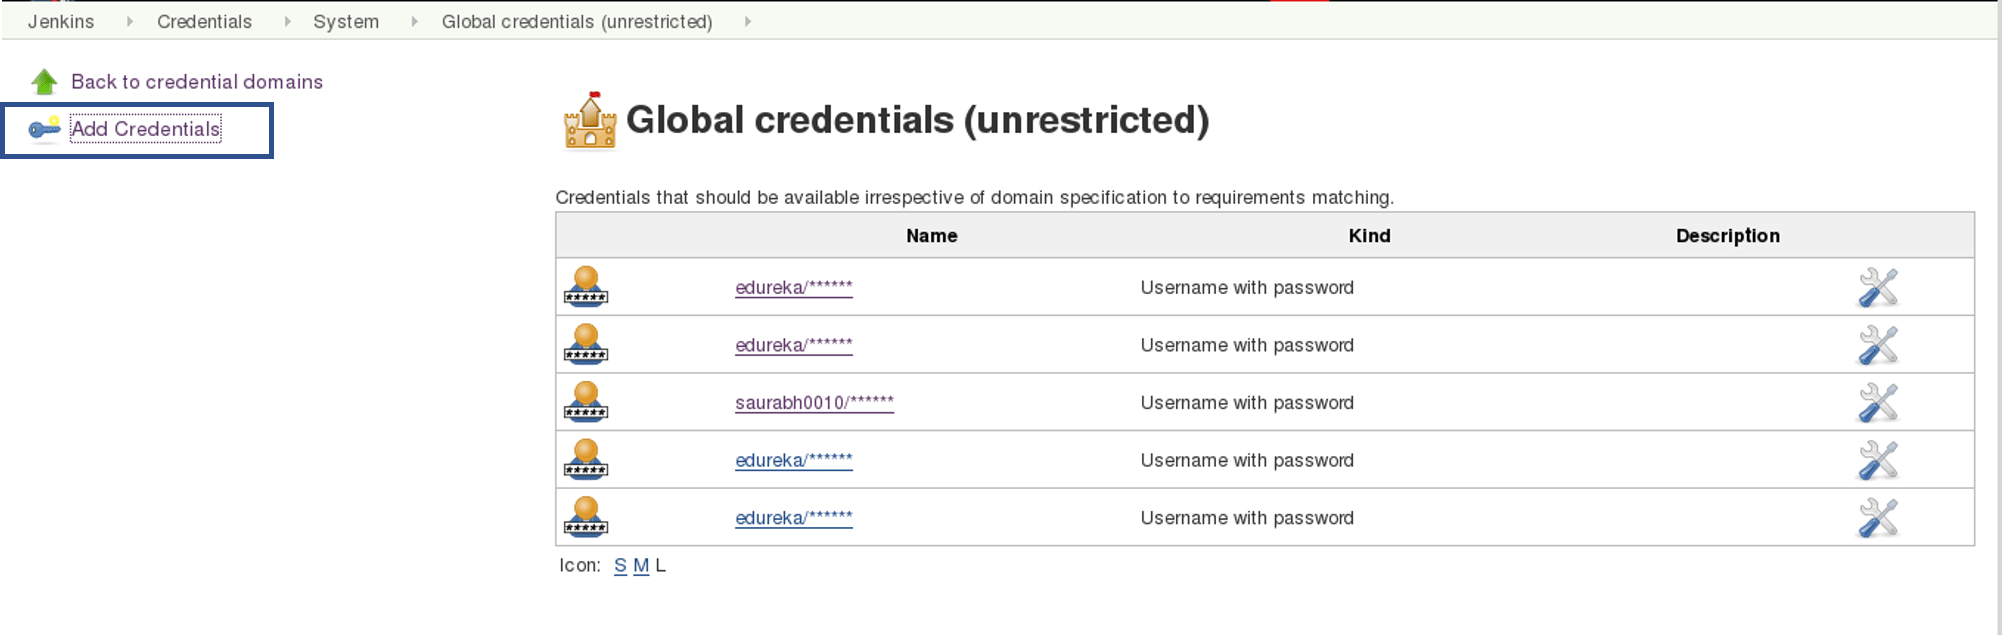
Then you will find an option to add the credentials. Click on it and add credentials.
Add the Tomcat credentials, consider the below screenshot.
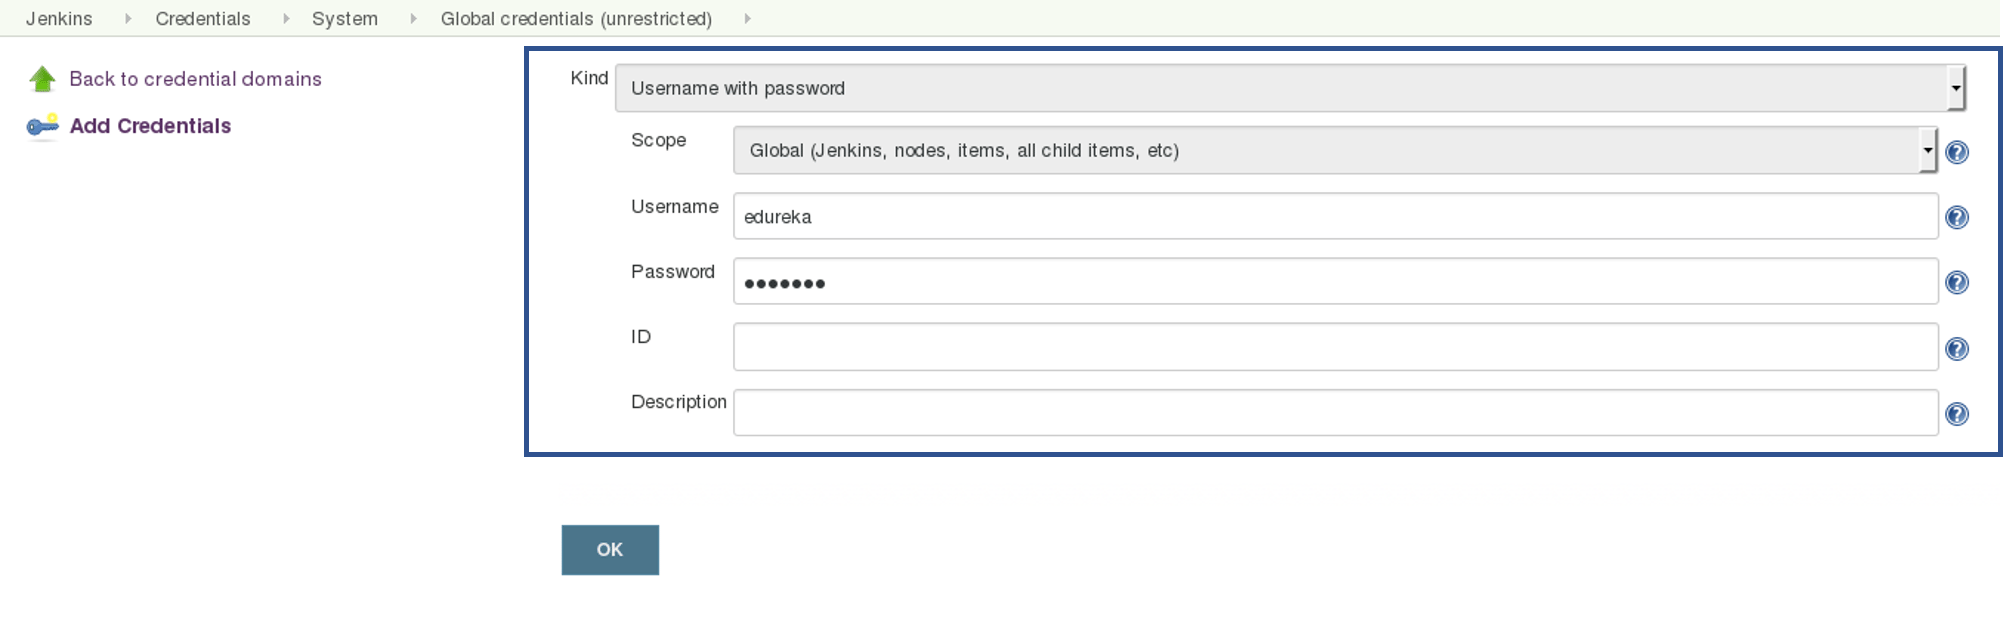
Click on OK.
Now in your Project Configuration, add the tomcat credentials which you have inserted in the previous step.
Click on Save and then select Build Now.
Go to your tomcat URL, with the context path, in my case it is http://localhost:8081. Now add the context path in the end, consider the below Screenshot:
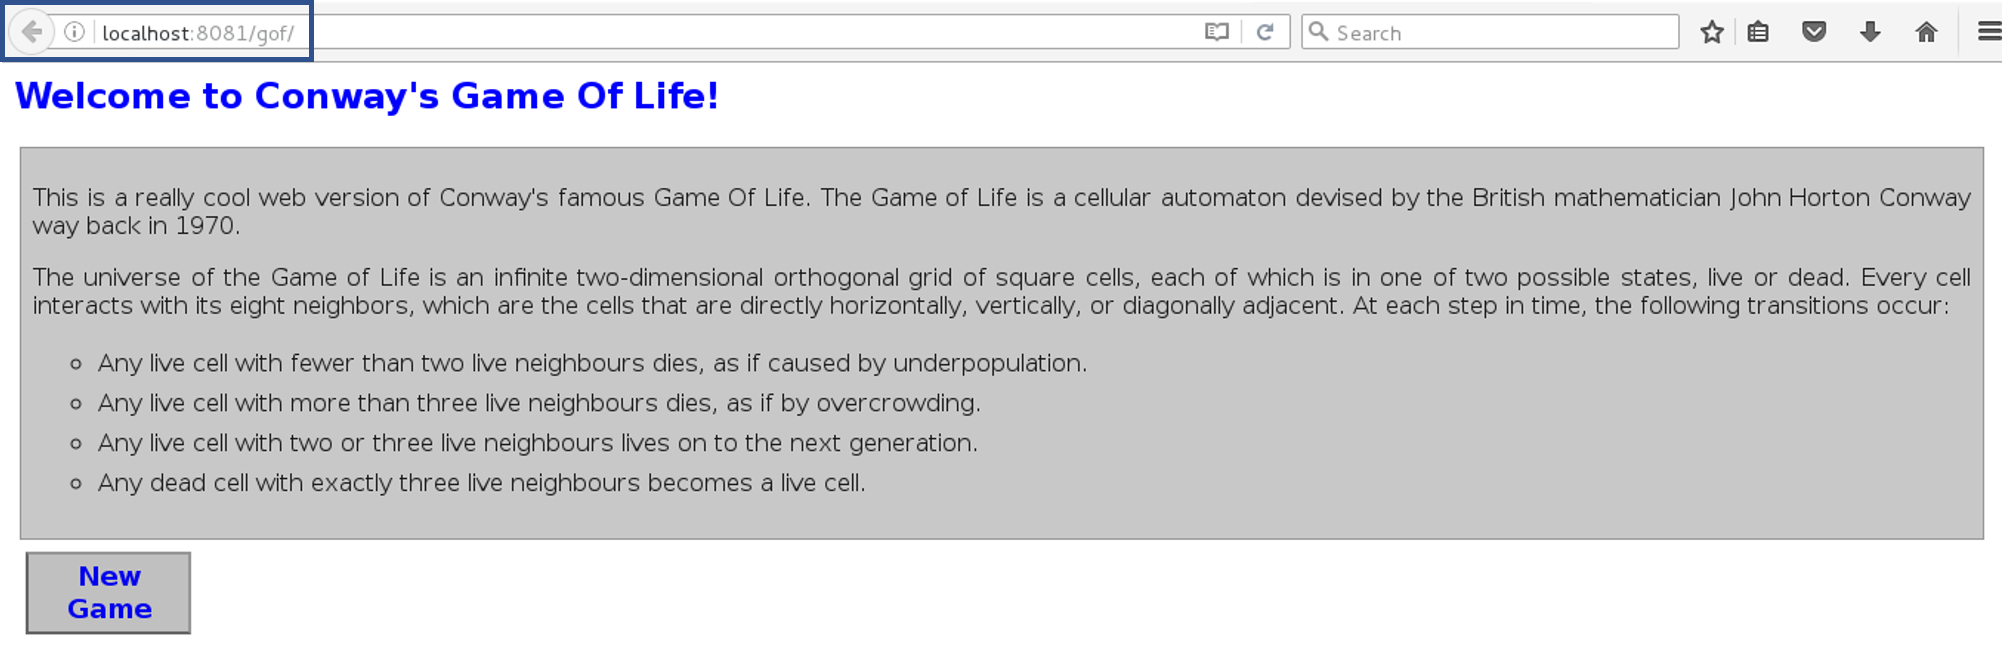
Link - http://localhost:8081/gof
I hope you have understood the meaning of the context path.
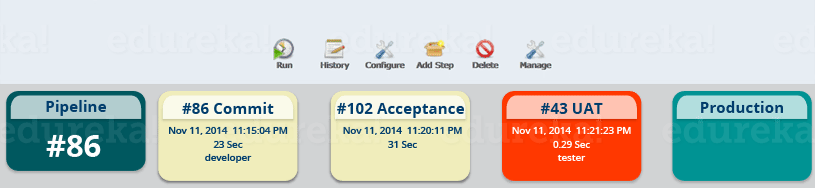
Now create a pipeline view, consider the below screenshot:

Click on the plus icon, to create a new view.
Configure the pipeline the way you want, consider the below screenshot:
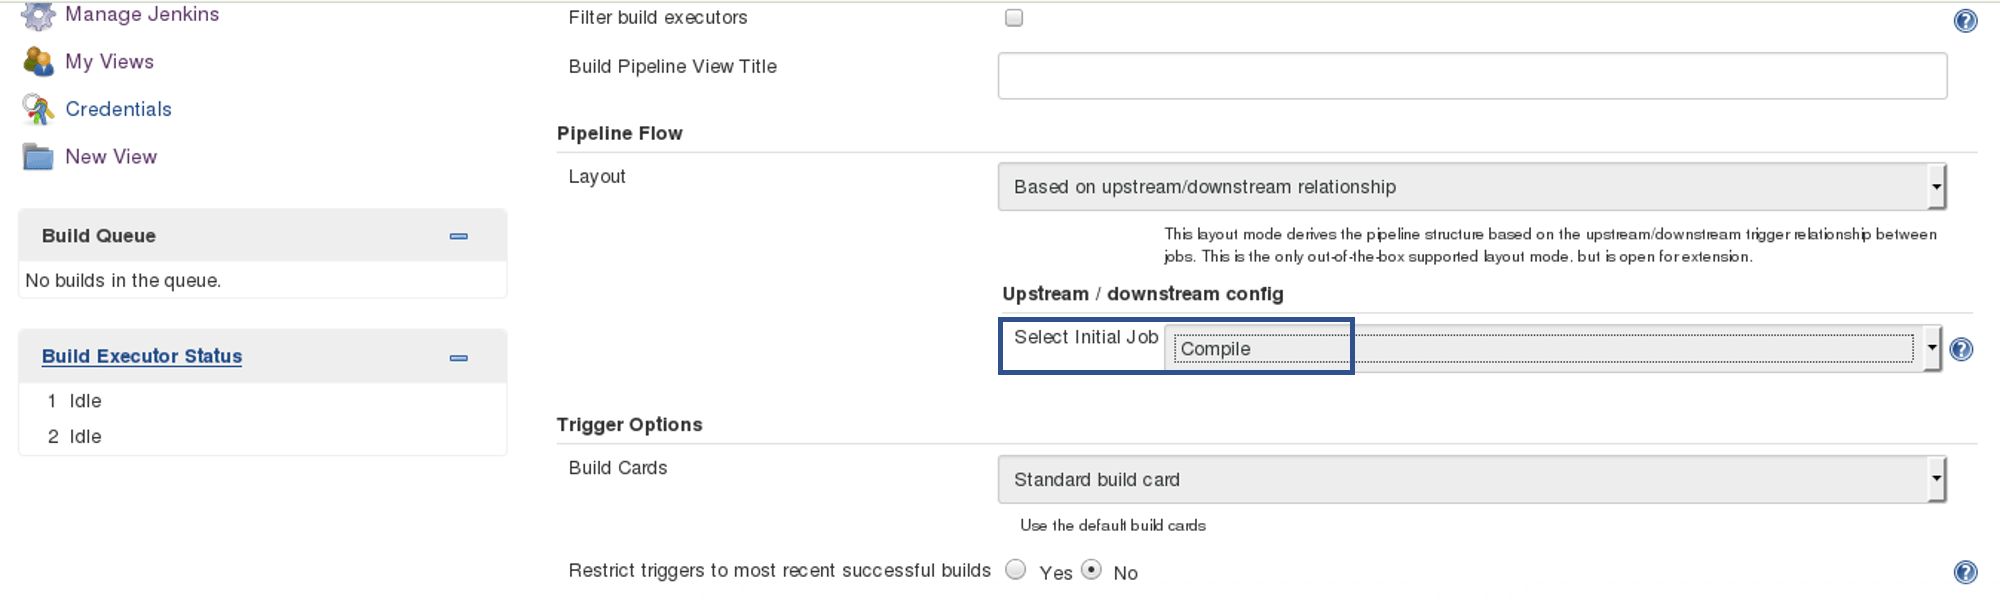
I did not change anything apart from selecting the initial job. So my pipeline will start from compile. Based on the way I have configured other jobs, after compile testing and deployment will happen.
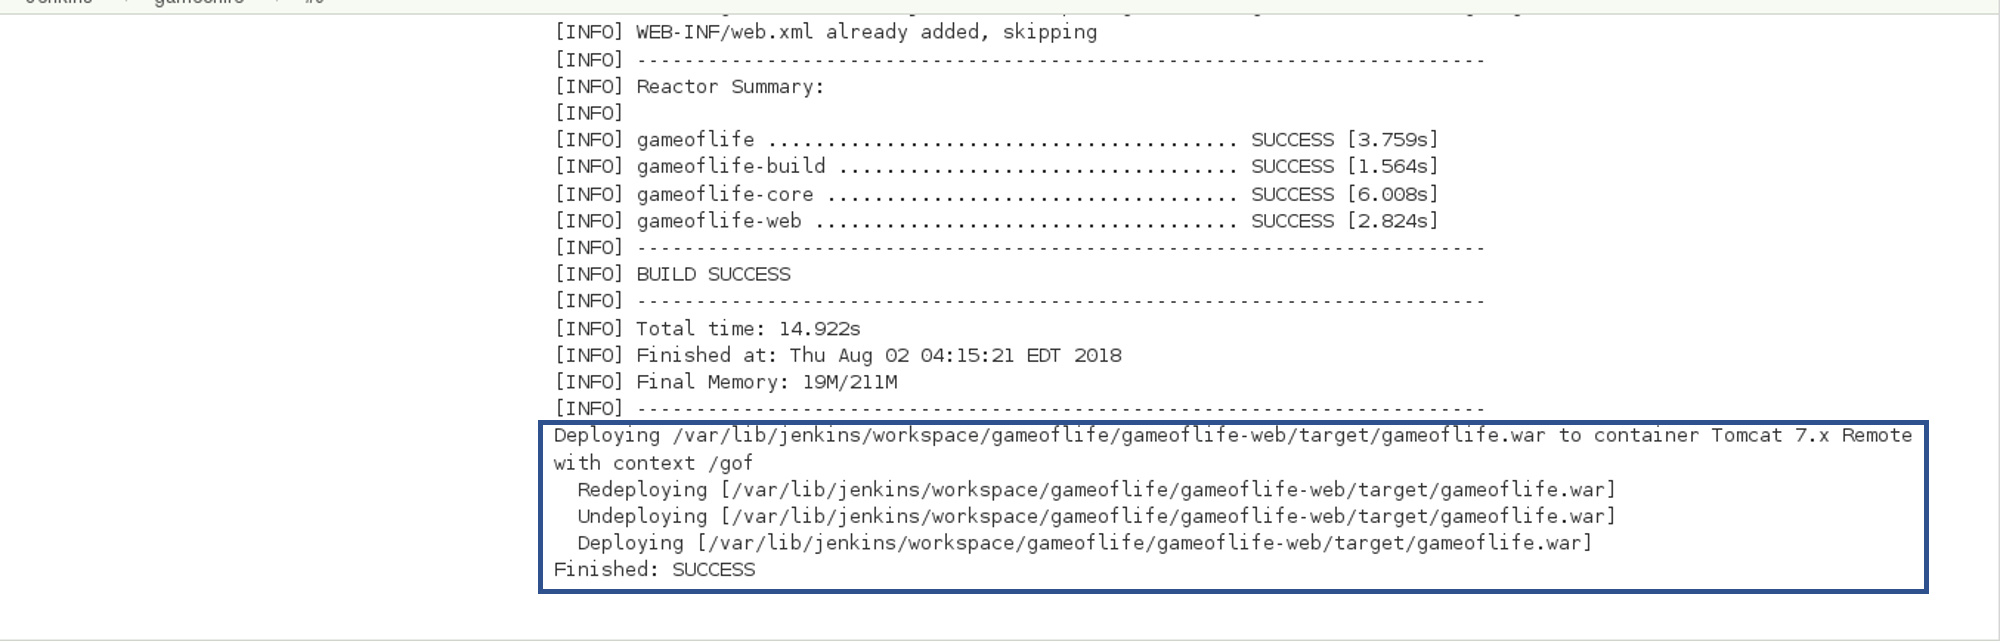
Finally, you can test the pipeline by clicking on RUN. After every five minutes, if there is a change in the source code, the entire pipeline will be executed.

So we are able to continuously deploy our application on the test server for user acceptance test (UAT).
I hope you have enjoyed reading this post on Continuous Delivery. If you have any doubts, feel free to put them in the comment section below and I will get back with an answer at the earliest. Unlock the potential of Continuous Testing in DevOps. Gain expertise in quality assurance, accelerated delivery, and seamless collaboration for successful software development.


 Thank you for registering Join Edureka Meetup community for 100+ Free Webinars each month JOIN MEETUP GROUP