


Borders are used in HTML pages to demarcate and highlight content. When there is plenty of information on a page and you wish to draw the user’s attention to specific parts, then use borders around that content. In this article on Borders in CSS I’ll discuss the following topics:
When to use Borders
The standard practice is to use CSS border tags to define borders in HTML pages for:
- Around important headings
- To highlight postscript or important notes
- To enclose pictures, illustrations, quotes from people, videos
- To draw attention to pricing, timelines or such significant information
You might want to read up on the CSS basics before getting on with learning about CSS borders.
For a comprehensive CSS tutorial, visit Edureka CSS Tutorial For Beginners. You will get an excellent heads-up on the way CSS is to be used to augment HTML web design.
Borders in CSS
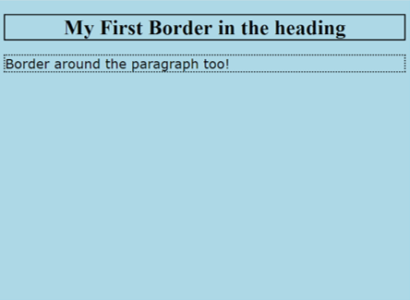
CSS Borders can be assigned to different sections of the HTML page, whether it is to enclose headings or paragraphs. Let’s start with an example. Here we define a border around the heading and another border around the paragraph text.
<!DOCTYPE html>
<html>
<head>
<style>
body {
background-color: lightblue;
}

h1 {
text-align: center;
border-style: solid;
}

p {
font-family: verdana;
font-size: 20px;
border-style: dotted;
}

</style>
</head>
<body>

<h1>My First Border in the heading</h1>
<p>Border around the paragraph too!</p>

</body>
</html>

Attributes of CSS Border
CSS borders have 3 major attributes to their
- style: The style attribute defines the pattern of the border.
- color: The color can be any one from the set defined by CSS colors.
- width: The width is used to vary the thickness of the border, to make it more prominent.
In the above example, we saw that only one border attribute is defined, that is its style. The other attributes when not defined take on default values. There is another attribute called radius, which is less frequently used. It is used to make the edges of the border rounded.
- border-style attribute
| Style | Description |
| border-style: solid | |
| border-style: double | |
| border-style: groove | |
| border-style: ridge | |
| border-style: inset | |
| border-style: outset | |
| border-style: none | |
| border-style: hidden | |
| border-style: dotted | |
| border-style: dashed |


You would notice that there is a ‘no border’ and ‘hidden border’ option as well. A developer can simply avoid defining a border, why explicitly define it as a ‘hidden border’? This is done for space usage and alignment purposes with other elements in the page.
Border styles can be mixed within an element too. For this purpose, the 4 individual border sides can be separately defined with different styles. This can be done in 2 ways. Either define all the 4 sides in a single tag. In this case, the count starts from the top line and then moves clockwise. Alternatively, each of the 4 borderlines can be defined in individual tags too. Both cases are shown in the next Example.
| Style | Description |
| border-style: dotted dashed solid double border-top-style: dotted; border-right-style: dashed; border-bottom-style: solid; border-left-style: double; |

- border-color attribute
The color attribute for a border can be set in multiple ways. This is similar to setting color for other elements. The colors can be set by one of the following methods:
- name – specify a color name, like “blue”. You can also try out some fancy color options like “BlanchedAlmond”!
- Hex – specify a hex value, like “#ff0000”
- RGB – set the RGB code. For instance, rgb(255,255,0) means Yellow.
- setting – such as “transparent” or “opaque”
- border-width attribute:
The width property, as the name suggests, defines the thickness of the 4 border sides. If one value is defined, it is for all sides, otherwise individual width values can also be set.
The width can be specified in any of the standard unit such as pixels(‘px’), points(‘pt’) or in centimeters(‘cm’). You can also specify the width using pre-defined values of ‘thick’, ‘thin’ and ‘medium’.
| Style | Description |
| border-width: 10px | |
| border-width: 0.1cm | |
| border-width: medium |


- border-radius attribute
The purpose of defining radius is to get rounded corners for the border. The radius factor defines the extent of roundedness. Larger the value, more curved the corners become. As a standard practice, radius values are kept between 1-3 times the border width.
The following code will generate:
border-width: 10px;
border-radius: 30px;

Default Values for Border Attributes
The only mandatory attribute is the style. If the style is missing, the border will not appear.
If the color is not specified, the color from the underlying element is taken as the default value. For instance, if the text color of a paragraph is defined as ‘blue’, then default border-color would also be blue. In case there is no color definition even for the element, then default color is ‘black’.
Build stunning cross-platform mobile apps with our comprehensive Flutter Training.
Define Borders in Shorthand
Some developers prefer to define border attributes in a concise one-line tag. This shorthand format helps in minimizing the lines of code and expert developers prefer this format. Using the shorthand format is recommended when the border definition is simple and fairly standardized. However, if you need to highlight each side of the border in a different style, then you need to stick to the format of defining individual tags.
The Following code is used:
border-style: dashed;
border-color: green;
border-width: 5px;
border: dashed green 5px;

Points to keep in mind while Designing Borders in CSS
Don’t use too many borders in a page, it can be distracting and make it difficult for the user to focus.
It is important to maintain consistency in border style and colors. Elements in the same level of hierarchy in a page must have similar border style and width for uniformity. For instance, if paragraph is defined with solid border and 5px width, maintain this format throughout other paragraph elements during web site design.
Stick to one style of tag definitions. Some developers are comfortable with shortcut definitions with all values assigned to a single border tag. Some others prefer explicit listing of all tags for width, color and style. The convention is that when elaborate border decorations are required in a page, the individual tags are listed separately. This helps during debugging such customized border definitions. For normal cases, just a shortcut definition would do.
Hope you found the information you were looking for on CSS borders, and with this, we come to an end of this Borders in CSS article.
Check out our Full Stack Web Developer Masters Program which comes with instructor-led live training and real-life project experience. This training makes you proficient in skills to work with back-end and front-end web technologies. It includes training on Web Development, jQuery, Angular, NodeJS, ExpressJS, and MongoDB.
Got a question for us? Please mention it in the comments section of “Border in CSS” blog and we will get back to you.