As a developer wouldn’t you like to keep your entire focus on production instead of repository administration and maintenance? That’s where AWS CodeCommit comes into the picture. Providing a secure and fully managed service, it has proved to boost an organization’s performance in various aspects. You can learn more from the AWS Certified Solutions Architect Training.
Introduction To AWS CodeCommit
AWS CodeCommit is a source control storage and version code service provided by Amazon. It helps the team with better code management and collaboration, exploiting the benefits of CI/CD. It eliminates the need for a third party version control. This service can be used to store assets such as documents, source code, and binary files. It also helps you manage these assets. Managing includes scaling, integrating, merging, pushing and pulling code changes. Let’s have a better look at services provided by CodeCommit:
Fully Managed Service:
If you’re a DevOps engineer, wouldn’t you like to keep your entire focus on production instead of maintaining updates, managing your own hardware or software? AWS CodeCommit eliminates the boring tasks of managing your resources providing high service availability and durability.
Store Code Securely:
Since its a version control system, it stores your code. For a matter of fact, it stores any kind of data, be it documents or binary files. Data stored is pretty secure as they’re encrypted at rest as well as in transit.
Work Collaboratively With Code:
AWS CodeCommit lets you collaboratively work with the code. You can work on a section of the code and the other person/team can work on the other section, the changes/updates can be pushed and merged in the repository. Users can review, comment on each other’s code helping them write code to their highest potential.
Highly Scalable:
AWS CodeCommit lets you scale up or down to meet your needs. The service can handle large repositories, a large number of files with large branches and lengthy commit histories.
Integration:
You can easily integrate AWS CodeCommit with other AWS services. It keeps these services close to other resources making it easier and faster to fetch and use increasing the speed and frequency of development life cycle. It also lets you integrate third-party services pretty easily.
Migration:
You can easily Migrate any Git-based repository to CodeCommit easily.
Interactions Using Git:
Interacting with CodeCommit is pretty simple as its Git-based. You can use Git Commands to pull, push, merge or perform other actions. It also gives you the feature to use AWS CLI commands along with its very own API’s.
Cross-Account Access:
CodeCommit lets you cross-link two different AWS accounts making it easier to share repositories between two accounts securely. There are a few things to keep in mind like you shouldn’t share your ssh keys or AWS credentials.
Introduction to AWS CodeCommit | AWS Certified DevOps Engineer Training
This video will give you an introduction to the version control system like pushing, pulling, merging, and committing code using AWS DevOps Service – CodeCommit.
GitHub is also one of the version control systems. Let’s first look at the similarities between GitHub and CodeCommit.
- CodeCommit and GitHub use Git repositories.
- Both of them support code review.
- They can be integrated with AWS CodeBuild.
- Both of them use two methods of authentications, SSH and HTTPS.
Lets now have a look at the differences between them.
- Security: Git is administered using GitHub users while CodeCommit uses AWS’s IAM Roles and users. This makes it highly secure. Using IAM roles lets you share your repositories with only specific people while letting you limit their access to the repository. For example, few users can view the repository, few people can make edits, etc. CodeCommit lets you have a third-step authentication using MFA.
- Hosting: Git is like home for GitHub but not when used with AWS. Hence when GitHub is used with AWS, it’s like a third-party tool. Whereas, CodeCommit is hosted on AWS and managed by AWS, making integrations with CodeBuild and its usage much simpler.
- User Interface: GitHub is fully featured and has a really nice UI. Whereas the CodeCommit user interface is pretty average.
AWS CodeCommit Workflow
Have a look at the below flow diagram to understand the workflow of CodeCommit. It consists of three parts – Development Machine, AWS CLI/CodeCommit Console, AWS CodeCommit Service.
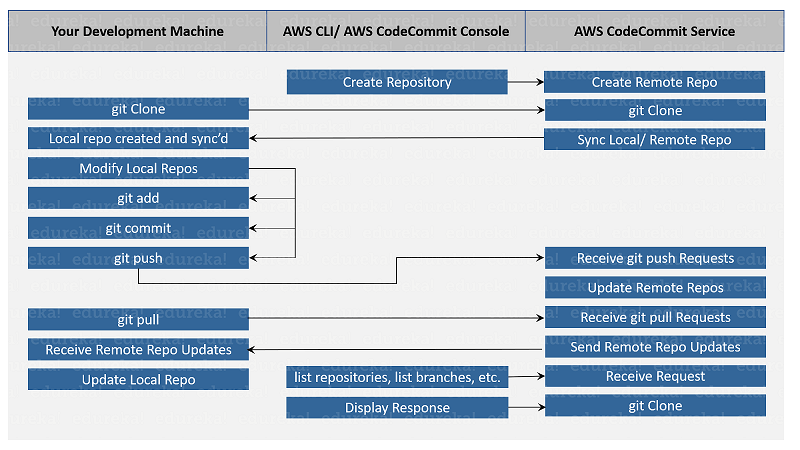
- You can use the AWS CLI or AWS CodeCommit Console to create a repository(remote) which will be reflected onto your AWS CodeCommit Service to start off with your project.
- Do a git clone from your development machine, a git clone request will be received at the CodeCommit service end. This will end up syncing the remote repository created in step 1 and the local repository that was just cloned.
- Use the local repository on the development machine to modify the code. Run git add to stage the modified files locally, git commit to commit the files locally and git push to push the modified changes to CodeCommit. This will, in turn, modify the remote repository.
- Download changes or modifications that are done by other team members working on the same repository using git pull. Update the remote repository and send those updates to your development machine to keep the local repository updated.
Case Study
Let’s have a look at a case study to point out my views better.
About the company:
I’m going to talk about this company called Edmunds.com. It’s an online website/app that lets buyers browse cars, view photos, videos, etc about cars that are out for sale.
Challenges:
Previously used on-premises SCM had a few issues as mentioned below:
- Adding new users to the SCM was difficult
- SCM has a huge operational burden
- Difficult and time-consuming to manage and maintain hardware and software
- Repositories lacked backup
- Repositories lacked clustering capabilities
- Service would suffer from downtime
AWS CodeCommit to the rescue:
Edmunds.com started using AWS’s CodeCommit after researching about many other services. They migrated more than 1,000 repositories and more than 270 users to AWS. CodeCommit handles hosting, maintenance, backup and scaling for the company.
- Fully managed: The company has experienced about 95 percent reduction in the time spent on administration and maintenance.
- Highly Available: Made git repositories highly available by using Amazon’s S3 to store the backup across different Availability Zones.
- Code Efficient: Company is saving across $450 per user manually.
- Flexible: Using Amazon’s CodeCommit made their website to be easily scalable in terms of the number of users making it very flexible.
Demo: Create a Repository In CodeCommit And Explore Its Features
In this section, I’ll demonstrate the creation of a repository on CodeCommit, create a branch, commit changes, view the changes and merge repositories. Let’s have a look.
Step 1: Go to your AWS login page and log into your AWS account. If you do not have an account, proceed by creating a free account. Once you log-in, you should see a page as shown below:
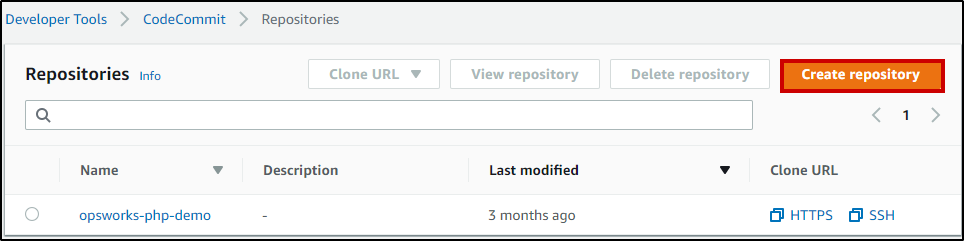
Search for CodeCommit and click on that service. Further, click on Create Repository to create a repository.
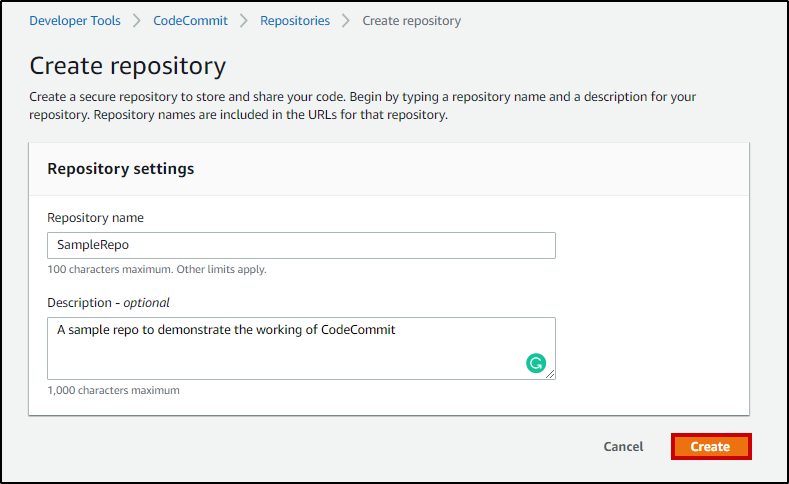
You’ll be prompted to add your Repository Name and Description. Add those and click on Create.
You should get a success message as I got.

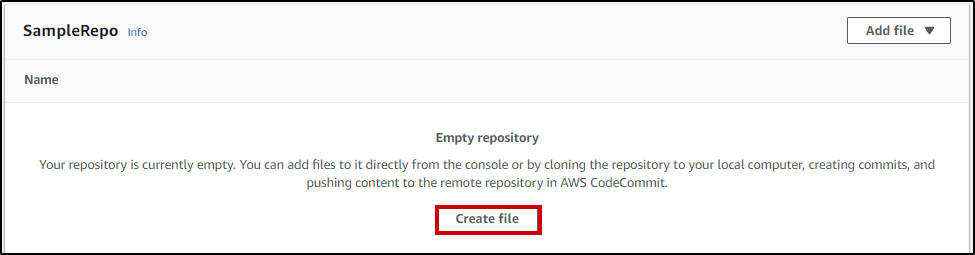
There are two ways of connecting your repository – SSH and HTTPS. In this case, I’ll be using HTTPS. Now that a repository has been created, go ahead and create files in the repository. When you create a repository, it’s always empty. You’ll have to create and add files. Get inside the repository that you’ve created and click on Create file.
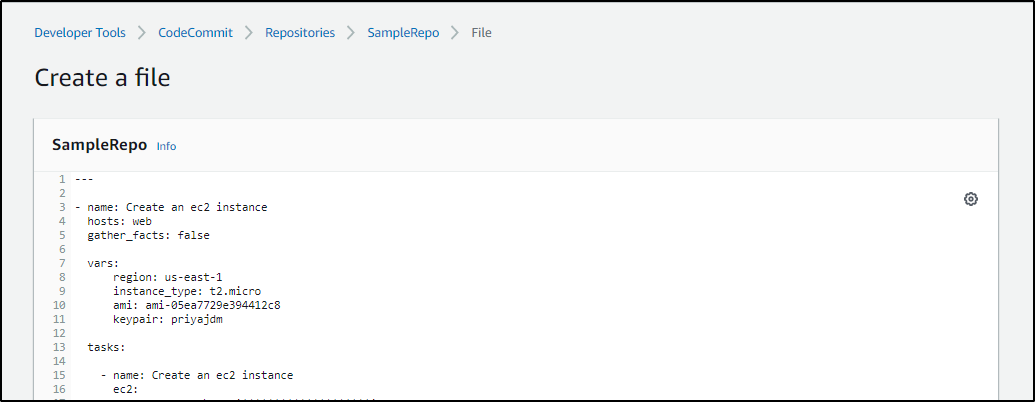
Once you’ve created the file. Go ahead and add code to the file.
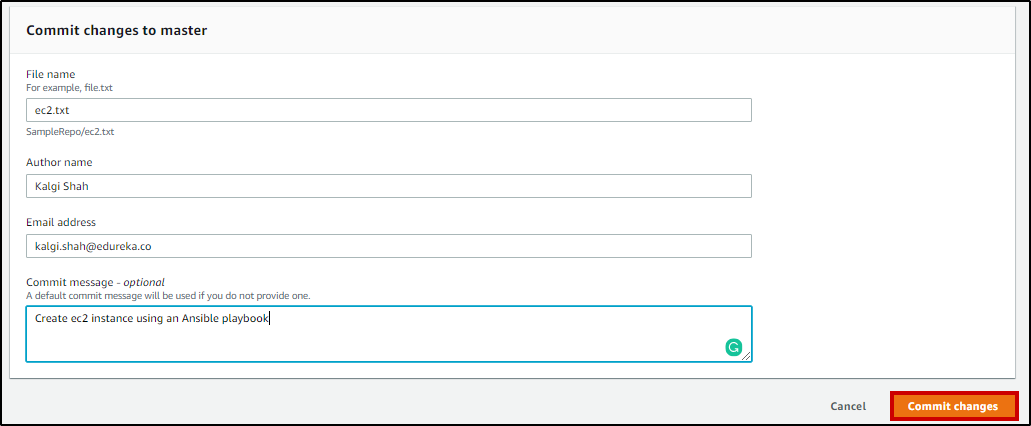
Now that you’ve written your code, you need to commit these changes. Add Filename, Author name, Email ID, Commit message and click on Commit Changes.
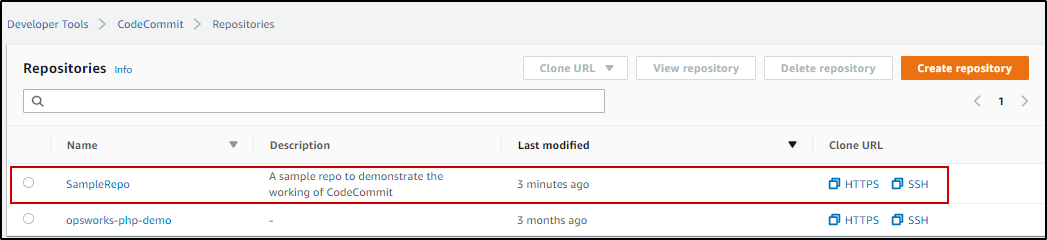
Now when you navigate to the Repository section by clicking on Repository, you should see your repository there.
![]()
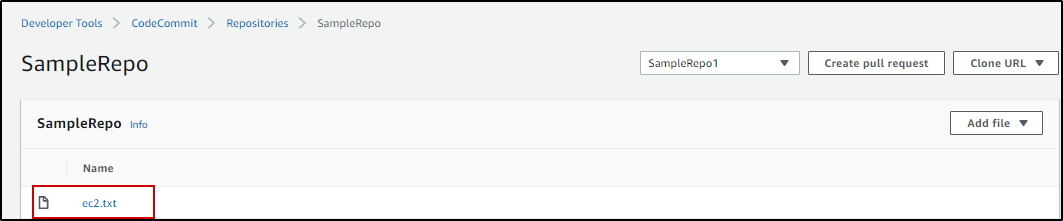
Go ahead and click on your repository, you should see the file that you just created.
What are branches and why are they used
Now that you’ve created a repository, a file and added the code into the file, let’s learn how to create branches. Do you guys know why branches are used? In a Dev or Prod environment, you are not the only one working on these repositories. There are going to be other people working on different sections of the same repository. Different people working on the same file can get confusing.
It’s better to use branches in such situations. Branches are basically copies of the original file which can be allocated to different people. They can make changes, commit them and push it to CodeCommit. After certain tests when these codes are verified, they can be merged with the master branch. In the next section, I’ll explain how to create branches, edit branches, view and compare changes, view commit history and how to merge these branches with the master branch.
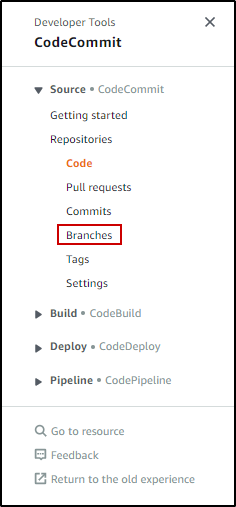
Step 2: To create branches, click on Branches on the extreme right.
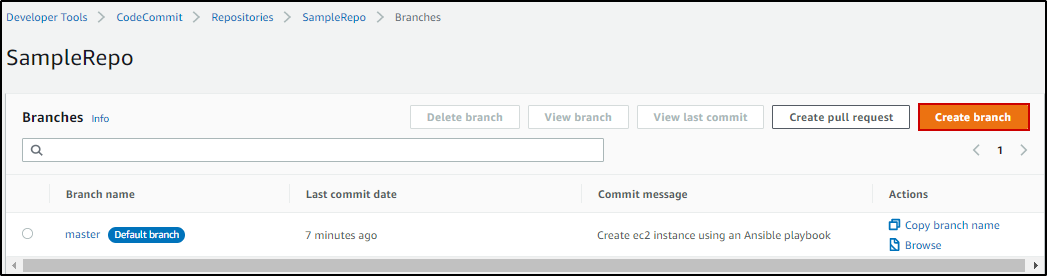
And then click on Create branch on the extreme right top corner as shown below:
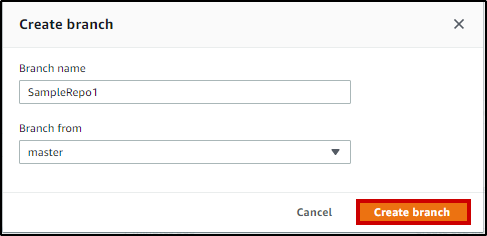
Add branch name and description and click on Create branch.
You should see something similar to this:
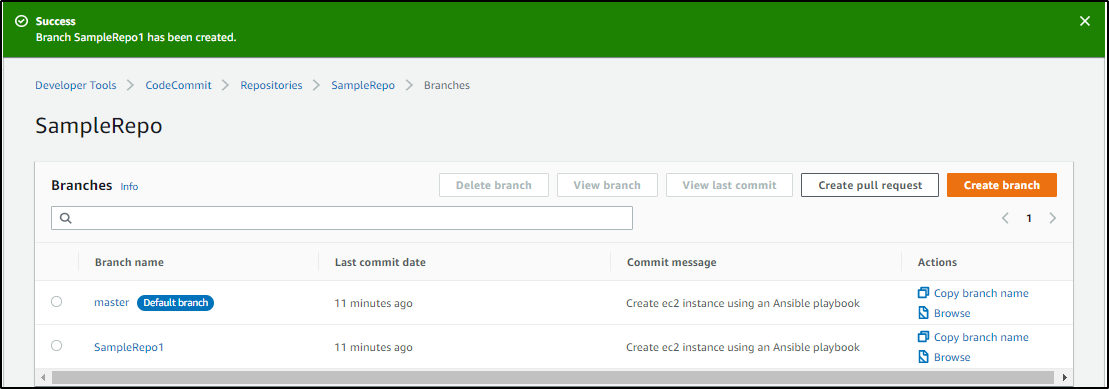
Once you click on the branch, you’ll see that it contains all the files that exist on your master branch.

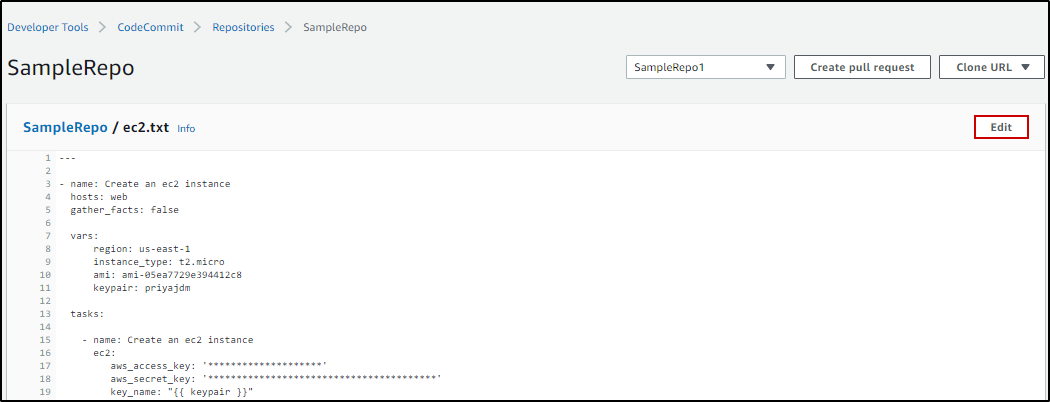
Let’s go ahead and make changes to this branch. Click on the file ec2.txt.
Click on Edit as highlighted below.
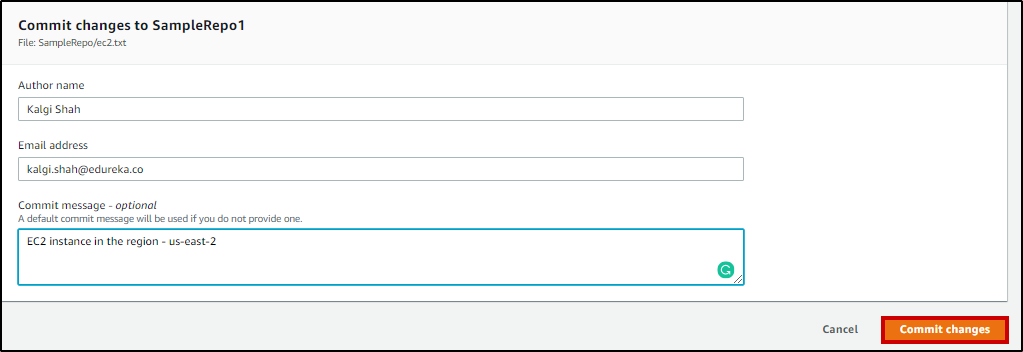
Make the changes as you wish and commit these changes by adding the Author name, Email Address, Commit message. Go ahead and click on Commit changes.
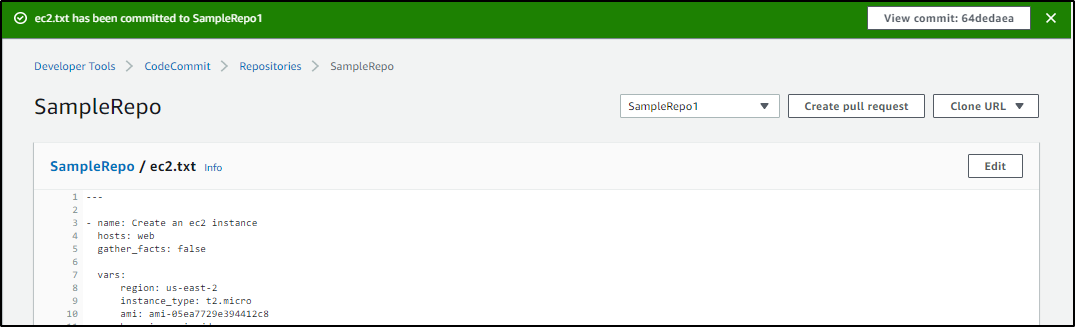
You should get a success message as I got.
Now that you have a master branch and another branch which is a little different than the master branch, let’s compare them to look for differences. Click on Create Pull Request.
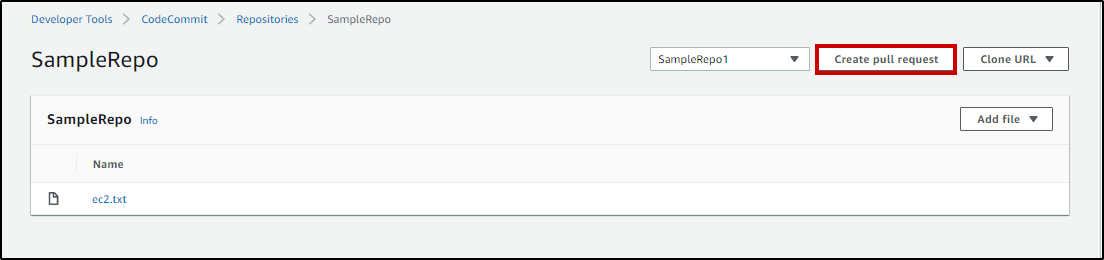
Select the master branch as you’re comparing the current branch with the master branch. Click on Compare.

This highlights all the differences in the master and the other branch.

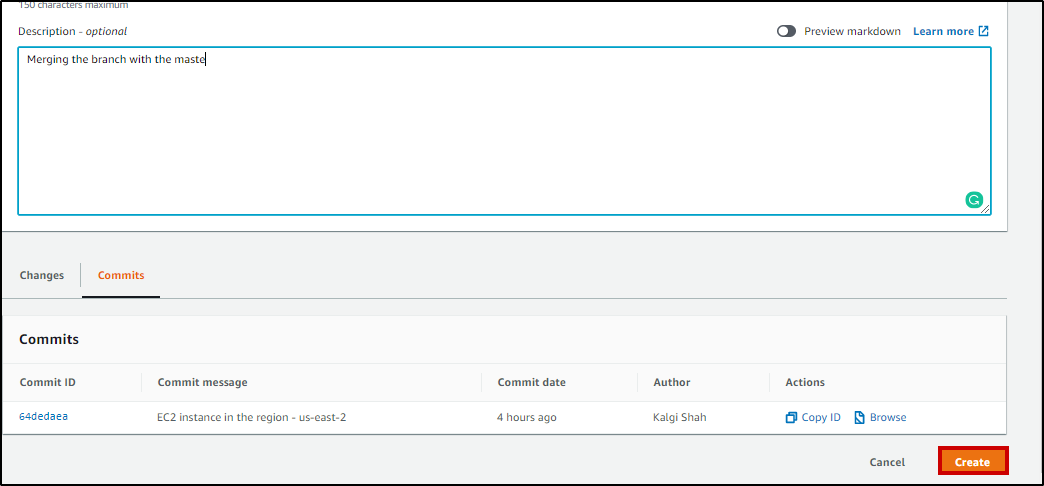
You can also check the commit history. Just click on Commits, next to changes.

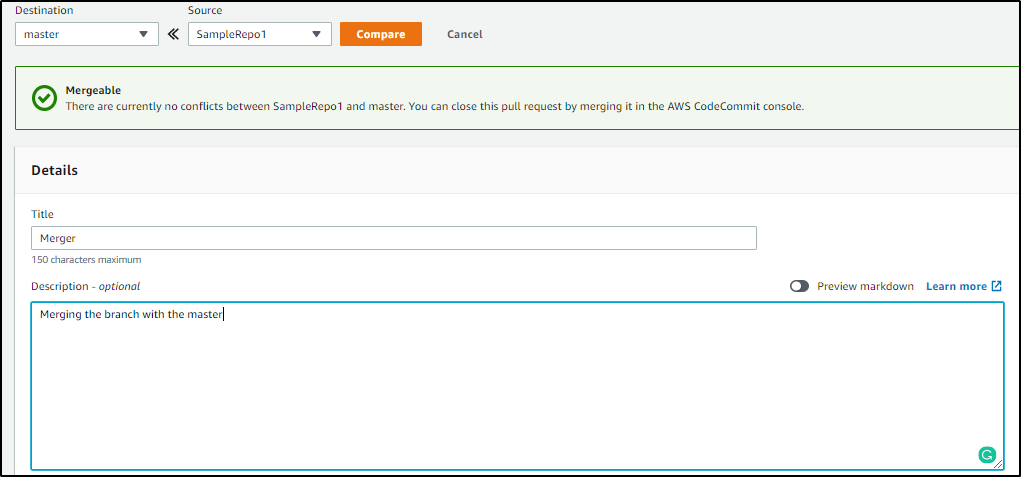
Step 3: Suppose you agree with the changes made in this branch and you’d like to reflect these changes to your master branch, you can merge the two branches. Add Title and Description.
And click on Create.
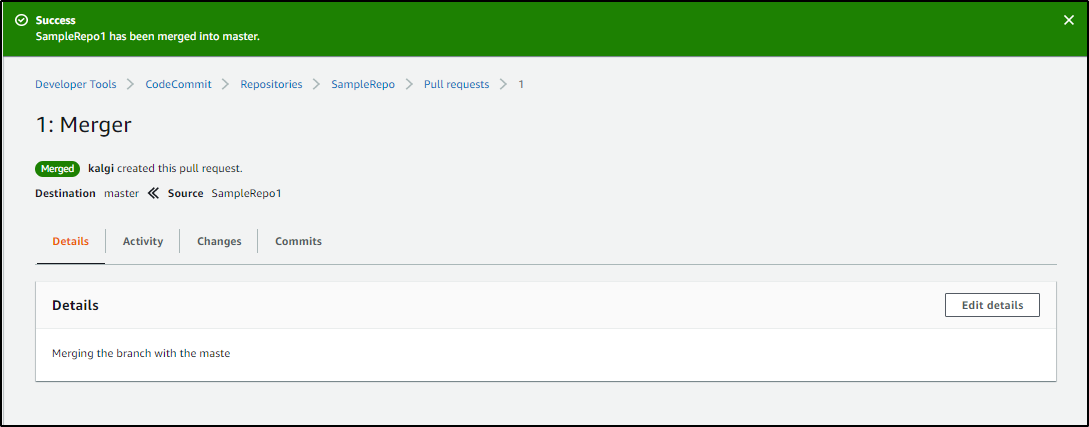
You get a success pull request notification.
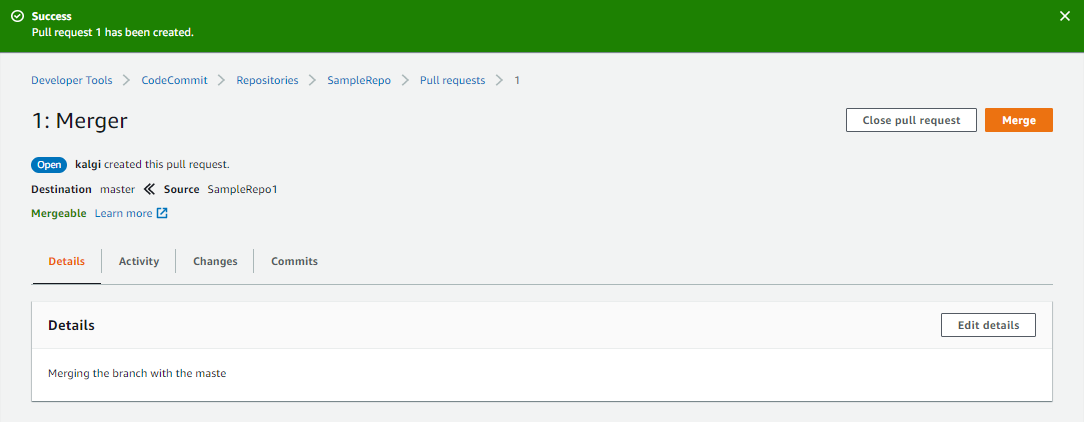
Click on Merge to finally merge the two branches.
This brings us to the end of the AWS CodeCommit blog. You can integrate this service with various DevOps tools and can make the building process easier. I hope this blog was helpful. So, Are you ready to take your skills in AWS to the next level and become an expert in DevOps? Enroll now in our AWS DevOps Certification Course and gain the knowledge and skills needed to design, deploy, and manage robust and scalable AWS infrastructure.
If you wish to learn more about Cloud Computing and build a career in Cloud Computing, then check out our AWS Training which comes with instructor-led live training and real-life project experience. This training will help you understand Cloud Computing in-depth and help you achieve mastery over the subject.
Got a doubt? Please mention it in the comments section or post it on Edureka Community and we will get back to you. At Edureka Community we have more than 1,00,000+ tech-fanatics ready to help.