Automation Anywhere is one of the most popular RPA tools, used by startups to multinational companies to automate different kinds of tasks. This article is going to be a brief guide on Automation Anywhere Installation, where I am going to show you the steps to set up and install the following:
- Pre-requisites
- Installation Modes
- Microsoft SQL Server Setup
- Automation Anywhere Control Room Installation
- Automation Anywhere Enterprise Client Setup
So, if you follow the below steps, you should be able to download and install Automation Anywhere on your Operating Systems, completely hassle-free. Lets, get started.
Before, I tell you how to go forward with Automation Anywhere Installation, let me mention the pre-requisites for the installation.
Pre-requisites
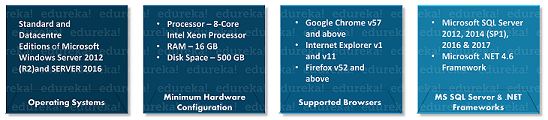
The following are the pre-requisites to install Automation Anywhere on your systems. Now, it may happen that SQL Server might not be present in the system. In, that scenario, you have to install and setup MS SQL Server, before setting up the Control Room.
The next thing, you must know, before installing Automation Anywhere is that there are two installation modes.
If you want a video lecture on the step-by-step installation of Automation Anywhere, you can refer to the following video:
Automation Anywhere Installation | Install and Setup Automation Anywhere Control Room | Edureka
This Edureka video on Automation Anywhere Installation will give you a step by step demonstration of how to install Automation Anywhere in your system.
Find out our Automation Testing Training in Top Cities/Countries
| India | Other Cities/Countries |
| Bangalore | UK |
| Hyderabad | USA |
| Pune | Canada |
| Chennai | Singapore |
Installation Modes
The two installation modes present are as follows:
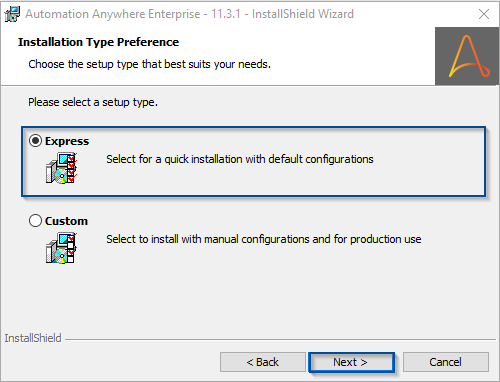
Express Mode
- This mode is used for quick installation with default setup configuration.
- Express mode is recommended when you want to install Automation Anywhere on your device only.
- This mode is mostly recommended for internal use, proof-of-concept, training, and evaluation.
Custom Mode
- This mode is used to configure a customized setup and manually configure various configurations.
- Custom Mode is mostly recommended for an enterprise environment setup where you wish to install Automation Anywhere on multiple systems.
- This mode is used when you need high availability, disaster recovery, and high productivity.
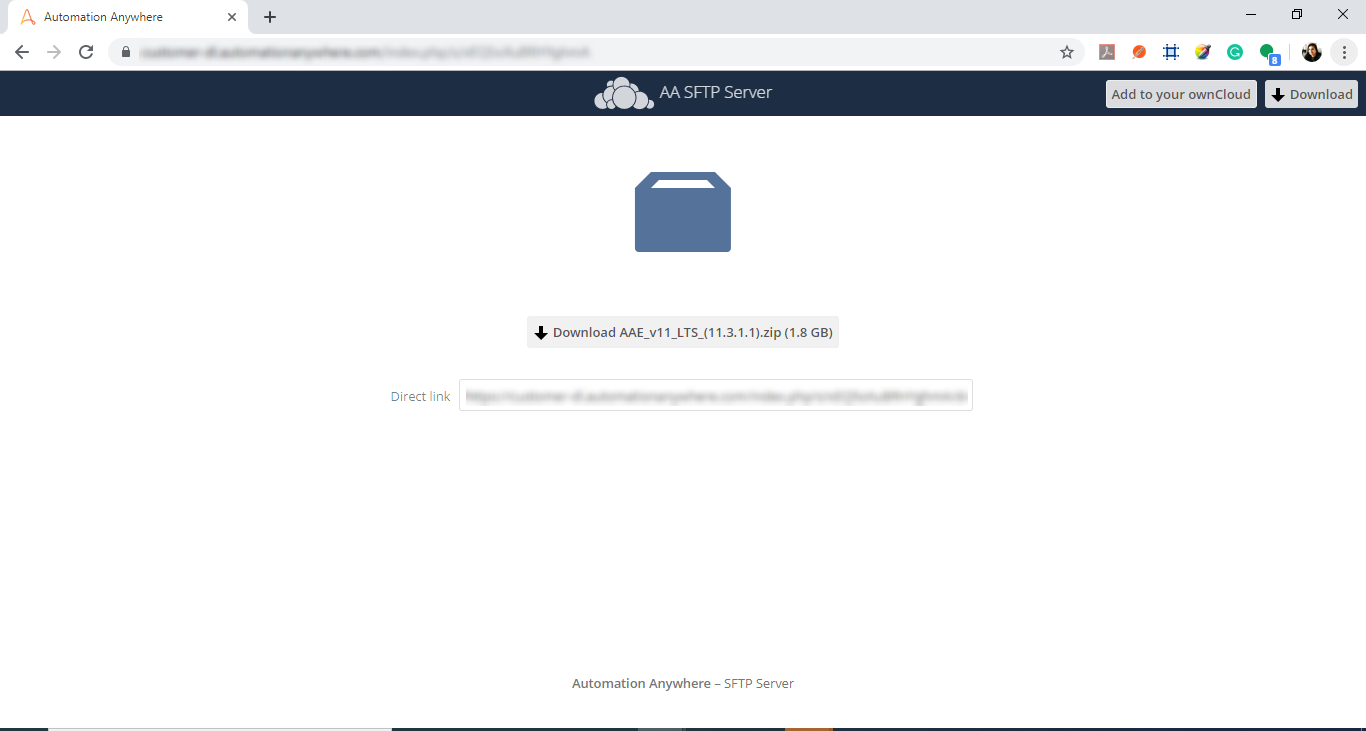
In this article on Automation Anywhere Installation, I am going to use the Express Mode. Now, to install Automation Anywhere Enterprise Edition, you have to first buy their License. Once you take their License, you will get a link, from which you have to download the ZIP folder as below.
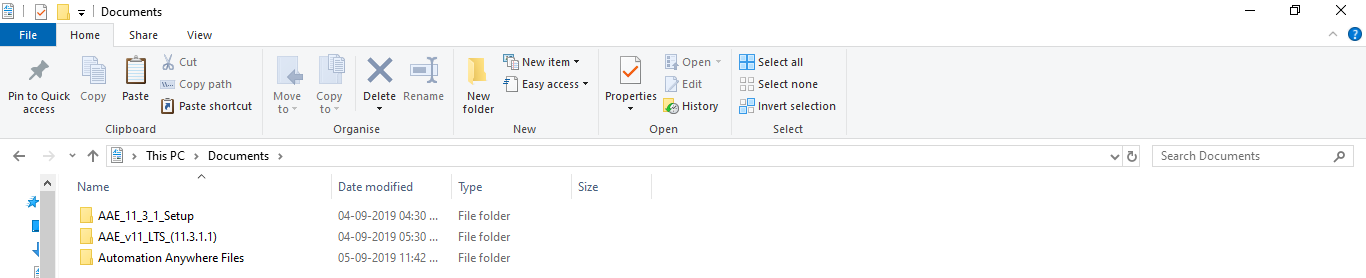
Once, you download, the above folder, unzip the folder, extract all files and then you are good to get started with setting up Automation Anywhere. Refer below.
Automation Anywhere Installation
Now, before I show you how to configure Control Room and Client, let me show you, how to set up of Microsoft SQL Server.
Microsoft SQL Server Setup
To set up the SQL Server, you have to follow the below steps:
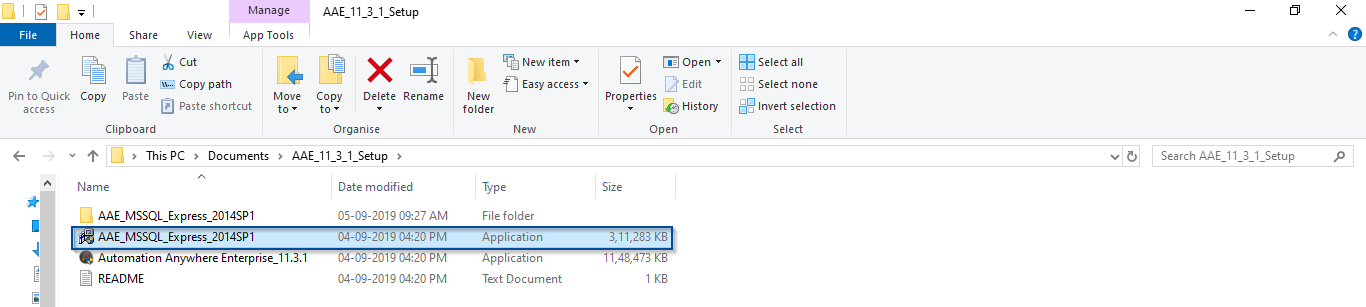
Step 1: Double click on the SQL Server application file to initialize the installation.
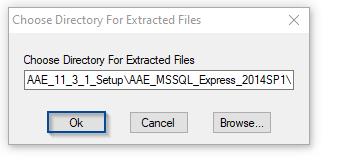
Step 2: Once you double-click on the application file, you will see the below dialog box to choose the directory for the extracted files. Choose the directory for the files and then click on Ok. Here, I will let it be as it is.
 Step 3: Now, once the files are extracted, you will see the below SQL Server Installation Setup wizard. Here, in this wizard, you see two options such as New SQL Server stand-alone installation and Upgrade from SQL Server.
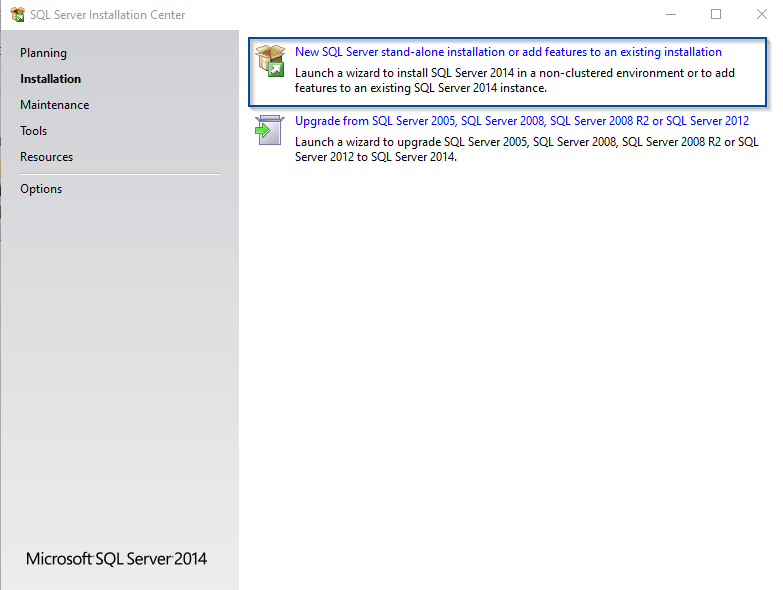
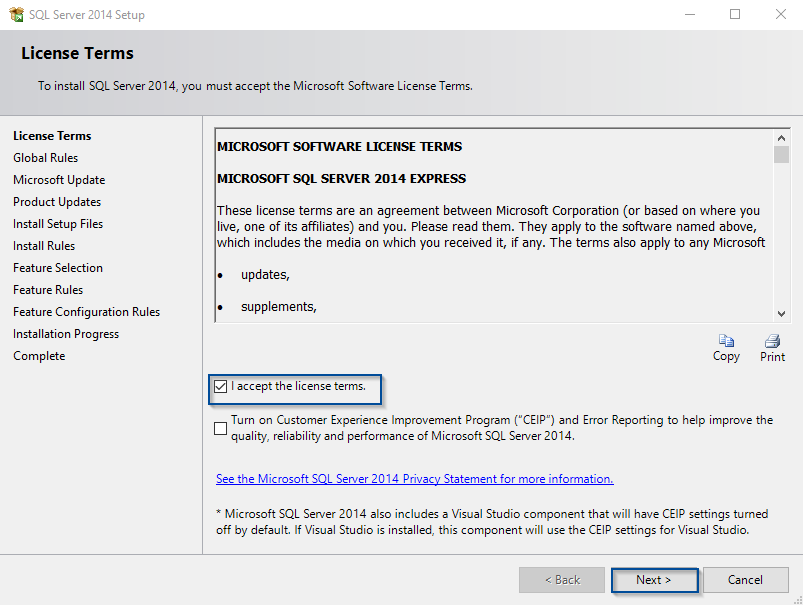
Step 4: In the above wizard, choose the first option i.e. New SQL Server stand-alone installation. Once, you click on the first option, you will see the wizard accept the License Agreement.
Step 5: So, go forward, read and accept the License Agreement by checking the radio button and then click on Next.
Step 6: After that, in the Global Rules section, if all the parameters are successful, then it will automatically move forward to the Microsoft Update.
Note: In the Global Rules section, if the restart fails, then you have to restart your system before installing SQL Server.
Step 7: Then, just click on Next in the Microsoft Update Wizard. Refer below.
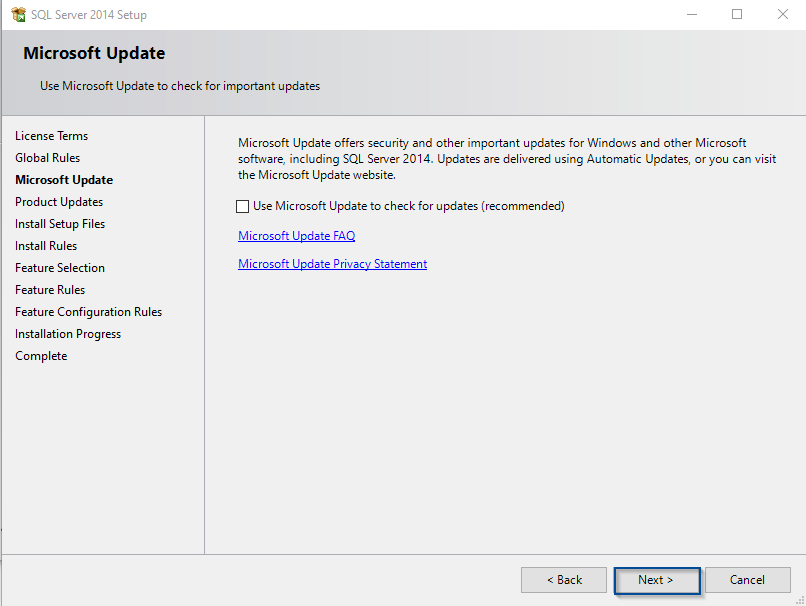
Once, you click on Next, the installation will continue automatically till Feature Selection section.
Step 8: Then, in the Feature Selection section, make sure all the checkboxes are selected. Then check the Instance root directory, Shared feature directory and Shared feature directory(x86). After that, click on Next. Refer below.
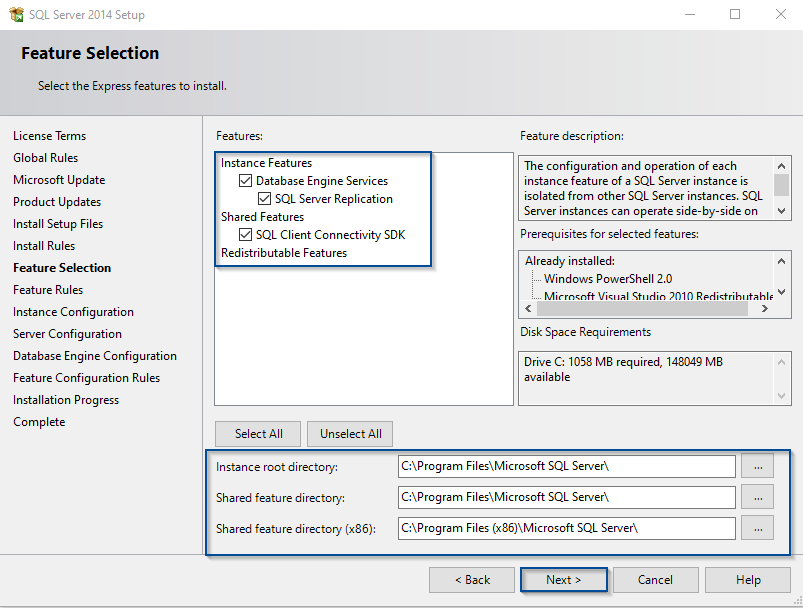
Once, you click on Next, the installation continues till the Instance Configuration section.
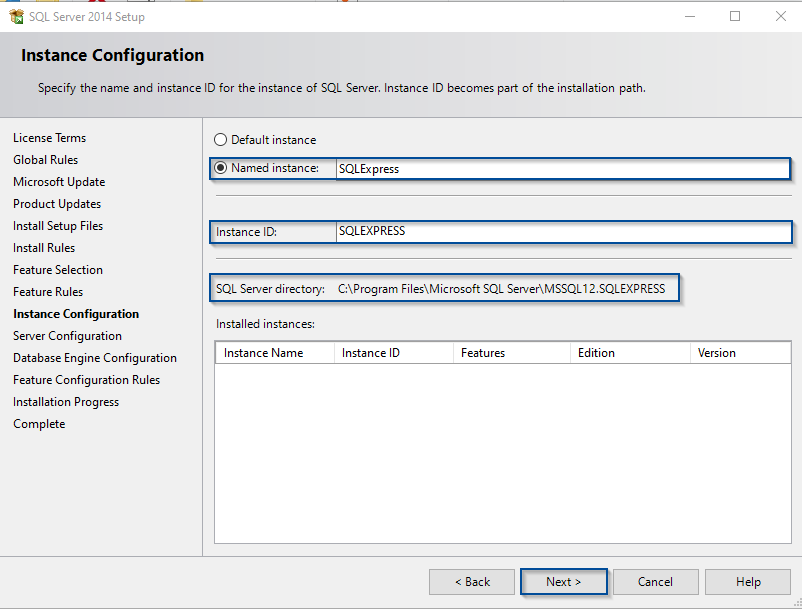
Step 9: In this section, you have to choose the name of the instance and the Instance ID. Here, I will let it be as it is, i.e. SQLExpress. Then, click on Next.
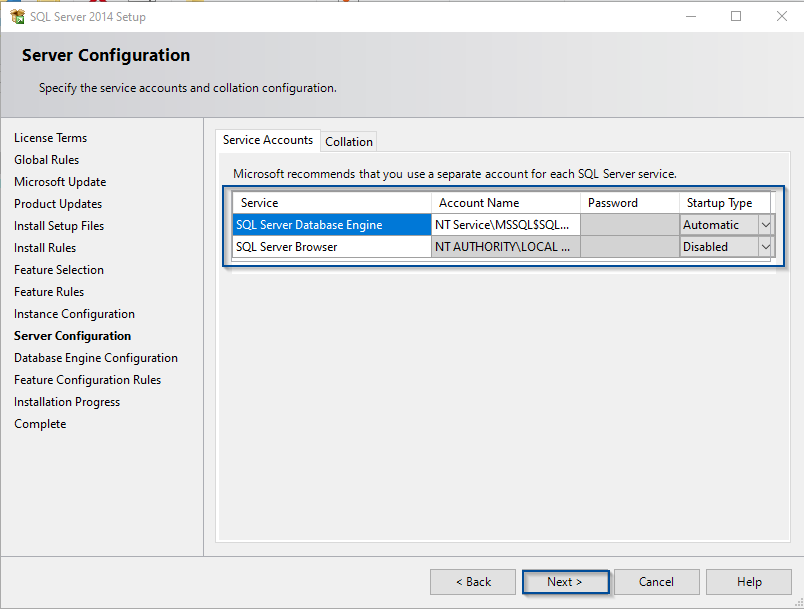
Step 10: Once, you click on Next, you will re-directed to Server Configuration wizard where you have to make sure that SQL Server Database Engine’s startup type is Automatic and SQL Server Browser is Disabled. Then, click on Next. Refer below.
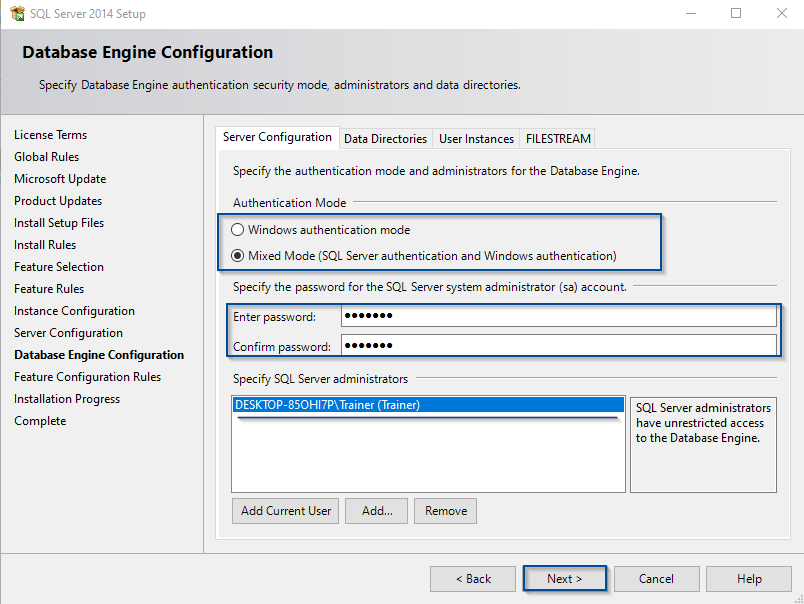
Step 11: In the next wizard, you have to choose the authentication mode. Here I will choose the Mixed Mode. Then, you have to enter the password and confirm the password. After that check, the device used as SQL Server Administrator and click on Next. Refer below.
Step 12: As soon as you click on Next, the installation will continue and once it finishes, you will see the following wizard.
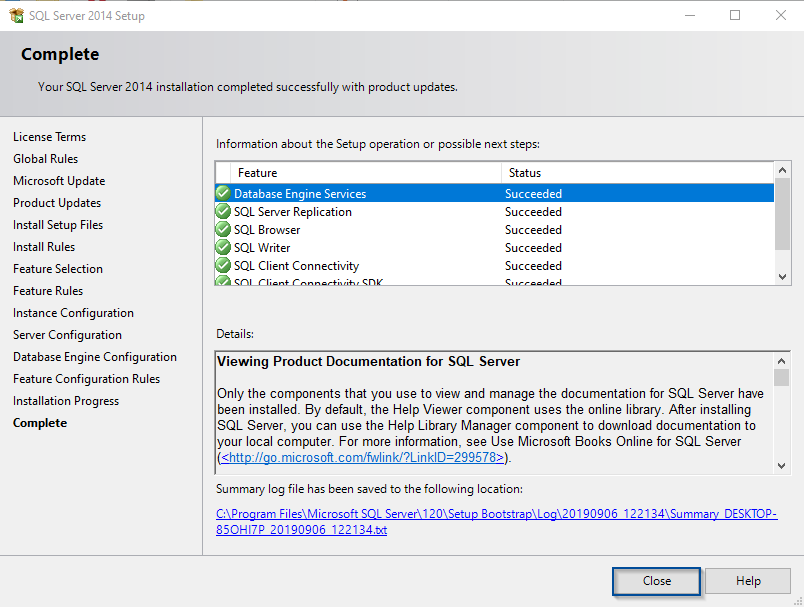
The above wizard will display all the features installed with SQL Express. Then, just click on Close to close this wizard. Now, once the installation is completed, you have to enable the TCP/IP Port and make sure that your system is connected to the SQL Server database. To do that, follow the below steps:
Check Connection of SQL Server
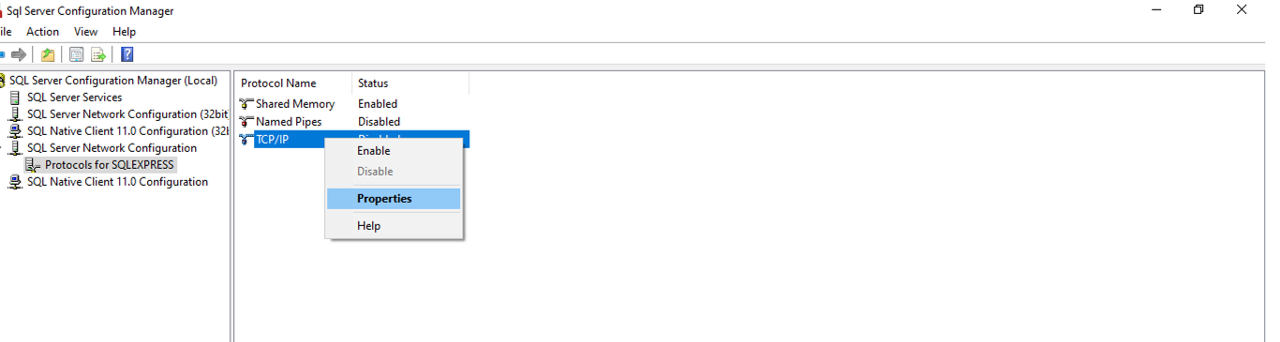
Step 13: Go to SQL Server 2014 Configuration Manager, choose Protocols for SQLEXPRESS under SQL Server Network Configuration. Then, right-click on the TCP/IP section and choose Properties.
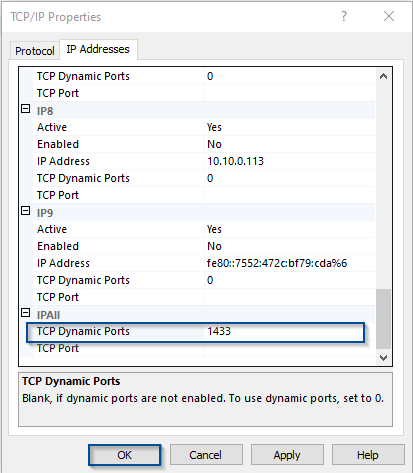
Step 14: After that, go to the IP Addresses tab in the dialog box which opens and scroll down to the end. You will find an IPAll section. Here, mention the port number in the Dynamic Ports section as 1433. After that, click on OK. Refer below.
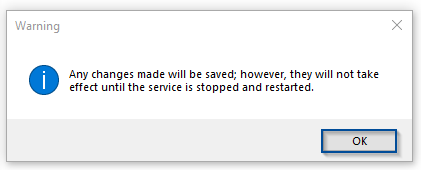
You will see a dialog box showing warning, as below. Click on OK.
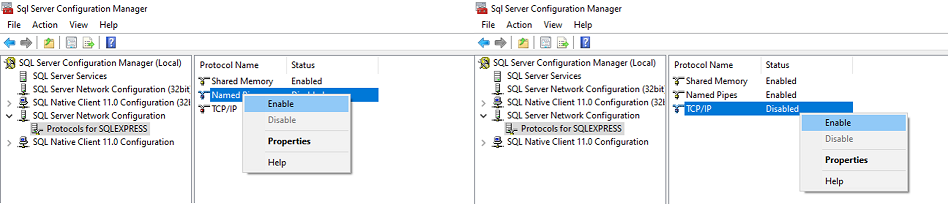
Step 14: Now, you have to enable Named Pipes and TCP/IP services, by right-clicking on both of them and choosing the Enable option.
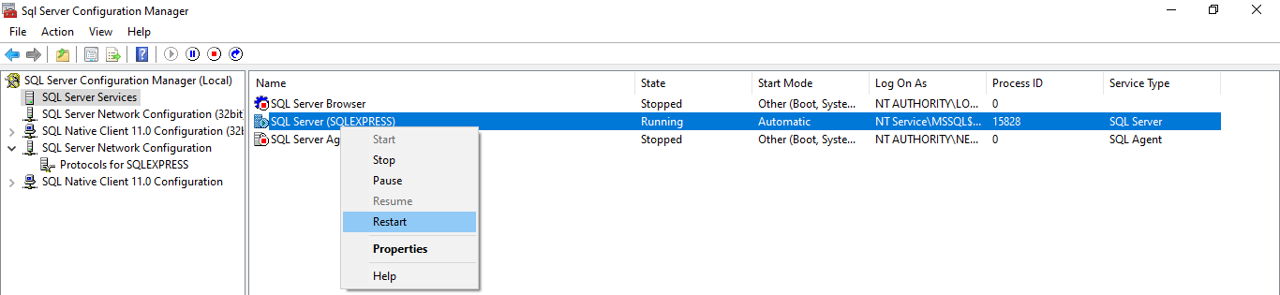
Step 15: Then, you have to go to the SQL Server Services section, and then restart the SQL Server(SQLEXPRESS) service, by right-clicking on the server and choosing the option to restart the service.
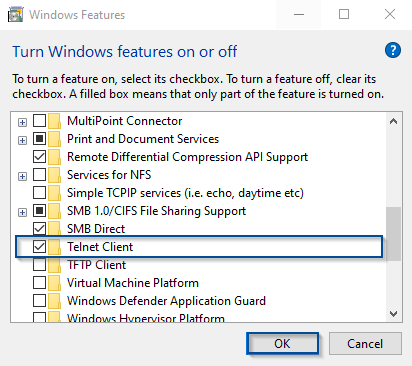
Step 16: Once, the service has been restarted, you have to check whether your system is connected to the SQL Server or not. To do that, you have to enable the Telnet Client. So, to enable the Telnet Client, go to Control Room -> Programs -> Programs and Features -> Turn Windows Features On or Off.
Step 17: In the dialog box, which opens up, choose Telnet Client and click on OK.
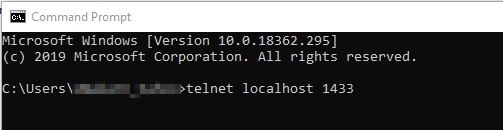
Step 18: After that, go to the command prompt, and mention telnet localhost 1433 as below. If you see an output as connecting to localhost your system is connected to the SQL Server.
With this, we come to an end to setup and installation of Microsoft SQL Server. Now, let us understand, how to set up and install Automation Anywhere Control Room.
Become certified with Automation testing certification today and enjoy higher salaries.
Automation Anywhere Control Room Installation
To setup Automation Anywhere Control Room, you have to follow the below steps:
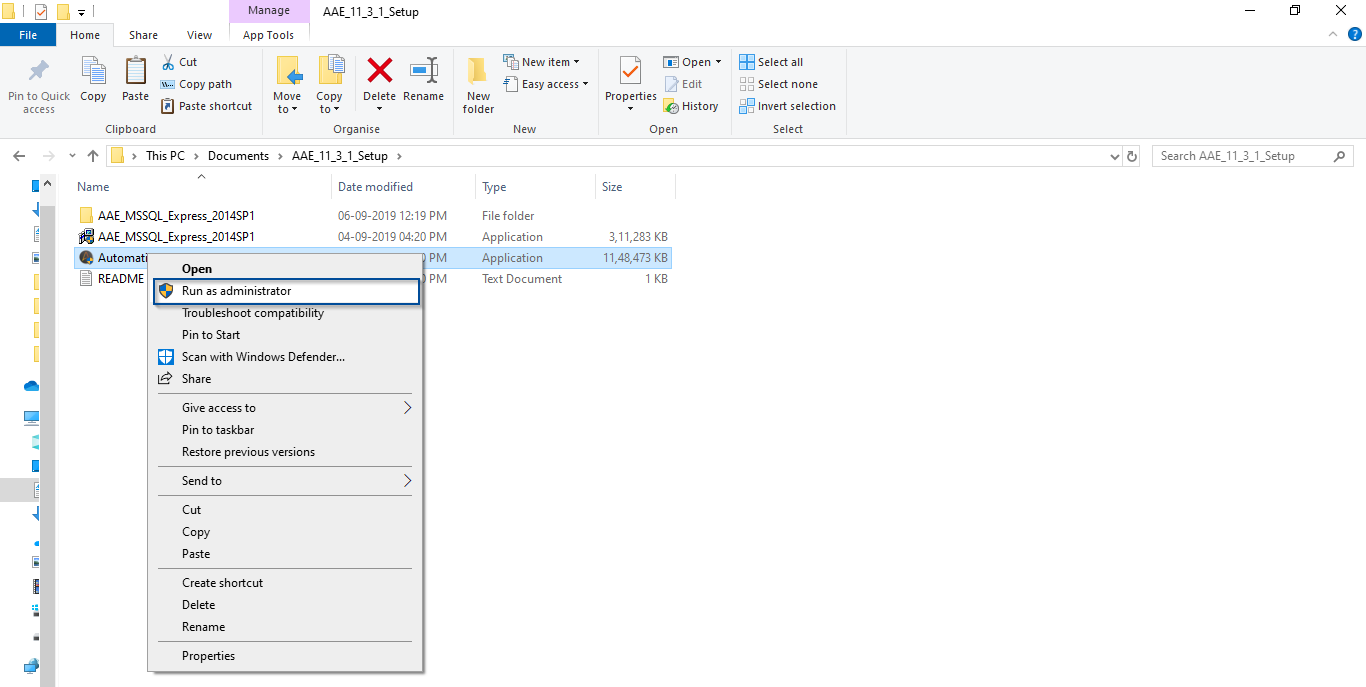
Step 1: Go back to the initial folder, and then right-click on the application and choose Run as Administrator. Refer below.
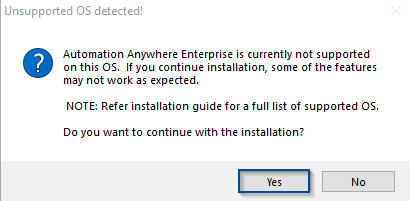
Once, the installation is initialized, you will see the below dialog box throwing a warning. Just click on Yes.
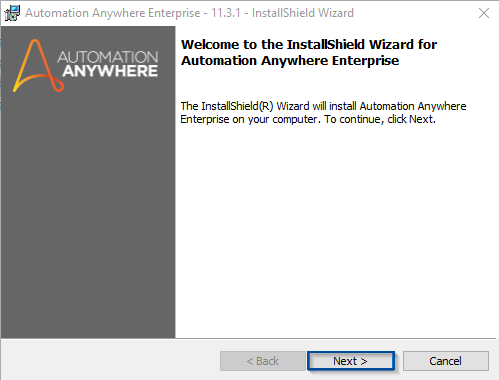
Step 2: Once the below wizard opens just click on Next.
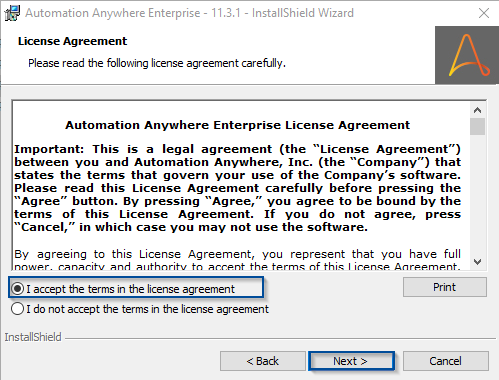
Step 3: In the next dialog box, which opens up you have to accept the License Agreement, by clicking on the radio-button. Then click on Next. Refer below.
Step 4: After that, in the next wizard as below, you have to choose the installation mode. As mentioned before, I will install the Control Room using the Express Mode. So, I will check-in the Express Mode and click on Next.
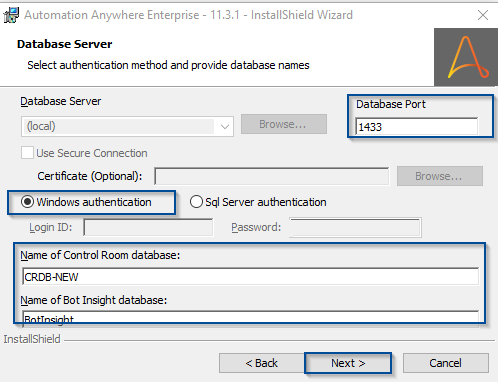
Step 5: Next, you have to check the configurations of Database Configuration in the below wizard and then click on Next. The following should be the configuration:
- Database Port – 1433
- Authentication Mode – Windows Authentication
- Name of Control Room Database – CRDB-NEW
- Name of BotInsight – BotInsight
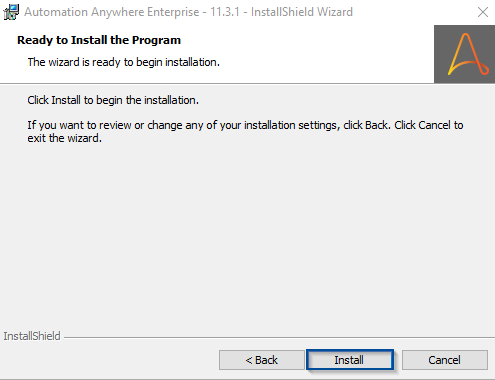
Step 6: Once, you click on Next, you see a wizard which says Ready to Install the Program. So, if you have checked all the required details, go forward and click on the Install option.
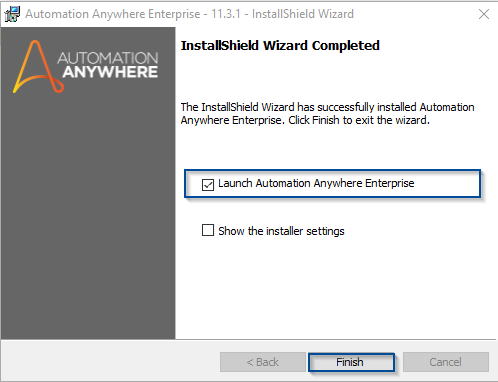
Once the installation is complete, you see an installation completed wizard as below. In this wizard, you can check-in the option, to Launch Automation Anywhere Enterprise. Then, click on Finish.
Now, this ends your installation of Automation Anywhere Control Room. Lets, next see how to set up Control Room.
Set Up Automation Anywhere Control Room
Step 7: So, as soon as you finish installing Automation Anywhere Enterprise, the Control Room will be automatically launched. Here, you have to mention the details of the Control Room administrator as below to create the first user in Control Room:
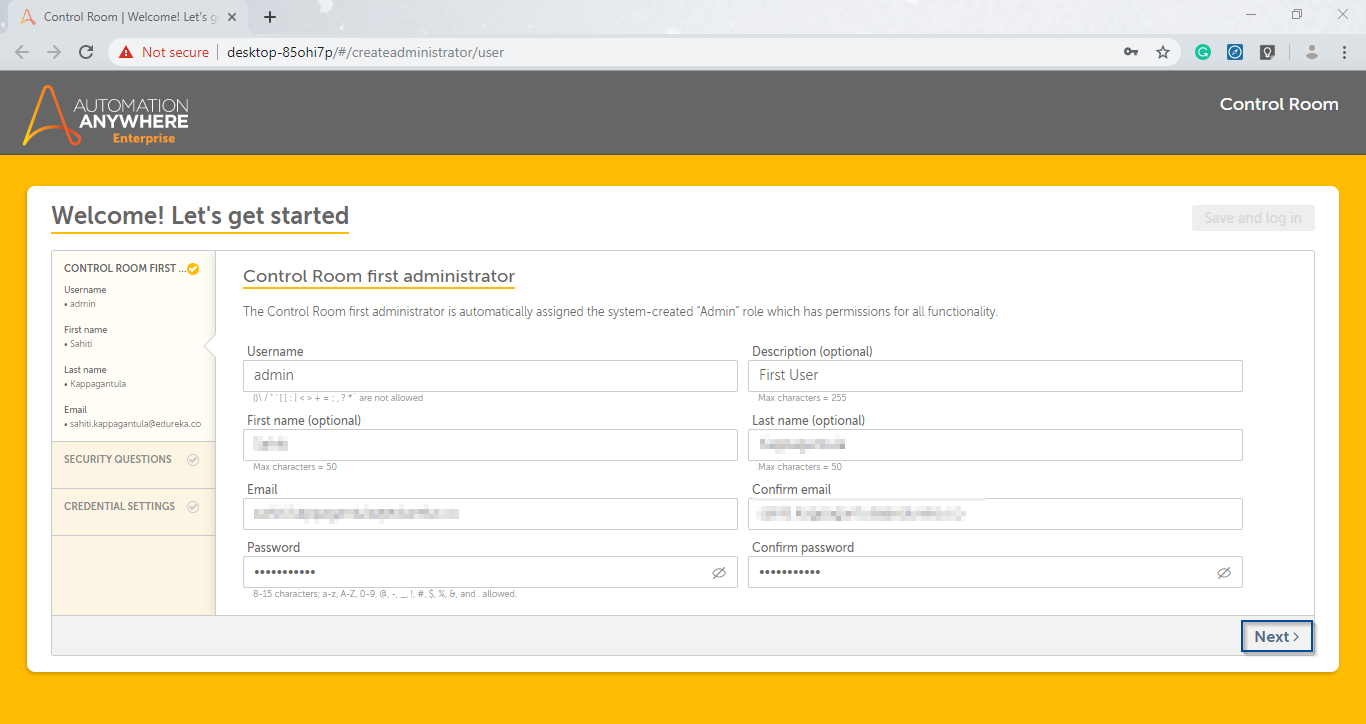
Then, click on Next.
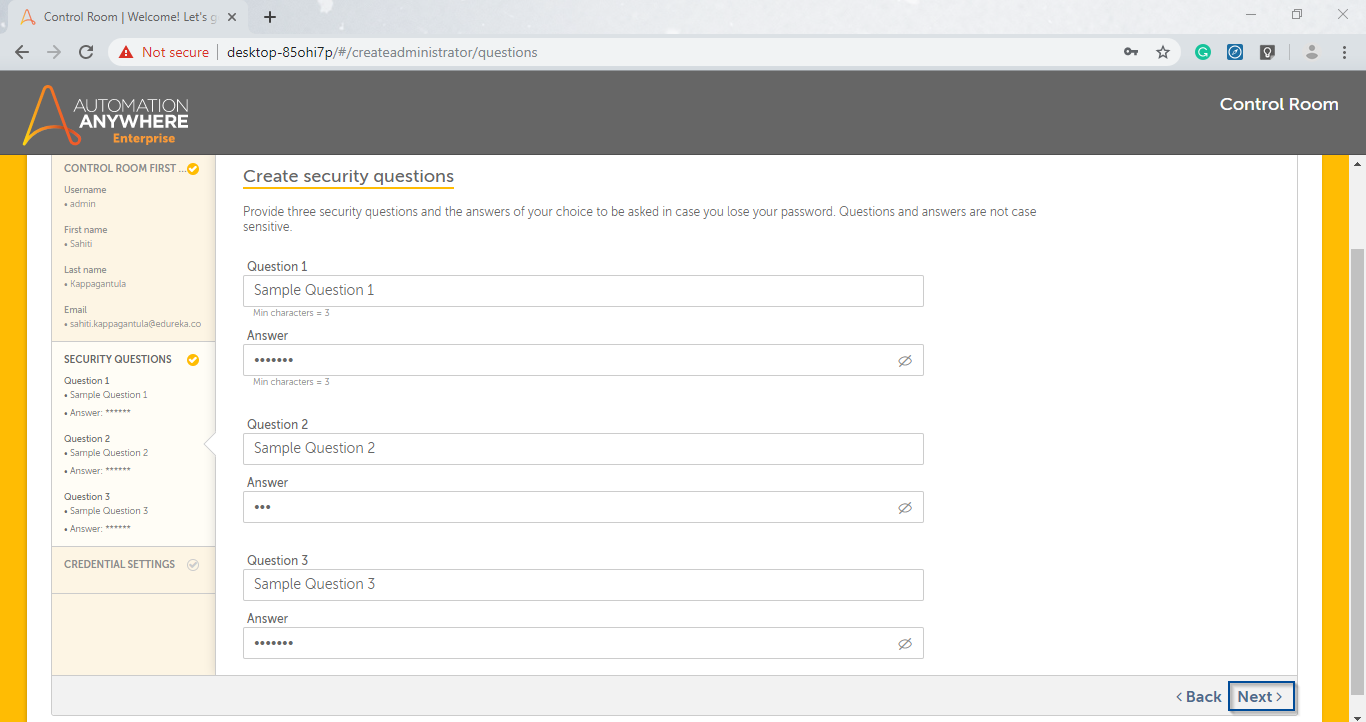
Step 8: After that, mention 3 security questions and answers as below. After that, click on Next.
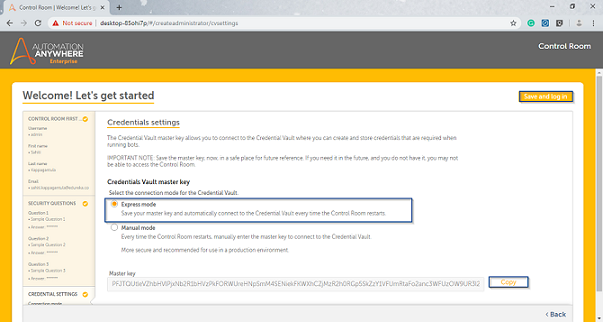
Step 9: Next, you have to choose the connection mode for the Credential Vault from the below page. Since I have installed using the Express Mode, I will choose the Express Mode radio button and the save the Master Key for future purpose. Then, click on Save and Log in.
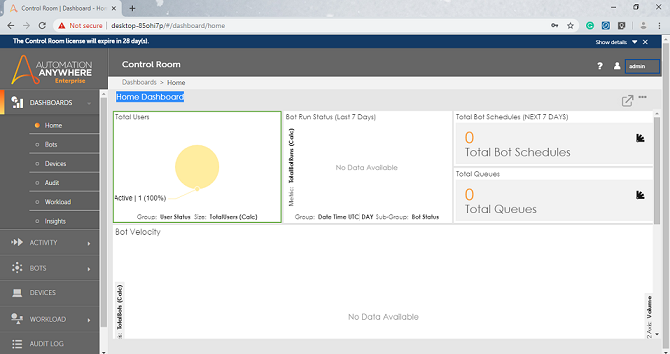
You will be logged in as the admin now. Refer below.
So, that’s how folks you can set up and install and Automation Anywhere Control Room. Now, let us see how to set up and install Automation Anywhere Enterprise Client.
Automation Anywhere Enterprise Client Setup
To setup Automation Anywhere Enterprise Client, you have to follow the below steps:
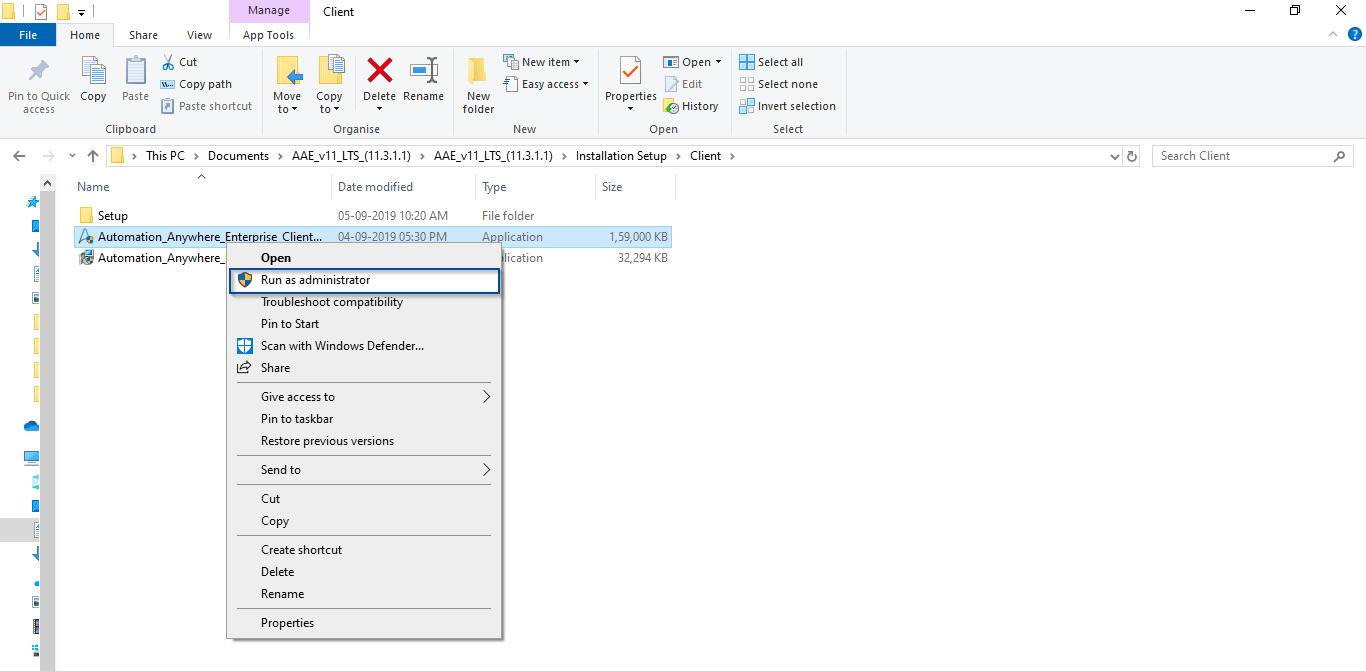
Step 1: Go to the Setup folder of Automation Anywhere Enterprise Client and right-click and choose Run as administrator.
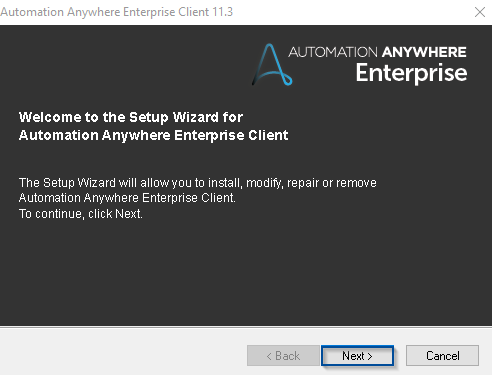
Step 2: In the wizard, which opens, click on Next, to begin the installation.
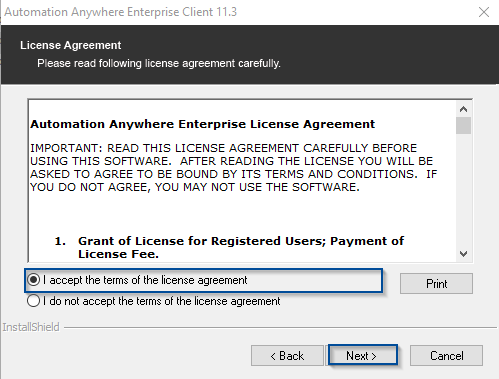
Then, read and accept the License Agreement by clicking on the radio button. Then, click on Next.
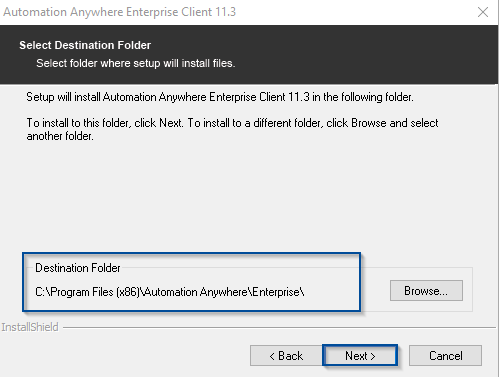
Step 3: After that, choose the destination folder and click on Next.
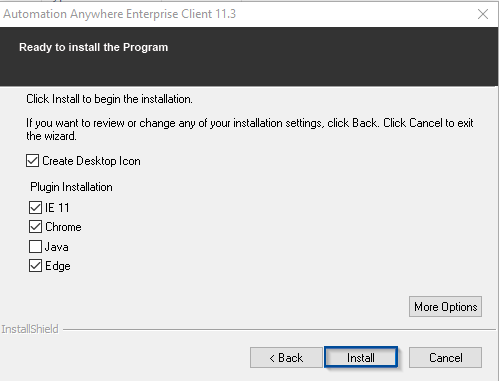
Step 4: Once, you click on next, you see a ready to install wizard as below. Here, click on Install.
Step 5: After the installation is complete, you see a wizard as below.
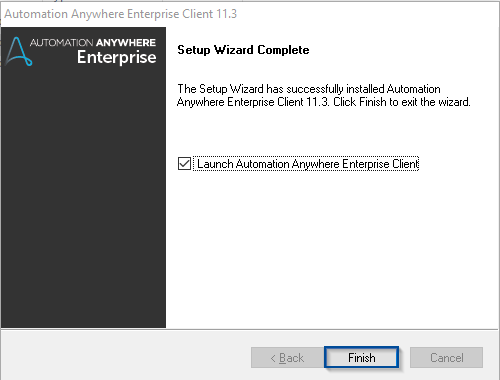
Click on Finish, in the above wizard.
With this, we come to an end to the installation and setup of Automation Anywhere Enterprise Client. Now, to login to Client, create a user in Control Room, and then use its credentials to login on the Client. You can refer to my article on Control Room, where I have shown how to create a role, create a user, and upload a bot on Control Room from Enterprise Client. Also, if you wish to practice a few use-cases on how to automate tasks using Automation Anywhere, you can refer to my article on Automation Anywhere Examples.
So, folks, we come to an end to this article on Automation Anywhere Installation. I hope you found this article informative.
We at Edureka, offer instructor-led Automation Anywhere Training. Edureka is a trusted online learning company with a network of more than 250,000 satisfied learners spread across the globe. This training will help you gain deep knowledge in Robotic Process Automation and hands-on experience in Automation Anywhere.
Got a question for us? Please mention it in the comments section of this Automation Anywhere Installation article and we will get back to you.