


AWS Certification Training Course for Solutio ...
- 165k Enrolled Learners
- Weekend/Weekday
- Live Class
(66000)
The more clues a detective has, the easier it gets for him to solve the case. That’s exactly how a load balancer works. The more information a load balancer has, the better it works. In this blog, I’m going to talk about Application Load Balancer and how it distributes incoming traffic by getting greater access to packet headers, HTTPS and HTTPS details.
Topics covered:
I’m sure you guys have heard about the OSI Model. It’s a 7 Layer architecture with each layer performing a special task in transferring data across the globe. These Layers include – Physical layer, Data Link Layer, Network Layer, Transport layer, Session layer, presentation Layer and Application Layer. Application Load Balancer operates on the 7th layer of the OSI Model as the name suggests. It has the ability to examine the application-level content and route the traffic based on this acquired information. Application-level content includes packet details, HTTP and HTTPS details. This makes the routing easier, faster and much more efficient. It’s one of the most widely used ELB.
Application Load Balancer consists of listeners and rules. When a client makes the request, the listener acknowledges it. The rules are guidelines that govern the routing of each client request once it’s heard by the listener. The rules consist of three components – Target group, Priority and Conditions. Target Groups consists of registered targets(servers where the traffic is to be routed). Each target group routes requests to one or more registered targets, such as EC2 instances, using the protocol and port number that you specify. So basically, when the listener gets the request, it goes through priority order to determine which rule to apply, analyzes the rules and based on condition, decides which target group gets the request.
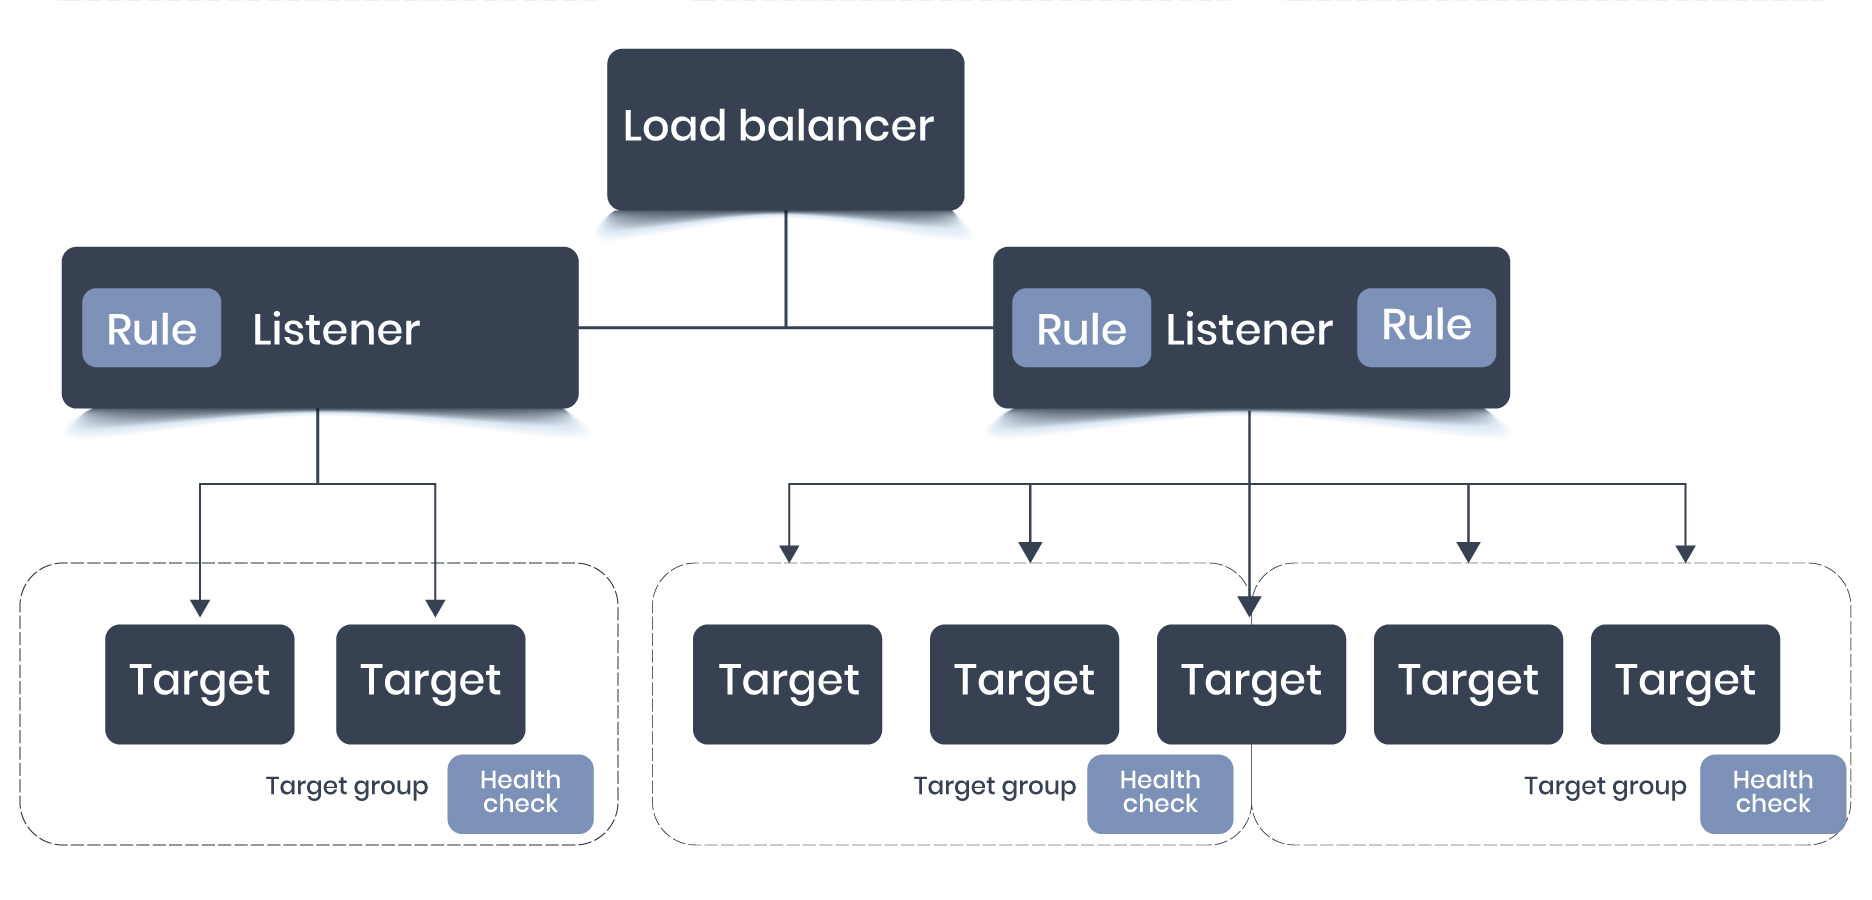
You can always add or remove targets from your load balancer as and when needed, without disrupting the overall flow of the requests to your application. ELB scales your load balancer dynamically, i.e. as traffic on your application changes over time keeping your application prepared for various situations.
Content-Based Routing: Application Load Balancer has to access HTTP headers and hence routes the traffic based on it.
Support for Container-Based Application: With the powerful concept of containerization, most of the users are packing their microservices into containers and hosting them on EC2 instances. This allows a single EC2 instance to run multiple services. Application Load Balancer supports these container-based applications. One instance can host multiple containers and listen on multiple ports, behind the same target group. It also performs fine-grained, port-level health checks.
Better Metrics: Application Load Balancer performs health checks on a per-port basis and also generates a report. Health check specifies a range of acceptable HTTP responses. These health checks are also accompanied by detailed error codes.
Path-Based Routing: Application Load Balancer supports path-based and host-based routing which is not the case with Classic load balancer. You can route requests to multiple domains using a single load balancer.
Register IP Address and Lambda Functions: Besides registering EC2 instances, you can also register IP addresses and Lambda functions to your target. And hence you can also register targets that are outside the VPC.
Provides Additional Protocols and Workloads:
Application Load Balancer provides two additional protocols – HTTP/2 and WebSocket
HTTPS/2: This protocol supports multiplexed requests across a single connection. This reduces Network traffic.
WebSocket: This protocol allows you to set up a long-lasting TCP connection between the client and the server. This protocol is way more efficient compared to the older methods.
Let’s understand Application Load Balancer better by creating one and using it. In this demo, I’m going to create two EC2 instances, deploy Nginx web server on both of them with different HTML output(easy to differentiate between them), create an application load balancer, register these two instances to that load balancer and check if the web server deployed on the instances can be accessed from the load balancer DNS. Let’s get started.
Step 1: Create two EC2 instances and connect your instances to either Putty or cmder.
Step 2: Install Nginx web server on both the instances. Execute the following commands for installing Nginx:
$ sudo apt-get update
$ sudo apt install nginx
$ sudo ufw app list
$ sudo ufw allow 'Nginx HTTP'
$ sudo ufw status
Copy the public IP of the instances and paste it on a browser like a URL, to check if Nginx has been installed successfully.
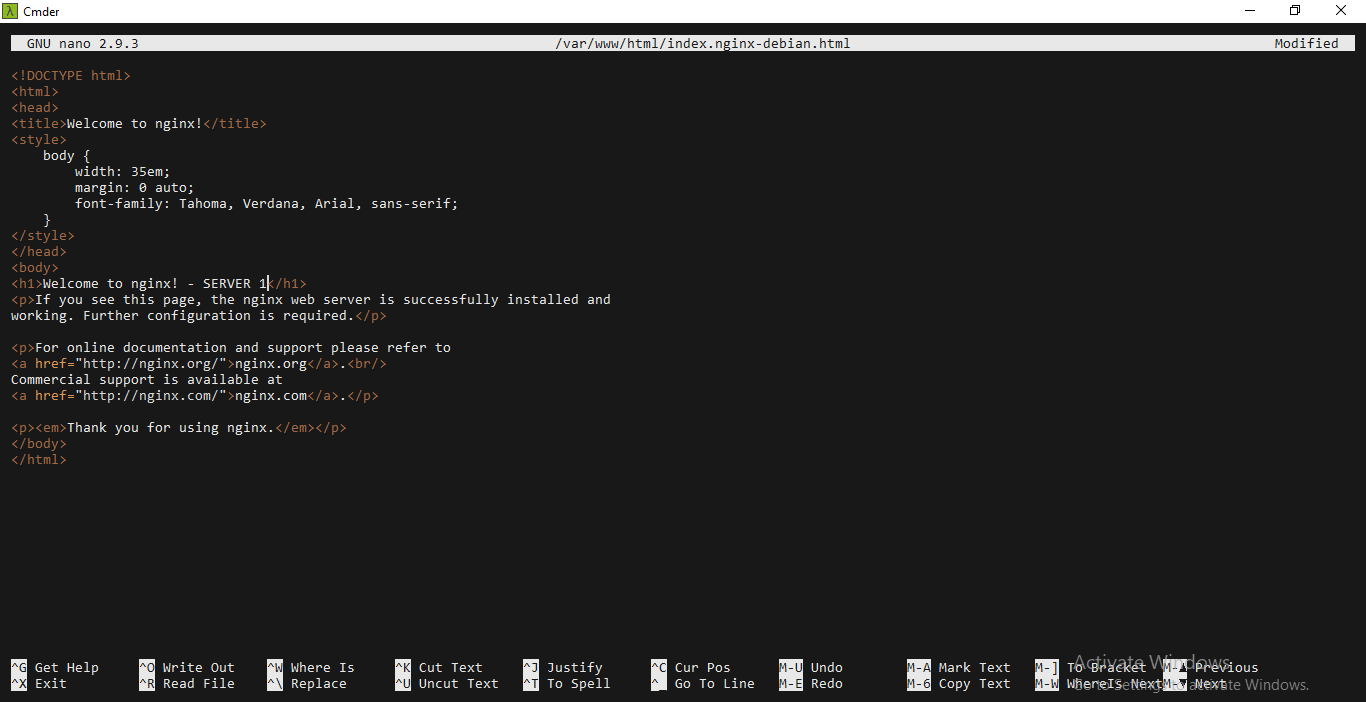
Step 3: Change the HTML output of the Nginx web server to avoid the confusion between the deployments on both instances.
$ cd /var/www/html
$ sudo vi index.nginx-debian.html
Change the content of the H1 tag as “Welcome to Nginx! – SERVER 1”. Do the same on the other instance except, change it to “Welcome to Nginx! – SERVER 2”.
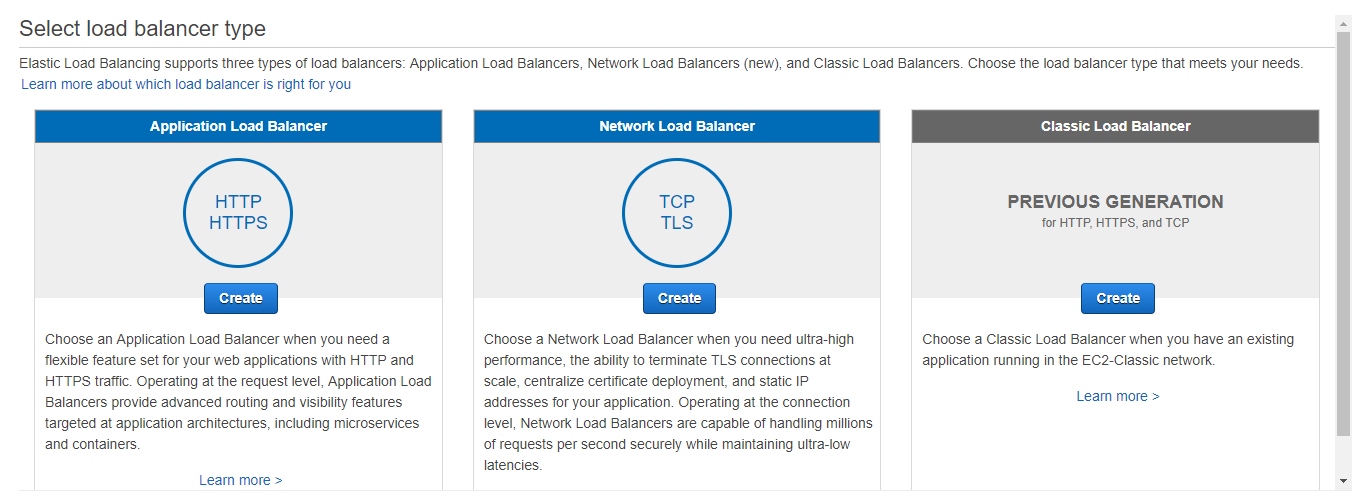
Step 4: Create an Application Load Balancer. In the navigation pane, under LOAD BALANCING, choose Load Balancers and click on Create under Application Load Balancer.

You’ll be navigated to another page, Choose Create Load Balancer there.
Let’s Configure the Load Balancer. For Name, type the name you would like your Load Balancer to have. For Scheme either select Internet-facing or Internal. In this case, I’ve chosen internet-facing. Internet-facing basically routes requests from clients to the target over the internet.

For Listeners, the default is to accept TCP traffic on port 80 and I’m continuing with the same default listener configuration. In case you want to add another listener, you can choose Add Listener.

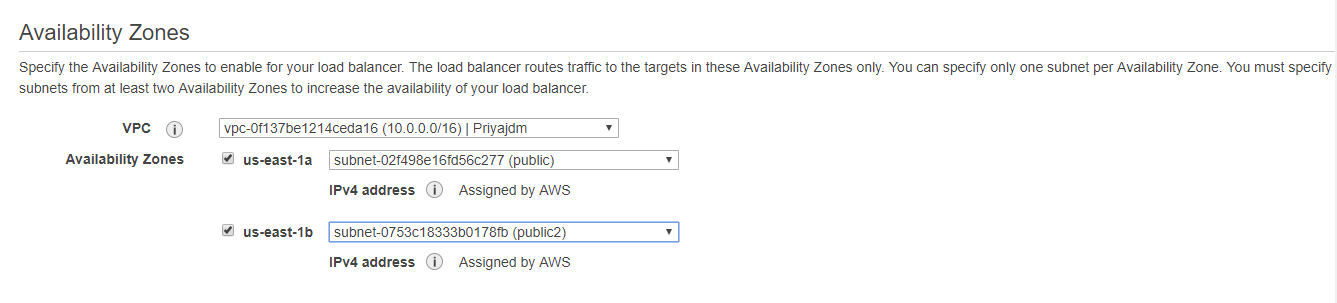
For Availability Zone, select the VPC that you’ve used to create your EC2 instances. Select an Availability Zone and the subnet for that Availability Zone for each Availability Zone used to create an EC2 Instance.
You add tags to your load balancer as required. Tags are especially useful when you have multiple load balancers.

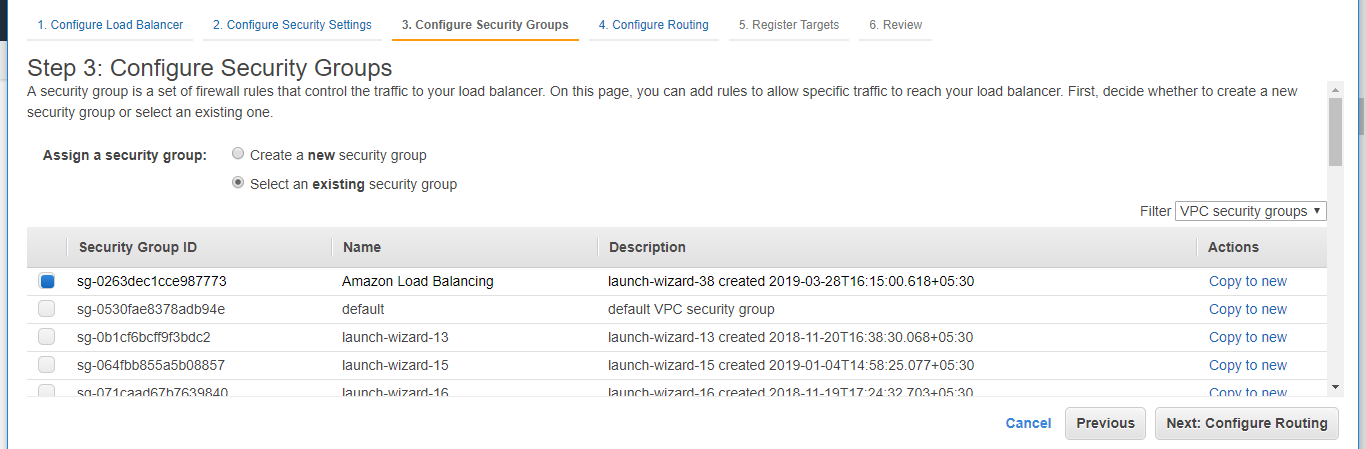
Click on Next: Configure Security Settings. You might see a warning but you can ignore it.

In this step, you can configure the security of your load balancer, You can either Create a New Security Group or Select an existing Security Group. In this case, I’ve chosen an existing security group.
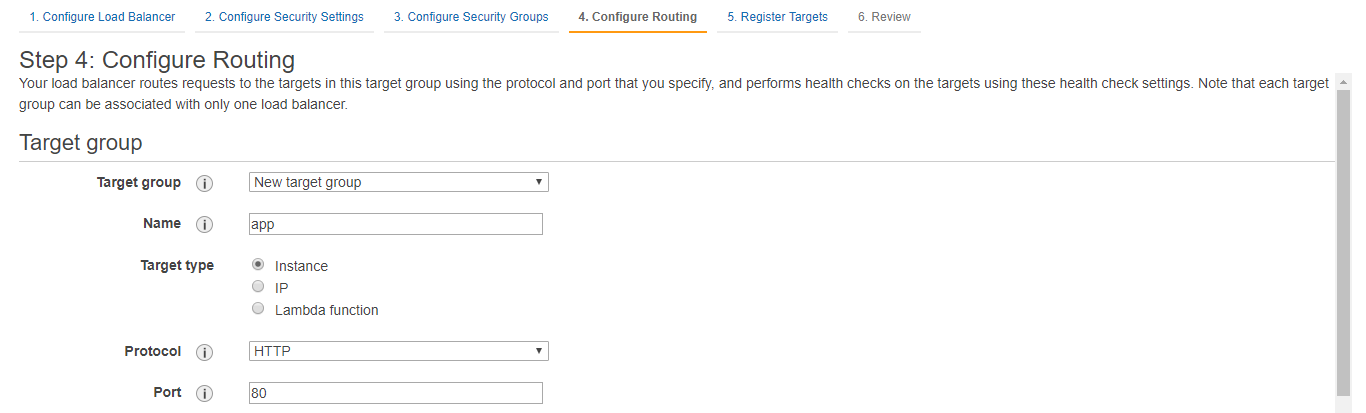
Once done with Security configuration, click on Next: Configure Routing. Select a New target Group. Add the Name you’d like to give your Target Group. Select the Target type as Instance, as we are attaching instances. Application load Balancer also allows you to attach IP addresses and Lambda Functions. Let the Protocol and Port be the default one.
I haven’t changed anything in Health Checks and Advanced Health Checks either. Default settings are good enough for us.

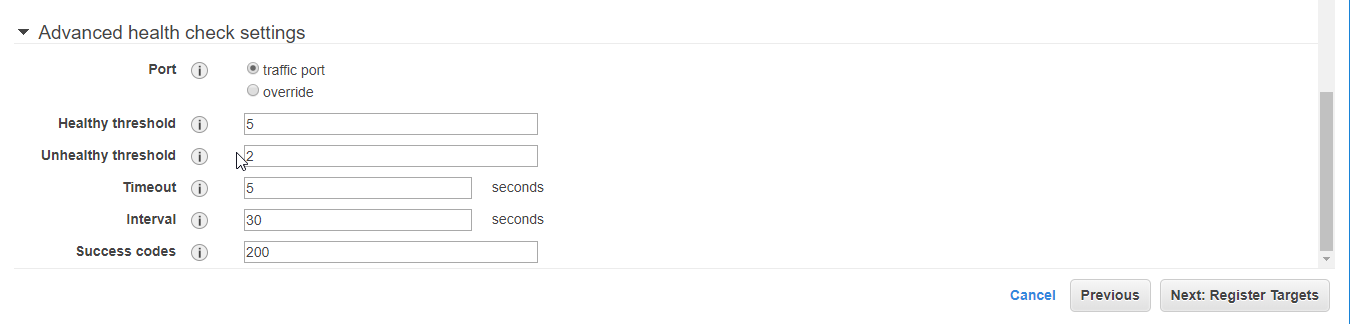
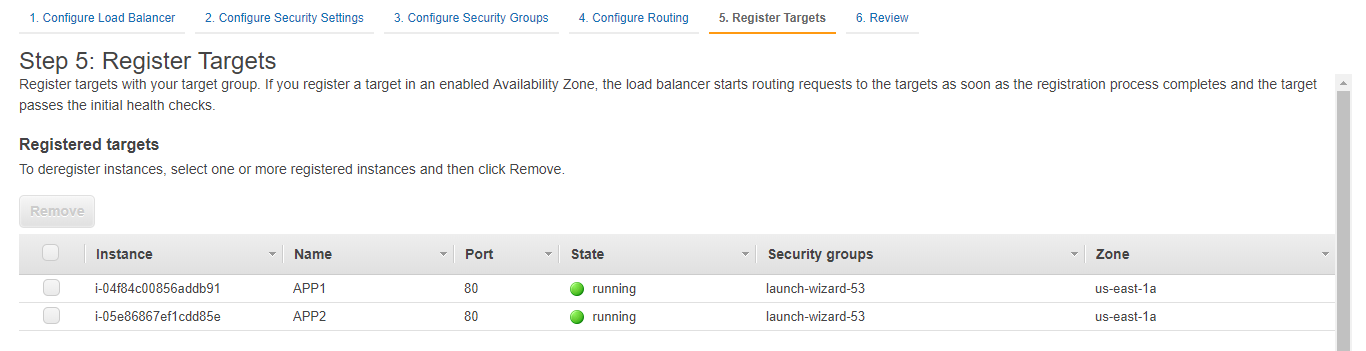
Click on Next: Register targets to add your targets(in this case, instances) to your load balancer.
Select the instances you wish to add as targets and then click on Add to Register.
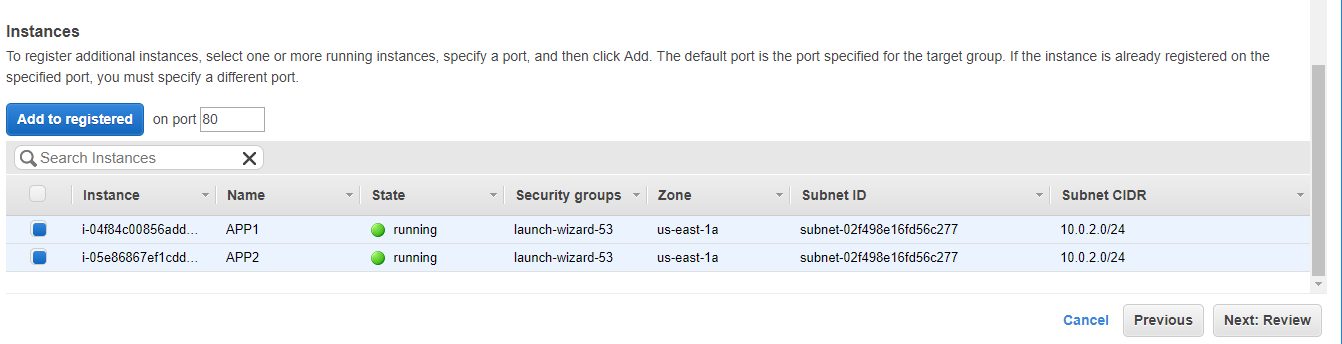
Your targets(instances) have now been registered to the Load Balancer.
Click on Next: Review. Review your Load Balancer and then finally click on Create.
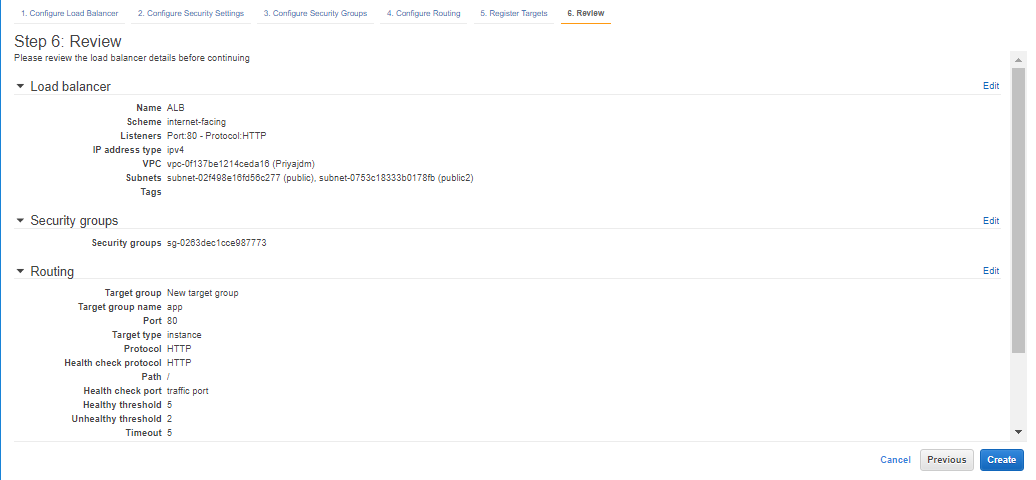
Your Load Balancer is now created and you can check it’s status.


Yayyy!! You’ve successfully created an Application Load Balancer. Now let us check if it’s actually working.
Step 5: Copy the DNS name of your load balancer and paste it on a browser like a URL. You should see the first instance’s output.
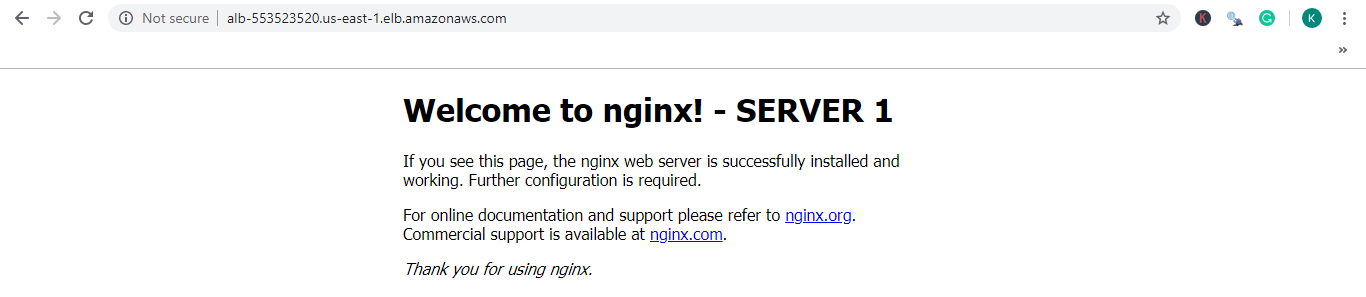
Now go to another browser and paste the same DNS name, you should see the second instance’s output.

And that shows that the load balancer is balancing the load of two instances on it. The loads on both your EC2 instances will be handled by this Load Balancer. Another way to test the working of your Load Balancer is to shut one instance and check if its deployments are deployed on the Load Balancer’s DNS.
This brings us to the end of this Application Load Balancer blog. I hope you guys have understood the concept behind this amazing service provided by Amazon. For more such blogs, visit “Edureka | Blog“.
If you wish to learn more about Cloud Computing and build a career in Cloud Computing, then check out our Cloud Computing Courses which comes with instructor-led live training and real-life project experience. This training will help you understand Cloud Computing in depth and help you achieve mastery over the subject.
Got a question for us? Please mention it in the comments section and we will get back to you or post your question at Edureka | Community. At Edureka Community we have more than 1,00,000+ tech-fanatics ready to help.
| Course Name | Date | Details |
|---|---|---|
| AWS Certification Training Course for Solutions Architect | Class Starts on 27th April,2024 27th April SAT&SUN (Weekend Batch) | View Details |
| AWS Certification Training Course for Solutions Architect | Class Starts on 4th May,2024 4th May SAT&SUN (Weekend Batch) | View Details |
| AWS Certification Training Course for Solutions Architect | Class Starts on 20th May,2024 20th May MON-FRI (Weekday Batch) | View Details |


 REGISTER FOR FREE WEBINAR
  Thank you for registering Join Edureka Meetup community for 100+ Free Webinars each month JOIN MEETUP GROUP


