


Apache Hive is one of the most important frameworks in the Hadoop ecosystem, in-turn making it very crucial for Hadoop Certification. In this blog, we will learn about Apache Hive and Hive installation on Ubuntu.
What is Apache Hive?
Apache Hive is a data warehouse infrastructure that facilitates querying and managing large data sets which resides in distributed storage system. It is built on top of Hadoop and developed by Facebook. Hive provides a way to query the data using a SQL-like query language called HiveQL(Hive query Language).
Internally, a compiler translates HiveQL statements into MapReduce jobs, which are then submitted to Hadoop framework for execution.
Difference between Hive and SQL:
Hive looks very much similar like traditional database with SQL access. However, because Hive is based on Hadoop and MapReduce operations, there are several key differences:
As Hadoop is intended for long sequential scans and Hive is based on Hadoop, you would expect queries to have a very high latency. Itmeans that Hive would not be appropriate for those applications that need very fast response times, as you can expect with a traditional RDBMS database.
Finally, Hive is read-based and therefore not appropriate for transaction processing that typically involves a high percentage of write operations.
Learn more about Big Data and its applications from the Data Engineering Training.
Hive Installation on Ubuntu:
Please follow the below steps to install Apache Hive on Ubuntu:
Step 1: Download Hive tar.
Command: wget http://archive.apache.org/dist/hive/hive-2.1.0/apache-hive-2.1.0-bin.tar.gz
Step 2: Extract the tar file.
Command: tar -xzf apache-hive-2.1.0-bin.tar.gz
Command: ls


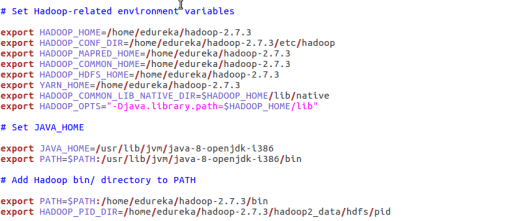
Step 3: Edit the “.bashrc” file to update the environment variables for user.
Command: sudo gedit .bashrc
Add the following at the end of the file:
# Set HIVE_HOME
export HIVE_HOME=/home/edureka/apache-hive-2.1.0-bin
export PATH=$PATH:/home/edureka/apache-hive-2.1.0-bin/bin
Also, make sure that hadoop path is also set.

Run below command to make the changes work in same terminal.
Command: source .bashrc
Step 4: Check hive version.


Step 5: Create Hive directories within HDFS. The directory ‘warehouse’ is the location to store the table or data related to hive.
Command:
- hdfs dfs -mkdir -p /user/hive/warehouse
- hdfs dfs -mkdir /tmp
Step 6: Set read/write permissions for table.
Command:
In this command, we are giving write permission to the group:
- hdfs dfs -chmod g+w /user/hive/warehouse
- hdfs dfs -chmod g+w /tmp
Step 7: Set Hadoop path in hive-env.sh
Command: cd apache-hive-2.1.0-bin/
Command: gedit conf/hive-env.sh


Set the parameters as shown in the below snapshot.


Step 8: Edit hive-site.xml
Command: gedit conf/hive-site.xml
<?xml version="1.0" encoding="UTF-8" standalone="no"?>
<?xml-stylesheet type="text/xsl" href="configuration.xsl"?><!--
Licensed to the Apache Software Foundation (ASF) under one or more
contributor license agreements. See the NOTICE file distributed with
this work for additional information regarding copyright ownership.
The ASF licenses this file to You under the Apache License, Version 2.0
(the "License"); you may not use this file except in compliance with
the License. You may obtain a copy of the License at

http://www.apache.org/licenses/LICENSE-2.0

Unless required by applicable law or agreed to in writing, software
distributed under the License is distributed on an "AS IS" BASIS,
WITHOUT WARRANTIES OR CONDITIONS OF ANY KIND, either express or implied.
See the License for the specific language governing permissions and
limitations under the License.
-->
<configuration>
<property>
<name>javax.jdo.option.ConnectionURL</name>
<value>jdbc:derby:;databaseName=/home/edureka/apache-hive-2.1.0-bin/metastore_db;create=true</value>
<description>
JDBC connect string for a JDBC metastore.
To use SSL to encrypt/authenticate the connection, provide database-specific SSL flag in the connection URL.
For example, jdbc:postgresql://myhost/db?ssl=true for postgres database.
</description>
</property>
<property>
<name>hive.metastore.warehouse.dir</name>
<value>/user/hive/warehouse</value>
<description>location of default database for the warehouse</description>
</property>
<property>
<name>hive.metastore.uris</name>
<value/>
<description>Thrift URI for the remote metastore. Used by metastore client to connect to remote metastore.</description>
</property>
<property>
<name>javax.jdo.option.ConnectionDriverName</name>
<value>org.apache.derby.jdbc.EmbeddedDriver</value>
<description>Driver class name for a JDBC metastore</description>
</property>
<property>
<name>javax.jdo.PersistenceManagerFactoryClass</name>
<value>org.datanucleus.api.jdo.JDOPersistenceManagerFactory</value>
<description>class implementing the jdo persistence</description>
</property>
</configuration>
Learn more about Big Data and its applications from the Data Engineering Course in London.
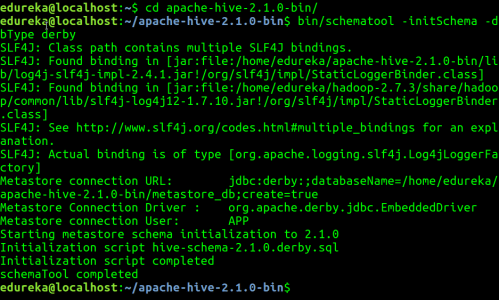
Step 9: By default, Hive uses Derby database. Initialize Derby database.
Command: bin/schematool -initSchema -dbType derby

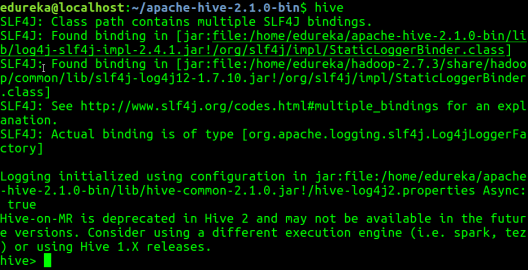
Step 10: Launch Hive.
Command: hive

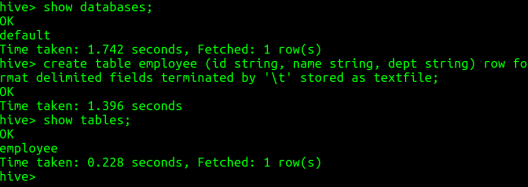
Step 11: Run few queries in Hive shell.
Command: show databases;
Command: create table employee (id string, name string, dept string) row format delimited fields terminated by ‘ ‘ stored as textfile;
Command: show tables;

Step 12: To exit from Hive:
Command: exit;
Now that you are done with Hive installation, the next step forward is to try out Hive commands on Hive shell. Hence, our next blog “Top Hive Commands with Examples in HQL” will help you to master Hive commands.
Gain hands-on experience in building and managing data storage, processing, and analytics solutions with the Microsoft Azure Data Engineering Certification Course (DP-203)
Related Posts: