


While discussing the Frame Animation code in the class, one of the students asked a question if we can play a sound along with the Animation. I promised her that I will pen down an Android tutorial which will play a sound when the animation starts, hence the reason for writing this blog! Now, the good part here is that, we can develop this application using concepts which we have already learnt in our previous classes. :)
The following concepts are used to develop frame by frame animation with audio:
- Frame Animation
- Media Player
- Event Listener (OnclickListener)
If you are not clear with the basic concepts of Android, please attend this Android Course..
As usual, before we delve further into the code, let us find out the prerequisites for developing the application: – See more:
- Android Development Environment – I cannot believe you already have this setup.
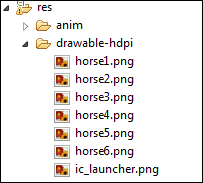
- Image Frames – In this application, I am animating a running horse. I downloaded 6 images of a running horse from the internet. Those images are copied under the drawable-hdpi folder.
- Sound of a galloping horse – Internet is really a great invention of human. I found a website (http://soundbible.com/1302-Galloping-Horse.html) which provides free sound clips. I downloaded the sound of a galloping horse from this site.
- Knowledge of FrameAnimation, MediaPlayer and EventListener – I am pretty sure that you were all ears in these sessions and have grasped the concepts pretty clear.
Now that we have discussed the pre-requisites, let us walk-through the code for ‘How to play Sound With Frame Animation’.
Step 1
Create an android application project using Eclipse. In my case I have created an application and named it AnimationWithSound.


Step 2
Copy the images in the drawable folder (res/drawable-hdpi).

Step3
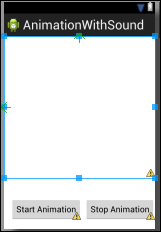
Next is the Layout. I have added an image view and 2 buttons. The image view will show the animated images . The “Start Animation” button, when clicked will start the animation and the “Stop Animation” will stop the animation.
The code for the layout (activity_main.xml) is shown below:

activity_main.xml
 <button>

</button><button>
Step 4
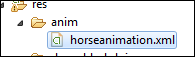
In this step, I created a folder named “anim” (any name can be given to this folder) and created an XML file to define how the image frames will be displayed when the animation starts.

The XML file content is shown below:
We have already learnt this when we walked through the frame animation code. :)
This XML has the list of the images that will be displayed in the image view in succession after the time interval specified through the duration keyword below:
<!--?xml version="1.0" encoding="utf-8"?-->
Step 5
Next step is to code the Activity which will have the animation logic in it. For developing this application, I coded to java classes:
- AnimationwithSound.java – This is the main activity which instantiates the Frame Animation . It has the animation start logic when the ‘start animation’ button is clicked and the animation stop logic when the ‘stop animation’ button is clicked.The code snippet with explanation of the logic is shown below:
package com.example.animationwithsound;

// This activity shows how a sound can be played along with a frameanimation

import android.os.Bundle;
 import android.app.Activity;
 import android.graphics.drawable.AnimationDrawable;
 import android.view.Menu;
 import android.view.View;
 import android.view.View.OnClickListener;
 import android.widget.Button;
 import android.widget.ImageView;

public class AnimationwithSound extends Activity implements OnClickListener {

//Getting a reference of all the views on the UI

 ImageView animationview;
 Button btstart, btstop;

// Getting a reference of the frameanimation and the Animationsound class

 AnimationDrawable frameAnimation;
 AnimationSound asound;

@Override
 protected void onCreate(Bundle savedInstanceState) {
 super.onCreate(savedInstanceState);
 setContentView(R.layout.activity_main);
 animationview = (ImageView) findViewById(R.id.AnimatedIview);
 btstart = (Button) findViewById(R.id.btStart);
 btstop = (Button) findViewById(R.id.btStop);

// To start with , just need the start button to be enabled, user should
 // not be able to click stop until the animation is started

 btstart.setEnabled(true);
 btstop.setEnabled(false);

// Registering the buttons to the onclicklistener

 btstart.setOnClickListener(this);
 btstop.setOnClickListener(this);

// Setting the background of the image view to the animation XML which
// defines how the image frames should be displayed one after the other

 animationview.setBackgroundResource(R.anim.horseanimation);

// Instantiating the frameanimation. Getting an instance of
 // AnimationDrawable

 frameAnimation = (AnimationDrawable) animationview.getBackground();

}

@Override
 public boolean onCreateOptionsMenu(Menu menu) {
 // Inflate the menu; this adds items to the action bar if it is present.
 getMenuInflater().inflate(R.menu.activity_main, menu);
 return true;
 }

 @Override
 public void onClick(View v) {
 // TODO Auto-generated method stub
 int id = v.getId();
 switch (id) {
 case R.id.btStart:

// First create an instance of the AnimationSound class. This will
 // call the AnimationSound constructor in AnimationSound.java and
 // create an instance of the MP3 sound file. Passing the MP3 file
 // which will be used to create the instance of the MediaPlayer

 asound = new AnimationSound(this, R.raw.galop);

// Starting the animation calling the startsound method in
 // AnimationSound class disabling the start button so that user
 // cannot click it until the animation is stopped enabling the stop
// animation button to allow te user to stop the animation

 frameAnimation.start();
 asound.startsound();
 btstart.setEnabled(false);
 btstop.setEnabled(true);
 break;

case R.id.btStop:
 // On click of the stop animation button, stopping the frame
 // animation and also the sound enabling the start animation button
 // so that user can restart the animation disabling the stop
 // animation button, so that user cannot click it until the
 // animation is started

 frameAnimation.stop();
 asound.stopsound();
 btstart.setEnabled(true);
 btstop.setEnabled(false);
 break;
 default:
 break;
 }

}

}
- AnimationSound.java – This class has the logic to instantiate the media player and it has two methods
- startsound() – On invoking this method, the sound is played along with the animation
- stopsound()– On invoking this method, the sound is stopped
The content of this class along with the explanation of the logic is shown below:
package com.example.animationwithsound;

// This class is used to handle playing the sounds when animation is started/stopped

import android.media.MediaPlayer;
 import android.content.Context;

public class AnimationSound {
 MediaPlayer mpsound;

 AnimationSound(Context context, int id) {

// Creates an instance of the mediaplayer using the passed mp3 file

 mpsound = MediaPlayer.create(context, id);

}

// When this method is called, the sound is played in a loop until the stopsound method is called

 public void startsound() {
 mpsound.start();
 mpsound.setLooping(true);
 }

// When this method is called , the playing of the sound is stopped

 public void stopsound() {
 if (mpsound != null) {
 if (mpsound.isPlaying()) {
 mpsound.stop();
 mpsound.setLooping(false);
 }

//Finally release everything and clear out the mediaplayer object

 mpsound.release();
 mpsound = null;
 }

}
 }
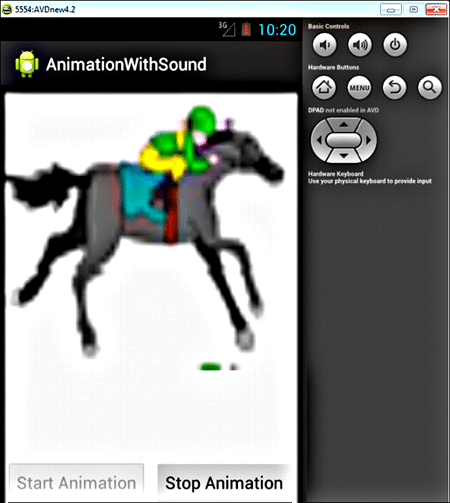
I hope you enjoyed this Android tutorial! If you were attentive in the class, I am sure you will be able to create Frame by Frame animation with background music with ease. When you export this code in your Eclipse workspace and run it on the emulator, you will be delighted to see the below output!
Bye for now and I will see you soon in the class!

Have a doubt in the discussed concepts? Ask our experts!
[dl url=”#” class=’eModal eModal-26′ title=”Download Code” desc=”” type=”” align=”” for=”download”]
Stay tuned for more tutorials to learn how to create Android Widgets! Happy Learning!
The following resources were used for creating this post: Edureka.co, Official Android Developers
You may also like these related posts: