


To gain a thorough insight, please read An iOS App a Click Away. This is the second blog of the ios app series.
If you are an experienced developer who is curious about the working of MultiComponent picker then you have come to the right blog. In this blog, I will talk about how to extend our conversion app with more functionality by implementing a multicomponent picker, and also how to perform exceptional handling using alerts.
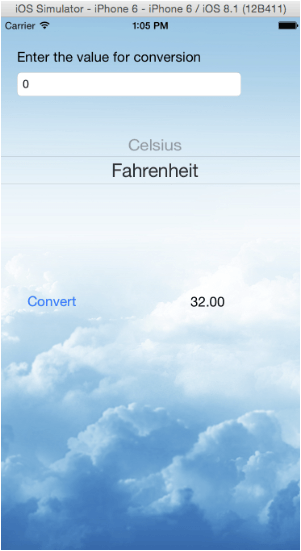
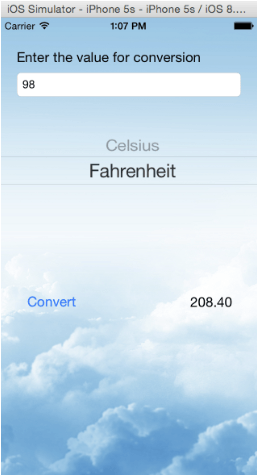
In the last blog, we have seen that when we type something on the text field, the keyboard pops up. The value to be converted is typed in the text field and then we see the keyboard does not go away.
To solve this problem we have to add a button that covers the entire view. When the user touches anywhere on the background, the keyboard should disappear.
Now, let’s go ahead and do it. Drag a button, set the type of the button as custom and text color as clear color from the attributes inspector.

and select Editor > Arrange > Send to Back

and resize the button in such a way that it fits the entire view.

This button now acts as a background invisible button that is clicked for the keyboard to disappear. Let’s write IBAction for the same, select the assistant editor mode and control + drag to the ViewController.h. Set the Connection to Action and name to BackgroundButton and click connect.

The view controller code looks like this now.
#import <UIKit/UIKit.h>

@interface ViewController : UIViewController<UIPickerViewDelegate, UIPickerViewDataSource>
@property (strong, nonatomic) IBOutlet UITextField *ValueTextField;
@property (strong, nonatomic) IBOutlet UIPickerView *picker2;
@property(strong,nonatomic) NSArray *data;
@property (strong, nonatomic) IBOutlet UILabel *ResultLabel;

- (IBAction)Convert:(UIButton *)sender;
- (IBAction)backgroundButton:(id)sender;

@end
Switch to ViewController.m and then write the following code.
- (IBAction)backgroundButton:(id)sender {
    [_ValueTextField resignFirstResponder];
    [_picker2 resignFirstResponder];
    [_ResultLabel resignFirstResponder];
}
Here the code tells all other objects to yield the first responder status when a touch is detected. Now, run the app and see. You will be able to find that the keyboard goes away when you touch the background. Now for the keyboard to go when you are done typing, call the backgroundButton method in the didselectRow() method of the picker. So the method code will be as follows.
-(void)pickerView:(UIPickerView *)pickerView didSelectRow:(NSInteger)row inComponent:(NSInteger)component
{
    selectedValue = _data[row];
    [self backgroundButton:0];

}
Now, you can work on the beautification part of the app, like adding a background and maybe even giving a fancy button image. However, in mine, I will be setting a background image.
To do that, find an appropriate image first duh! Then add it to the the folder Images.xcassets and change the image from 1x to 2x screen in universal.

Run the app and see if it works fine.
If I change the device to iphone 5s.

And run the app.
Here we can see that everything works fine as expected. Now what if I wanted to add a background to my button and make the appearance more like a button? To do that, I would first add an IBOutlet for the convert button to the ViewController.h
@property (strong, nonatomic) IBOutlet UIButton *convert;
and then add the following code in the viewDidLoad() method
self.convert.backgroundColor = [UIColor colorWithRed:0.4 green:0.8 blue:1.0 alpha:1.0];
[_convert setTitleColor:[UIColor whiteColor] forState:UIControlStateNormal];
Let us run our app and see, if it is the way we like it.
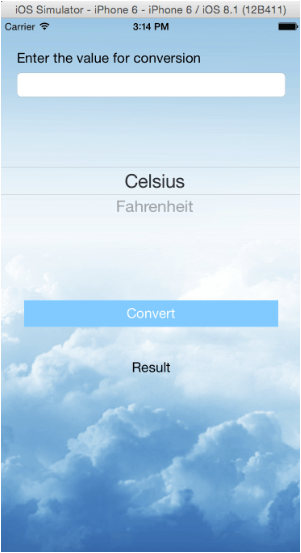
Ok great! You must have noticed that I have changed the positions of the result label as well, the reason for the change is something I will explain later.
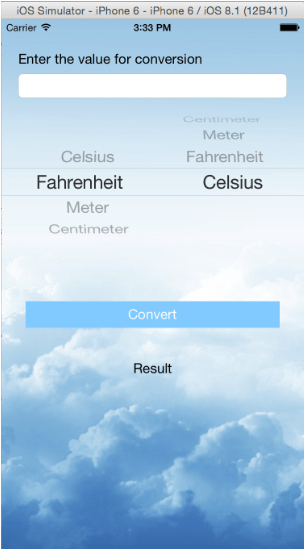
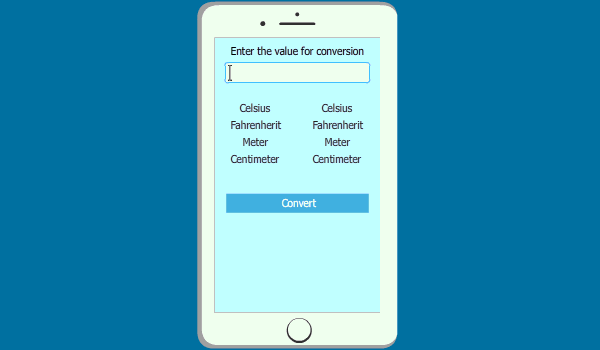
We know that our app converts from Celsius to Fahrenheit and vise-versa only. So, how about adding few more functions or units to convert? To do so, we need to add one more component to the UIPickerView that gives the appropriate selection, when a unit is selected in the first component of the picker.
To make a picker divided into two components, we need to add a new NSArray data2, which will hold the data for the second component. Also, define two constants that will represent our two components. Here, the left component is declared 0 and the right component is declared 1 for the simplicity of programming.
Your ViewController.h file looks like
#import <UIKit/UIKit.h>

# define data1comp 0
# define data2comp 1

@interface ViewController : UIViewController<UIPickerViewDelegate, UIPickerViewDataSource,UIAlertViewDelegate>

@property (strong, nonatomic) IBOutlet UITextField *ValueTextField;
@property (strong, nonatomic) IBOutlet UIPickerView *picker2;
@property(strong,nonatomic) NSArray *data1;
@property (strong, nonatomic)NSArray *data2;
@property (strong, nonatomic) IBOutlet UILabel *ResultLabel;
@property (strong, nonatomic) IBOutlet UIButton *convert;

- (IBAction)Convert:(UIButton *)sender;
- (IBAction)backgroundButton:(id)sender;

@end
Now define the array data2 in the ViewDidLoad() method. Now that we have both the data sources, we must be able to write code for the picker in such a way that when we select an item from the first component of the picker, the second component should automatically get changed to the corresponding value. The second component is dependent on the selection of the first.
For this, we need to define a dictionary which will store the keys and values. Keys contain the data corresponding to the first component of the picker, and values contain the data corresponding to the second component of the picker.
- (void)viewDidLoad {
[super viewDidLoad];
// Do any additional setup after loading the view, typically from a nib.

   _data1=[NSArray arrayWithObjects:@"Celsius",@"Fahrenheit",@"Meter",@"Centimeter", nil];
   data2=[NSArray arrayWithObjects:@"Centimeter",@"Meter",@"Fahrenheit",@"Celsius",nil ];

   dictionary= [NSDictionary dictionaryWithObjectsAndKeys:@"Celcius",@"Farenheit",@"Farenheit",@"Celcius",@"Meter",@"Centimeter",@"Centimeter",@"Meter", nil];

   self.view.backgroundColor=[UIColor colorWithPatternImage:[UIImage imageNamed:(@"bg2.png")]];
}
Now, we must change the data source and delegate methods of the current picker to the following, so that we have data filled in both the components.
-(NSInteger)numberOfComponentsInPickerView:(UIPickerView *)pickerView
{
   return 2;
}
-(NSInteger)pickerView:(UIPickerView *)pickerView numberOfRowsInComponent:(NSInteger)component
{
   if(component == data1comp)
   {
     return [self.data1 count];
   }
     return [self.data2 count];
}
-(NSString *)pickerView:(UIPickerView *)pickerView titleForRow:(NSInteger)row forComponent:(NSInteger)component
{
   if(component == data1comp)
   {
    return [self.data1 objectAtIndex:row];
   }
    return [self.data2 objectAtIndex:row];
}
-(void)pickerView:(UIPickerView *)pickerView didSelectRow:(NSInteger)row inComponent:(NSInteger)component
{
   [self backgroundButton:0];

   if(component == data1comp)
   {
     NSString *data11=[_data1 objectAtIndex:row];
     NSArray *a= [dictionary objectForKey:data11];

     secondrow = [self.data2 indexOfObject:a];
     [_picker2 selectRow:secondrow inComponent:data2comp animated:YES];
     [_picker2 reloadComponent:data2comp];

     selectedValue = data11;
     selectedRow= row;
   }
}
Here in our didSelectRow() method, we are getting the selected value of the first component, then we pass it as argument to the objectForKey() method of the dictionary, and get the corresponding value for the key. To find the corresponding position for the value in the second array i.e data2, we use the indexOfObject() method of the array and store the result in an integer value.
We then pass this integer value to the picker method selectRow:row inComponent:component () method. And reload the component of the picker using reloadComponent().
Once we have done this, as we select one item from the first component, the corresponding item will be selected in the second component of the picker.
The code for the didSelectRow()
-(void)pickerView:(UIPickerView *)pickerView didSelectRow:(NSInteger)row inComponent:(NSInteger)component
{
[self backgroundButton:0];
if(component == data1comp)
{
NSString *data11=[_data1 objectAtIndex:row];
NSArray *a= [dictionary objectForKey:data11];
secondrow = [self.data2 indexOfObject:a];
[_picker2 selectRow:secondrow inComponent:data2comp animated:YES];
[_picker2 reloadComponent:data2comp];
selectedValue = data11;
selectedRow= row;
}
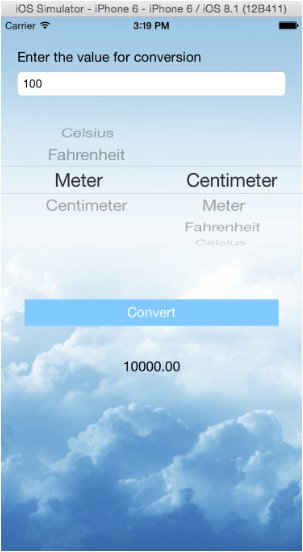
}Now run the app and see, if the picker works as it is expected.
Voila! it works!
So let us continue to code our convert button. The earlier picker had just two values to match i.e Celsius and Fahrenheit and then the result was calculated. But now we have four values Celsius, Fahrenheit, Meter and Centimeter. So I have used a switch statement, that calculates the value based on the selected row variable.
- (IBAction)Convert:(UIButton *)sender {
    float val=[_ValueTextField.text floatValue];
    NSLog(@"value %f",val);
    switch(selectedRow)
    {
      case 0:// Celsius to Fahrenheit
             res=(val*1.8)+32;break;
      case 1: // Fahrenheit to Celsius
             res=(val-32)/1.8;break;

      case 2: // Meter to Centimeter
             res= val*100; break;

      case 3://Centimeter to Meter
             res=val*0.01; break;
      default: res=0.0;
    }

    NSString *final= [NSString stringWithFormat:@"%.02f",res];
    _ResultLabel.text = final;
}
if you run the app, we can see that everything works fine.
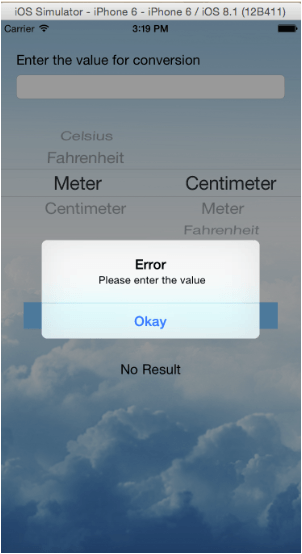
Now, we can check for exceptions that can occur in our app. For example, there is no value in the text box. Or we are trying to convert from Celsius to Meter or Centimeter, which is actually not possible. These types of situation are called as exceptions and we must avoid it by writing code to handle such errors.
Let us solve the first kind of error that can occur when we run our application. That is, we miss to write our value to be converted in the textfield. For this scenario, we must alert our users to enter the value and then proceed.
We can use the UIAlertView for this. We can write a method named showAlertWithMessage (NSString *) message. In this method, we can declare an alertView and then finally display it using the show() method. The code for the method will be as follows.
- (void)showAlertWithMessage:(NSString *) message {

     UIAlertView *alertView = [[UIAlertView alloc] initWithTitle:@"Error" message:message delegate:self cancelButtonTitle:nil otherButtonTitles:@"Okay", nil];
     alertView.tag = 100;

     _ResultLabel.text=@"No Result";
     [alertView show];

}
Now this method when the user clicks the convert button has to be called as conversion. Conversion should not be done without entering the value. So in the method definition for convert, we must check if the length of the textfield is greater than or equal to zero or not. If it is then do the conversion, else display the alert. Therefore, the convert button code would be like:
- (IBAction)Convert:(UIButton *)sender {

   if([_ValueTextField.text length] <= 0)
   {
     [self showAlertWithMessage:@" Please enter the value"];
   }
   else
   {

     float res=0.0;
     float val=[_ValueTextField.text floatValue];
     NSLog(@"value %f",val);
     switch(selectedRow)
     {
        case 0:// Celsius to Fahrenheit
               res=(val*1.8)+32;break;
        case 1: // Fahrenheit to Celsius
               res=(val-32)/1.8;break;

        case 2: // meter to centimeter
               res= val*100; break;

        case 3://centimeter to meter
               res=val*0.01; break;
        default: res=0.0;
     }

     NSString *final= [NSString stringWithFormat:@"%.02f",res];
     _ResultLabel.text = final;
    }
}
Now run the app and try to click on the convert button without entering values in the textfield.
The second type of exception that could occur is if the value in the first component does not match with the value in the second component of the UIPickerView. For this, we check if the current selected component row value of the second component is equal to the value of row value returned by the didSelectRow() delegate of the method. If the condition does not match, then the conversion is not possible and if the values match then conversion can be done.
We can implement this logic as follows,
- (IBAction)Convert:(UIButton *)sender {

  if([_ValueTextField.text length] <= 0)
  {
    [self showAlertWithMessage:@" Please enter the value"];

  }
  else
  {
    _ResultLabel.textColor= [UIColor blackColor];

    float res=0.0;
    NSInteger n =[_picker2 selectedRowInComponent:data2comp];

    if(n==secondrow)
    {

      float val=[_ValueTextField.text floatValue];
      NSLog(@"value %f",val);
      switch(selectedRow)
      {
        case 0:// Celsius to Fahrenheit
               res=(val*1.8)+32;break;
        case 1: // Fahrenheit to Celsius
               res=(val-32)/1.8;break;

        case 2: // meter to centimeter
               res= val*100; break;

        case 3://centimeter to meter
               res=val*0.01; break;
        default: res=0.0;
      }

      NSString *final= [NSString stringWithFormat:@"%.02f",res];
      _ResultLabel.text = final;
    }
    else
    {
      // code for displaying error.
      _ResultLabel.textColor= [UIColor redColor];
      _ResultLabel.text = @"Result cannot be calculated";
    }
}
Now run the app and see by changing the value in the second component after you make the selection in the first component.
You can see the error message, that the result cannot be calculated. You will notice that the error message was printed in the same result label, and that the message is long. So this is why the label was moved down from the earlier orientation.
So, our conversion app is complete. You can add more functionality to the app according to your choice and make it more beautiful according to your creativity.
Got a question for us? Mention them in the comments section and we will get back to you.
For details, You can even check various concepts related to Android app development, and will help you become a certified Android developer with the Android app development course.
Related Posts:


